Maker Pro
Maker Pro

4xLCD torches in series without using 4 lots of 3xAAA's

Joelongc

Aug 10, 2015
9
Joined
Aug 10, 2015
Messages
9
Hi All,

Firstly, thanks for having me here. Second, I am completely inept at this stuff, intelligent enought to follow instructions and grasp the basics, so apologies in advance for potentially needing to ask follow up questions.

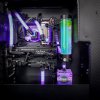
I am trying to hook up 4x UV LED torch heads into a computer I have built. The torches were purchased cheaply online so I can cut the heads off and use as miniature "spot lights". They are much brighter than current applications offered for PC modifications otherwise I would have gone an easier route. Also FYI I have left one of the torches on for an hour in a confined space and it produced almost no heat so should be good on that front.

Details:

Each torch runs off 3xAAA batteries in series so 4.5v
Obviously running off 12x batteries and replacing them constantly not an option so;
Either hook them up to my PCs 1000w power supply or more likely;
Find a suitable transformer to power them (this I have no idea about)

So I am guessing I have to hook the LED heads up in Parralel, which should still mean 4.5v but much higher current draw... I will stop there as I really don't know where to start.

I need advice on:
How to wire them up
Best power source and;
How to choose the right power source
Anything you think I have missed in my thinking this "thingrig" up

Thank you for reading and more so if you reply.

Joel
 

(*steve*)

¡sǝpodᴉʇuɐ ǝɥʇ ɹɐǝɥd
Moderator
Jan 21, 2010
25,510
Joined
Jan 21, 2010
Messages
25,510
you may be able to connect the three in series and power it from 12V from the PC.

However there's a reasonable chance you'll blow them up.

What voltage do you read across the batteries when the light is on?
 

Alec_t

Jul 7, 2015
3,591
Joined
Jul 7, 2015
Messages
3,591
Welcome to EP, Joel!
Do you know the LED wattage? I would be concerned about the health hazard of using 4 UV sources.
 

Joelongc

Aug 10, 2015
9
Joined
Aug 10, 2015
Messages
9
Hi guys,

Thanks for the responses. I'm not sure about the wattage and as they are cheap I doubt they will be labeled etc. I will check volts with them running today and let you know.

On the health aspect. They are rediculously bright, I have never seen a UV source so bright, so I did some research very quickly. Got some info on forums from a few guys that study UV (they work for companies that supply antibacterial UV wash lights. It should be very safe, even direct exposure to the beam apparently would be unlikely to cause any more long term damage than looking into a bright torch. And also they will be in my PC case, the interior is almost exclusively black (aside from PvC tubing so we are only talking about refracted light. I got quite comfortable with the safety. Unless you think I should reevaluate?

Joel
 

Colin Mitchell

Aug 31, 2014
1,416
Joined
Aug 31, 2014
Messages
1,416
Just connect one to the 5v of the USB and look at it through a camera. Then connect the second third and fourth in parallel.
 

Gryd3

Jun 25, 2014
4,098
Joined
Jun 25, 2014
Messages
4,098
Do you have any details on the torches?
Is there a small circuit board inside with any components on it perhaps?

Depending on the electronics used you 'may' be able to get away with connecting it to the 5V rail of the PSU inside the case, or you may need to put a diode or resistor in-line.

I have a small LED torch that uses 3 AAA cells as well, it's a high intensity white LED, and I'm pretty certain it's just a 1W LED. It would be interesting to see your torch to compare, but I would be willing to bet it's 1W or 3W if it's a single LED ;)

Word of warning though... connecting that to a USB port is most certainly not a good idea... You do not know the current draw, and you risk damaging the main-board of the computer you just built.
In an ideal world, you would test it on an old PC, or a spare power supply first. A computer power supply will 'fault' and shut down if any of it's outputs become too heavily loaded. If this is the case you can simply reset the power supply and try again. That... and the power supplies are usually cheaper and easier to replace :D

I would also certainly advise against connecting your torch to anything other than the batteries until you can confirm any other portion of the circuit in the torch. (For example, my torch uses a small multi-function LED driver circuit, and I would be confident in powering it with 5V... if my torch were constructed without any form of current limiting, connecting it to a 5V source capable of a few Amps would kill it in very short order!...)
 

Colin Mitchell

Aug 31, 2014
1,416
Joined
Aug 31, 2014
Messages
1,416
"I have a small LED torch that uses 3 AAA cells as well, it's a high intensity white LED, and I'm pretty certain it's just a 1W LED."

To start with, you cannot draw more than 100mA from AAA cells.
You would be lucky to draw 25mA in a small LED torch and maybe up to 50mA.
 

Gryd3

Jun 25, 2014
4,098
Joined
Jun 25, 2014
Messages
4,098
"I have a small LED torch that uses 3 AAA cells as well, it's a high intensity white LED, and I'm pretty certain it's just a 1W LED."

To start with, you cannot draw more than 100mA from AAA cells.
You would be lucky to draw 25mA in a small LED torch and maybe up to 50mA.
Here ya go : http://data.energizer.com/PDFs/E92.pdf
Yes, AAA is used in low current applications, but that does not mean that they never put out more than 100mA. The page I linked provides information on an AAA cell up to a 500mA discharge rate.
 

Joelongc

Aug 10, 2015
9
Joined
Aug 10, 2015
Messages
9
Hi guys,

Very sorry for the delay in my response, had to put the project on hold but back now.

Ok some really great insight here, thank you.

So I cut the head off to get to the circuit board, much more basic than I expected. It is simply 9 LEDs run in parallel (photo attached).

I got a reading with fresh AAA's of 4.81v and 3.815v when the LEDs are drawing. They seem to have a massive draw as the heat produced is noticeable for the first 10 mins then they settle down to a moderate brightness and produce almost no heat. They run like this for extended periods with no change.
 

Attachments

  • image.jpg
    image.jpg
    226 KB · Views: 103

Gryd3

Jun 25, 2014
4,098
Joined
Jun 25, 2014
Messages
4,098
Hi guys,

Very sorry for the delay in my response, had to put the project on hold but back now.

Ok some really great insight here, thank you.

So I cut the head off to get to the circuit board, much more basic than I expected. It is simply 9 LEDs run in parallel (photo attached).

I got a reading with fresh AAA's of 4.81v and 3.815v when the LEDs are drawing. They seem to have a massive draw as the heat produced is noticeable for the first 10 mins then they settle down to a moderate brightness and produce almost no heat. They run like this for extended periods with no change.
The only other thing to look at would be the battery cap, most likely where the button is.
You can take a multi-meter and measure resistance from the battery terminal to the case with the button on and button off to determine if there is a resistor or anything else in there... if not, this is an even more horrid design than I thought.
It is generally considered to be a very bad practice simply connecting LEDs in parallel because of how they operate.

LEDs are current driven devices that have a slightly variable forward voltage drop when they are operating. In a decently designed system, there will be a resistor in-line with each LED (or LED string) that is sized to allow an acceptable current through. The problem here though... is that if an LED burns out, the other LEDs will now have more current flowing through them which can lead to the remaining LEDs failing like dominoes.

For this project to work... you cannot simply connect a voltage line from the power supply. Why? Well, remember that resistor I said above that was a bare requirement?
Batteries have a property called 'internal' resistance, and it's this property with the AAA batteries that's preventing your LEDs from popping like popped corn.
*Assuming that each LED draws 20mA, you will have a total current draw of 200mA. This means that the AAA batteries will be a little more stressed than normal, and will only last a 2-3 hours at most. Using the voltages you provided, and the guess of 200mA for the whole thing. That would mean the battery pack has an internal resistance of 5Ω.

Voltage = Current * Resistance
(4.81 - 3.815)/0.2 = R = 5Ω

It's that... or the LEDs are being grossly over-driven for the first portion of use.
Anyway... the problem is that power supplies have a much much smaller 'internal resistance' , and some have pretty much none. The internal resistance is responsible for causing the voltage to drop when you begin to pull current which is what is keepnig your LEDs from popping. Hook it up to a 4.5V power supply instead and you can say good-bye relatively shortly.
You can make it work though. You will need to pick up some resistors, and cross your fingers that the LEDs run balanced or the assembly you showed us will fail.
So. Math time.
If you start with 5V (It's the closest we can get without going under the LED voltage drop) then the LEDs drop 3.815V as you measured, then we need to drop about 1.2V across our resistor.
@ 200mA, our resistor needs to be 6Ω. This resistor will also need to be greater than 1/4Watt and you will need one for each one of the LED modules you wish to install.
(Please note that 6.2Ω is the closest standard size without going under... so you will want this one)


Alternatively, I would like to highly encourage you to shop online or around your town to find 12V lighting accessories to use. You can buy LED strip lighting that you can simply stick to the inside of your case along the perimeter and it can be attached right to the 12V line. I wish you the best of luck, but am concerned with the build quality of those things...
 

BobK

Jan 5, 2010
7,682
Joined
Jan 5, 2010
Messages
7,682
I am curious as to how you determined that your UV LEDs are bright. Do you have UV vision? If they are truly UV LEDs, you should not see them at all, or maybe a faint violet glow. If they appear bright, I suspect that they are not UV LEDs.

I am also curious as to why you would place UV LEDs inside your computer case. Is this a new kind of anti-virus protection?

Bob
 

Joelongc

Aug 10, 2015
9
Joined
Aug 10, 2015
Messages
9
The only other thing to look at would be the battery cap, most likely where the button is.
You can take a multi-meter and measure resistance from the battery terminal to the case with the button on and button off to determine if there is a resistor or anything else in there... if not, this is an even more horrid design than I thought.
It is generally considered to be a very bad practice simply connecting LEDs in parallel because of how they operate.

LEDs are current driven devices that have a slightly variable forward voltage drop when they are operating. In a decently designed system, there will be a resistor in-line with each LED (or LED string) that is sized to allow an acceptable current through. The problem here though... is that if an LED burns out, the other LEDs will now have more current flowing through them which can lead to the remaining LEDs failing like dominoes.


It's that... or the LEDs are being grossly over-driven for the first portion of use.
Anyway... the problem is that power supplies have a much much smaller 'internal resistance' , and some have pretty much none. The internal resistance is responsible for causing the voltage to drop when you begin to pull current which is what is keepnig your LEDs from popping. Hook it up to a 4.5V power supply instead and you can say good-bye relatively shortly.
You can make it work though. You will need to pick up some resistors, and cross your fingers that the LEDs run balanced or the assembly you showed us will fail.
So. Math time.
If you start with 5V (It's the closest we can get without going under the LED voltage drop) then the LEDs drop 3.815V as you measured, then we need to drop about 1.2V across our resistor.
@ 200mA, our resistor needs to be 6Ω. This resistor will also need to be greater than 1/4Watt and you will need one for each one of the LED modules you wish to install.
(Please note that 6.2Ω is the closest standard size without going under... so you will want this one)

Thank you so much, I now have the resistors and am going to tinker today and tomorrow. You were spot on with the switch. And I do agree with you on the quality issue. I have purchased purpose build UV's but they just don't cut the effect I am going for, these more powerful sources are just the ticket... But only if they are safe.
 

Joelongc

Aug 10, 2015
9
Joined
Aug 10, 2015
Messages
9
I am curious as to how you determined that your UV LEDs are bright. Do you have UV vision? If they are truly UV LEDs, you should not see them at all, or maybe a faint violet glow. If they appear bright, I suspect that they are not UV LEDs.

I am also curious as to why you would place UV LEDs inside your computer case. Is this a new kind of anti-virus protection?

Bob
Hi Bob, thank you for posting although I can't see the point of why you have (your condescending questions make you seem offended by my post maybe) but will give you the benefit of the doubt in that maybe answering your questions will dictate the best idea you might have to help out.

To be honest on the UV front I don't know much about UV light (although still aware it's hard to perceive). I guess the way I have always perceived a UVs intensity is by how much it lights up a bright surface. For example a bright white or florescent surface. Although I can see that bizarre purply/blue hue around darker areas with my peripheral. I am so sorry if I have this completely wrong, I am not an expert in this area. Regardless It most likely doesn't matter if it is wrong from my projects point of view. It lights up the areas I need it to light up better than any other UV light I have tried. If it turns out it's actually technically less bright, so be it. I just don't know how else to explain that to someone than saying "it's brighter", sorry.

As for the use. It's for my water cooled PC. I have custom designed everything and it is to help get a certain look I am going for. Figured I may as well make it look good and these sorts of challenging projects get me excited, so I go all out. This one was nice for me to pour my time into during a particularly hard time in my life. Shutting off to design tube runs and mould plastics etc seem overkill to most but it was my way of relaxing. Like all my hobbies I guess!

Hoping this satiates your curiosity Bob. I look forward to what solutions you are surely to provide now.

Also I have provided you a photo with one of the UV lights lighting up the coolant in my reservoir to help you better understand my project.

Joel.
 

Attachments

  • image.jpg
    image.jpg
    322.7 KB · Views: 99
Last edited:

BobK

Jan 5, 2010
7,682
Joined
Jan 5, 2010
Messages
7,682
I really was curious. Here is what you said:

They are rediculously bright, I have never seen a UV source so bright

This does not mention using something fluorescent to determine the brightness. If implies you could see the brightness with your eyes.

And putting them inside a computer case still seems strange to me. What is it lighting up inside your computer case, and why wouldn't visible light, be better? Is the case lined with fluorescent material?

My line about the anti-virus was an attempt at a joke.


Bob
 

Joelongc

Aug 10, 2015
9
Joined
Aug 10, 2015
Messages
9
You could try these : http://www.flexfireleds.com/colorbright-uv-purple-led-strip-light-by-the-foot/

The tape/strips distribute light more, and run off 12V :D
I have something similar but the light if far too diffused so doesn't have the desired effect where I need it. That being said.. I just had a close look at the strip, it's designed to be cut in sections. This means I should easily be able to have small strips of 2 or 3 LEDs parked right up against those spots.

Thank you for this you just found me a whole separate option to persue, now off to test. Will let you know how it goes.
 

Joelongc

Aug 10, 2015
9
Joined
Aug 10, 2015
Messages
9
I really was curious. Here is what you said:


This does not mention using something fluorescent to determine the brightness. If implies you could see the brightness with your eyes.

And putting them inside a computer case still seems strange to me. What is it lighting up inside your computer case, and why wouldn't visible light, be better? Is the case lined with fluorescent material?

My line about the anti-virus was an attempt at a joke.


Bob
Ok Bob sorry about that. It was a poorly worded statement reading it back, I can see where you are coming from. The LEDs themselves are relatively bright for UV so they do have some considerable spillover into the visible spectrum. But the UV component is incredibly powerful from my small experience with UV sources in the past.

If you have a look at the photo I have a UV light on the reservoir inside the case. I have a dye mixed into the water that lights up either bright green or blue under UV light but looks clear without. I want a very bright UV light on the main parts of the system as it looks nice and with bright enough UV the light emitted by these areas is also enough to light up the other parts inside, showing them off also.
 

Joelongc

Aug 10, 2015
9
Joined
Aug 10, 2015
Messages
9
Hi Guys,

So I Ordered the LED strips and created my own "runs" trough the PC case. Worked a treat. Still a couple of things to finish hiding some of the strips but here is a sample of what it turned out like.

Thank you so much for your time thinking about and then posting on my question. I hope to help you out on one of the forums and areas of speciality I run in into the future
 

Attachments

  • image.jpg
    image.jpg
    121.4 KB · Views: 93
  • image.jpg
    image.jpg
    171.5 KB · Views: 59
  • image.jpg
    image.jpg
    154.8 KB · Views: 94
  • image.jpg
    image.jpg
    303.5 KB · Views: 73

Similar threads

C
Replies
1
Views
999
Henry Hallam
H
N
Replies
1
Views
953
Clive Mitchell
C
C
Replies
0
Views
1K
Clive Mitchell
C
C
Replies
1
Views
989
JohnR66
J
Top