Maker Pro
Maker Pro

Help needed for 12V lead-acid switched mode battery charger.

OhMy

Apr 5, 2014
63
Joined
Apr 5, 2014
Messages
63
Thank you, Adam, for a bit of encouragement and advice :).
 

OhMy

Apr 5, 2014
63
Joined
Apr 5, 2014
Messages
63
Update.
Made some changes to the schematic and made a PCB. I know, it's not pretty, and most likely the component placement is quite bad, but it's the best of me :D. The red lines are jumpers or just wires. Too much of them, isn't it?
I had a size restriction of this PCB, because I plan to put it in an empty PC power supply casing (if only it will make that far :confused:). Couldn't find a place for the AC filter inductance and maybe some other non-essential elements.
Ladetajs_PCB.GIF Ladetajs.GIF
 
Last edited:

Arouse1973

Adam
Dec 18, 2013
5,178
Joined
Dec 18, 2013
Messages
5,178
Um I know you have spent a time doing this and it looks pretty good.But this is the why you have to draw the schematic right. Your dc link caps are too far from the mosfets to be honest. You have to make sure you have the correct clearance and creepage for mains. Send me the gerber to [email protected] and I'll have a look next week if you want.
Adam
 

OhMy

Apr 5, 2014
63
Joined
Apr 5, 2014
Messages
63
Thank you for the honest opinion, Adam.
Your dc link caps are too far from the mosfets
Do you mean the lines (marked with yellow) from the two 220uF to mosfets? Would they cause too much voltage drop or some sort of unwanted interference to the rest of the circuit?
Send me the gerber to [email protected] and I'll have a look next week
I appreciate your willingness to help, but that would be too much to ask from you. Besides I have never worked with gerber files, so I'm not even sure, if I could send you a usable one :oops:.
I use SprintLayout to make my PCBs, they are drawn 100% manually without any fixed connections between components. There is something like an automated tracing by defining the connections, but believe me- the results are far worse, than my own ;). According to some, this is one of the "less good" programs, but it works for me, since I must have a way to export the traces in a format usable for a CNC carving. It may sound strange, but I have no other ways of making the PCBs, so I do it with a CNC router.

I'll try to rearrange the components in the PCB by myself and leave it to your judgment.

Thank you.
 

Attachments

  • Ladetajs_PCB_1.GIF
    Ladetajs_PCB_1.GIF
    170.1 KB · Views: 196

(*steve*)

¡sǝpodᴉʇuɐ ǝɥʇ ɹɐǝɥd
Moderator
Jan 21, 2010
25,510
Joined
Jan 21, 2010
Messages
25,510
Yeah, Sprint layout can export gerber files, but it can't import them (sadly)
 

OhMy

Apr 5, 2014
63
Joined
Apr 5, 2014
Messages
63
Here's another version of the PCB, hopefully without mistakes and better than the first. SOOOOO exhausting :eek:. I'm pretty sure, I won't draw another one...

What do you think, which one would be the best of the two bad designs :D?
 

Attachments

  • Ladetajs_PCB_2.GIF
    Ladetajs_PCB_2.GIF
    189.9 KB · Views: 254
  • Ladetajs_PCB.GIF
    Ladetajs_PCB.GIF
    184.2 KB · Views: 251

OhMy

Apr 5, 2014
63
Joined
Apr 5, 2014
Messages
63
OK. Crossed my fingers and made the second version of the PCB. Quality isn't very good, but it is what it is, considering a really old copper clad and a wobbly homemade CNC.
 

Attachments

  • PICT7052.JPG
    PICT7052.JPG
    212.8 KB · Views: 222

OhMy

Apr 5, 2014
63
Joined
Apr 5, 2014
Messages
63
Why can't something just work? You put it together, plug in- and it works, is that really impossible :mad:?

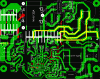
Today finally came the SG3525 and IR2110 for this supply. I put in the 3525 first, tested its outputs to be OK- 45.4kHz at 47.8% duty (zero feedback voltage). Then put in the IR2110 and checked its outputs: low side OK, high side seemed strange, but I thought it was because there was no high voltage on the PCB yet. So I put everything together and plugged it in though a 60W bulb. And it worked (or so it seemed). Voltage regulation worked too, and was stable. But the high side mosfet was a little warm.
OK, next I tried to load it with a 33 ohm resistor, but the supply seemed not to be able to maintain the output stable- I could not even get a proper voltage reading on a DMM. I thought, it was because of the light bulb, so replaced it with a 2A fuse. And, as soon as I connected the resistance at output, the supply got lifeless. Then I found out, that there was some 3.5V at pin 10 of 3525, but it didn't came from the current sense transformer. Tried to adjust the current sense pot to the ground position, and there was a Bang. Both mosfets were dead.
Replaced the mosfets and the SG3525, and tried to plug it in again through the 60W bulb. But the light stayed on and the new mosfets were dead too. THROUGH a 60W bulb. How was that possible?
Changed the 2110 chip, but now I'm kinda afraid to test it again. You know- the funny thing is, that these parts don't grow in trees :rolleyes:.
 

OhMy

Apr 5, 2014
63
Joined
Apr 5, 2014
Messages
63
Well, after changing the burned components, it worked for more than an hour without any problems or signs of heating. The output voltage floated just +/- 0.01V, unloaded, of course.
So far the biggest load was the 2.2 ohm resistor at 13.0V output for some 4 seconds (got too hot to hold), and the voltage regulation was perfect.
Time will show, how it's going to be with greater loads.
 

OhMy

Apr 5, 2014
63
Joined
Apr 5, 2014
Messages
63
Finally there came the time for heavy testing ;).
One thing is for sure- this circuit CAN work in constant current mode, it does not cycle off and back on. Although this current limit isn't consistent- for example, using a ~0.5 ohm as a load, the current settles at ~25A or at some 12-15A about equal number of times. But, when making a real short circuit, the current always stays at ~14A. Also I noticed, that the current sense pot adjustment is a long way from being linear- it suddenly changes the limiting current very rapidly. What could be the cause of such behavior?
The only thing that gets hot, are the rectifier schottkies, so I'm pretty sure, that it's capable of outputting 14.4V at 30A, if only the current sense would be more constant. Any ideas on that, please?

Yes, and, while torturing this circuit, I managed to burn the third pair of IRF840 mosfets together with second IR2110. It looks like they like to die together. After this I put the IRFP360 in, so far they are fine :).
 

(*steve*)

¡sǝpodᴉʇuɐ ǝɥʇ ɹɐǝɥd
Moderator
Jan 21, 2010
25,510
Joined
Jan 21, 2010
Messages
25,510
Yeah, when the mosfets die, they almost certainly go short circuit first. One doing this will essentially cause the other to fail. This will also expose the IR2110 to voltages (or at least voltages at low impedances) that will likely destroy it.
 

OhMy

Apr 5, 2014
63
Joined
Apr 5, 2014
Messages
63
Took measurements of no-load current consumption by measuring the voltage drop across a 4.65 ohm resistor in series with the 230VAC. It was about 58-60mV, that is ~0.013A and ~3W. It looks almost too good to be true, considering, that there is a separate auxiliary 12V transformer too.
 

OhMy

Apr 5, 2014
63
Joined
Apr 5, 2014
Messages
63
So, The charger has been tortured in every possible way and yet it didn't fail (knock on wood :D). Nice :cool:.
The output rectifiers do get hot, but I put a PC fan above them, so probably not a problem. Short circuit current is about 34A but on some ~0.4 Ohm load it is adjusted to stay around 30A. I do believe, that this supply could output 50A or more for short periods, but I'm not ready to push my luck any further :rolleyes:.

Thank you all very much for assisting in building process :)
 

OhMy

Apr 5, 2014
63
Joined
Apr 5, 2014
Messages
63
Thank you, Adam.

Since I'm using a ferrite core with ~1.3mm airgap in the middle, I was thinking about filling this gap with some other ferrite slice. I think, it shouldn't do any harm, right?
 

Arouse1973

Adam
Dec 18, 2013
5,178
Joined
Dec 18, 2013
Messages
5,178
Hi OhMy
I believe most ferrite core applications will need that gap. You need to look up your type of core N27. Different material will require a different gap. The gap is there to help to reduce core saturation from the magnetising flux. It also helps to even out manufacturing tolerances in relation to the saturation of the core. If you have an issue with chattering cores then place a piece of cardboard in the gap.
Cheers
Adam
 

OhMy

Apr 5, 2014
63
Joined
Apr 5, 2014
Messages
63
OK, maybe I won't make any changes to this transformer, because it works fine as it is, although I haven't tested its efficiency. And I was unable to cut a slice of some ferrite material with a dremel diamond cut off disc mounted in a mill. It was easy to cut, but it didn't stay in one peace, instead it broke into little fragments.
I was thinking about filling that gap mainly because of what many others have written- that an air gap can (and must) be used only in flyback type transformers, but it is unacceptable in other topologies. I don't have my own opinion yet.
Thanks for now :)
 

Arouse1973

Adam
Dec 18, 2013
5,178
Joined
Dec 18, 2013
Messages
5,178
Yes correct, but I would leave it for the moment. There are a lot of variations in core manufactures and quality. The gap reduces the inductance of the coil which counteracts the difference in the quality of the core. Wind two different cores with the same number of windings and they will have different core saturation currents. Any core can saturate independant of topology.
Adam
 
Top