Play drums through the Wekinator software platform by programming sliders in Python.
This article will cover how to create a drum machine in Wekinator by building and adjusting sliders programmed through Python.
To start, we'll need to create two sliders coded in Python and send their values to the Wekinator through the OSC protocol.
The Wekinator will be trained according to the input values and return output data.
Processing will receive the output and enable control of the drum program.
Input Data
The two sliders used in this project are created using the Tkinter interface.
Tkinter is the most commonly used GUI programming toolkit for Python.
It functions as a thin object-oriented layer above the Tcl/Tk programming languages.
By sending the slider values to the Wekinator using the OSC protocol through a specific port, we'll cause both to be the same on both sides.
For the purpose of this guide, we'll be using the 6448 default port for the Wekinator.
GUI window that will appear after running Python code.
Python Code
import OSC
from Tkinter import *

c = OSC.OSCClient()
c.connect(('127.0.0.1', 6448))   # localhost, port 6448

def showValues():
    label1.config(text=str(w1.get()))
    label2.config(text=str(w2.get()))
    label1.after(100, showValues)
    oscmsg = OSC.OSCMessage()
    oscmsg.setAddress("/wek/inputs")
    oscmsg.append(float(w1.get()))
    oscmsg.append(float(w2.get()))
    c.send(oscmsg)


master = Tk()
w1 = Scale(master, from_=0, to=200, length=400, tickinterval=10)
w1.set(19)
w1.pack()
w2 = Scale(master, from_=0, to=200,length=600, tickinterval=10, orient=HORIZONTAL)
w2.set(23)
w2.pack()

label1 = Label(master, fg="green")
label1.pack()
label2 = Label(master, fg="green")
label2.pack()

showValues()

mainloop()
Output Data
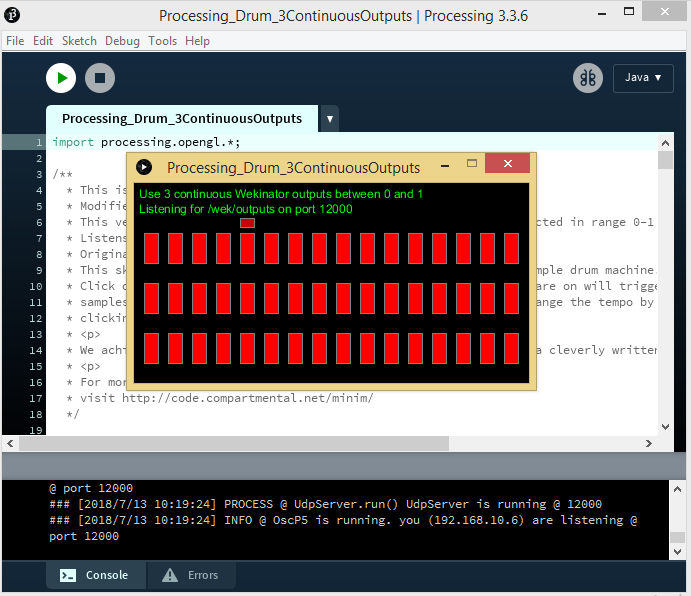
A processing sketch should receive three continuous data outputs from the Wekinator and produce music through the drum machine according to them.
The sketch is available through the Wekinator website.
After downloading the 'simple continuously-controlled drum machine' file from the Wekinator website, unzip it and run the sketch in processing.
Reference the image below to see how this step should look.
How the 'simple continuously-controlled drum machine' file will look running in processing.
Wekinator Instructions
Launch the Wekinator platform and change the settings to the values shown in the below figure.
- Set the inputs value to '2'
- Set the outputs value to '3'
- Set the output type to "all continuous"
- Leave the other settings as they are.
The Wekinator should now be capable of sending the three continuous outputs to programming.
The Wekinator 'Create New Project' window displaying input and output changes.
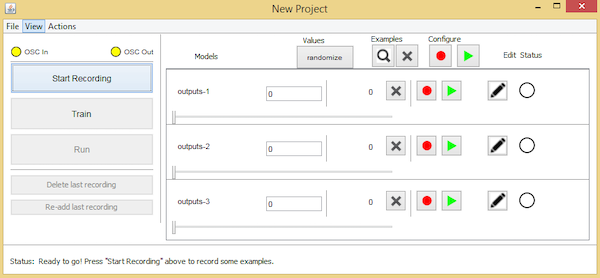
Click on the next button and the 'New Project' window will appear.
The Wekinator 'New Project' window displaying output sliders.
Now, drag the sliders in the Tkinter GUI window to any position and select randomize button.
Start the recording for a second in order to record some samples.
Drag the sliders again the Tkinter GUI window to a random placement and randomize them.
Start the recording again for a minute or so.
Once again, drag the sliders in the Tkinter GUI window to a place of your choosing and select randomize.
Create another short recording.
Finally, click on 'Train' and run the program. This time when you drag the sliders in the Tkinter GUI window it will activate the drum machine.