A simple rectifier tube can produce high-quality X-ray radiographs. It is a cost-effective way to explore the principles of medical imaging and vacuum tube physics in a controlled DIY environment.
An X-ray machine (or radiograph) is a quick, painless medical test that produces images of the structures inside your body—particularly your bones. It is one of the oldest and most frequently used forms of medical imaging. The process is based on a specific type of high-energy electromagnetic radiation. An X-ray machine produces a concentrated beam of X-ray photons. This beam is aimed at the specific part of the body being examined.
As the rays pass through your body, different tissues absorb them at different rates depending on their density. On the other side of your body, there is a specialized film or a digital sensor. This detector captures the rays that managed to pass through you.
Security X-ray systems at border crossings and airports work on the same basic principles as medical X-rays, but they are tuned specifically to identify materials rather than anatomy. In this project I will show you how I made a miniature X-ray machine with standard components that can be easily purchased on the market and at the same time their manufacturing cost is very low.
Even the manufacturing method is relatively simple, but for safety reasons I do not recommend trying to recreate it. X-rays are extremely dangerous to human health and if appropriate protective measures are not used, serious consequences can occur. Keep in mind that the X-ray radiation that we receive in our body remains forever and increases cumulatively with each new dose.
This project is sponsored by PCBWay . From concept to production, PCBWay provide cutting-edge electronic design solutions for global innovators, Including hardware design, software development, mechanical design, product testing and certification. PCBWay engineering team consists of experienced engineers in electronics, embedded systems, and product development. They successfully delivered hundreds of projects across industries such as medical devices, industrial automation, consumer electronics, smart home, and IoT.
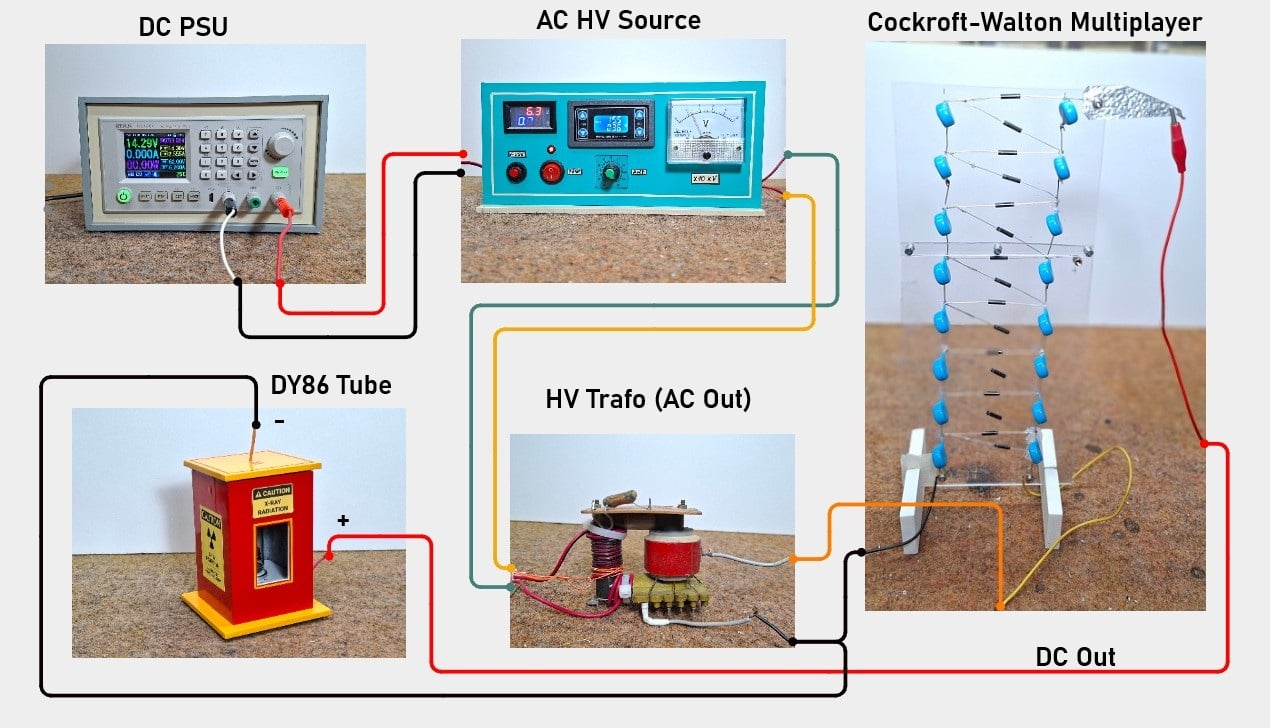
Generally, the X-ray machine consists of several components:
- A source of low DC voltage, in my case a laboratory power supply, and a battery can also be used.
- Then a high AC voltage generator, preferably with the ability to continuously regulate the voltage and current - specifically, I use this device from a previous project of mine, which is ideally suited for this purpose.
- Next is a Cockroft-Walton voltage multiplier, which rectifies and increases the input AC voltage from the line transformer. By the way, this multiplier is also from a previous project of mine.
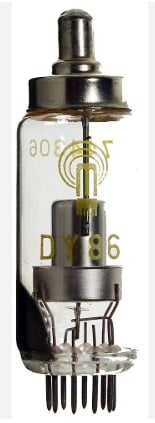
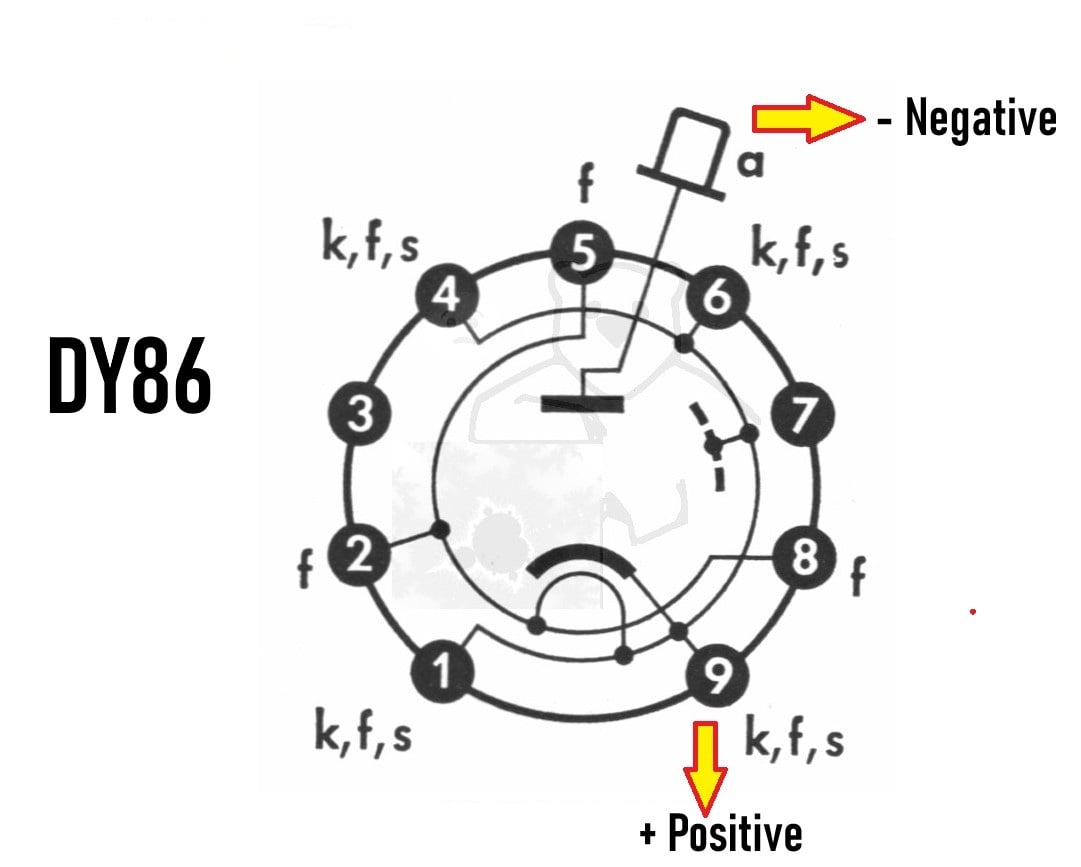
- Тhe source of x-ray radiation, which in this case is a cheap DY86 rectifier vacuum tube from an old black-and-white TV.
In fact, this is the biggest advantage of this concept, since even the smallest dental x-ray tube costs several hundred dollars. The only downside is that the exposure has to last much longer due to the low radiation level, but in fact this is desirable in such dangerous DIY experiments. The DY86 tube is connected inversely, i.e. the cathode to plus and the anode to minus, which significantly increases its lifespan.
Even when exposed lasts longer than 1 hour, the tube temperature does not exceed 30 degrees - that's why this is called a cold emission.
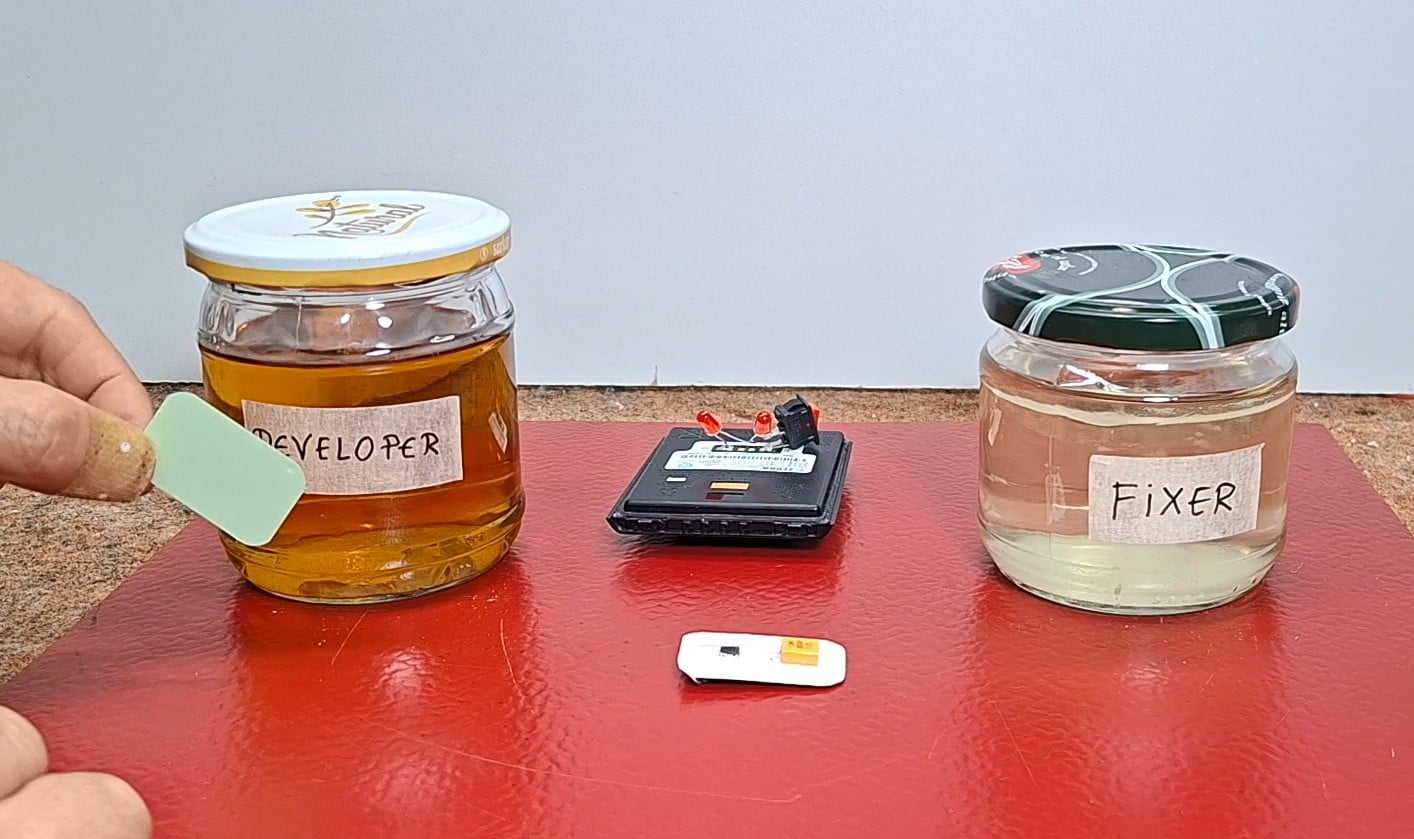
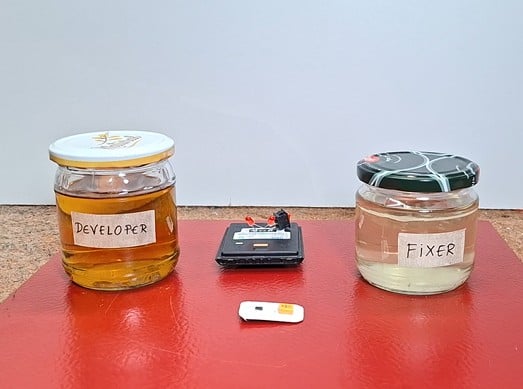
- And finally, the medium on which the image is formed, specifically for that purpose I use dental film and appropriate chemicals for developing and fixing the image.
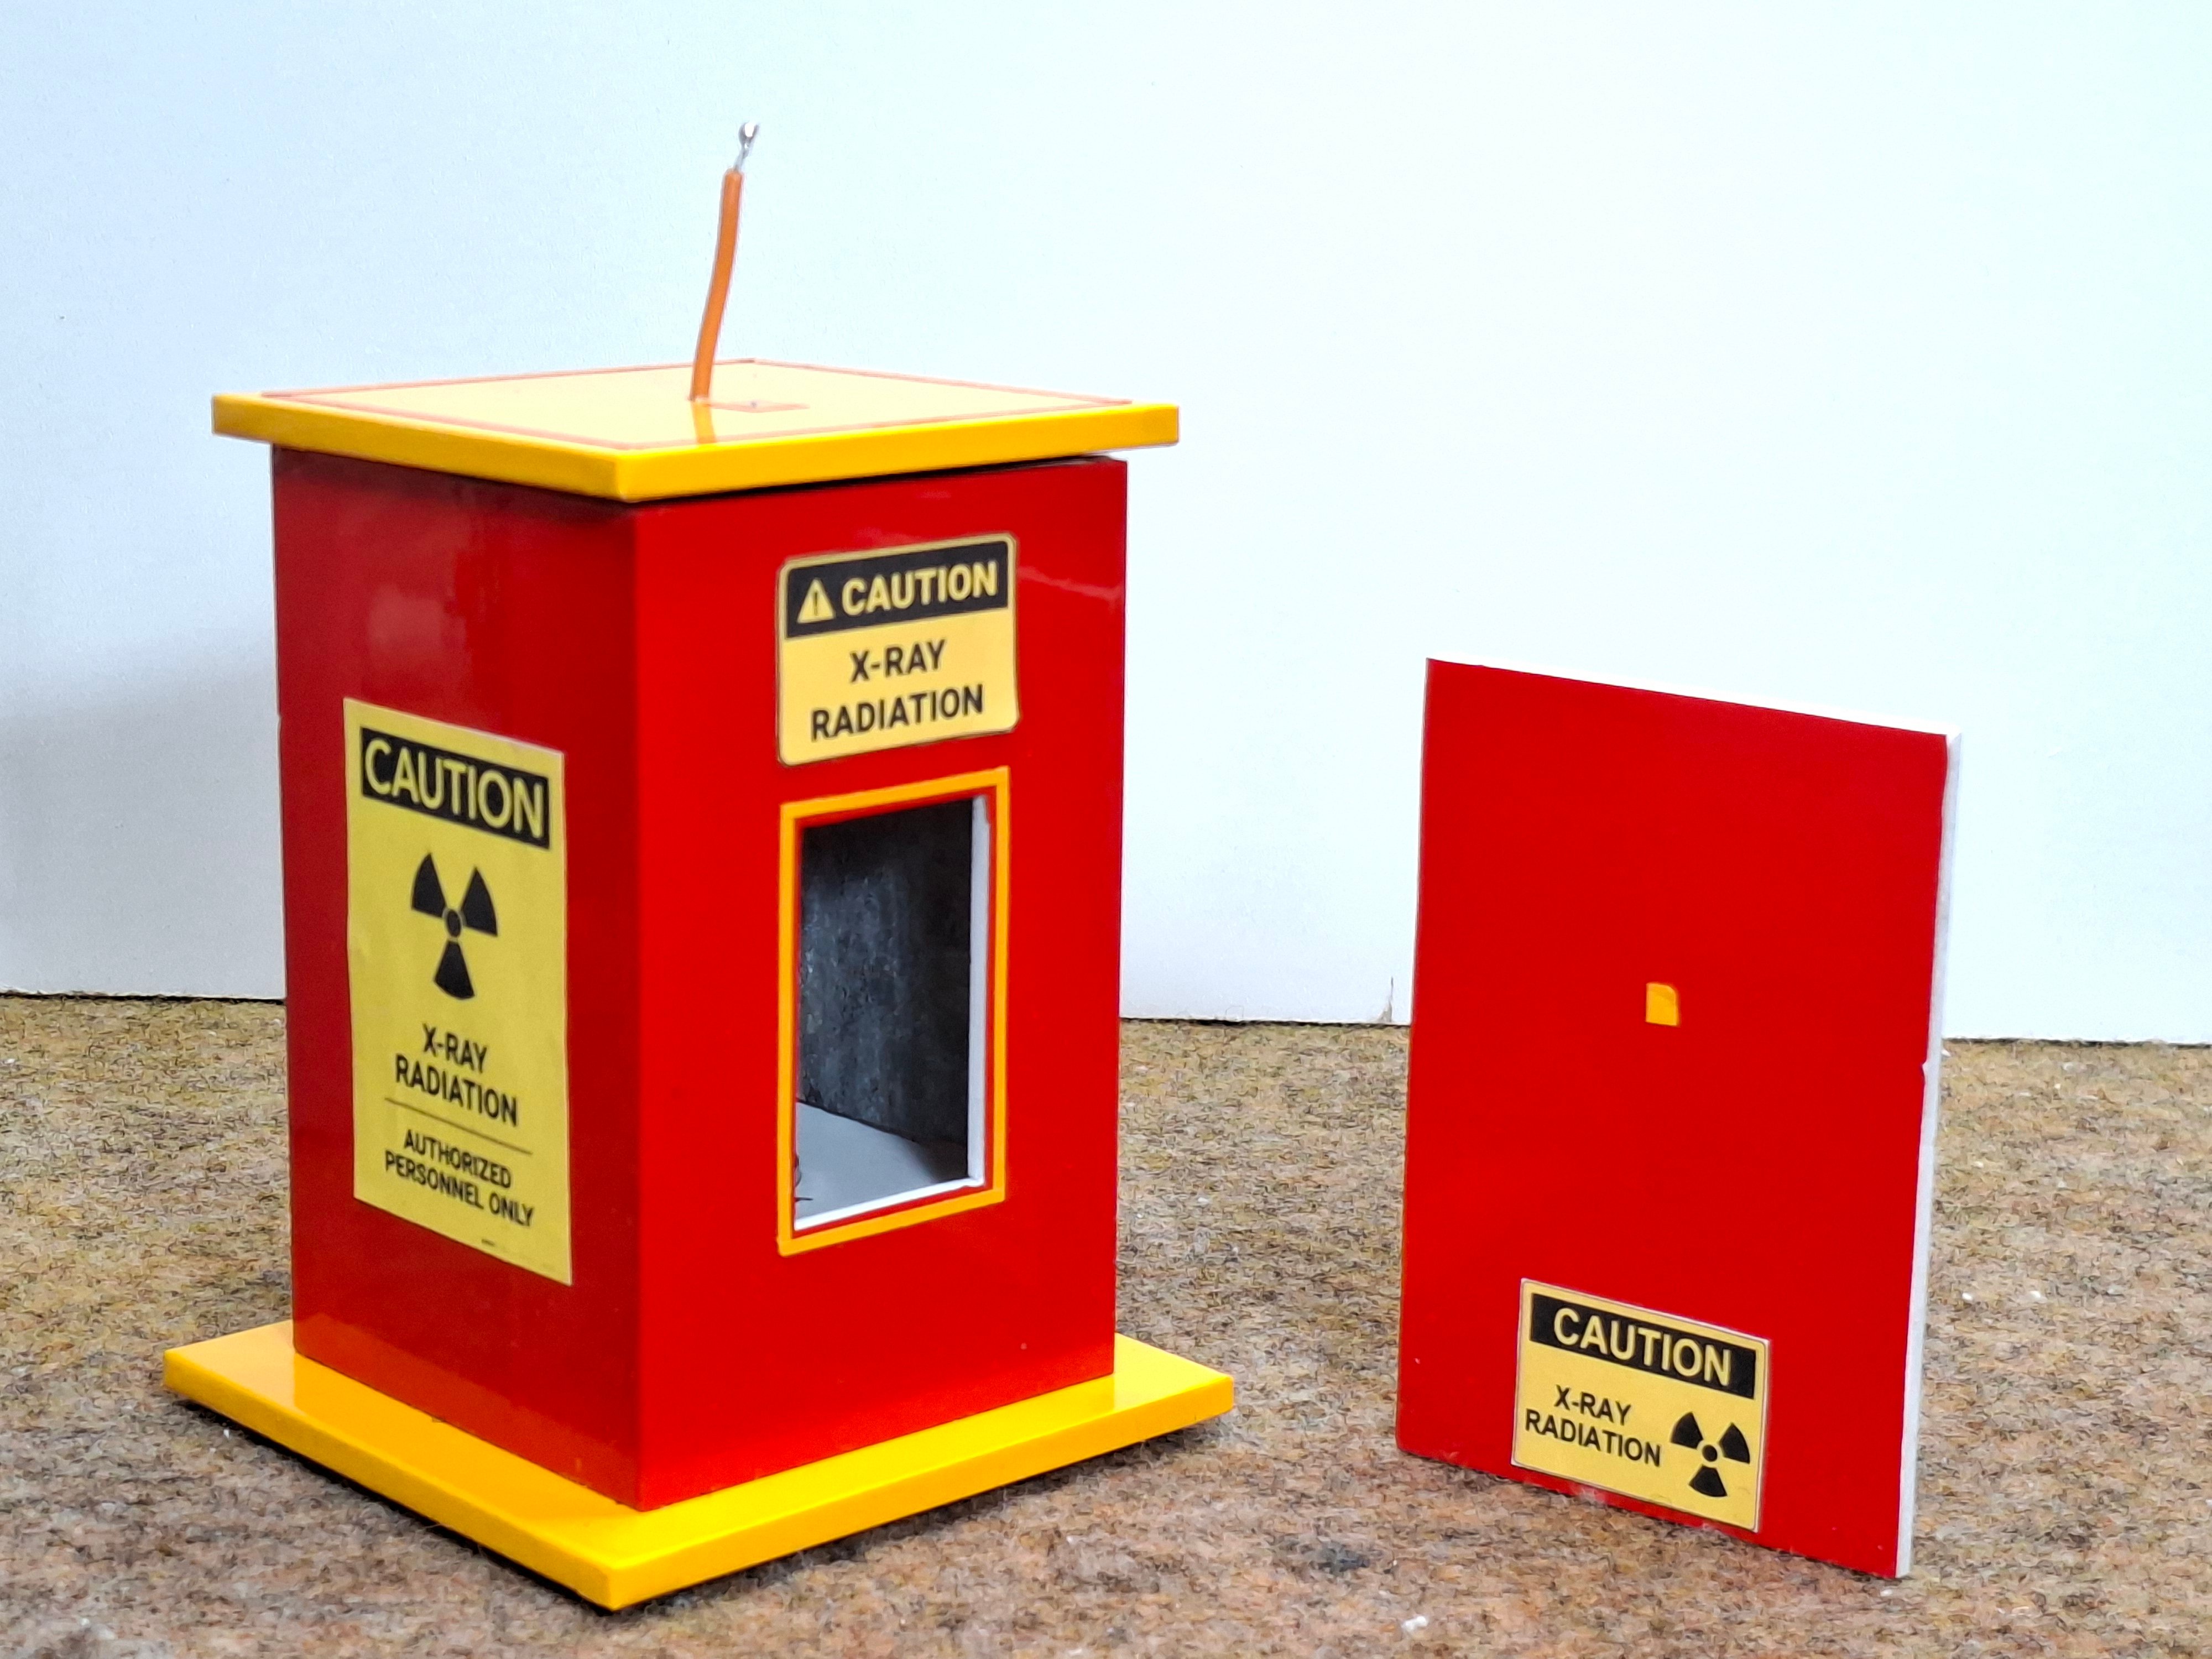
On three sides there is a protective lead plate, and in front there is an opening of which the object that we are recording is placed. Since we are working with extremely high voltages, specially insulated wires are used, which also need to be spaced apart from each other, as well as from the shield. I place the object at a distance of 10 to 15 centimeters from the source and start the irradiation. The exposure time depends on the intensity of the x-rays and the distance from the source.
Specifically, I get the best results with the following parameters:
- Distance from the source 10cm (at that point the radiation has an intensity of about 200µSv)
- and Exposure time from 30 to 60 min depending on the object we are imaging (for objects with thicker and more impermeable material the exposure is longer).
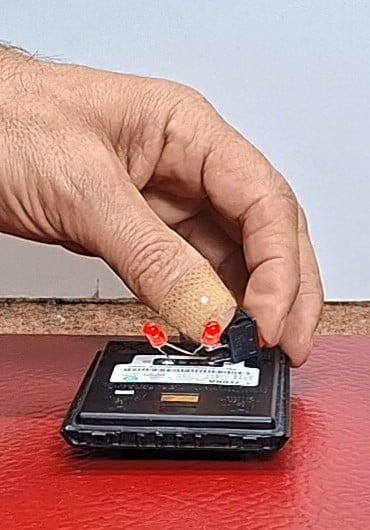
When the exposure is over, we move on to film processing. This is done in a completely dark room, possibly slightly illuminated with a discreet red light source. For this purpose, I use 3 red 5mm LEDs.
I carefully open the film and immerse it in the developing solution for about 30-40 seconds. Then I wash it in water, then put it in a fixing solution for 2 to 3 minutes.
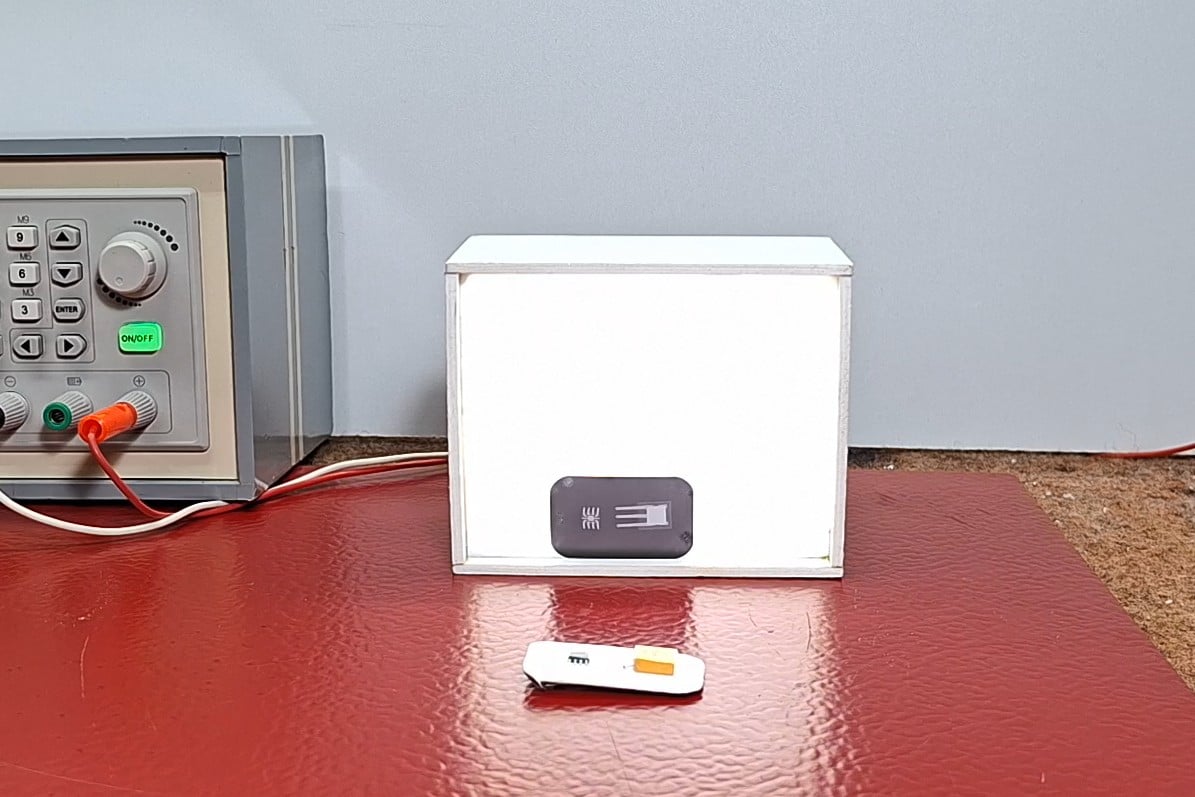
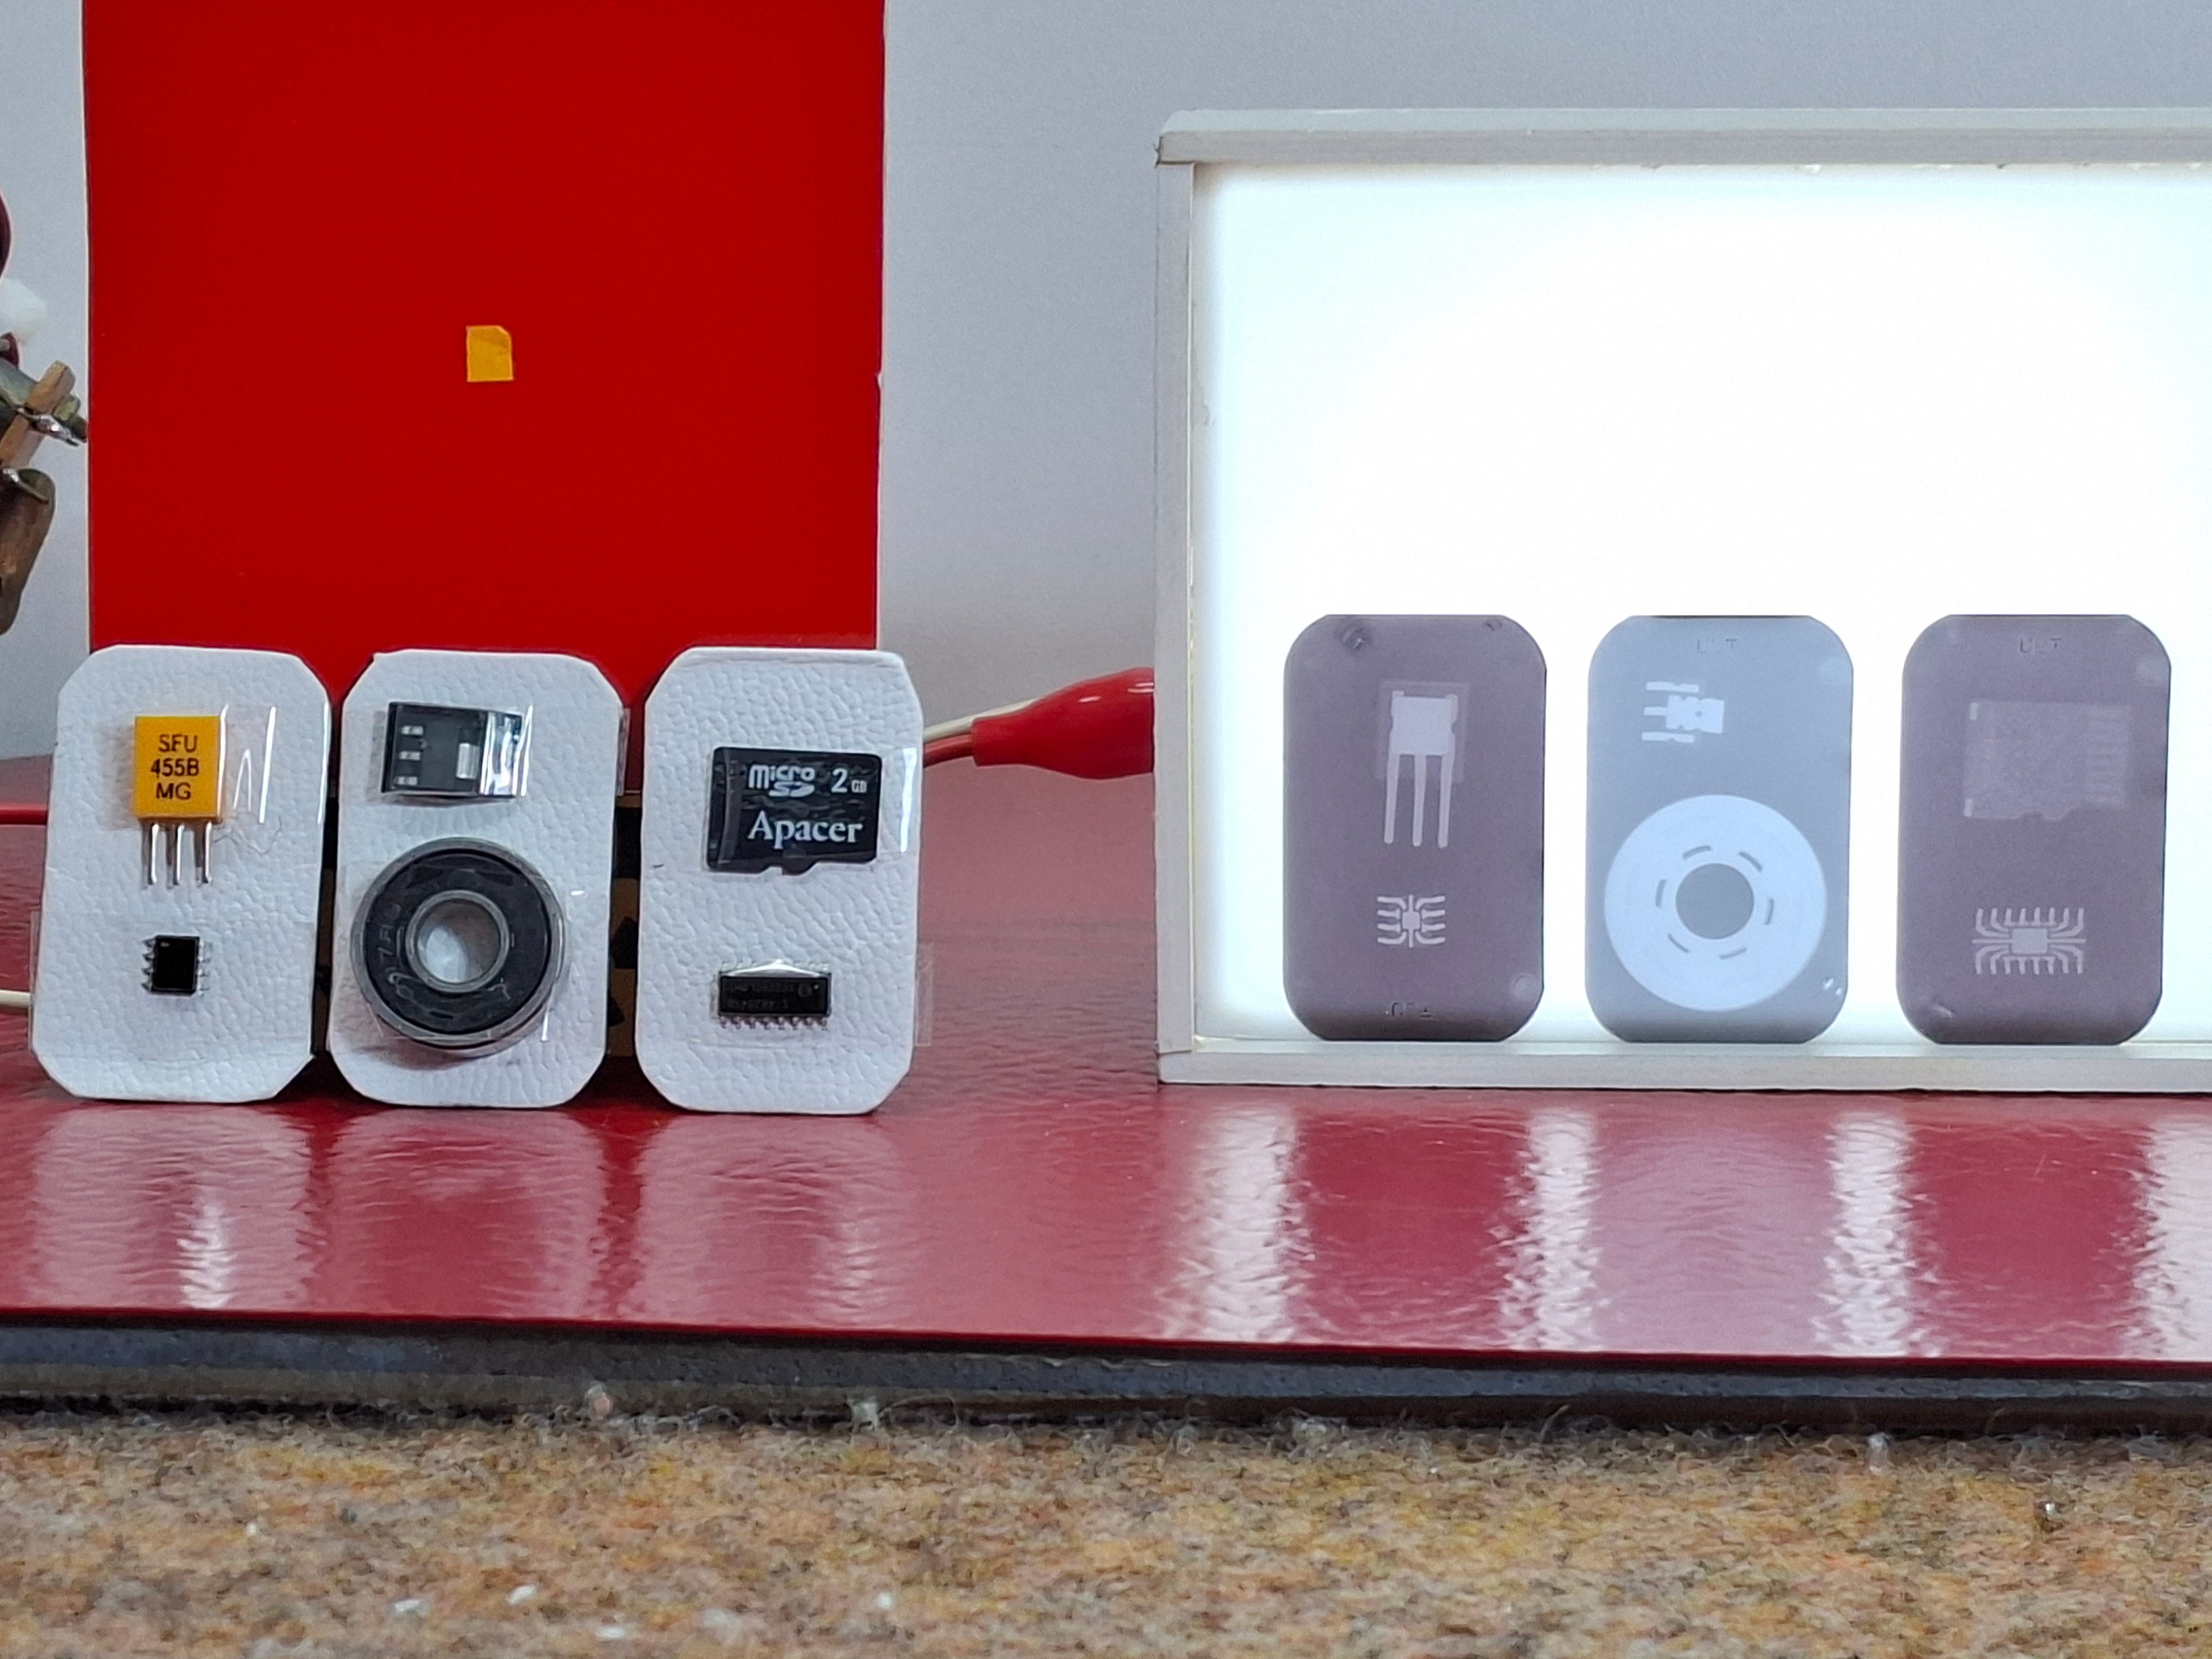
After this, the film is no longer sensitive to white light and we can wash it well under a strong stream of water and let it dry. The processed films are best viewed when placed under intense white diffuse light. For this purpose I have made this small screen.
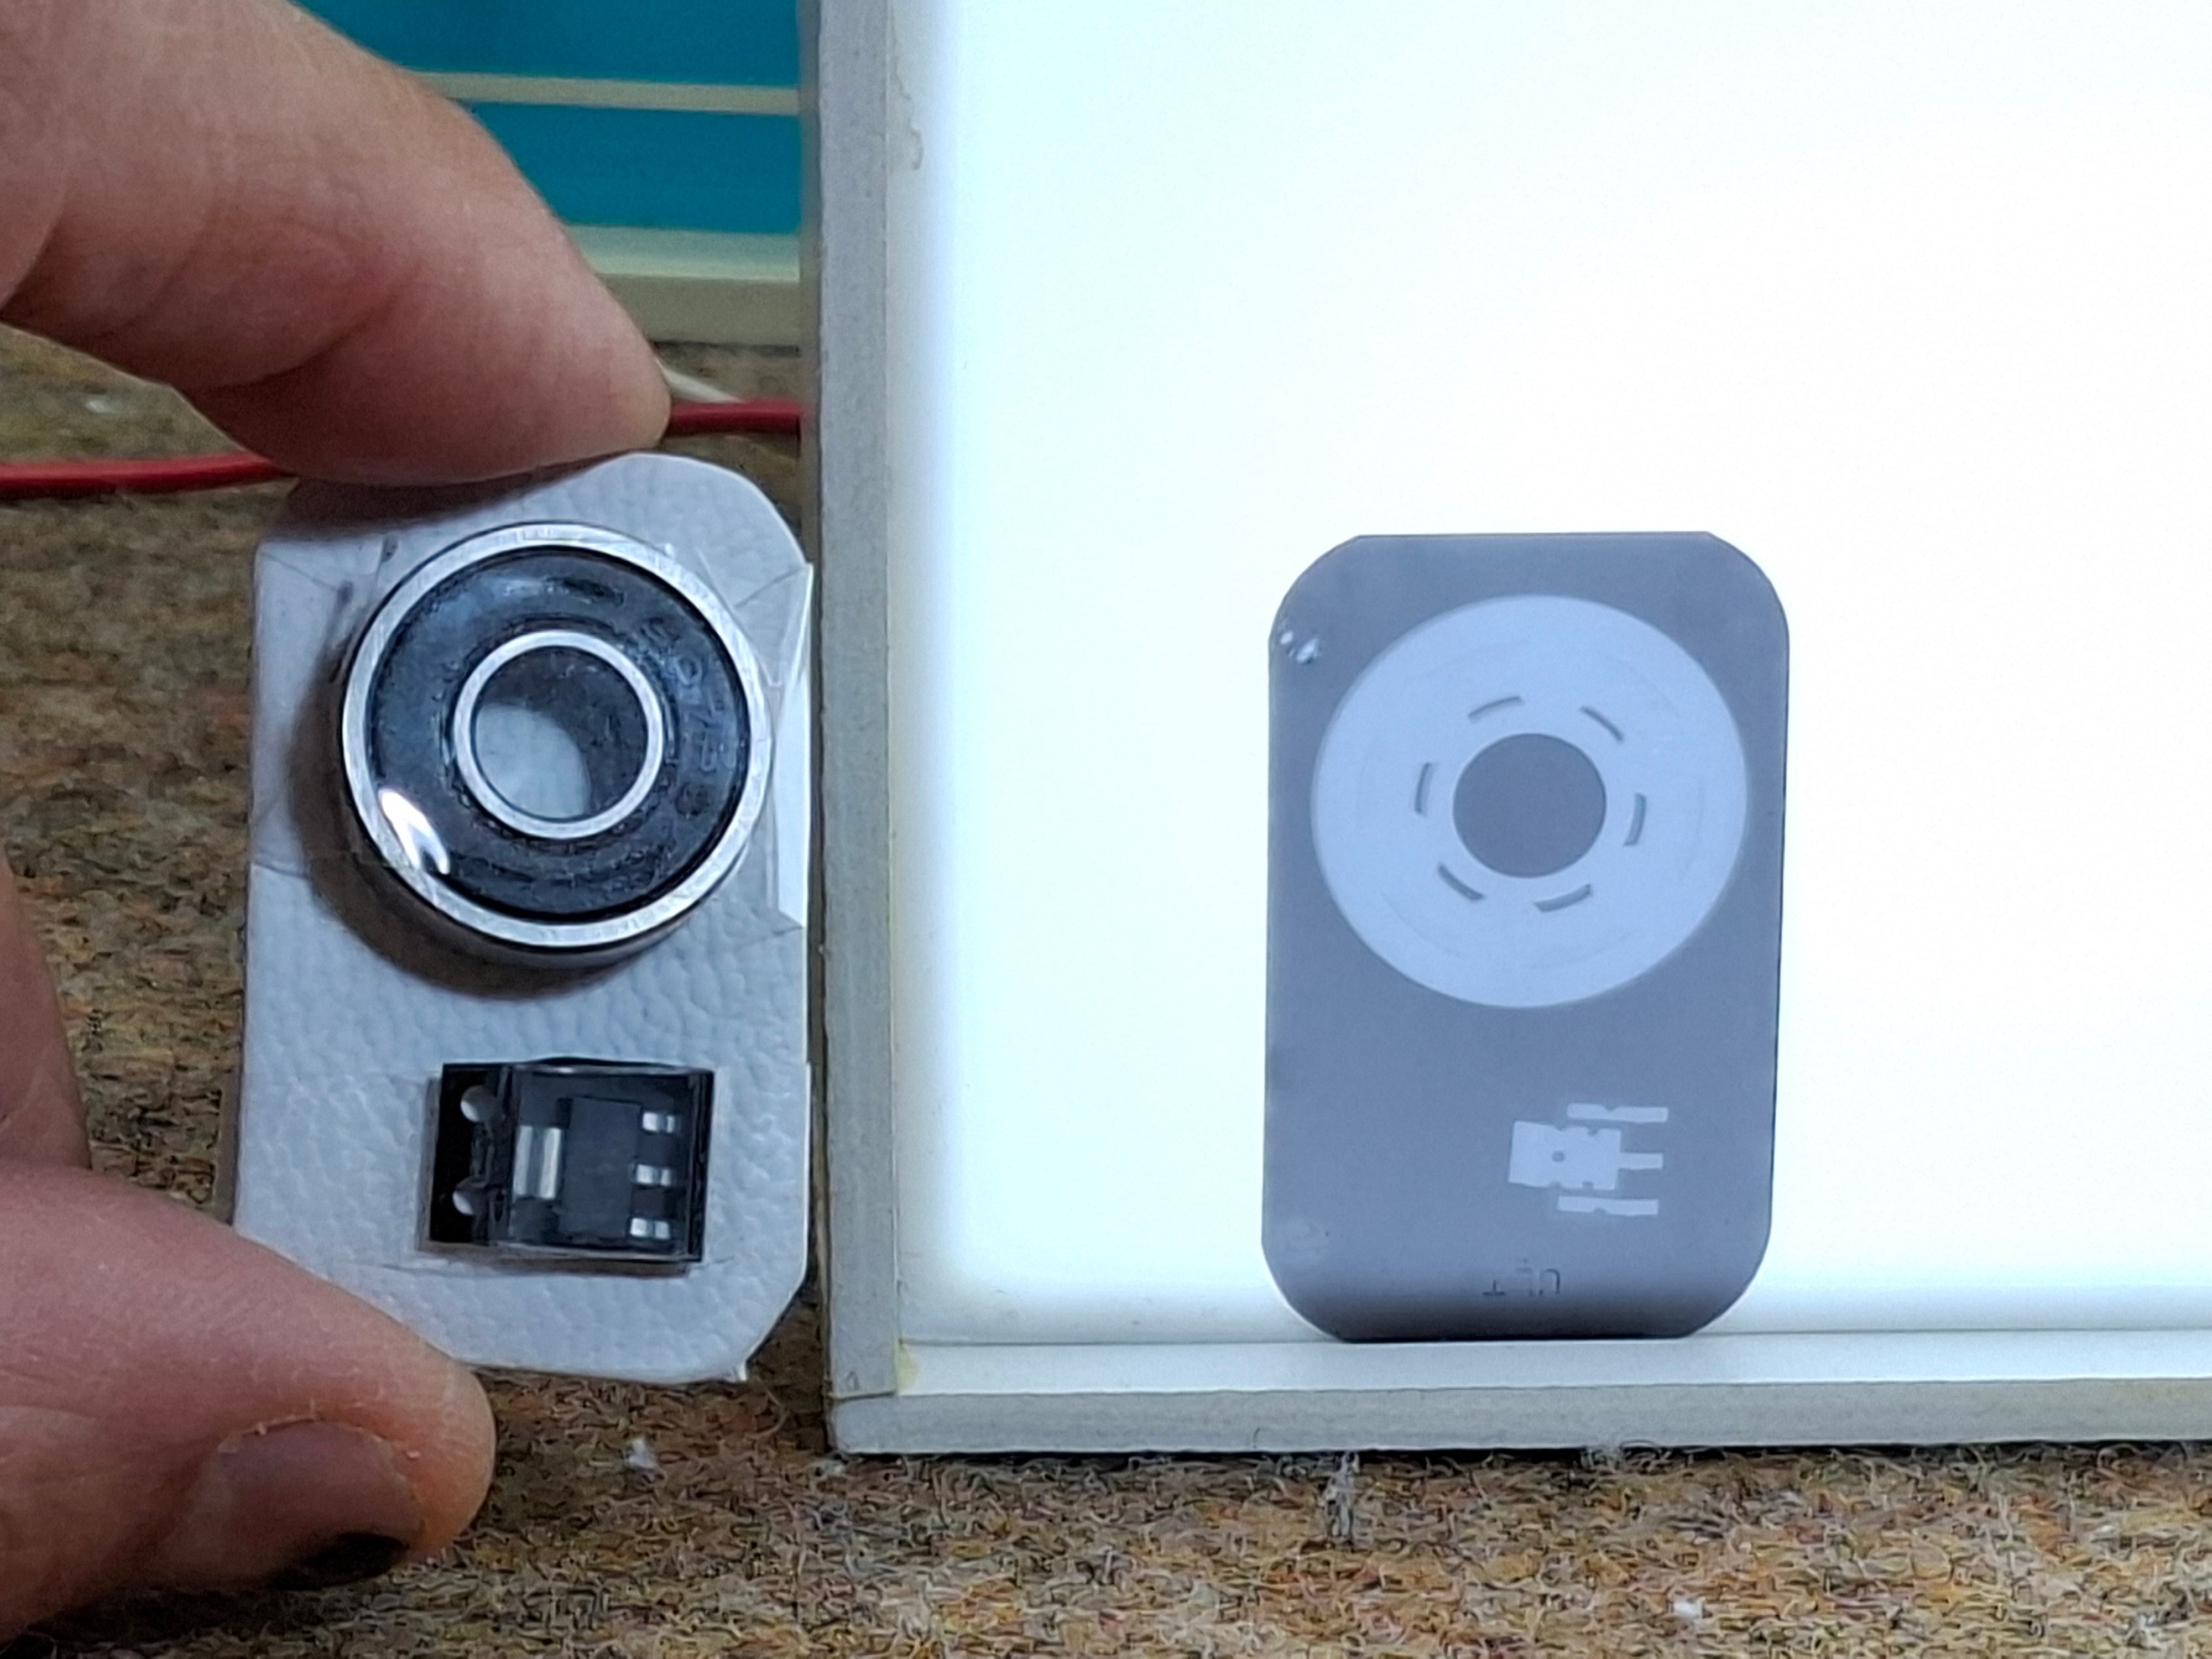
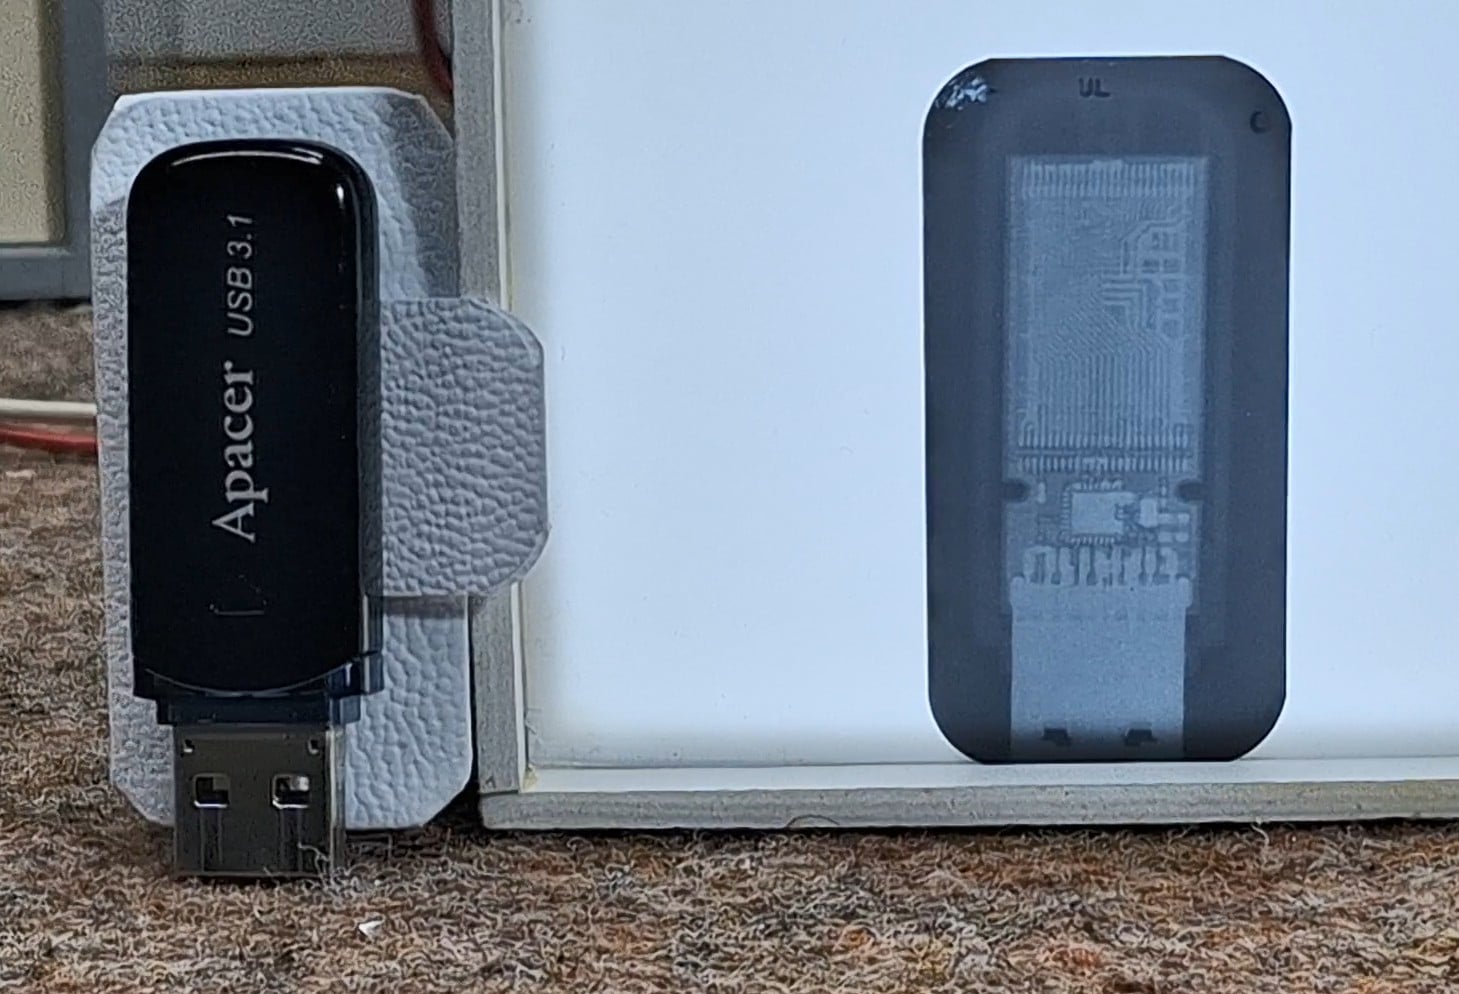
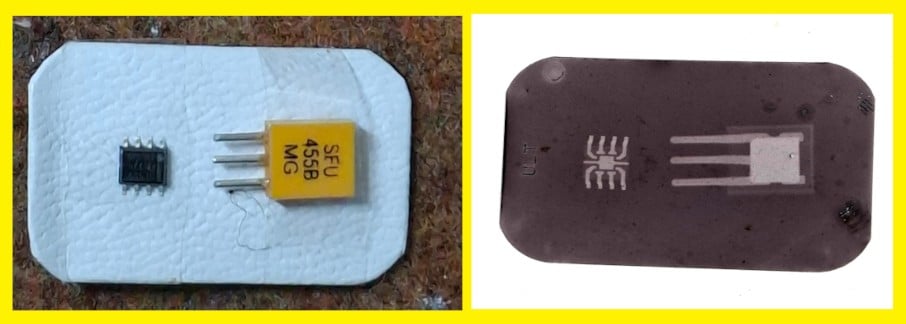
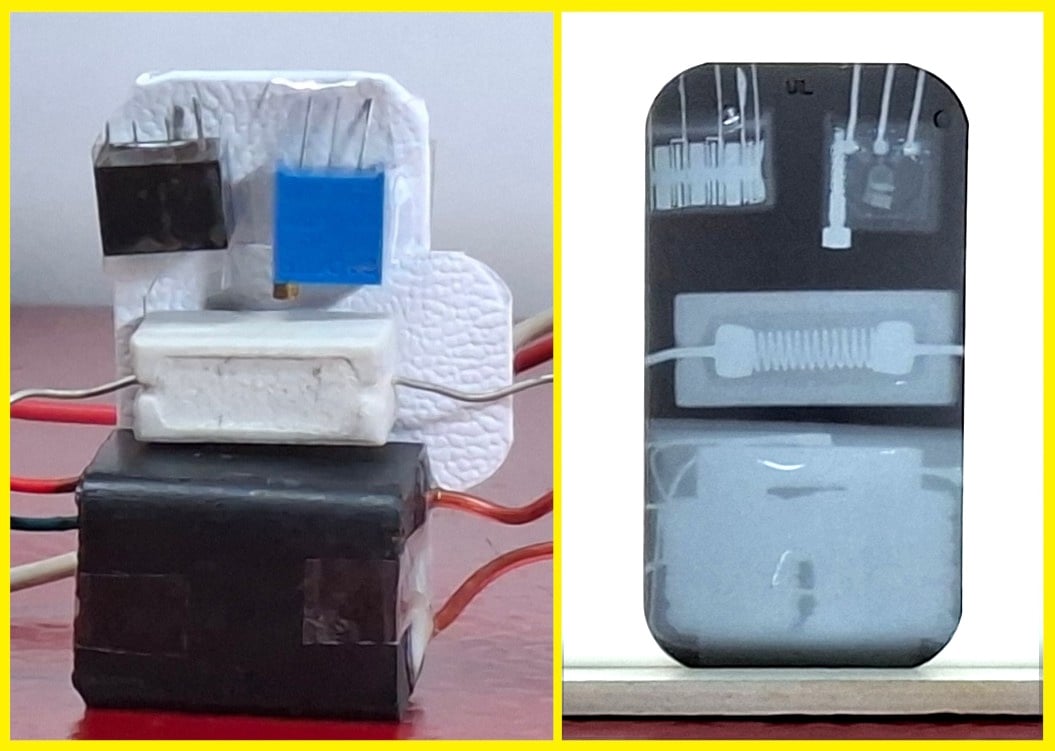
Now you will see what some of the objects processed with this X-ray machine look like.
And finally a short conclusion. This project successfully demonstrates how I build a low-cost, miniature DIY X-ray machine using a DY86 vacuum tube and a Cockcroft-Walton voltage multiplier. By achieving precise control over high-voltage levels and radiation intensity, I can produce high-quality radiographs of electronic components using dental film.
SAFETY NOTES: Due to the extreme health risks involved, this video is for educational and documentary purposes only. X-rays are very dangerous ionizing radiation. They are invisible and pass through human body, and they can cause fatal diseases. Do not attempt to recreate this experiment at home. If you decide to carry it out despite the warning, I take no responsibility for your injuries - you do everything at your own risk.