In this tutorial, I am going to show you guys how to create a fire effect first using 4017 IC and then using an Ard
In this tutorial, I am going to show you guys how to create a fire effect first using 4017 IC and then using an Arduino.
I will also show you guys how to create a Cardboard Tank and a Burning Village.
This was a small request from my son and my attempt to recycle some household junk. He loves the final built, I hope you guys also like it.
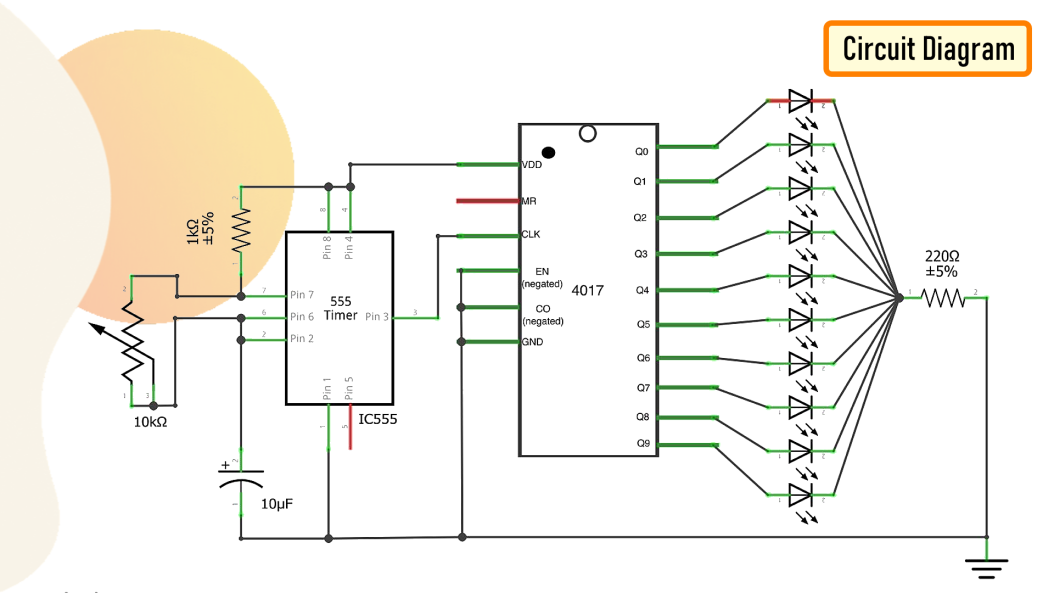
The circuit is very simple. Basically its a forward chaser circuit using 4017 IC.
The 555 Timer IC operates as a clock oscillator or clock generator. The output on PIN-3 goes high causing a shift.
The signal from the 555 IC clocks the 4017 decade counter. Output of 555 timer IC on PIN-3 is given as an input to 4017 IC through PIN-14. Whenever a pulse is received at the input of IC 4017, the counter increments the count and activates the corresponding output PIN.
By increasing or decreasing the value of resistance of the 10K pot we can adjust the speed of the chaser circuit.
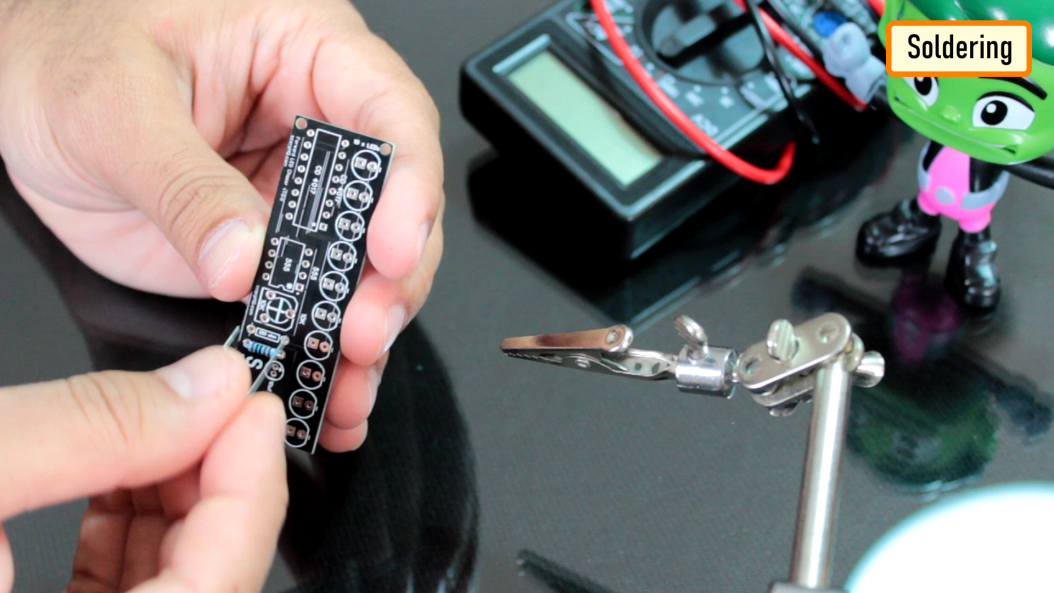
So this is how my board looks like. I have 4 breakout boards in this 100cm x 100cm assembly.
Soldering
Lets start by soldering the 2 resistances to the board. Then,lets solder the 10uf capacitor to the board. After that, lets solder the 10K pot. Next, lets solder the 2 IC bases and install the two ICs to the bases.
I am not going to solder any LEDs directly to the board, instead I will solder them to separate boards and then connect them using ribbon cables.
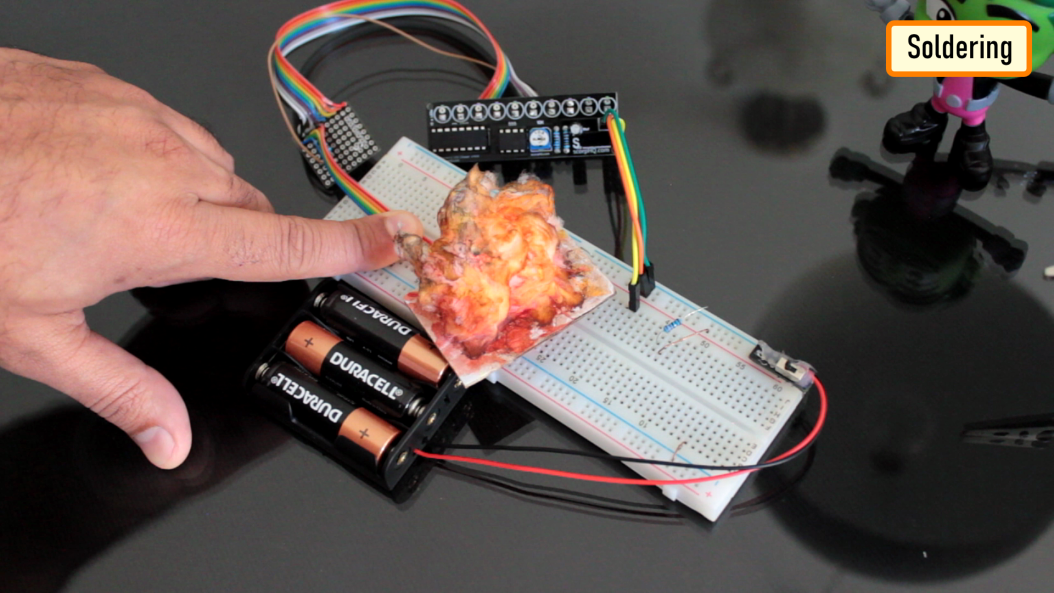
Lets do a quicks test before moving to the next step. Using water-color I painted a cotton ball to look like a fire ball. Looks perfect, isn't it?
The same fire effect can also be created using an Arduino. The beauty of using an Arduino is that, by updating the "Blink Example Code" we can flash as many LEDs as we want. I will provide a copy of the code in the description below, however, it totally depends no you how you want to present it.
Thanks
Thanks again for checking my post. I hope it helps you.
If you want to support me subscribe to my YouTube Channel: https://www.youtube.com/user/tarantula3
Blog Posts:
1. Tank V1: https://diy-projects4u.blogspot.com/2021/06/diy-cardboard-tank.html
2. Tank V2: https://diy-projects4u.blogspot.com/2021/08/diy-cardboard-tank-v2.html
3. Burning Village: https://diy-projects4u.blogspot.com/2021/08/arduino-based-tank-project-for-kids.html
Video references:
1. Tank V1 Video: https://youtu.be/F8-_zKV1fgc
2. Tank V2 Video: https://youtu.be/dKCBB7hs0EU
3. Burning Village: https://youtu.be/WWq06aZlOjE
Cardboard Templates:
1. Tank V1 : https://drive.google.com/file/d/1rk7nt5us-fkiT5n4weV5snbRRS-OXbrw/view?usp=sharing
2. Tank V2 : https://drive.google.com/file/d/1HsBgBTptAtvTRbSao00rKqmljLg5kg6h/view?usp=sharing
Gerber File:
https://drive.google.com/file/d/1D3leQ-gLd41OdMKKmfCK8I4xFMHkbHCh/view?usp=sharing
Schema:
https://drive.google.com/file/d/1D_tFC6Kf04yycXtXdHEEhGABf1nJGogr/view?usp=sharing
Code:
https://drive.google.com/file/d/1lbOnCmx4DODpjmPjyo9sjGHCzJE3TZFF/view?usp=sharing
Support My Work
BTC: 1M1PdxVxSTPLoMK91XnvEPksVuAa4J4dDp
LTC: MQFkVkWimYngMwp5SMuSbMP4ADStjysstm
DOGE: DDe7Fws24zf7acZevoT8uERnmisiHwR5st
ETH: 0x939aa4e13ecb4b46663c8017986abc0d204cde60
BAT: 0x939aa4e13ecb4b46663c8017986abc0d204cde60
LBC: bZ8ANEJFsd2MNFfpoxBhtFNPboh7PmD7M2
Thanks, ca again in my next tutorial.