Cranial electro stimulation uses harmonic frequencies to help balance the brain's chemistry.
Cranial electro stimulation uses harmonic frequencies to help balance the brain's chemistry. By connecting with the body's control center, the brain harmonic frequencies provide wide-ranging and extensive benefits in a painless and non-invasive manner, with little or no side effects:
- Regain mental acuity and clarity
- Helps with addictions & cravings
- Enhance meditation experiences
A project for making such a device was recently presented in a local magazine, but the device was relatively complex and contained 6 Integrated Circuits. In a very simple way can be made similar device with the help of Arduino microcontroller and a few discrete elements. The basic idea and code is from the nvtronics.org forum. I extended the code with a simple 20 min timer, which is the recommended time for this type of simulation. You can easily change this time in the code in line:
timerCount = 20 * 60 * 10; ////(20 mins * 60 sec * 10 * 1 deciseconds)
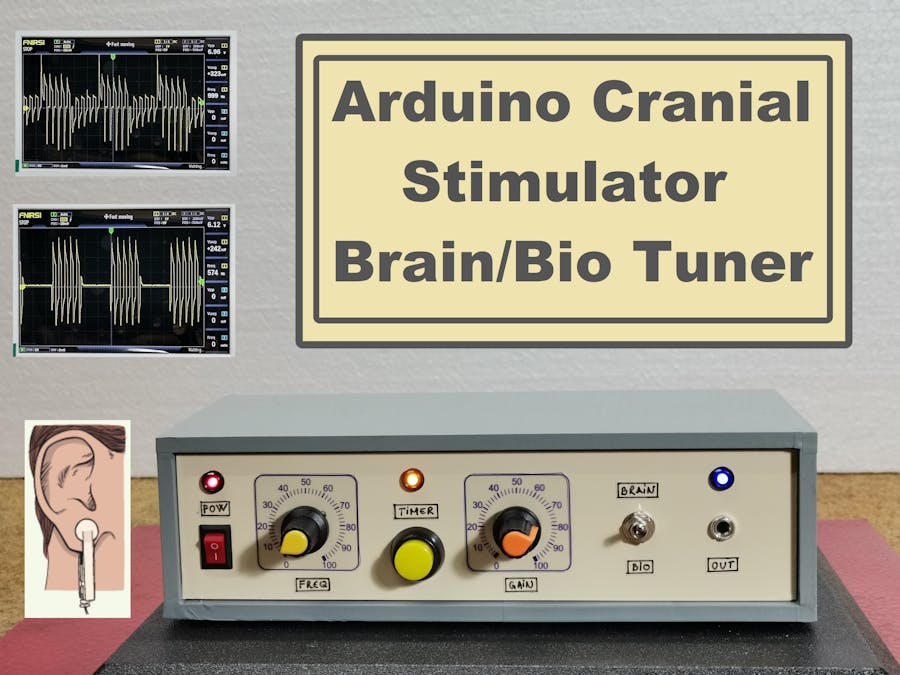
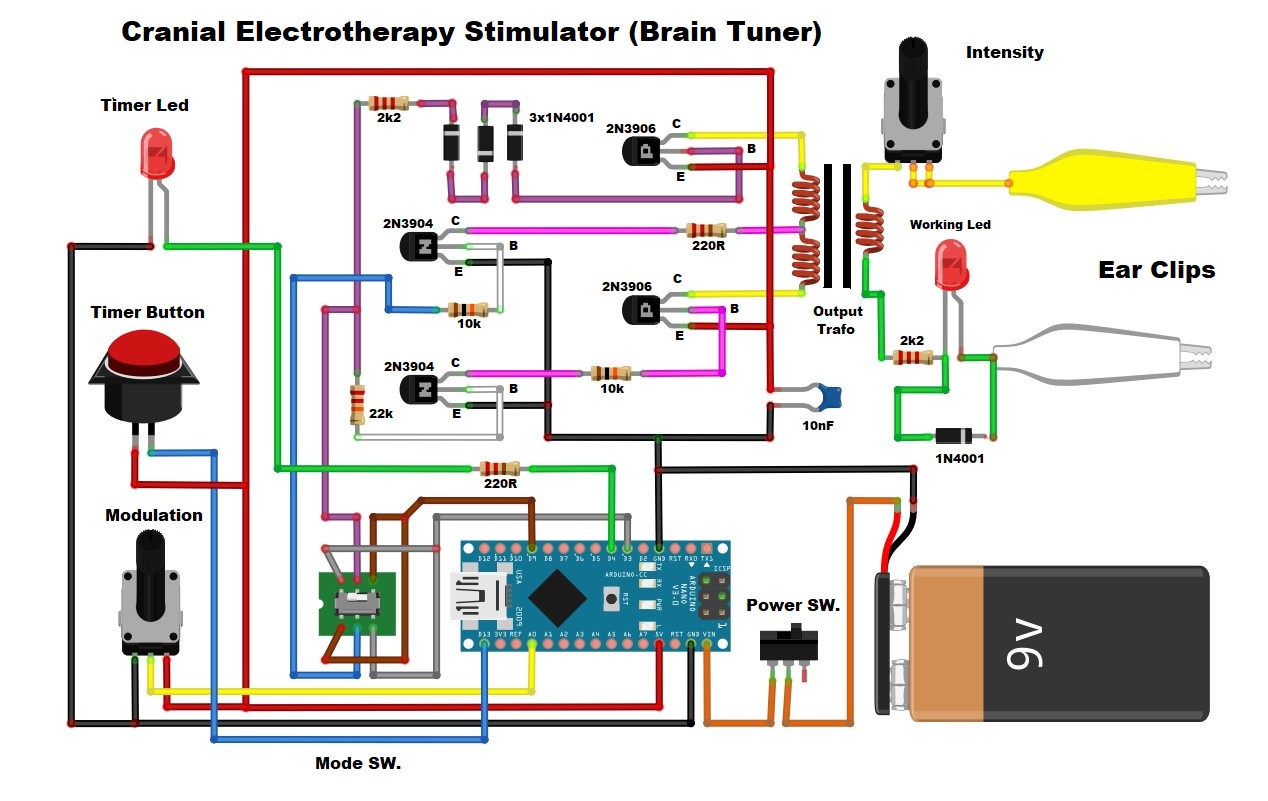
I also added a switch with which we can choose between Brain Tuner and Bio Tuner mode. Arduino generates two frequencies(111 Hz and 1110 Hz) modulated by a third one and all of them multiplexed by an audio transformer and applied to ear lobes.
Device is relatively simple to build and contains a few component:
- Arduino Nano microcontroller
- Discrete element board containing 4 transistors, several resistors and diodes, and transformer
- I am using a transformer from the output audio stage of an old radio receiver, and you can see more detailed trafo features on the above mentioned forum
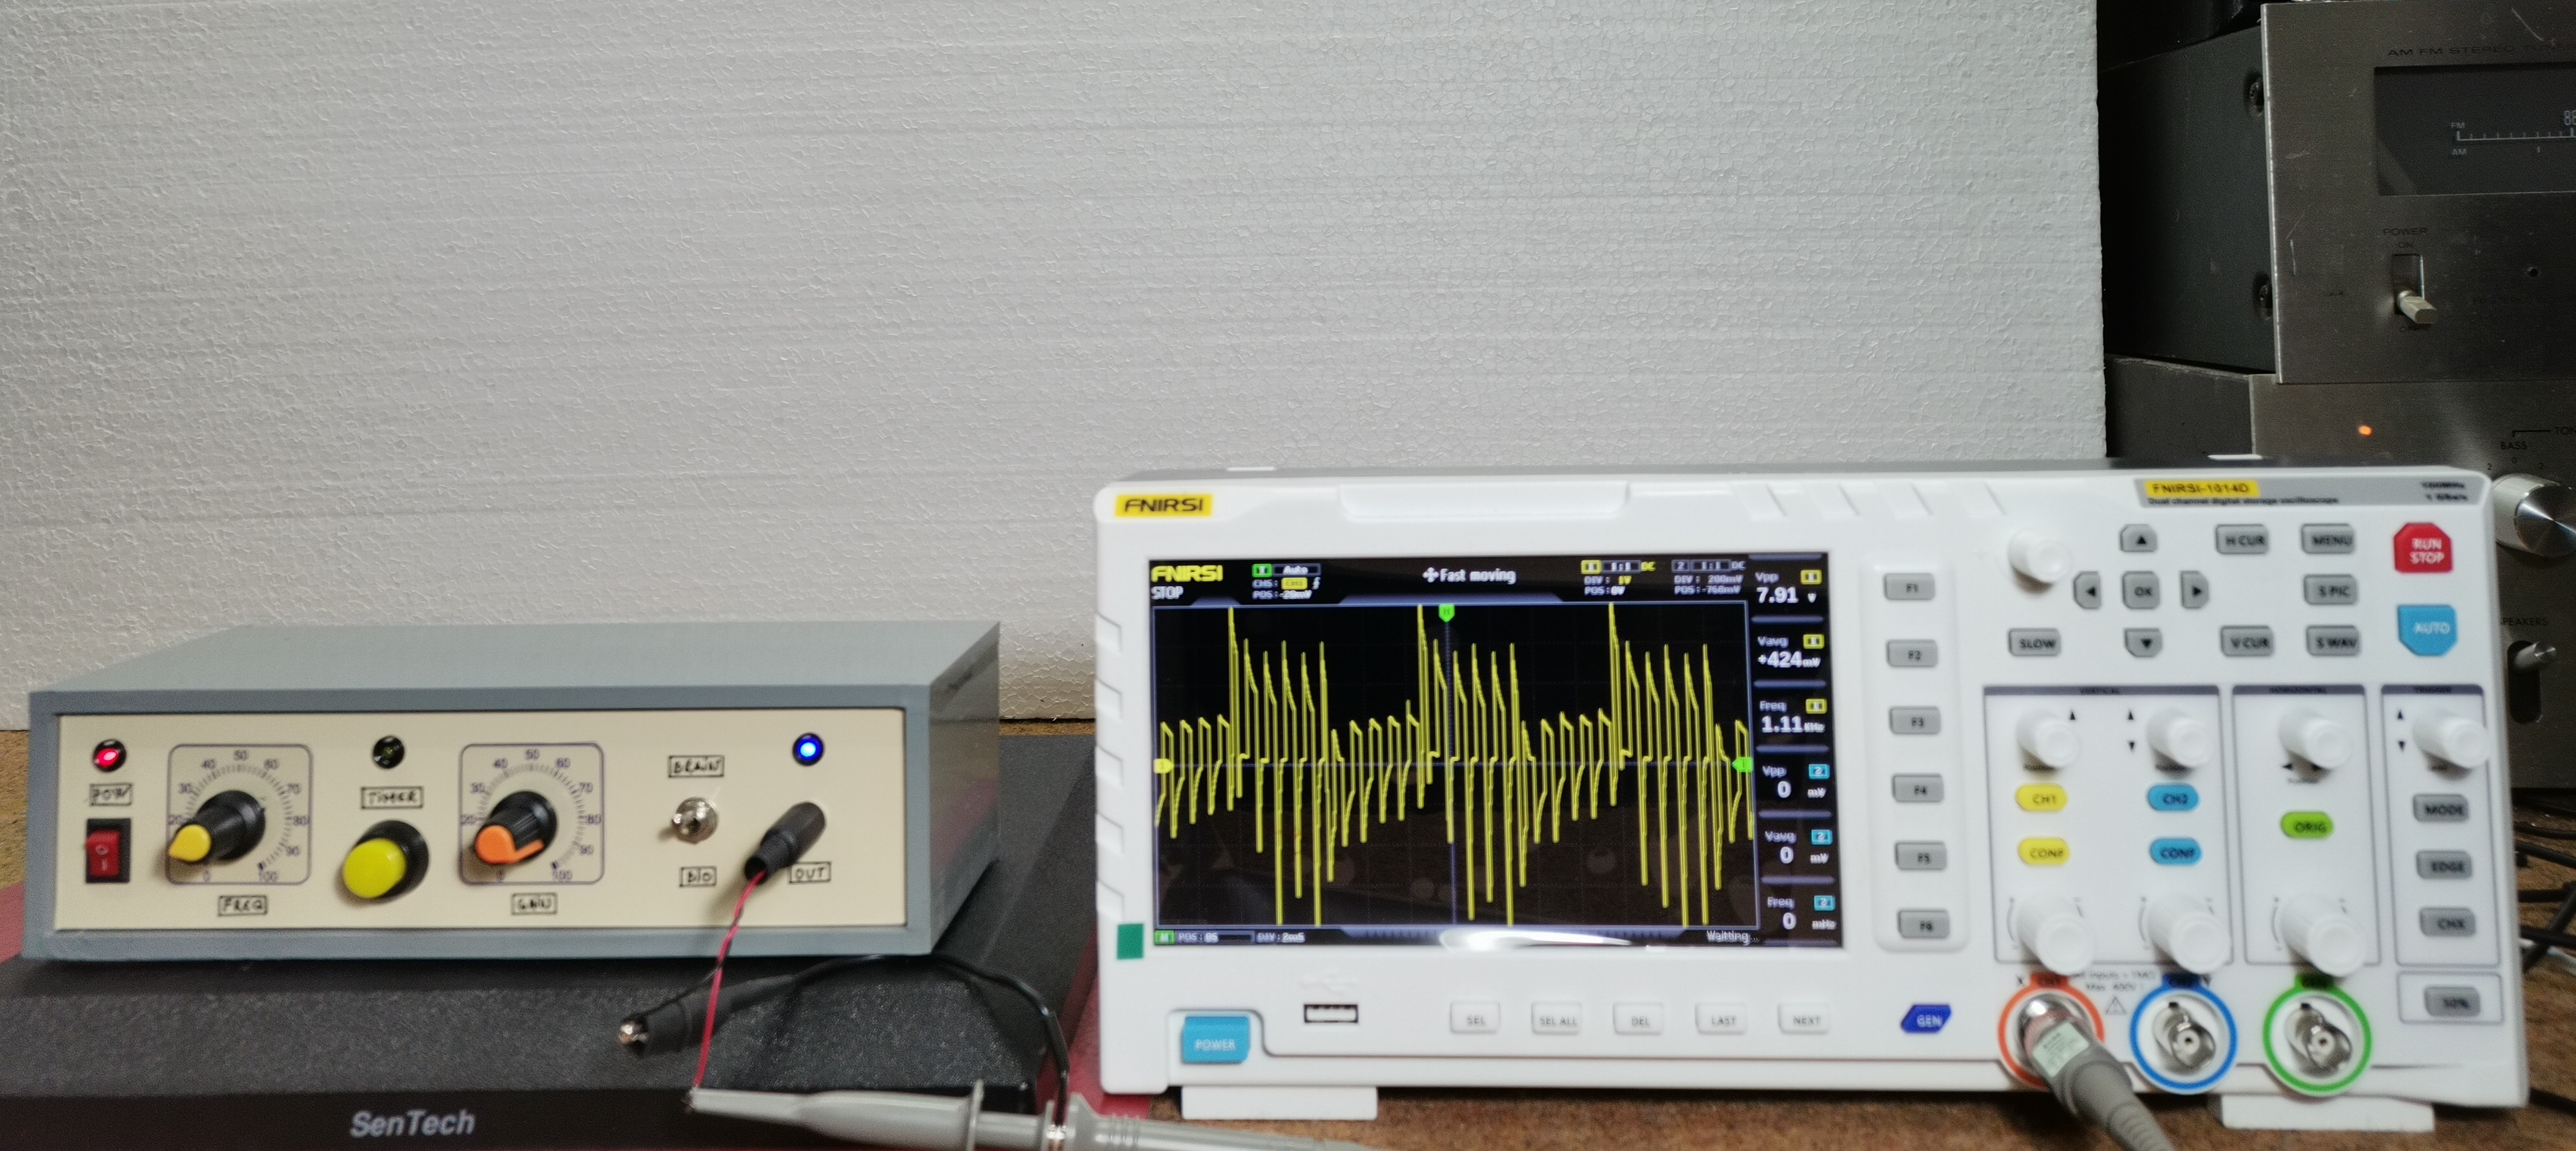
And now let's see how the device works in reality. For that purpose, we will connect an oscilloscope to the output so that we can follow the shape of the output signal. For this purpose, a resistor with a value of 1.5 kiloohm is connected in parallel to the output. First potentiometer will control current in electrodes & you can set it while using device according to sensation in your ears. Too much current will cause discomfort, and you should only set it to the point where you can feel slight tingling or a bit more. Other potentiometer control the interrups of signal selectable between 0.5 and 5Hz.
The signal we see on the oscilloscope screen corresponds to the signal of the commercial Bob Beck Brain Tuner which sells for $ 150 and up. Тhe device also has a Bio Tuner mode that turns on with the switch, and we can the shape of this signal on oscilloscope.
Yellow button turns on the timer. The LED lights up until 20 minutes have elapsed and then turns off. Due to the needs of this presentation, I reduced the time to 1 minute. In addition to the LED, a relay can be connected to the timer that will physically control the duration of the therapy. At the link with a detailed description you can see that there are two schematic diagrams, of which the simple one represents only Brain Tuner, and the other one has Bio tuner mode and timer, but it is more complicated to make. It is important to emphasize that for safety reasons the device should be powered by a battery that due to low consumption will last a long time
This unit is not a medical device. I can’t claim or prove any therapeutic effectiveness for this device, but if you are interested in trying it, the circuit is so cheap and relatively simple to build that an attempt can be made with quite no harm.
Finally, the device is built into a suitable box made of PVC material and coated with a self-adhesive color label.