In this project, we will see how to detect Whistle sound and once it is detected we will toggle the AC lamp via a relay.
In this project, we will see how to detect Whistle sound and once it is detected we will toggle the AC lamp via a relay.
Working of Project:
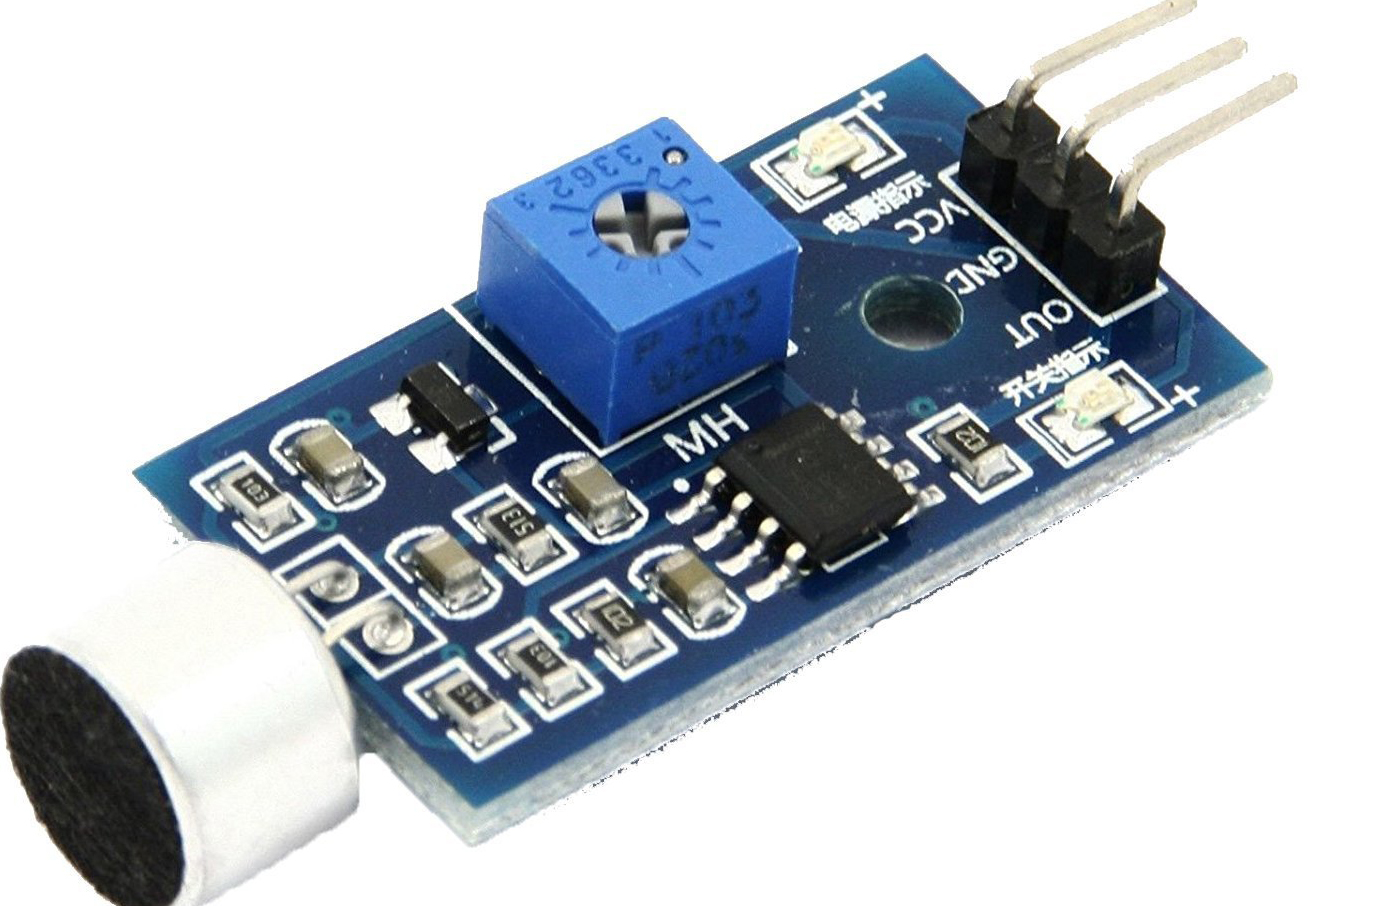
As we know a fundamental component in a sound sensor is the microphone. The diaphragm inside the microphone flutters to the sound waves in the atmosphere which creates an electrical signal on its output pin. But they can not be processed directly due to its low magnitude.
To amplify such low signal sine waves and transform them into square waves the module utilizes the on-board LM393 Comparator module. The low voltage audio output from the microphone is provided to one pin of the comparator through an amplifier transistor while a reference voltage is set on another pin using a voltage divider circuit involving a potentiometer.
When the audio output voltage from the microphone beats the threshold voltage the comparator goes high with 5V else the comparator remains low at 0V. In this way, the low signal sine wave can be transformed into a high voltage (5V) square wave.
So by calculating the frequency of the square wave, we can find the frequency of the sound signals in the atmosphere. Check it once by connecting it to the to make sure things are working.
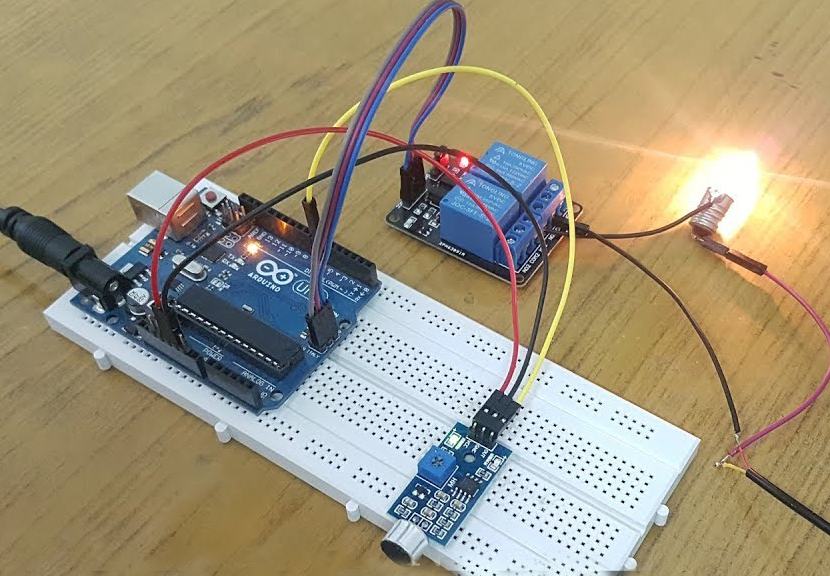
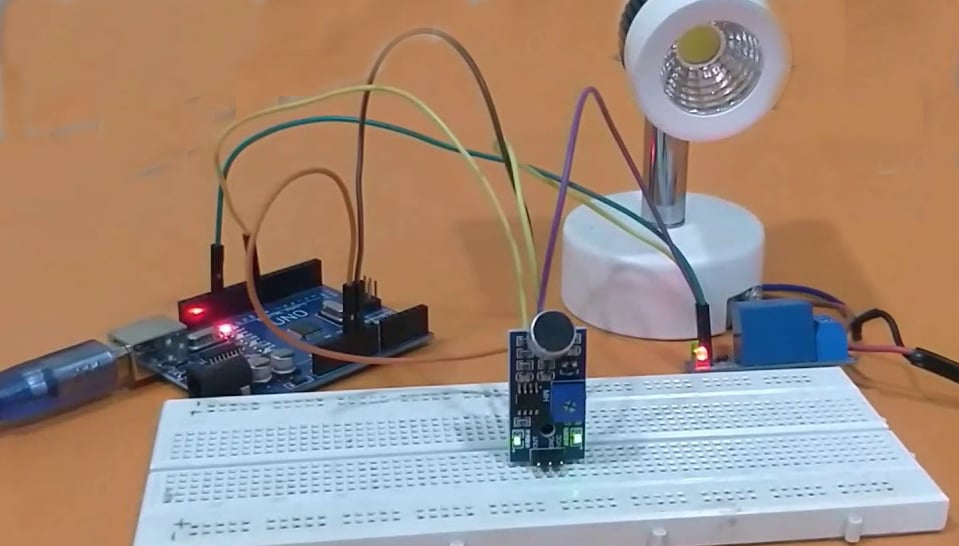
The Relay module and the Sound sensor is powered by the 5V pin of the Arduino. The output pin of the Sound sensor module is connected to the digital pin 8 of the Arduino. The Relay module is triggered by pin 13 which is also attached to the in-built LED on the UNO board.
On the AC supply, the neutral wire is directly attached to the Common(C) pin of the Relay module while the Phase is attached to the Normally Open (NO) pin of the relay via the light bulb. In this way when the relay is triggered thus the light bulb will glow. Else the blub will remain off.
IoT Training will give a thorough view of such IoT Technologies.
#include <FreqMeasure.h>//https://github.com/PaulStoffregen/FreqMeasure

void setup() {
  Serial.begin(9600);
  FreqMeasure.begin(); //Measures on pin 8 by default
  pinMode(LED_BUILTIN, OUTPUT);
}

double sum=0;
int count=0;
bool state = false;
float frequency;
int continuity =0;

void loop() {
  if (FreqMeasure.available()) {
    // average several reading together
    sum = sum + FreqMeasure.read();
    count = count + 1;
    if (count > 100) {
      frequency = FreqMeasure.countToFrequency(sum / count);
      Serial.println(frequency);
      sum = 0;
      count = 0;
    }
  }

    if (frequency>1800 && frequency<2000)
    { continuity++; Serial.print("Continuity -> "); Serial.println(continuity); frequency=0;}

    if (continuity >=3 && state==false)
      {state = true; continuity=0; Serial.println("Light Turned ON"); delay(1000);}

    if (continuity >=3 && state==true)
      {state = false; continuity=0; Serial.println("Light Turned OFF"); delay(1000);}

    digitalWrite(LED_BUILTIN, state);
}