In this project we will make a RGB light controller with Arduino HC-05 Bluetooth Module.
Introduction
Hello makers, today we will learn to make a Bluetooth controlled RGB strip which is controlled from our smartphone. The basic idea behind this project is to create background/desk light that adds a feel of warmth to the viewer's eyes. Yes, this light is pretty good for YouTubers and persons associated with product photography. Also I will attach the screenshots of how I developed an android app in MIT app inventor 2 to control the led's.
Sponsor Link : UTSource
Gather All the Necessary Components
Circuit Diagram
The circuit diagram for this project is given here and it is easy to solder on the general purpose PCB. But I would recommend to test the circuit on a breadboard first. Make sure the RGB strip which you buy is a common anode type. i.e. You need to connect the led to ground in order to turn it on. The mosfets are controlled by the PWM pins of the Arduino Uno.
The circuit receives the command from the smartphone via the HC-05 Bluetooth module. The Arduino's TX and Rx pins are used for this.
Let's Program the Arduino Board
Now here I have included two programs. Both are same with just one change. One of the code has the capability to store the previous selected color to display even after the Arduino is reset.
The other code is just a simple RGB led controller that we have to configure every time we power on the device.
The code with the EEPROM is quite efficient and you don't have to connect your smartphone every time. If you have any doubts regarding the code feel free to comment below.
Note : Disconnect the Bluetooth module's Rx and Tx pin while uploading the code or it will give you an error.
//Previous state will not be saved
#include <SoftwareSerial.h>
int bluetoothTx = 5;
int bluetoothRx = 6;
SoftwareSerial bluetooth(bluetoothTx, bluetoothRx);

void setup()
{
 pinMode(11,OUTPUT); // Blue pin of RGB LED
 pinMode(10,OUTPUT); // Green pin of RGB LED
 pinMode(9,OUTPUT); // Red pin of RGB LED
 //Setup usb serial connection to computer
  Serial.begin(9600);
 //Setup Bluetooth serial connection to android
  bluetooth.begin(9600);
}

void loop()
{
  //Read from bluetooth and write to usb serial
  if(bluetooth.available()>= 2 )
  {
    unsigned int color1 = bluetooth.read();
    unsigned int color2 = bluetooth.read();
    unsigned int color = (color2 *256) + color1;
    Serial.println(color);

    if (color >= 1000 && color <1255)
    {
    int blue = color;
    blue = map(blue, 1000,1255,0,255);
    int blue1 = 255-blue;
    analogWrite(11,blue1);
    //Serial.print(blue1);
    }

    if (color >=2000 && color <2255)
    {
      int green = color;
      green = map(green,2000,2255,0,255);
      int green1 = 255 - green;
      analogWrite(10,green1);
     // Serial.print(green1);
    }

    if (color >=3000 && color < 3255)
    {
      int red = color;
      red = map(red, 3000, 3255,0,255);
      int red1 = 255 - red;
      analogWrite(9,red1);
      //Serial.print(red1);
    }
 }
}
//Previous state will be saved
#include <SoftwareSerial.h>
#include <EEPROM.h>
int bluetoothTx = 5;
int bluetoothRx = 6;
int addrR = 0;
int addrG = 1;
int addrB = 2;
SoftwareSerial bluetooth(bluetoothTx, bluetoothRx);

void setup()
{
 pinMode(11,OUTPUT); // Blue pin of RGB LED
 pinMode(10,OUTPUT); // Green pin of RGB LED
 pinMode(9,OUTPUT); // Red pin of RGB LED
 //Setup usb serial connection to computer
  Serial.begin(9600);
 //Setup Bluetooth serial connection to android
  bluetooth.begin(9600);

  int red1 = EEPROM.read(addrR);
  int green1 = EEPROM.read(addrG);
  int blue1 = EEPROM.read(addrB);
  analogWrite(9,red1);
  analogWrite(10,green1);
  analogWrite(11,blue1);
}

void loop()
{
  //Read from bluetooth and write to usb serial
  if(bluetooth.available()>= 2 )
  {
    unsigned int color1 = bluetooth.read();
    unsigned int color2 = bluetooth.read();
    unsigned int color = (color2 *256) + color1;
    Serial.println(color);

    if (color >= 1000 && color <1255)
    {
    int blue = color;
    blue = map(blue, 1000,1255,0,255);
    int blue1 = 255-blue;
    analogWrite(11,blue1);
    //Serial.print(blue1);
    delay(10);
    EEPROM.write(addrB, blue1);
    }

    if (color >=2000 && color <2255)
    {
      int green = color;
      green = map(green,2000,2255,0,255);
      int green1 = 255 - green;
      analogWrite(10,green1);
     // Serial.print(green1);
      delay(10);
     EEPROM.write(addrG, green1);
    }

    if (color >=3000 && color < 3255)
    {
      int red = color;
      red = map(red, 3000, 3255,0,255);
      int red1 = 255 - red;
      analogWrite(9,red1);
      //Serial.print(red1);
      delay(10);
      EEPROM.write(addrR, red1);
    }
 }
}
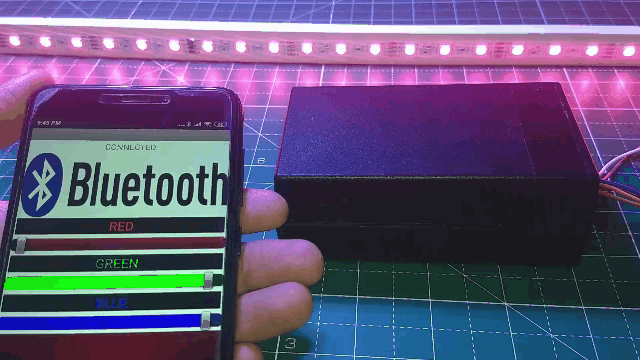
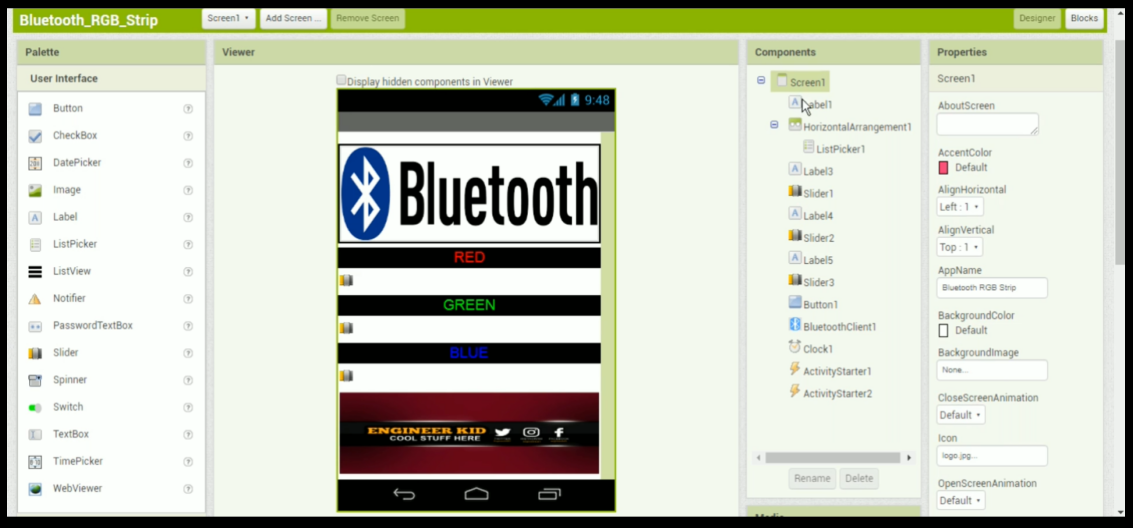
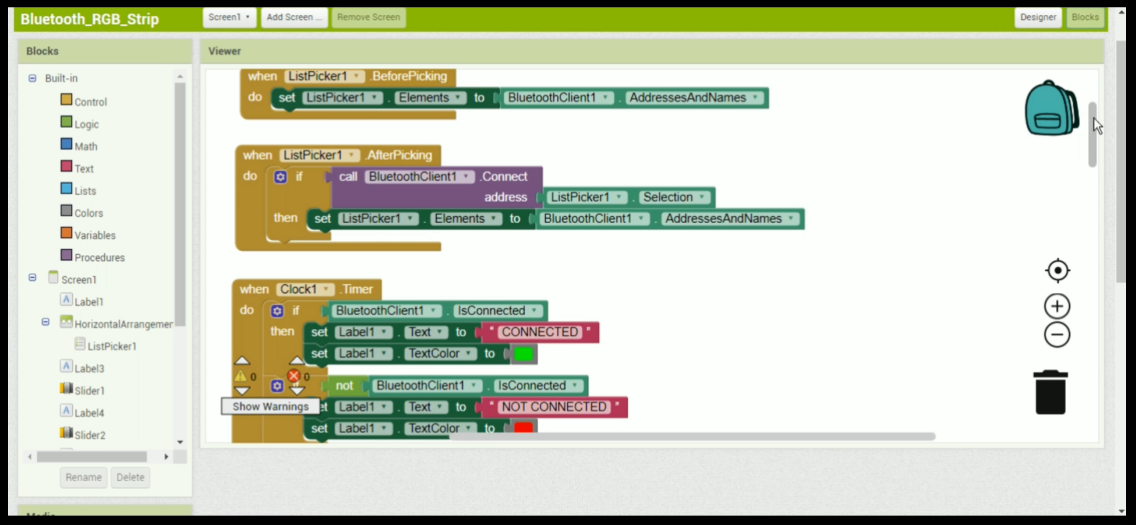
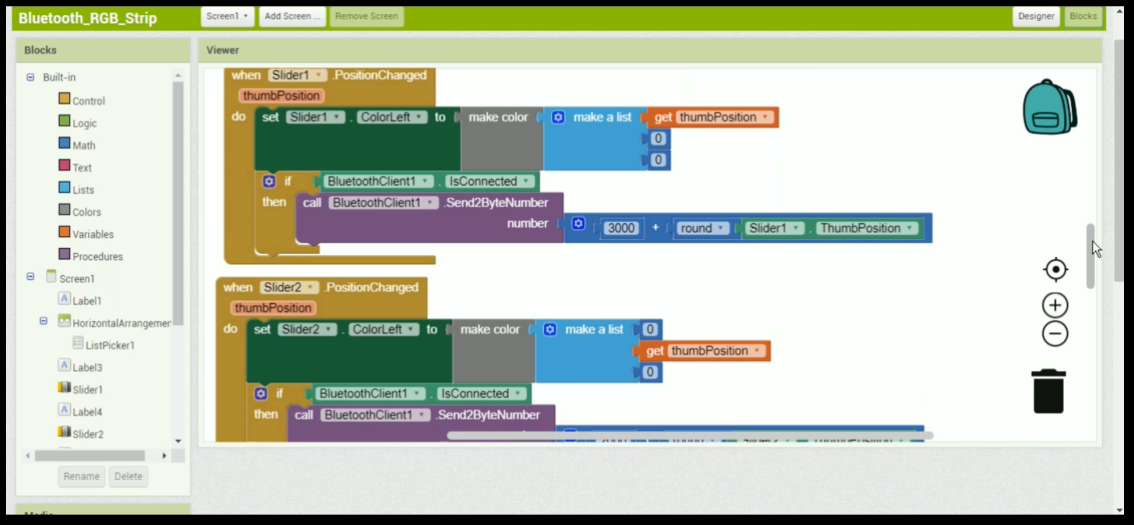
The Android Application
I used MIT App Inventor 2 to create this android application. The interface is a simple sliding switch which sends PWM values to the Arduino via Bluetooth. The Bluetooth device can be selected from various available devices. If you want to make the application same as mine then follow the images above. And set the blocks as I did to get the same controls.
Those who wish to save themselves from this task can directly download my application.
The installation of the software requires you to turn on installation from unknown sources option on your smartphone.
When installed, turn on your phone's Bluetooth and pair it with the HC-05 module. The password will be "0000" or "1234".
Now click on the large Bluetooth icon and select your paired device.
Now you can control the RGB strip by sliding the horizontal bars. You can also create a mix color by adding up the three colors.
That's it your project is ready. Now find a small enclosure to fit all the components in and connect the 12V power supply as shown in the circuit diagram.