In this article, we will detect the color luminance and proximity of a device with industry laser lights.
The TMG39931 I2C module plays a significant role in various application especially in detecting the color luminance. With the help of node-red services, we will be able to test the sensor data serially with ESP32.
In this blogtut, we will interface the TMG39931 with ESP32 module which can send the sensor data to your application software using Wireless Mesh network or through various cloud platforms like Azure, Thingspeak and many more.
Software Platforms
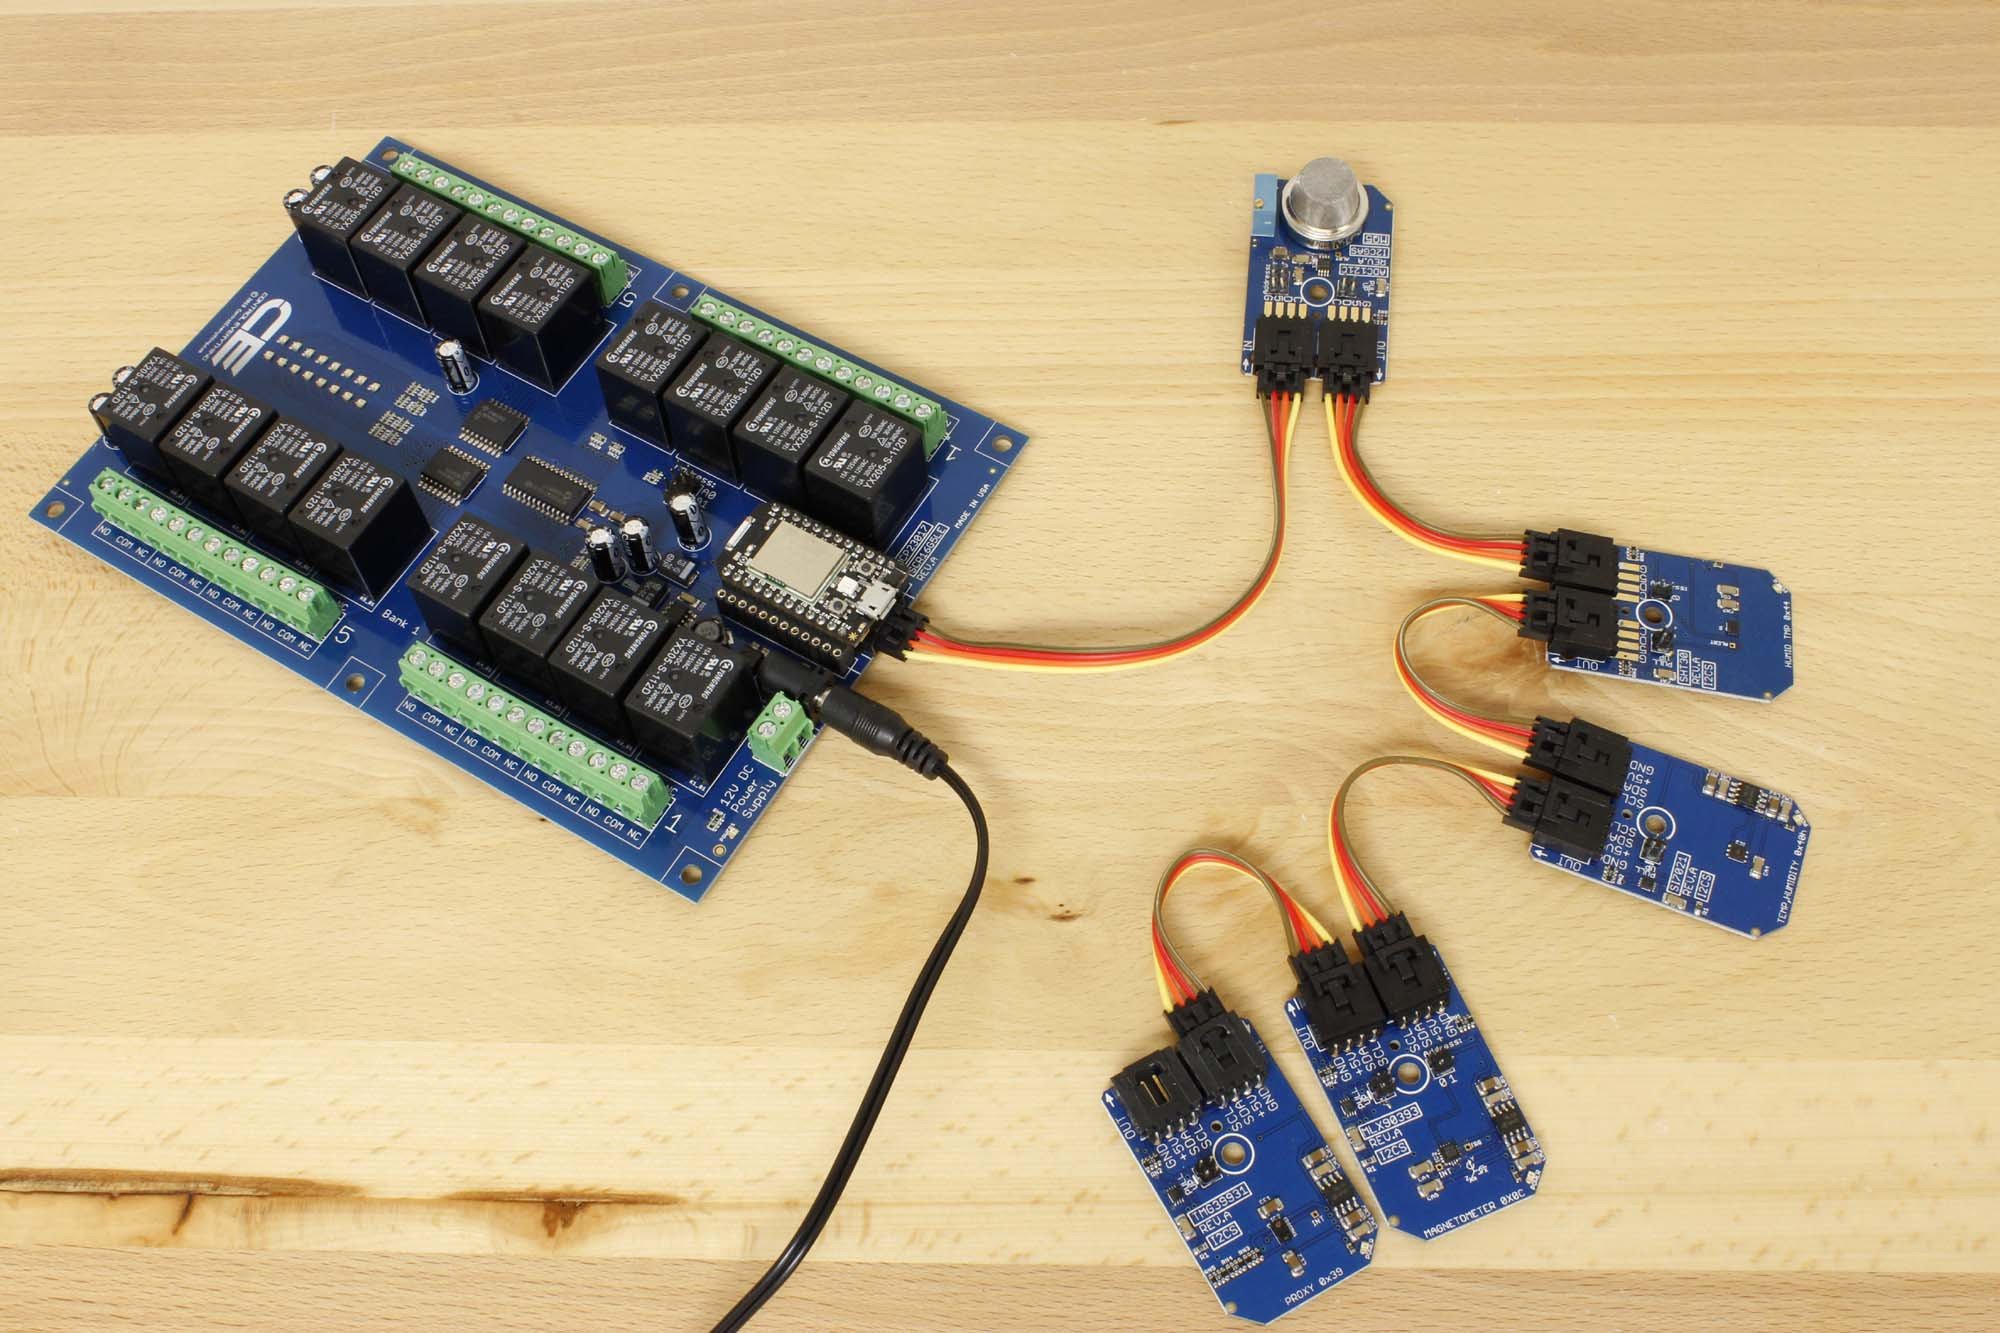
Hardware Required
I2C code
- Initialize the Wire.h file called as I2C Library especially use in Arduino IDE
- Initialize the I2C registers of sensor module which is specified to work with 2 wire protocol.
- Begin the I2C transmission and Initialize the baud rate as per the requirements for serial communication.
Wire.begin(21,22);
Serial.begin(115200);
setup_wifi(); //We will be using simple Wifi.h library
- Request for 9 bytes of Data which we want to read from the sensor through I2C connection for reading the Color luminance and proximity Coefficients.
if(Wire.available() == 9)
  {
    data[0] = Wire.read();
    data[1] = Wire.read();
    data[2] = Wire.read();
    data[3] = Wire.read();
    data[4] = Wire.read();
    data[5] = Wire.read();
    data[6] = Wire.read();
    data[7] = Wire.read();
    data[8] = Wire.read();
   }
TMG39931 Sensor Application
- If bytes are available then use the mentioned below formula will help to convert the data bytes and display desired values
// Convert the data
  float cData = data[1] * 256.0 + data[0];
  float red = data[3] * 256.0 + data[2];
  float green = data[5] * 256.0 + data[4];
  float blue = data[7] * 256.0 + data[6];
- Manipulate the wavelength parameters as per the requirement of Sensitivity and resolution settings given in the datasheet
- Using Serial.print you will be able to read the sensor data in the serial monitor screen.
// Output data to serial monitor
  Serial.print("Green Color Luminance : ");
  Serial.println(green);
  Serial.print("Red Color Luminance : ");
  Serial.println(red)  ;
  Serial.print("Blue Color Luminance : ");
  Serial.println(blue) ;
  Serial.print("InfraRed Luminance : ");
  Serial.println(cData) ;
  Serial.print("Proximity of the device : ");
  Serial.println(c);
  delay(500);
About TMG39931 I2C module
The compact slim module can be used to detect various application at one time. The factory calibrated sensor consists of ultraviolet and IR blocking filters and has ambient light rejection. Not only that sensor can also be used in IR beam hardware support systems. While Using this sensor we were able to understand its famous application which are IR, Proximity, Gesture Colour Luminance detection through this sensor using the different dataset which can be easily accessed through I2C transmission.
TMG39931 Sensor Application
There is various color detection application which is used through Camera. But for highly precise and accurate detection where we cannot use Camera, we can find out actual color spectrums by making this sensor work with industrial mechanisms to work at different applications.
The know its best specialty, we created the application by using the sensor with one of the industrial Dyeing machines which interface in such a way that it can operate the machinery actuators by detecting the specific intensity of light through laser lights connected to the machines. While work and understanding this application, if there will be any issue in detection then the Alert will be sent to email id using Email node in the node-red using mentioned earlier in Axial Monitoring Blogtut.
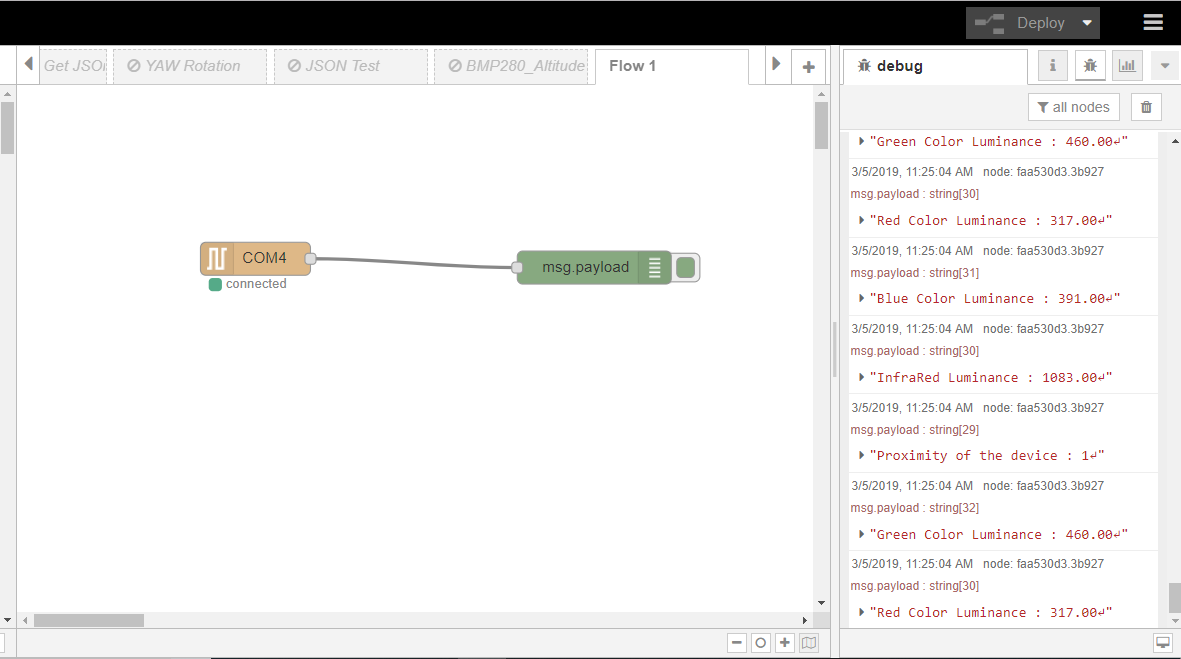
Node-Red
After working with an above different way to monitor Color Luminance with ESP32. Let's detect the Luminance in Node-RED check out the data with debug node.
For installation of Node-Red and to install the different nodes in node red in windows operating System, please go through instruction and earlier blogtut.
In this project, We will be using Serial Node connected with the debug node which displays the data of sensor which is manipulated with the help of ESP32.
Note: I have already mentioned about Serial Node in Control I2C relay Blogtut
Output
Code
https://github.com/varul29/TMG39931_ESP32_Node-Red
https://github.com/varul29/Node-Red_Tutorial
Credits
- Ncdcommunity
- Node-Red
- Esp32 Bluetooth classic