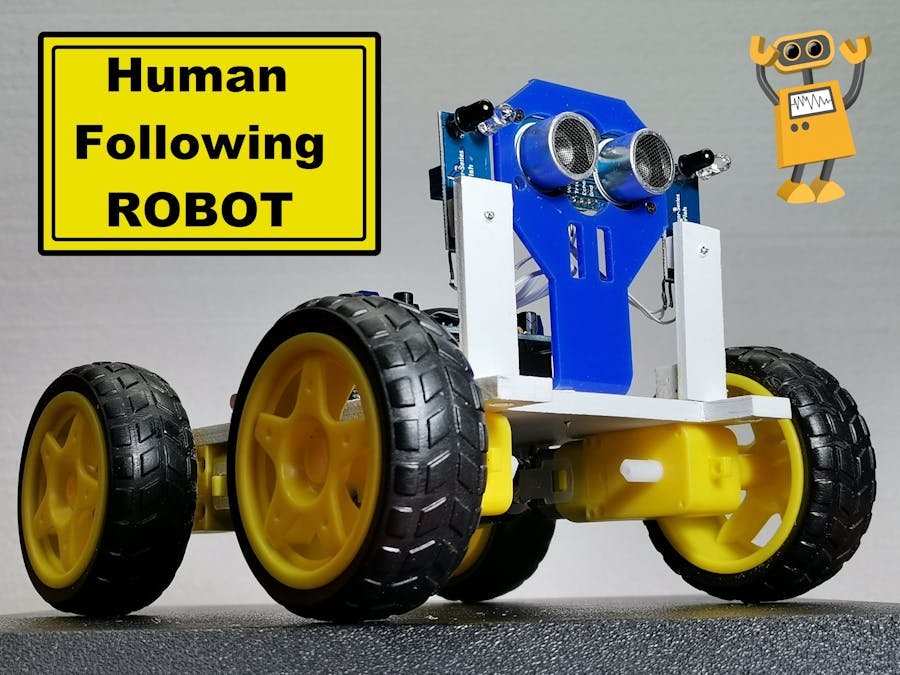
This Robot uses a combination of Ultrasonic and infrared sensors to track an object.
There are several technologies that can detect and maintain a certain distance between a Robot and a Human. The most commonly used are ultrasonic sensors, infrared sensors, laser range sensor, voice and face recognition camera sensors etc..
This time I will introduce you to the Arduino Robot, which uses a combination of Ultrasonic and infrared sensors to track an object. The device is really very simple to build and very effective, so it has been presented several times on the Internet. Most often in these presentations a servo motor is used which moves the ultrasonic sensor. This servo motor has no role in the operation of the Robot, except the visual one at the beginning, and complicates it unnecessarily. In my project I removed this servo, in order to simplify.
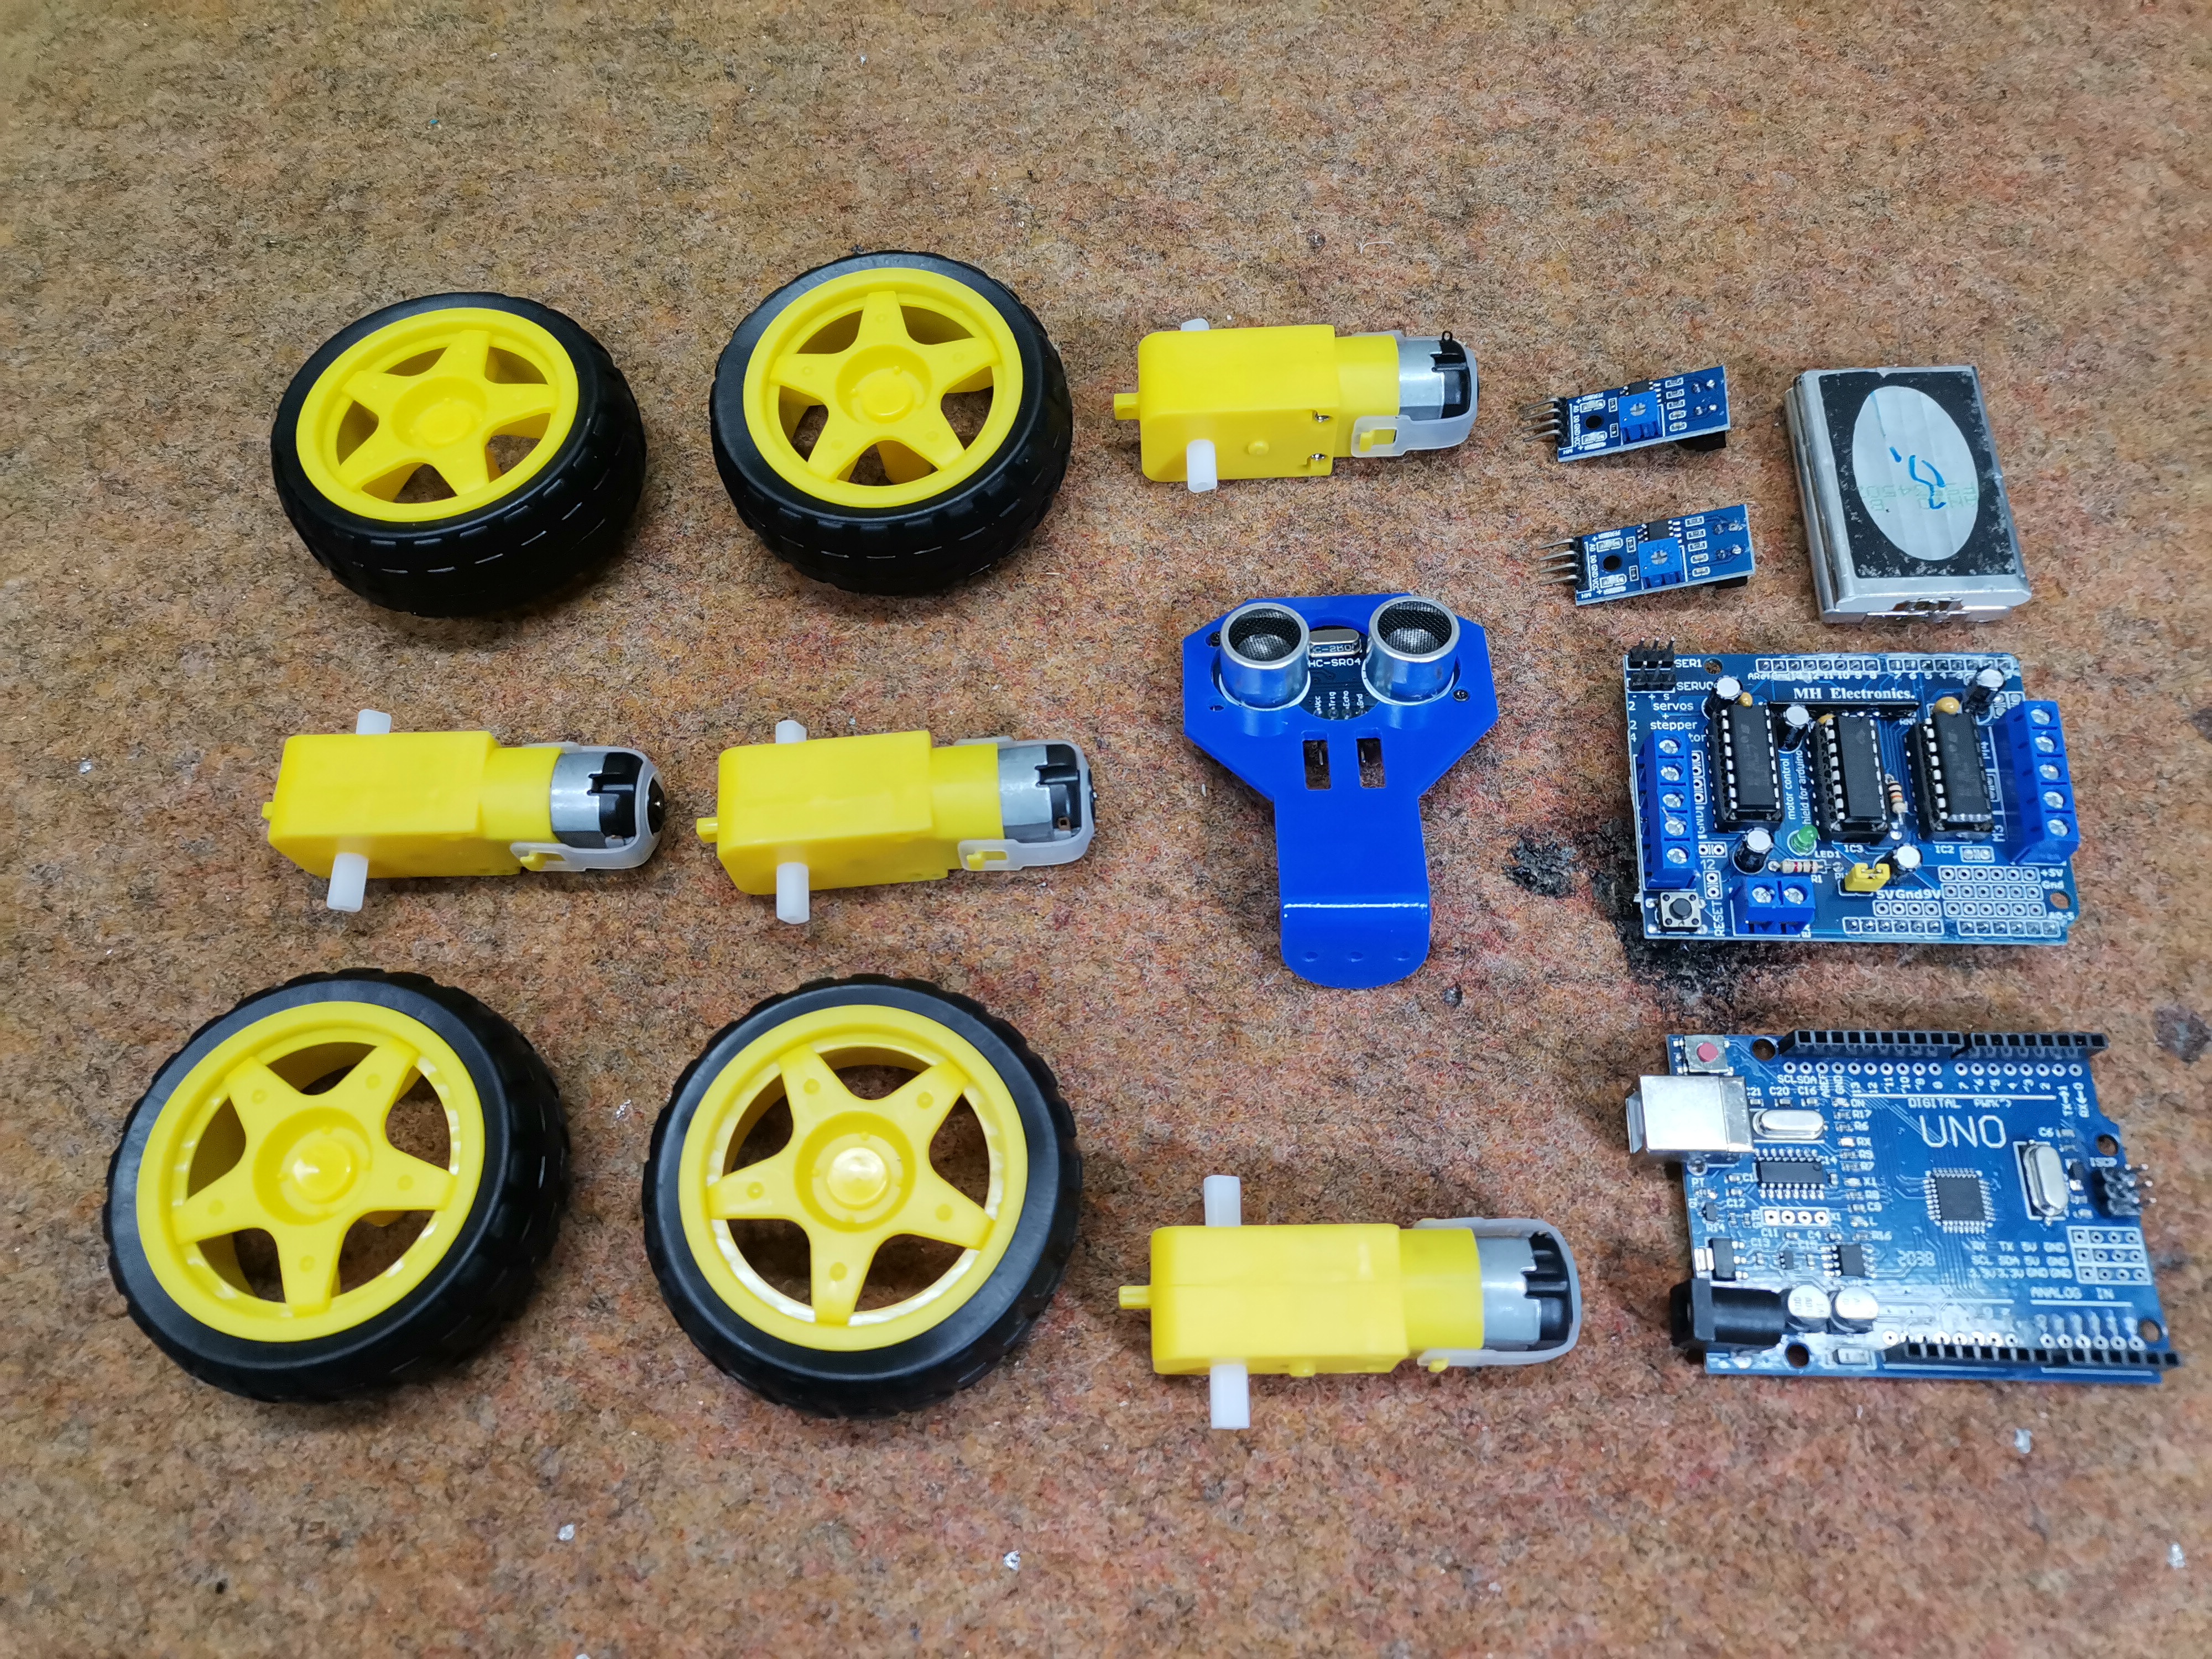
The robot consists of several components:
- Arduino Uno microcontroller
- L293D Motor driver shield
- 4pcs. DC gear motors with Weels
- HC-SR04 Ultrasonic sensor module
- 2 Infrared sensor boards
- and 7.4 Volts Lithium-Ion Battery pack
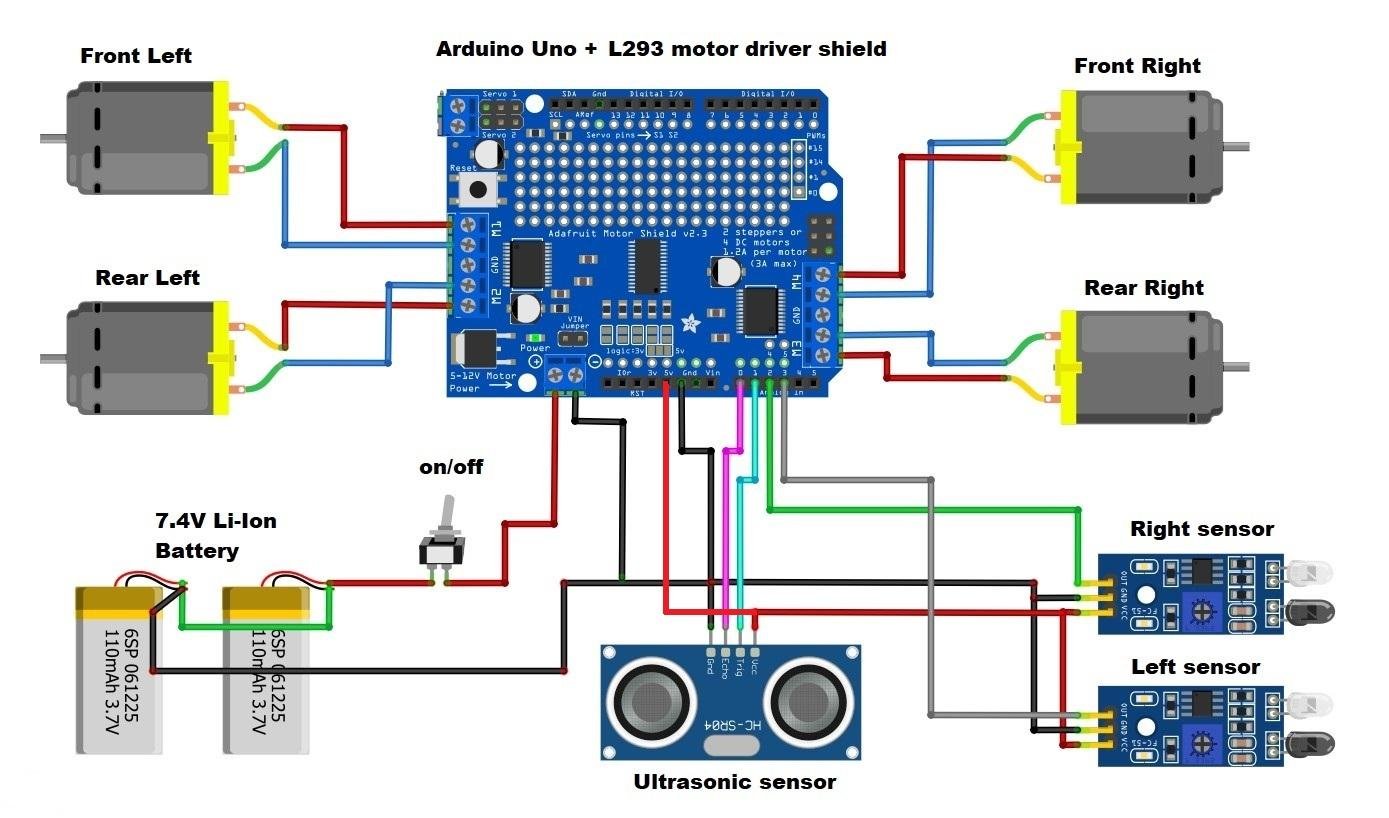
To make it, we need only one rectangular plate, on which lower side should be glued the engines, and on the upper surface are mounted other elements. You can use discontinued L293D motor driver shield like in my case, but also and Adafruit motor shield as is presented on the schematic diagram without any changes.
The principle of object detection and monitoring is based on data accepted by both sensors. The ultrasonic sensor detects the presence of an object in front of it within certain limits, in our case between 10 and 30 centimeters. If there is no object (for example our hand) in this space, all four engines are idle. At the moment when an object appears in this space, the data from the infrared sensors are read, and based on the obtained data, commands are given to the motors, whereby the robot moves in the desired direction. The distance to which the infrared sensors respond is adjusted by a small triming potentiometer. This distance should be adjusted so that it is slightly larger than the minimum distance to which the ultrasonic sensor is set to respond, in our case it is more than 10 centimeters.
In the video you can see what this looks like in reality, just to mention that the smooth movement of the robot takes some time to adjust the distances in the code as well as the way the hand moves.
#include<NewPing.h>
#include<AFMotor.h>
#define RIGHT A2
#define LEFT A3
#define TRIGGER_PIN A1
#define ECHO_PIN A0
#define MAX_DISTANCE 100

NewPing sonar(TRIGGER_PIN, ECHO_PIN, MAX_DISTANCE);

AF_DCMotor Motor1(1,MOTOR12_1KHZ);
AF_DCMotor Motor2(2,MOTOR12_1KHZ);
AF_DCMotor Motor3(3,MOTOR34_1KHZ);
AF_DCMotor Motor4(4,MOTOR34_1KHZ);

void setup() {
  // put your setup code here, to run once:
  Serial.begin(9600);

pinMode(RIGHT, INPUT);
pinMode(LEFT, INPUT);

}

void loop() {
  // put your main code here, to run repeatedly:

  delay(50);
 unsigned int distance = sonar.ping_cm();

int Right_Value = digitalRead(RIGHT);
int Left_Value = digitalRead(LEFT);

if((Right_Value==1) && (distance>=10 && distance<=30)&&(Left_Value==1)){
  Motor1.setSpeed(120);
  Motor1.run(FORWARD);
  Motor2.setSpeed(120);
  Motor2.run(FORWARD);
  Motor3.setSpeed(120);
  Motor3.run(FORWARD);
  Motor4.setSpeed(120);
  Motor4.run(FORWARD);
}else if((Right_Value==0) && (Left_Value==1)) {
  Motor1.setSpeed(200);
  Motor1.run(FORWARD);
  Motor2.setSpeed(200);
  Motor2.run(FORWARD);
  Motor3.setSpeed(100);
  Motor3.run(BACKWARD);
  Motor4.setSpeed(100);
  Motor4.run(BACKWARD);
}else if((Right_Value==1)&&(Left_Value==0)) {
  Motor1.setSpeed(100);
  Motor1.run(BACKWARD);
  Motor2.setSpeed(100);
  Motor2.run(BACKWARD);
  Motor3.setSpeed(200);
  Motor3.run(FORWARD);
  Motor4.setSpeed(200);
  Motor4.run(FORWARD);
}else if((Right_Value==1)&&(Left_Value==1)) {
  Motor1.setSpeed(0);
  Motor1.run(RELEASE);
  Motor2.setSpeed(0);
  Motor2.run(RELEASE);
  Motor3.setSpeed(0);
  Motor3.run(RELEASE);
  Motor4.setSpeed(0);
  Motor4.run(RELEASE);
}else if(distance > 1 && distance < 10) {
  Motor1.setSpeed(0);
  Motor1.run(RELEASE);
  Motor2.setSpeed(0);
  Motor2.run(RELEASE);
  Motor3.setSpeed(0);
  Motor3.run(RELEASE);
  Motor4.setSpeed(0);
  Motor4.run(RELEASE);
  }
 }