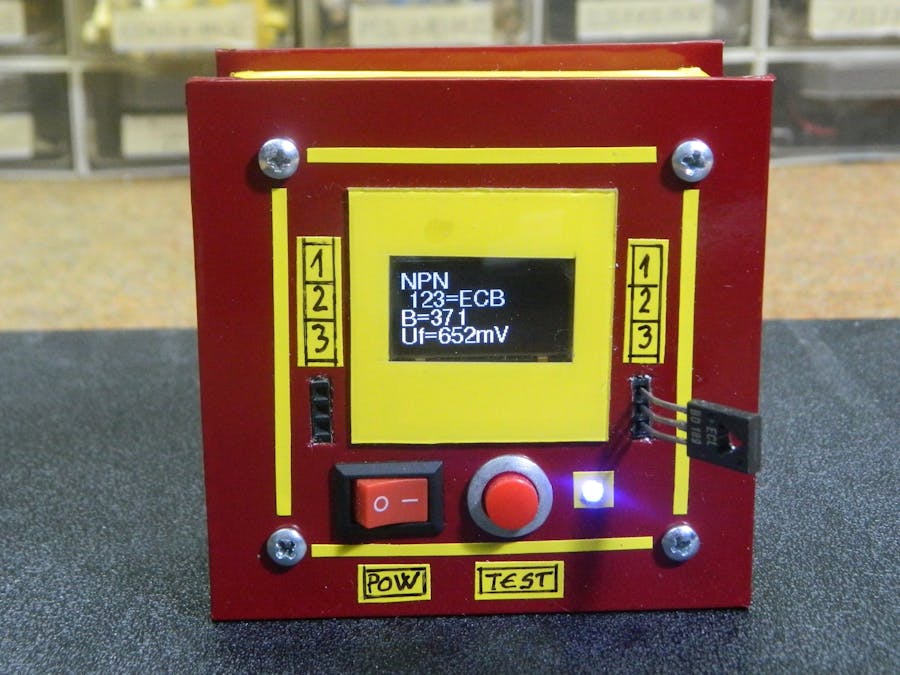
The device is capable of testing: PNP, NPN transistors, N or P Channel MOSFET, Diodes, Double diodes, Resistors, Capacitors...
This is a super simple autodetecting and auto-ranging electronic components tester. The device is capable of testing:
The project was developed by Markus Frejek and the next Development of the project continues by Karl-Heinz Kübbeler and Markus Reshke. This is a great example of how to make a quality device with a little hardware and good software. There are many versions of this device that usually contain add-ons that complicate making and usually the software is given in the form of ready-made firmware (.hex file), which is also relatively difficult to set up on Arduino. It is also important to emphasize the use of the given libraries because they also have certain modifications
This presented device is made with an Arduino Nano microcontroller which contains the basic functions, and the code is given in the form of a regular sketch, which means that it can be easily uploaded and modified. This allows the instrument to be made in less than an hour and costs no more than five dollars. The sketch is taken from the arduino.ru forum, by a member with the nick "Arduinec" and has also been modified by other members.
The hardware part of the device is incredibly simple and contains only a few components:
- Arduino Nano microcontroller
- Small monochrome OLED display SSD1306
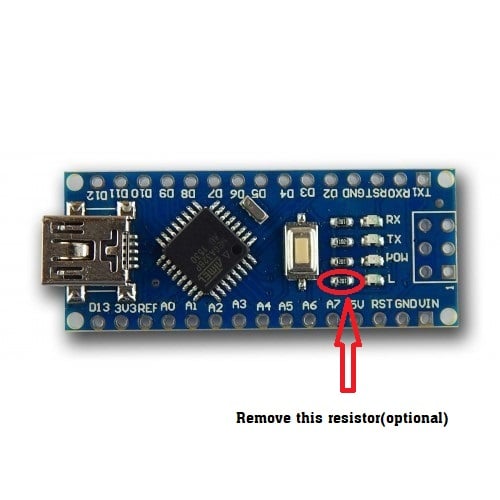
According to some instructions, the LED resistor on pin13 from Arduino should be removed (this resistor is circled in red in the picture), but in my case, the device worked without any modifications to the microcontroller. The instrument works stable with only one 3.7 Volt lithium battery.
The accuracy of the instrument mostly depends on the resistors R1 to R6, so they should have a tolerance of 1%. In addition, in the video, I will present you testing of several different electronic components.
Finally, the device is placed in a suitable box and is an indispensable accessory in your lab.