ChatterBox is a secure off-grid mesh communication and location sharing system, that uses LoRa frequencies, meshing, and other techniques to enable you to stay in contact with others nearby when grid services are unavailable.
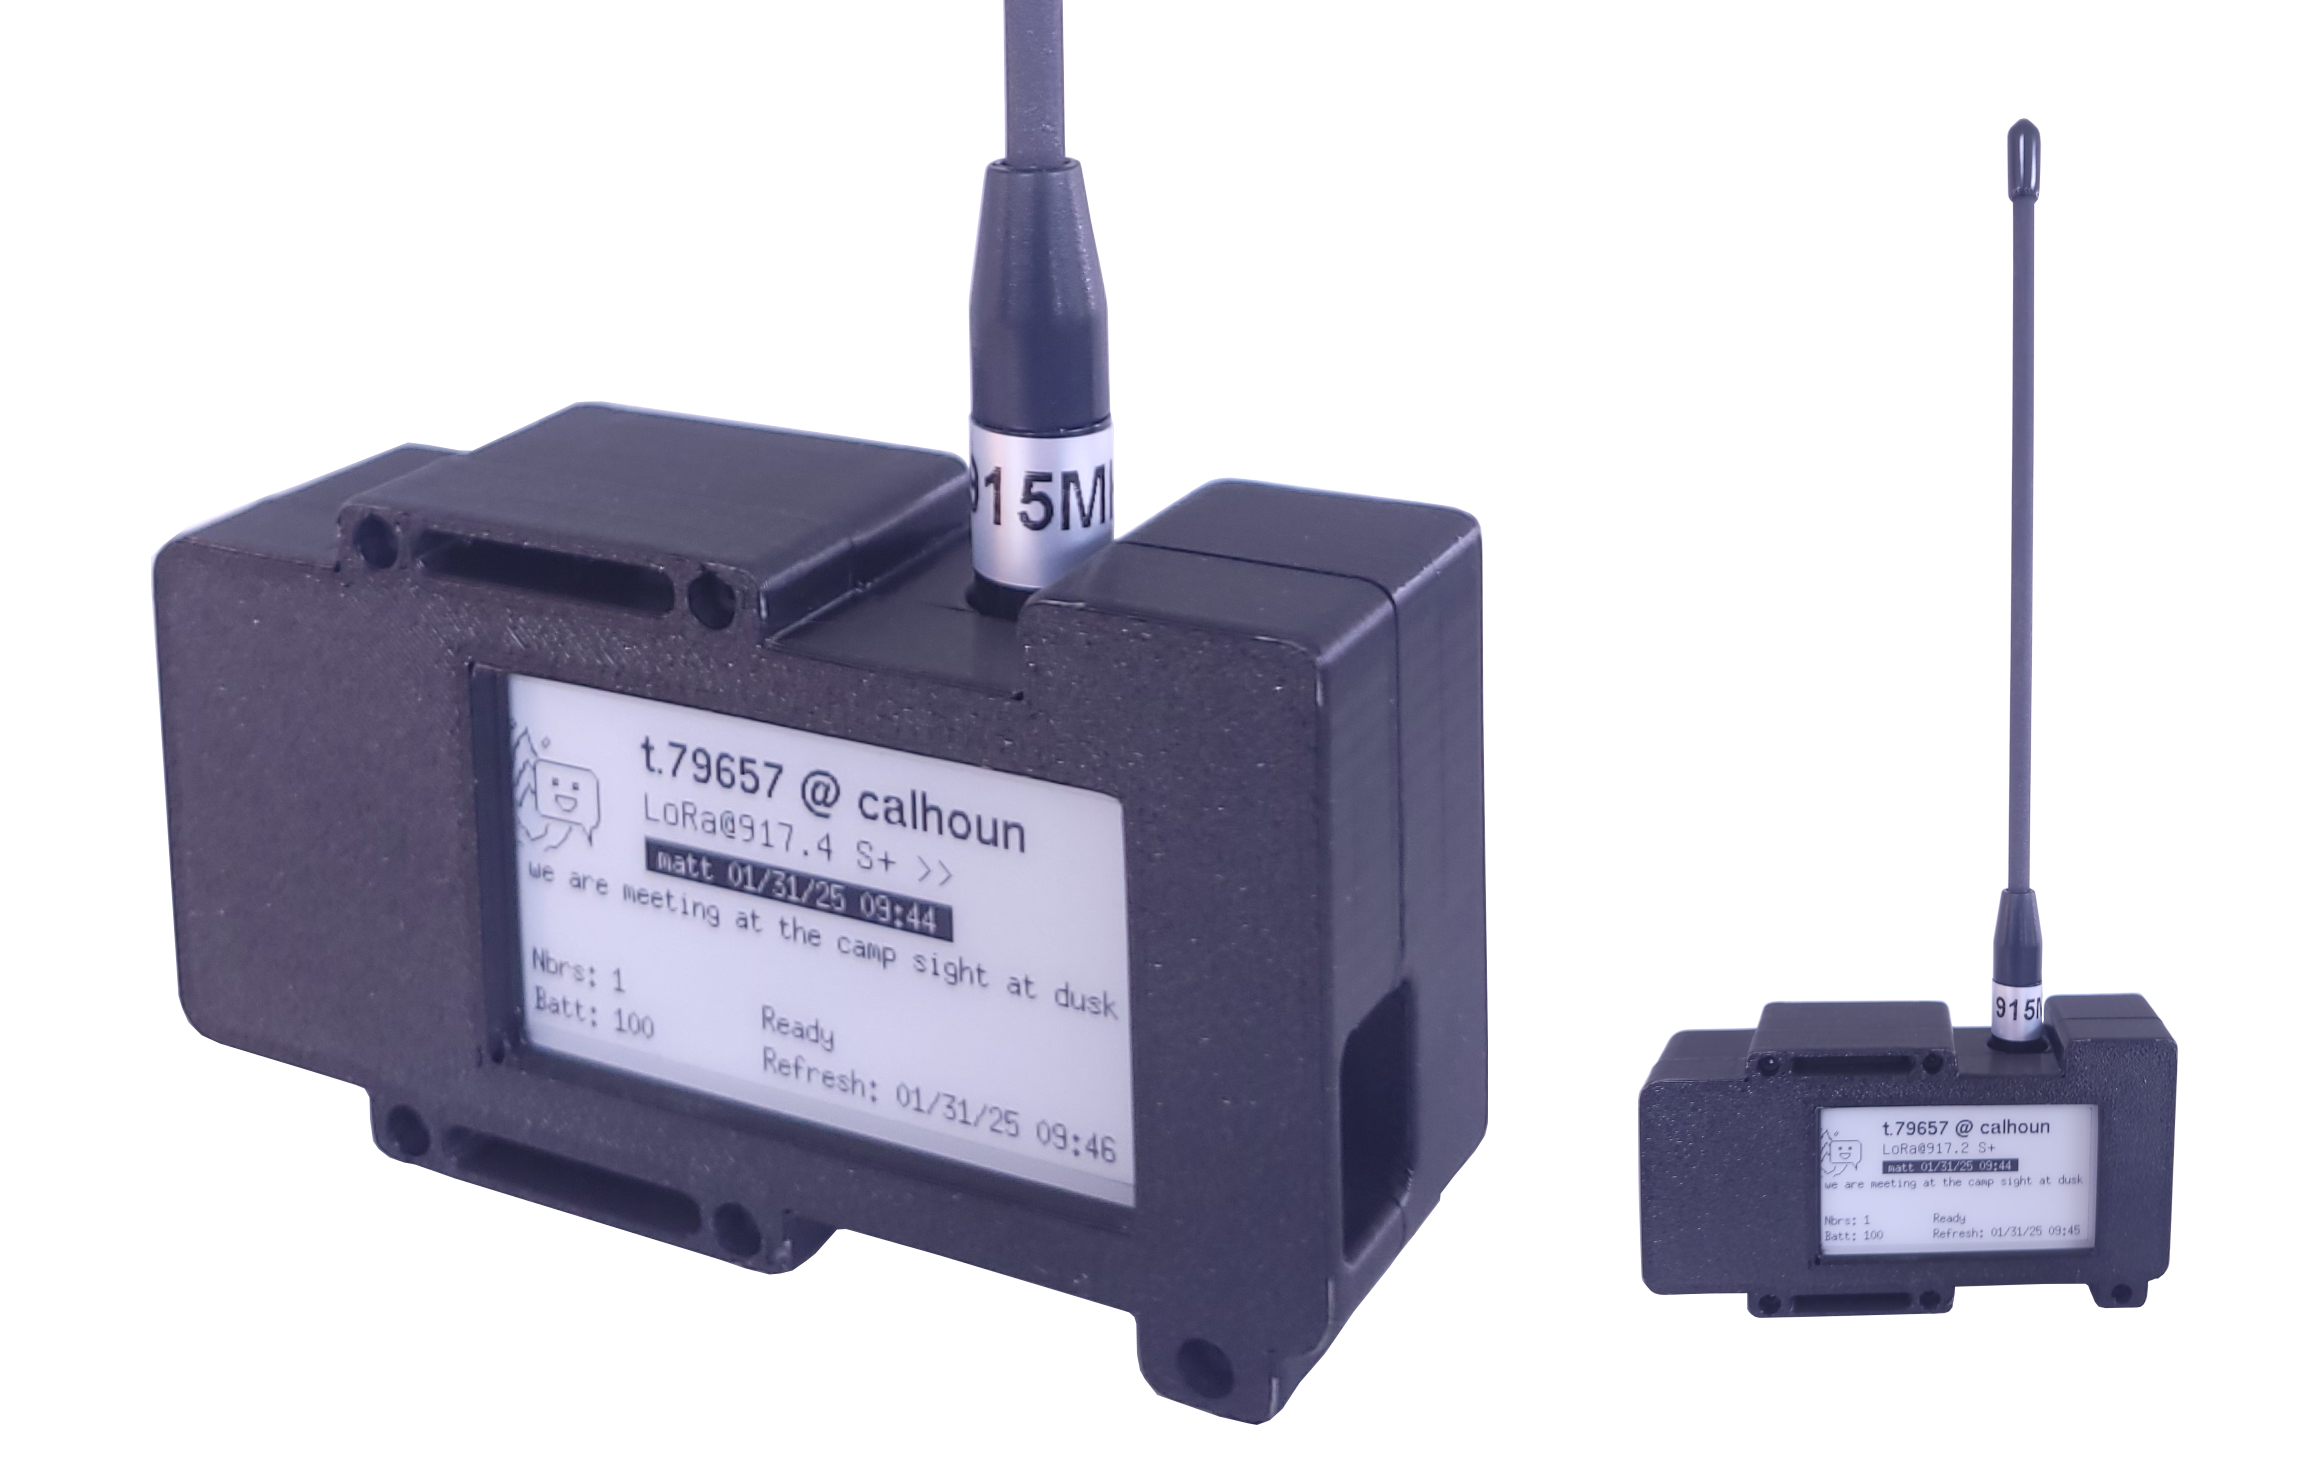
This is a low power mesh node. It is what I use for my home base station as well as my solar-powered mobile node (truck).
Step 1 - 3D Print your Enclosure
This project typically takes me about 30 minutes to put together, once the 3D printed items are complete.
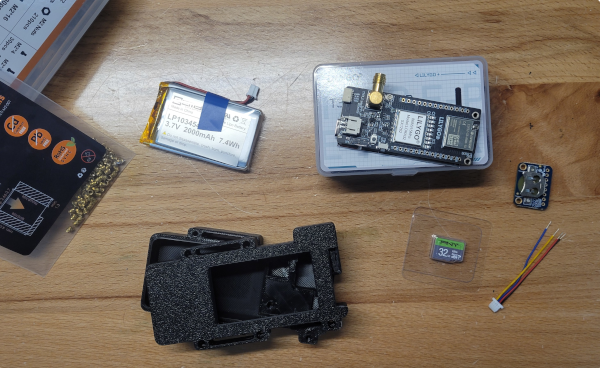
Step 2 - Gather Components
See the attached assembly PDF for links. The components you will need include:
- Lilygo T3S3 E-Paper
- Adafruit DS3231 realtime clock (and cr1220 battery)
- 2000 mAh LiPo Battery
- Qwiic connector
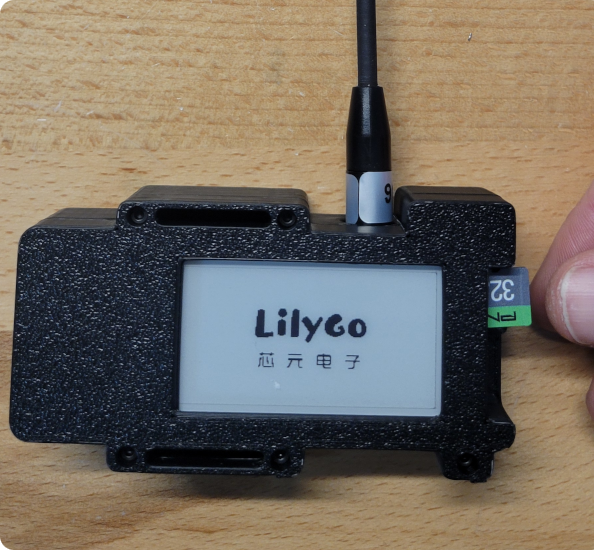
- Optional: Compatible MicroSD card (max 32 GB, t3s3 is very picky about sd cards)
- M2 Knurled nuts
- M2 screws
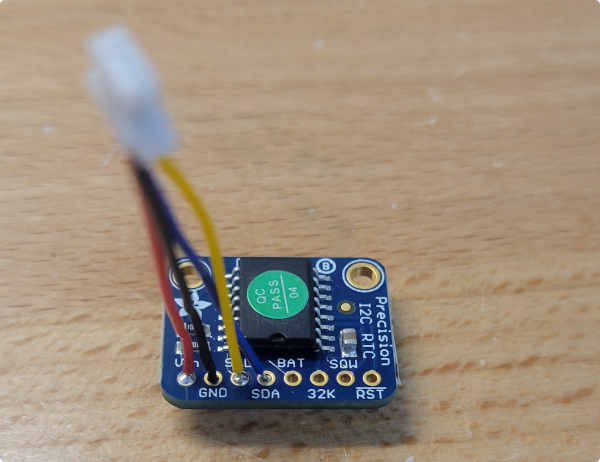
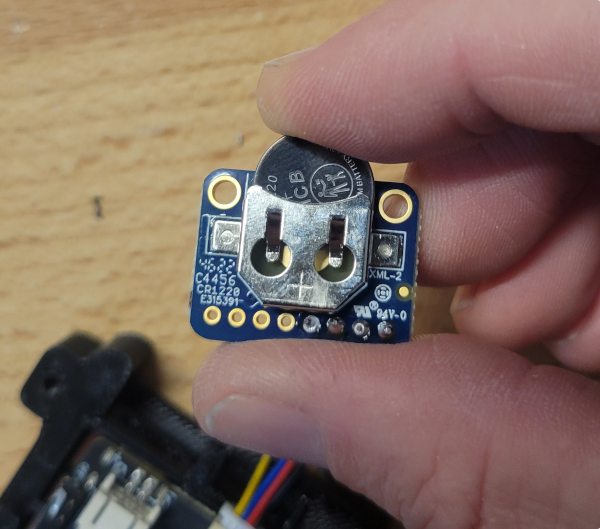
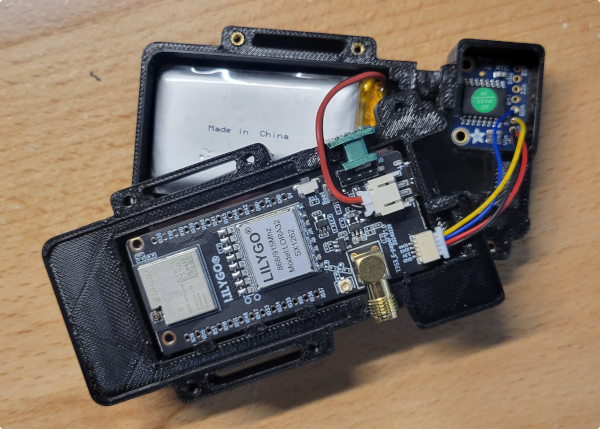
Step 3 - Solder Qwiic Connector to RTC
Solder Qwiic connector to DS3231
On the DS3231, we only connect VIN, GND, SDA, and SCL. The Qwiic connector is soldered as follows:
- Red: VIN
- Black: GND
- Yellow: SCL
- Blue: SDA
On the T3S3 plug we use, the pins end up being routed as:
- Pin 43 -> SCL
- Pin 44 -> SDA
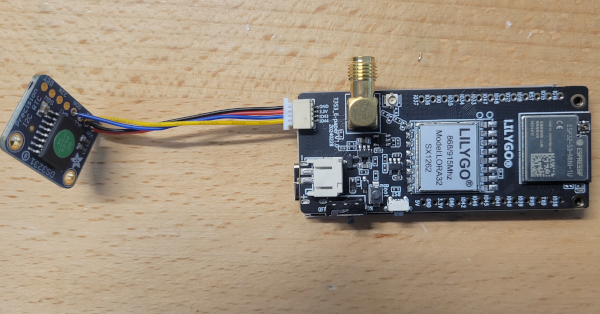
Step 4 - Plug in the Qwiic Connector
Plug Qwiic connector into the T3S3
Step 5 - Insert CR1220 into the RTC
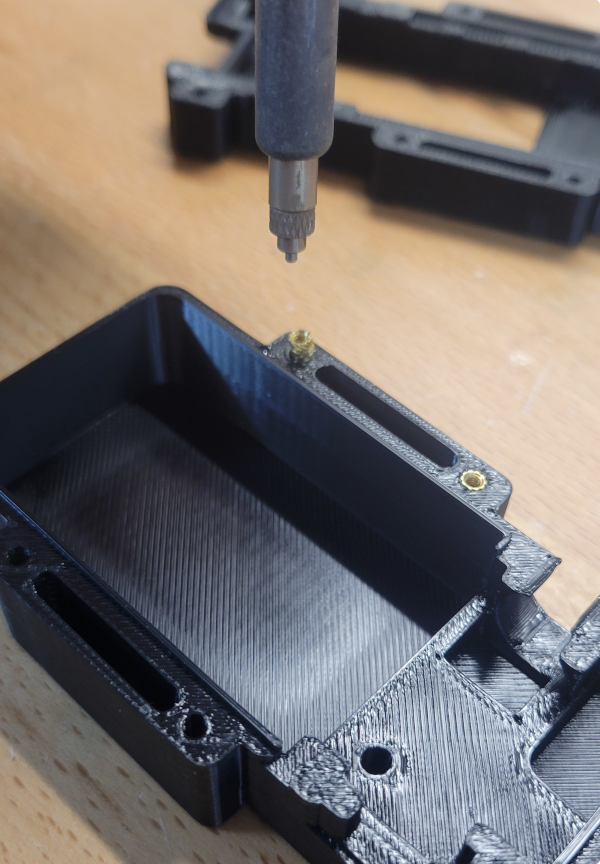
Step 6 - Press the Knurled Nuts into the Case Back
Press the knurled m2 nuts
I use this inexpensive soldering tip, specifically designed for melting knurled nuts into place. However, I've also used a screwdriver + heat gun before, which works fine (just don't melt the surrounding material).
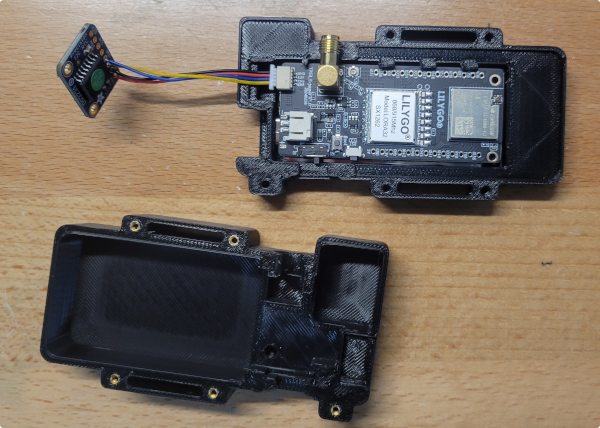
Step 7 - Gently Seat the T3S3 into Place
T3S3 inserted into case front
It is extremely easy to crack the glass on the T3S3 while doing this. Use your fingers to pry apart the case somewhat so the glass can slide past the retaining tabs without too much pressure.
Once you have seated the T3S3, the case and tabs should hold it in place securely.
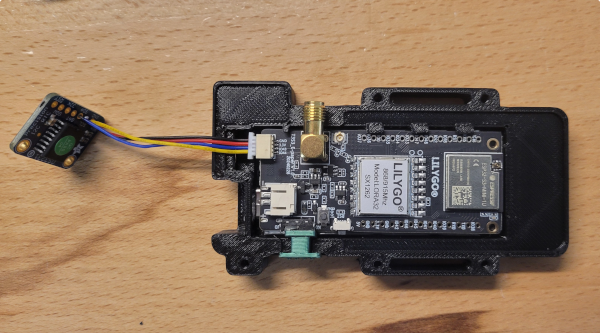
Step 8 - Add the Power Switch
Step 9 - Connect the Battery
Step 10 - Close the Case, Add Antenna & SD
As of the latest firmware version, SD card is not required, but is still recommended. If you use an SD card, be sure to choose one from the compatible list at chatters.io. The SD card linked in the assembly PDF doc is a good one.
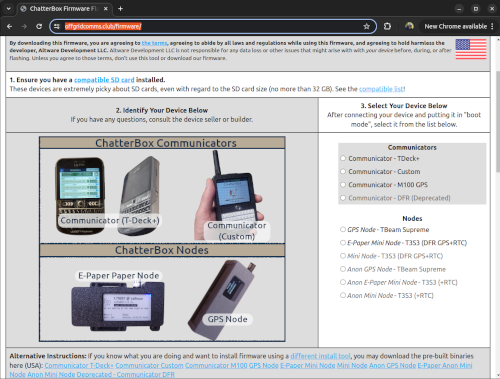
Step 11 - Flash the Firmware onto the Device
The firmware for this node is free and can be downloaded from a few places:
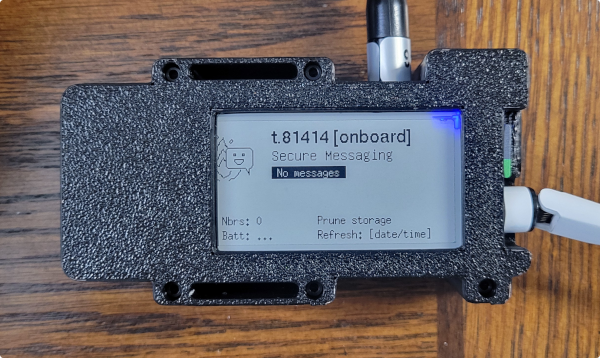
If everything's working properly, the screen will flash for 5-10 seconds and you should see a screen similar to what's shown here.
This means it's ready to be onboarded by your cluster's root device.
From your root communicator, choose: Settings / Cluster / Onboard Device
Onboarding takes a minute or two, after which your new e-paper mesh node will join your cluster.