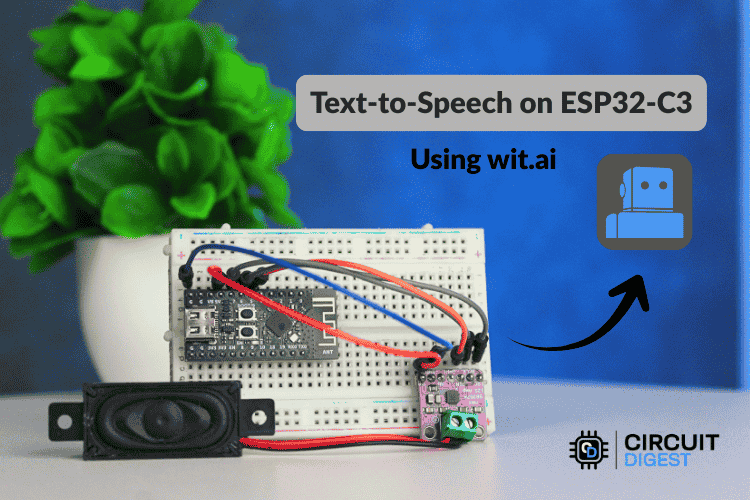
Build a cloud-powered voice output device using ESP32-C3, I2S audio, and Wit.ai
Introduction
Text-to-Speech (TTS) technology converts written text into spoken audio. It is widely used in smart assistants, accessibility devices, alert systems, and interactive electronics. Adding voice feedback to embedded systems can significantly improve usability, especially in IoT devices and automation projects.
Microcontrollers, however, typically lack the computing power required to generate natural-sounding speech locally. While development boards like the ESP32 are powerful compared to traditional microcontrollers, they still have limited RAM, processing speed, and storage for complex speech synthesis models. Because of these limitations, many embedded systems rely on cloud-based services to perform speech generation.
In this project, you will build an ESP32-C3 Text-to-Speech Using AI. The microcontroller sends text to a cloud service, where it is converted into speech. The generated audio is then streamed back to the ESP32 and played through a speaker using an I2S audio amplifier. This approach allows even small embedded devices to produce natural-sounding voice output without heavy local processing.
How Cloud-Based Text-to-Speech Works
Modern text-to-speech systems involve multiple stages of processing. These include preparing the text for speech, converting the words into phonetic sounds, generating the appropriate tone and rhythm, and finally synthesizing audio.
On computers and smartphones, these steps are handled locally because the hardware has enough processing resources. Microcontrollers such as the ESP32 cannot easily perform these operations in real time due to memory and processing constraints.
A cloud-based workflow solves this problem. Instead of synthesizing speech locally, the ESP32 sends the text to an online AI service. The remote server performs the complex speech synthesis process and returns the resulting audio stream. The ESP32 only needs to receive the audio data and play it through a speaker.
This architecture provides several benefits:
- Natural-sounding voices powered by advanced AI models
- Reduced memory and processing requirements on the device
- Simple firmware implementation
- Scalability and continuous improvements from cloud services
Project Overview
In this project, the ESP32-C3 connects to Wi-Fi and sends a text request to the Wit.ai cloud API. The platform processes the text and generates speech audio. The audio stream is returned to the ESP32, which then outputs the sound through an I2S amplifier connected to a speaker.
The system operates in the following sequence:
- A sentence is sent to the ESP32 through the serial monitor.
- The ESP32 transmits the text to the Wit.ai server using an HTTPS request.
- The server converts the text into speech.
- The audio stream is returned to the ESP32.
- The ESP32 sends the digital audio data to the amplifier using the I2S interface.
- The amplifier drives a speaker to produce the spoken output.
This method allows microcontrollers to provide voice feedback while keeping firmware simple and efficient.
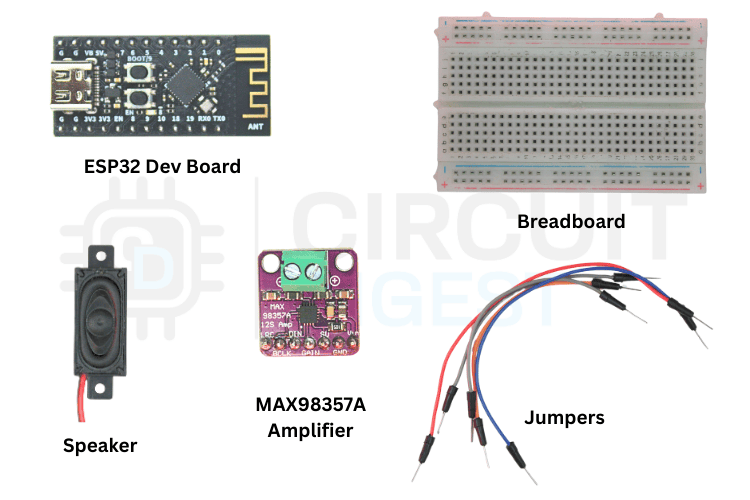
Hardware Required
To build this project, you will need the following components:
- ESP32-C3 development board
- MAX98357A I2S digital audio amplifier
- 4Ω or 8Ω speaker
- Breadboard
- Jumper wires
- USB cable for programming and power
The MAX98357A module is a compact digital amplifier designed for microcontrollers. It receives digital audio using the I2S interface and drives a speaker directly, eliminating the need for complex audio circuits.
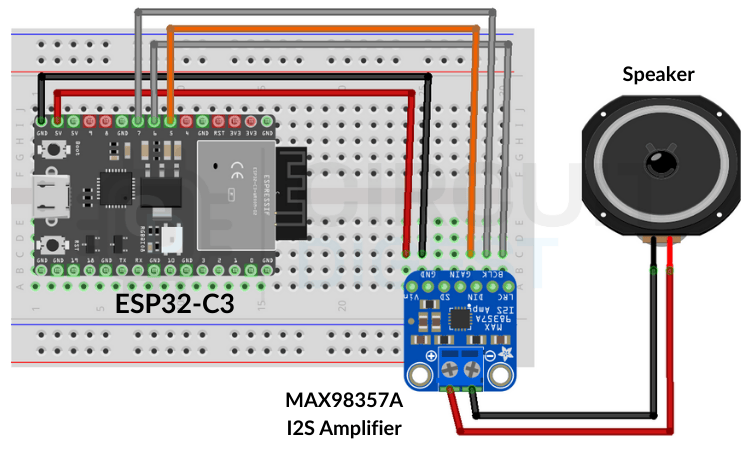
Circuit Connections
The ESP32 communicates with the MAX98357A amplifier using the I2S protocol. I2S is commonly used for high-quality digital audio transmission between processors and audio devices.
Connect the modules as follows:
- GPIO27 → BCLK (Bit Clock)
- GPIO26 → LRC (Left/Right Clock)
- GPIO25 → DIN (Data Input)
- 5V → VIN
- GND → GND
Once the amplifier is connected, attach the speaker to the amplifier output terminals.
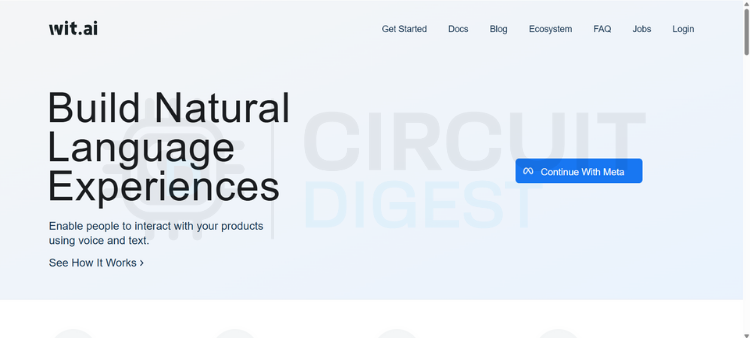
Setting Up a Wit.ai Account
Before programming the ESP32, you need access to the Wit.ai API.
Create an Account
Visit the Wit.ai website and create a free account. You can sign in using email or a Meta account.
Create a New Application
After logging in, create a new application from the dashboard. Choose the language you want the system to support.
Obtain the Server Access Token
Open the application settings and locate the Server Access Token. This token is required for authenticating API requests from the ESP32.
Copy the token and store it securely, as it will be required in the Arduino code.
Installing the Required Library
A dedicated Arduino library simplifies communication with the Wit.ai API and handles audio streaming.
- Open the Arduino IDE.
- Go to Library Manager.
- Search for WitAITTS.
- Install the library.
After installation, open the example sketch provided with the library.
Navigate to:
File → Examples → WitAITTS → ESP32_Basic
This example demonstrates the complete workflow for sending text to the API and streaming the audio response.
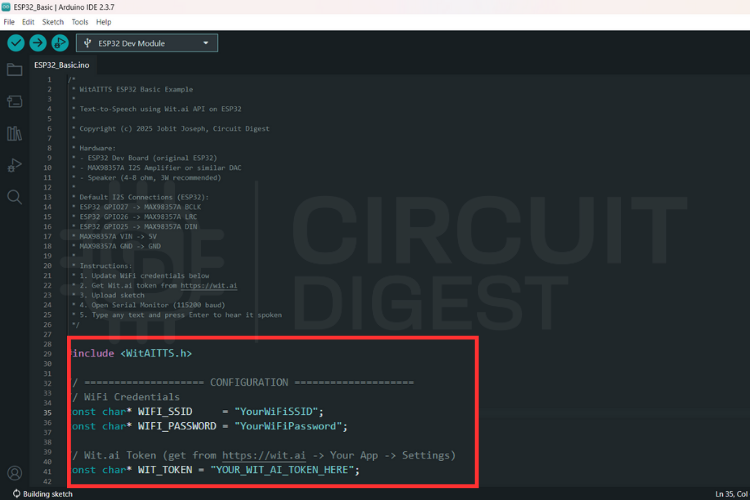
Before uploading the sketch, update the following parameters in the code:
- Wi-Fi SSID
- Wi-Fi password
- Wit.ai server access token
The ESP32 will use these credentials to connect to the internet and communicate with the API.
After entering the credentials, compile the sketch and upload it to the ESP32-C3 board.
Configuring the Code
Testing the System
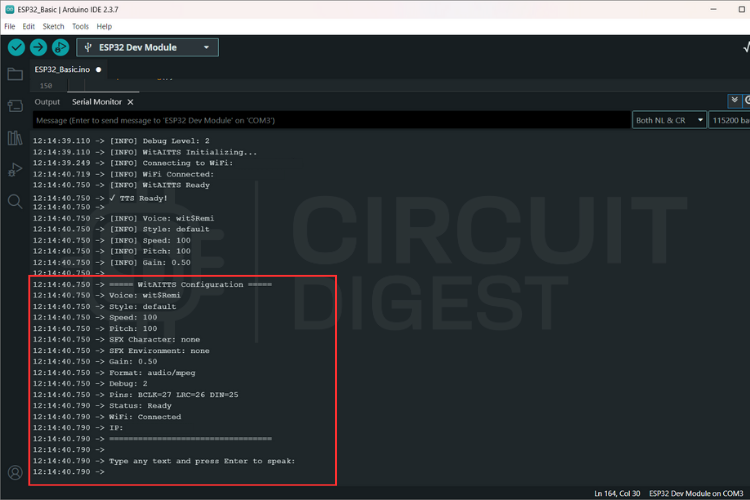
Once the firmware is uploaded, open the Serial Monitor in the Arduino IDE.
The ESP32 will connect to Wi-Fi and display its IP address once the connection is successful.
To test the system:
- Type a sentence into the Serial Monitor input field.
- Press Enter.
- The ESP32 sends the text to the cloud service.
- The generated speech audio begins streaming back to the device.
- The speaker outputs the spoken sentence.
The audio playback begins as soon as the stream starts, so the system does not need to wait for the entire file to download.
Title here
Streaming audio instead of downloading the entire file provides several benefits:
- Lower memory usage
- Faster response time
- Smooth playback without buffering delays
However, audio quality can depend on several factors such as Wi-Fi signal strength, stable power supply, and speaker quality.
Troubleshooting Tips
If the system does not work correctly, check the following:
Invalid API token
Ensure the server access token is entered correctly.
Wi-Fi connection problems
Verify the network credentials and signal strength.
Distorted or weak audio
Check the power supply, speaker impedance, and I2S wiring connections.
Possible Applications
This ESP32-based text-to-speech system can be used in many IoT and robotics projects, including:
- Smart home voice notifications
- Talking robots
- Voice feedback systems
- Educational electronics projects
- Accessibility devices
- Interactive kiosks and displays
Conclusion
Using cloud-based AI services makes it possible to add high-quality speech output to microcontroller projects. In this project, the ESP32-C3 acts as a lightweight client that sends text to the Wit.ai API and streams the generated audio back for playback.
The result is a compact and efficient voice-enabled system that can easily be integrated into IoT devices, automation projects, and embedded applications. By combining Wi-Fi connectivity, I2S audio output, and AI speech synthesis, makers can build intelligent systems capable of communicating with users through natural-sounding voice output. Explore a wide range of hands-on AI projects and tutorials for makers and engineers covering machine learning, embedded AI, and smart IoT applications.
Audio Streaming Advantages