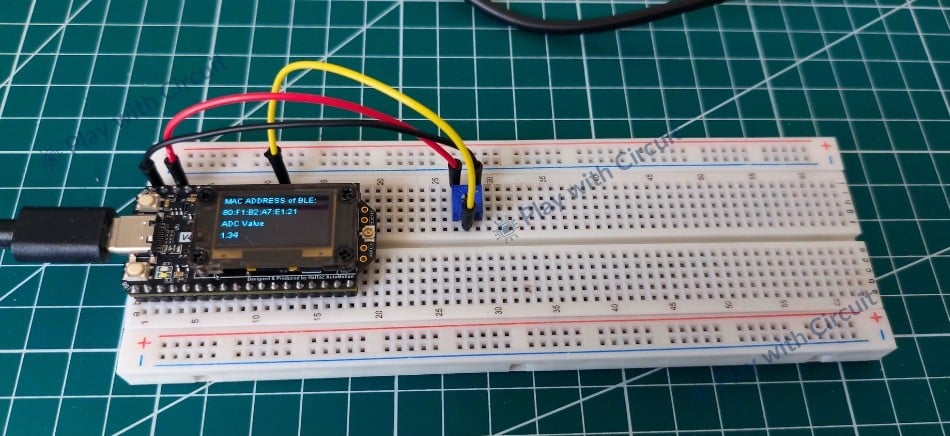
This project is a practical guide to getting started with the Heltec WiFi LoRa 32 V4, an ESP32-S3-based development board that combines LoRa, Wi-Fi, Bluetooth, an OLED display, native USB, battery management, and GNSS connectivity.
The Heltec WiFi LoRa 32 V4 is an ESP32-S3 development board designed for wireless and IoT applications where Wi-Fi or Bluetooth alone may not be enough. Instead of adding separate modules for long-range communication, display, battery management, and wireless connectivity, the board brings these functions together on a single compact platform.
It combines an ESP32-S3R2 microcontroller, SX1262 LoRa transceiver, Wi-Fi, Bluetooth, a 0.96-inch OLED display, native USB, battery charging, solar input, and a dedicated interface for external GNSS modules. This makes it suitable for applications such as remote sensor nodes, environmental monitoring, and home automation.
This guide focuses on the hardware, important GPIO assignments, and the initial Arduino IDE setup needed to start working with the V4.
Hardware Overview
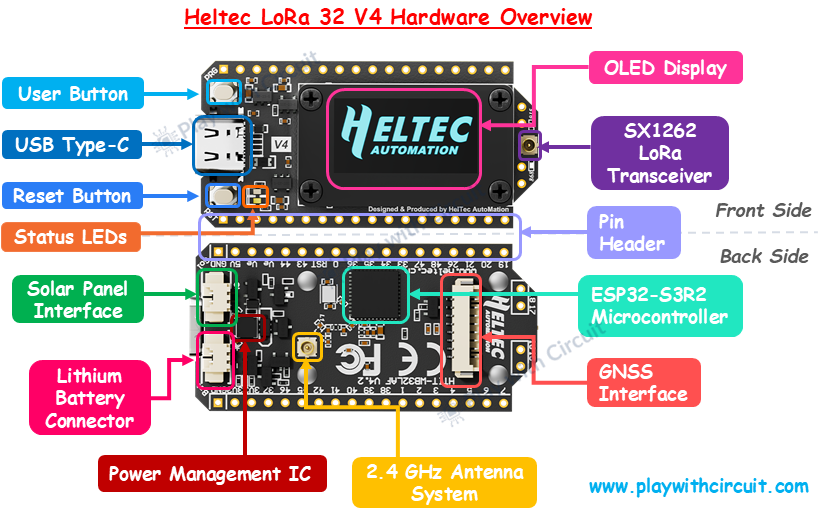
The ESP32-S3R2 is the main controller, providing dual-core processing up to 240 MHz along with integrated Wi-Fi and Bluetooth. Long-range communication is handled by the SX1262 LoRa transceiver.
The board also includes a 0.96-inch OLED connected through I2C. It can be used for displaying sensor readings, debugging information, network status, or other application data.
A USB Type-C connector provides power, firmware uploading, and USB communication. The V4 uses the ESP32-S3's native USB interface. For portable applications, the board provides a dedicated connector for a single-cell Li-ion or LiPo battery. Its power-management circuitry handles battery charging, voltage regulation, and power-source switching. There is also a solar input for applications where the board needs to operate from a solar-powered system.
Another useful feature is the dedicated GNSS interface. The V4 does not contain a GPS receiver, but it provides UART and control signals that make connecting an external GNSS module much easier.
The board exposes ESP32-S3 GPIOs through two rows of headers. These provide access to digital I/O, ADC, PWM, UART, SPI, I2C, and touch functionality.
Setting Up Arduino IDE
Start by installing the latest Arduino IDE. The Heltec V4 requires the Heltec ESP32 framework for its board definitions and hardware configuration.
Open File → Preferences and find Additional Board Manager URLs.
Add the Heltec package URL:
https://resource.heltec.cn/download/package_heltec_esp32_index.json
After saving the settings, open Boards Manager and search for Heltec ESP32. Install the available Heltec ESP32 package.
This framework provides the ESP32-S3 board definitions, USB configuration, LoRa hardware mappings, and other settings required by the V4.
You should also install the Heltec ESP32 Dev-Boards library through Arduino IDE's Library Manager. If the IDE asks to install additional dependencies, allow it to do so.
When the V4 Is Missing from the Board List
One issue that can occur during setup is that the Arduino IDE shows Heltec V2 and V3 boards but does not list the WiFi LoRa 32 V4.
This is generally related to an older Heltec framework version. If updating the package through Boards Manager does not resolve the issue, the framework can be updated manually using the latest release from Heltec's GitHub repository.
After updating the framework and restarting Arduino IDE, select:
Tools → Board → Heltec WiFi LoRa 32 V4
Then connect the board using a USB-C cable.
Why the Heltec V4 Is Useful for IoT Projects
The main advantage of this board is the combination of wireless technologies and supporting hardware. A single ESP32-S3 can collect sensor data, display information locally, communicate with a phone over Bluetooth, send data over LoRa, and connect to the internet through Wi-Fi.
That combination makes the V4 particularly interesting for projects where long-range communication and low-power operation are more important than simply connecting a sensor to a Wi-Fi network.
For example, a battery-powered environmental node could collect sensor readings, display basic information on the OLED, and periodically transmit measurements over LoRa without requiring a separate radio board.
Conclusion
The Heltec WiFi LoRa 32 V4 is a starting point for experimenting with long-range IoT communication. Its ESP32-S3, SX1262 LoRa radio, OLED, native USB, battery-management system, solar interface, and GNSS connector provide a useful collection of hardware in a relatively small board.
The most important point when starting a project is to understand the GPIO assignments. Several pins are already connected to onboard peripherals, so checking the pin mapping before connecting external hardware can prevent unexpected conflicts.
For a more detailed explanation of the V4 hardware, pinout, and setup process, the complete reference is available on Play with Circuit.