How to easily build your own indoor automatic irrigation system for your plants in 20 minutes!
Objective:
We will build an intelligent indoor irrigation system that you can use to water your plants at home, office or even as a simple school project you can showcase to your friends.
Helpful Resources:
Below are some helpful resources to get you started in setting up the brain module (microcontroller) needed to run this project. We will be using an ESP32 microcontroller from Zio called Zuino XS PsyFi32.
We love using Zio Qwiic products to prototype most of our Arduino I2C projects because of the simplicity of use and seamless integration between Arduino IDE and prototyping modules. The setup between modules is easy with no complications of wiring mistakes, just plug and play!
Zuino XS PsyFi32 Qwiic Start Guide
You can purchase the modules and components separately or you can purchase a full kit.
For this project, we will use Zio Qwiic Plant Hydration kit. It has all the required modules and components to get you immediately started. You can purchase the kit here!
Step 1
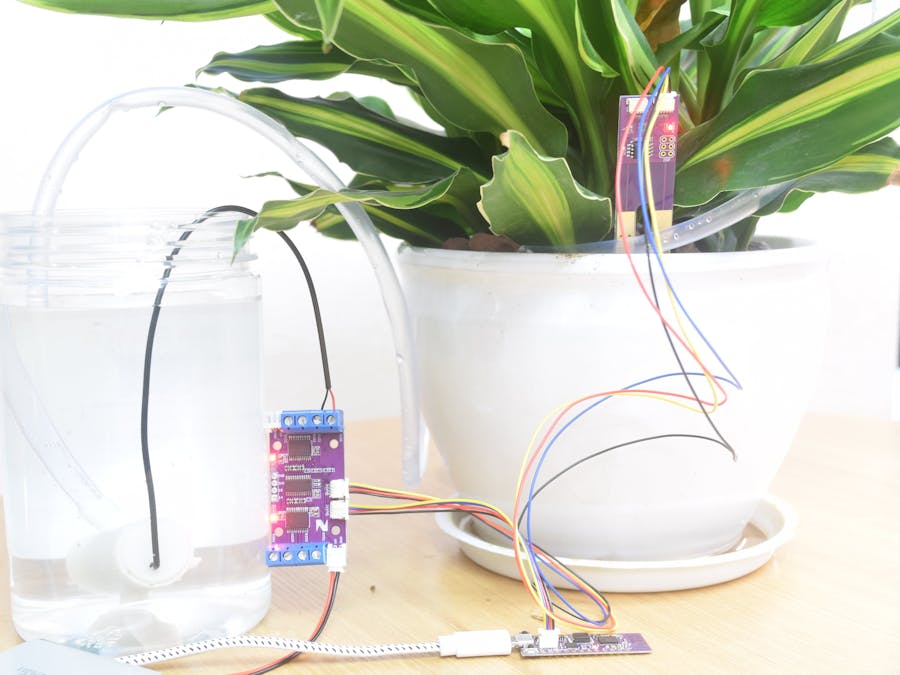
Connect PsyFi32 and Soil Moisture sensor, Motor and Water pump, and Battery Holder together
How to set up your Motor, Water pump and Battery Holder
Take the Zio DC Motor Controller and connect it with the water pump. You need a screwdriver to connect this two modules together.
Your set up will look like this:
To make the motor controller work, you need to supply power to it. Connect the battery holder to the motor controller. Smart Prototyping has a Qwiic version of the Battery Case/Holder that you can just plug into your Qwiic modules. It needs 4 AA Standard size batteries to power up and comes with a handy OFF/ON switch.
Your connection will be as follows:
Step 2
Download the source code from the Zio.cc Github Repository.
You can leave the code as is and just use the default values. By default, the values set for DRY, WET and NORMAL are 650, 250 and 500 respectively.
You can make changes on the time taken needed to water your plant again and also the time needed to reconfirm the value when your sensor checks for moisture according to your needs. Or you can just use the default settings.
After you make the necessary changes click upload.
Part 1 - How to calibrate your sensor and check basic readings
*For those who are code friendly*
You can check out this guide on how to check basic readings.
Open Serial monitor (Make sure it is at 9600 baud)
Insert your sensor to the soil and collect the readings for when your soil is Dry, Wet and Normal. (You need it to calibrate your soil and input this value in the code later).
Part 2 - Set your moisture level for DRY and Wet.
The sensor will try to reconfirm that your soil is dry, it will detect that your plant needs the water boost, and send this info to PsyFi32. It will program the DC Motor to pump water to your plant. Your sensors LED will light up.
When your soil is damp, the sensor will detect that your plant is sufficiently hydrated so will not need the H2O boost. The Green LED will not light up.
If you already know your soil moisture rate you can skip this part and just input the code.
Make changes to the following code:
After you make the necessary changes click upload.
Step 3
Insert the sensor probe into your plant's soil. Supply your battery holder with Standard Alkaline batteries and switch it on to power your motor pump. Connect your PsyFi32 to a power source (in this tutorial we use a Portable USB charger) and click the reset button.