Learn to build a facial recognition system with the ESP32-CAM module with Arduino IDE!
In this project, I will show you how you can create a facial recognition system by building an IP surveillance CCTV with the ESP32-CAM module.
The ESP32-CAM can host a video streaming web server over Wi-Fi with very good FPS (frames per second) which we can access with any device from our network. Once we access the video stream from the network, we can perform facial recognition.
What is the ESP32-CAM?
The ESP32-CAM is a tiny ESP32-based chip camera module that only costs about $5 USD.
The module includes an OV2640 camera and several GPIOs to connect peripherals using an ESP32. It also features a microSD card slot, which can be beneficial for many other projects to store images taken from the camera or to store files for cloud storage on the network and comes with a 2MP camera module.
Required Hardware
- ESP32-CAM with OV2640
- FTDI programmer
- Female-to-female jumper cables
- Any 3.3 + volt battery (For powering up the module)
Required Software
- Arduino IDE
- Setup ESP32 Board in Arduino IDE
Wiring the Hardware
Before uploading the code, wire everything as shown in the diagram below and use an FTDI controller to connect the ESP32-CAM to your computer.
FTDI | ESP32-CAM |
|---|
3.3 V
| 3.3 V
|
GND | GND |
RX | TX |
TX | RX |
How to Configure Arduino IDE for the ESP32-CAM
To start configuring the ESP32-CAM in Arduino IDE, open Arduino IDE and go to File —> Preferences.
Add this additional URL:
https://dl.espressif.com/dl/package_esp32_index.json
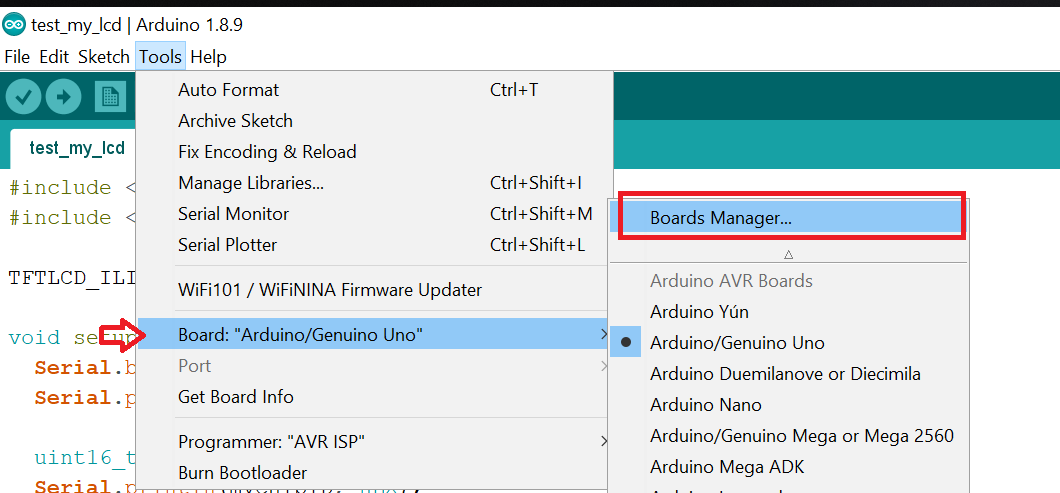
After adding the URL, go to Tools —> Board: —> Board Manager.
In the search bar of the window, type “ESP32” and install the esp32 by Espressif Systems version 1.0.1.
Note: Make sure it is 1.0.1. Otherwise, your code will not work.
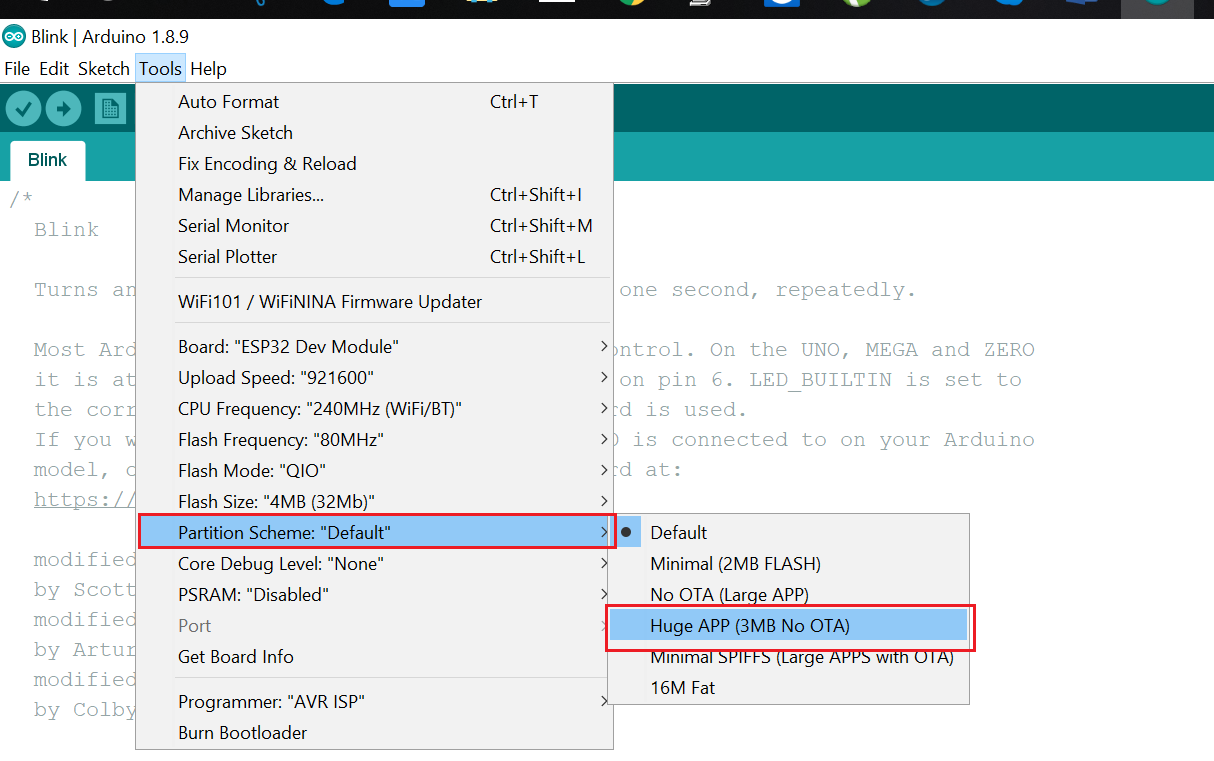
After installing the board package, go to Tools —> Board: and select Esp32 Wrover Module.
After selecting Esp32 Wrover Module, go to Tools —> Partition Scheme and Select Huge App(3MB No OTA).
Once that’s complete, go to Tools —> Port —> Select Port.
Upload Source Code
To upload the code, follow the steps below.
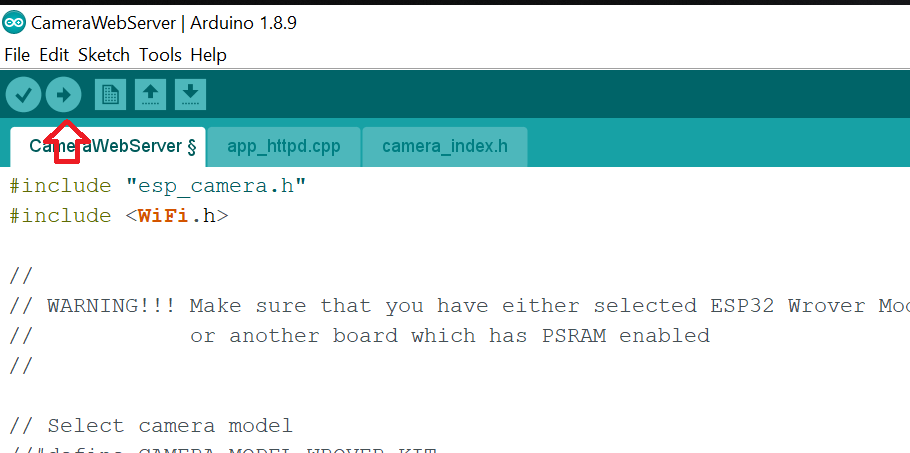
Go to Files —> Examples —> Esp32 —> Camera —> CameraWebServer
After opening the “camerawebserver” example, edit the example source code as shown below.
#define CAMERA_MODEL_WROVER_KIT
Comment this line by adding “//”
#define CAMERA_MODEL_AI_THINKER
Uncomment this line by removing “//”.
Add your Wi-Fi information as mentioned in the figure below.
After making these changes, upload the code by typing “CTRL + U”. Or click on the arrow button highlighted in the image below.
NOTE: For uploading the code, GPIO 0 should be connected with GND on the ESP32 module. Hit the reset button, after which your ESP32 will go into flash mode, allowing you to upload the code.
And after uploading the code, disconnect GPIO 0 from GND, and press the reset button. Now open your serial monitor which should display the IP address of your ESP32-CAM as shown in the image below.
Use a Good Power Source!
For better performance, use any 3.3V lithium battery or another good power source with the ESP32-CAM module. After uploading the code, disconnect the 3.3V supply from FTDI and connect the external power source. Otherwise, the camera module will not perform well. Follow the diagram below.
Visit the camera’s IP address and you will see a message similar to ”check the image below.” Set the resolution and then click on Start Streaming.
Turn on Face Recognition from the left-side menu, and the ESP32 will begin detecting human faces.
When using the Face Recognition function, always use CIF resolution.
Now, the system can perform face recognition and detection. To start, you have to enroll a new face. ESP32-CAM will then save the user’s face which enables it to detect that face later on.