Got a PS4 DualShock controller lying around? Learn to connect it to an Arduino and control a robot via Bluetooth!
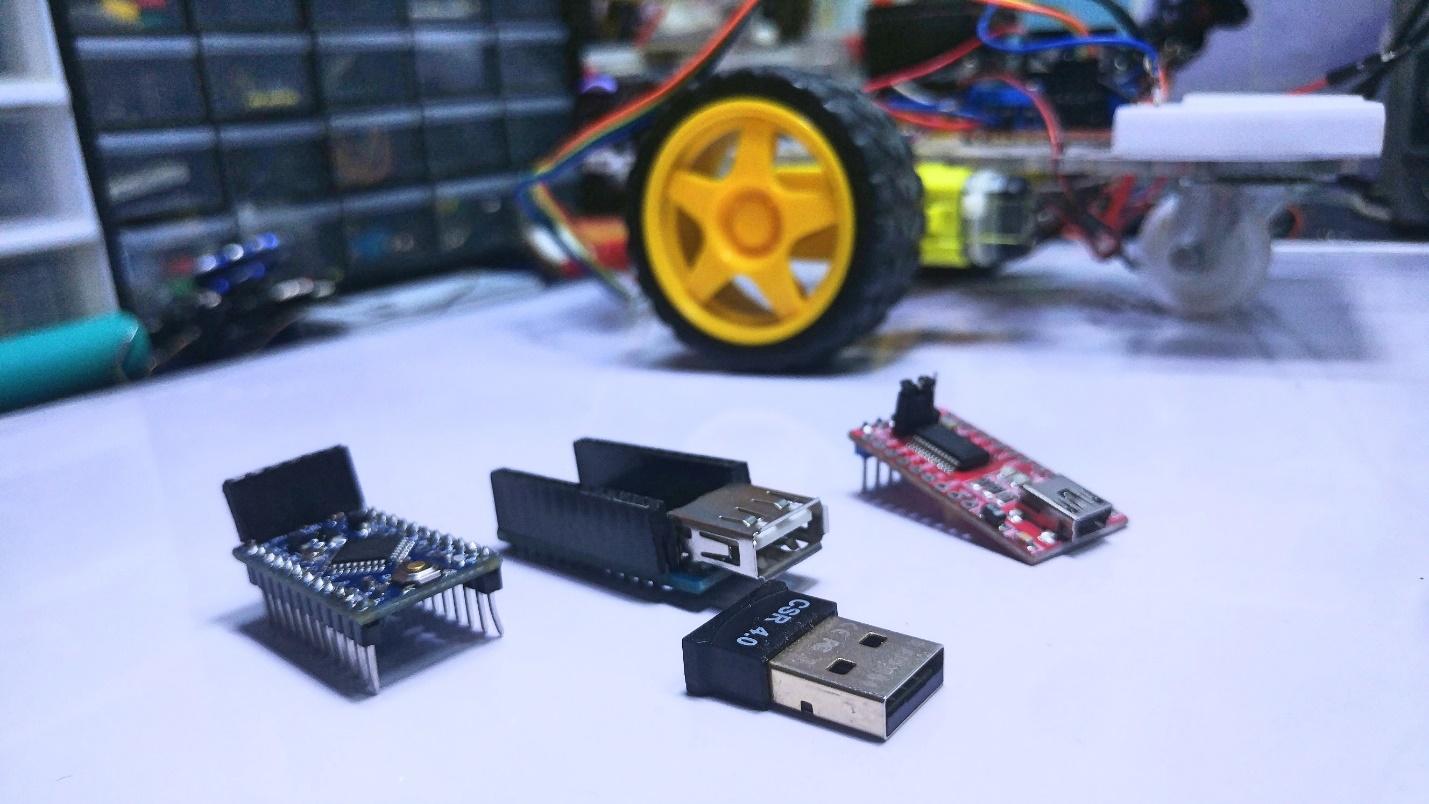
In this tutorial, I’ll show you how to control an Arduino-based robot including two DC motors via the official PS4 Bluetooth-based DualShock joystick controller by using USB host, Arduino, and a USB Bluetooth Dongle. Before diving into this project, collect the necessary hardware.
Collect the Hardware
- Arduino Pro Mini
- PS4 Bluetooth Controller
- USB Host Shield Mini
- FT232RL
- Arduino Robot Kit
- L298N Motor Driver
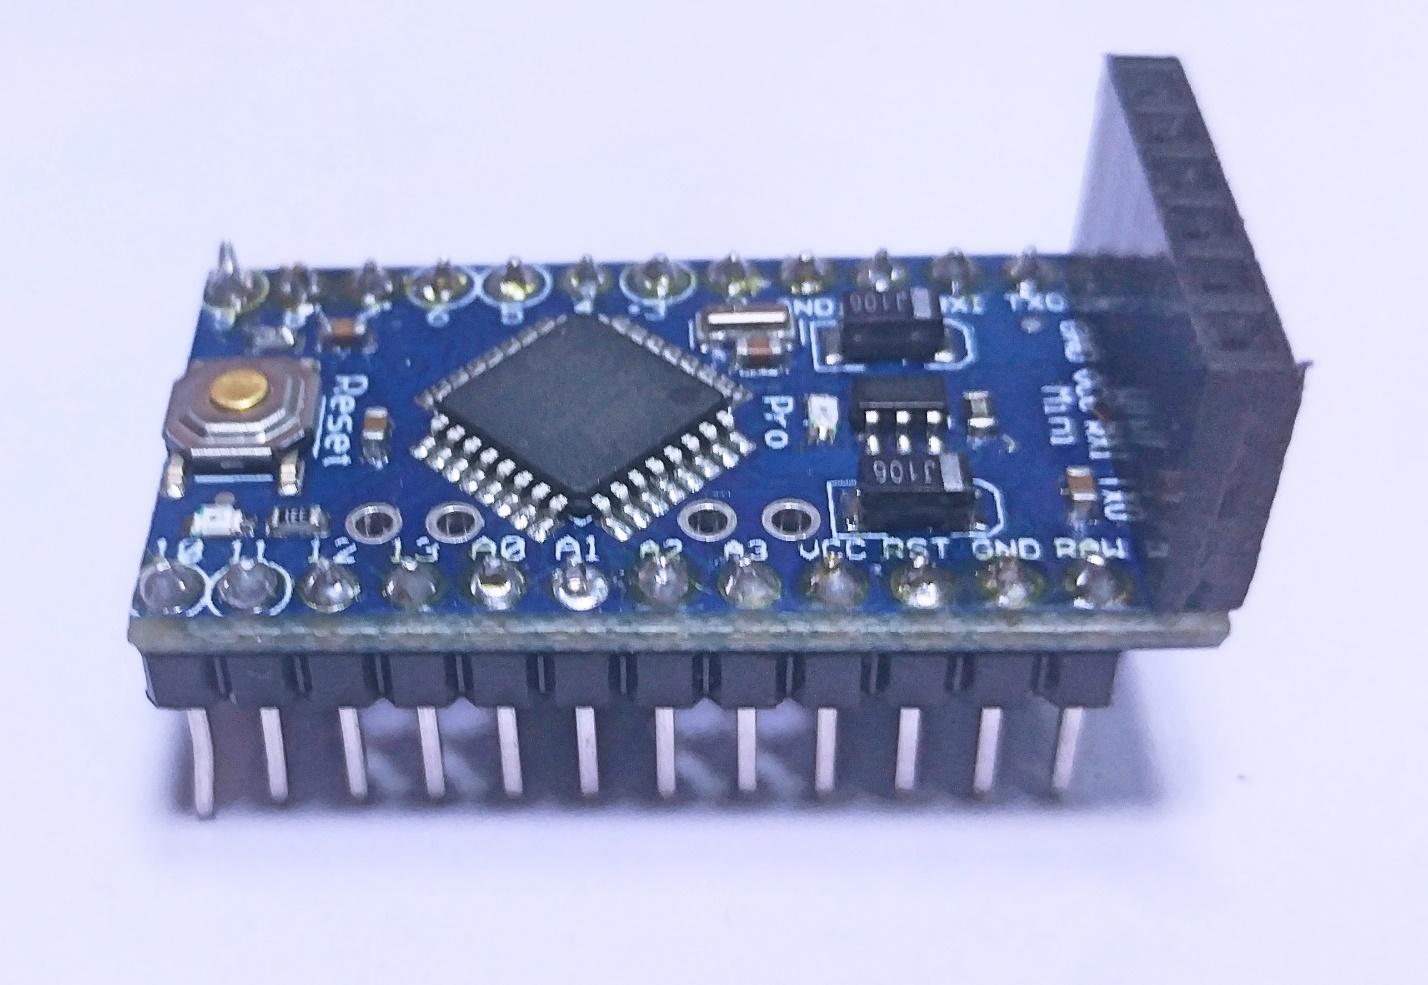
Arduino Pro Mini
If we talk about Arduino Mini, it’s basically an Arduino controller without the programming chip installed on it. The reason why Arduino removed the programming chip is simply to reduce the size and cost of PRO Mini. Also once you have one programming device, it can then be reused for other PRO Mini projects, which is quite common.
What is USB host?
USB Host is an adapter for USB devices. You can use it to connect an Arduino board to a USB device, such as a USB joystick, a mouse, or a thumb drive.
For example, you can control your Arduino robot with your own USB based joystick gamepad. We can connect any USB slave device easily with an Arduino microcontroller such as a USB mouse, USB keyboard, USB printer, USB mass storage, and more.
The USB Host might need analog/digital converters necessary to develop a full-speed USB peripheral/host controller with Arduino microcontroller.
Features
- USB 2.0 Full Speed compatible
- 3.3/5V operation level compatible
- All GPIOx pins break-out
- USB Host 5V/500mA supply for USB protocol
Specifications
- Operating Voltage: 5V/3V
- Max Current: 500mA only when Arduino is connected with a good power supply
- Max Current: 400mA only when Arduino is powered from its USB port
- USB Controller: MAX3421E
To get this project working, you will need the USB Host Shield for the Arduino and a Bluetooth dongle. I used the USB host shield from Arduino but it’s now discontinued. You can utilize Sparkfun’s USB shield instead.
The USB shield is necessary because we need to connect a Bluetooth based PS4 Controller to the Arduino, which doesn’t have a Bluetooth receiver. Then you can use the included library to pair with the Bluetooth based PS4 controller. And once the Bluetooth connection is established with the PS4 controller, we can use simple functions to read the state of the device.
Also, all of the code is open source. If you want to experiment more with the USB Host by yourself, [Kristian]’s work could be helpful to get started. All of the source code is available on Github. The example sketch also shows how easy it is to add a PS4 controller into your own Arduino project. For this project, we will be adapting this code for controlling the motor of an Arduino Robot car using the left joystick of a PS4 controller.
Assembling the Hardware
If you are using a different version of Arduino, then you can simply follow the pinout below for wiring it to your own Arduino board.
The pinout for wiring your Arduino.
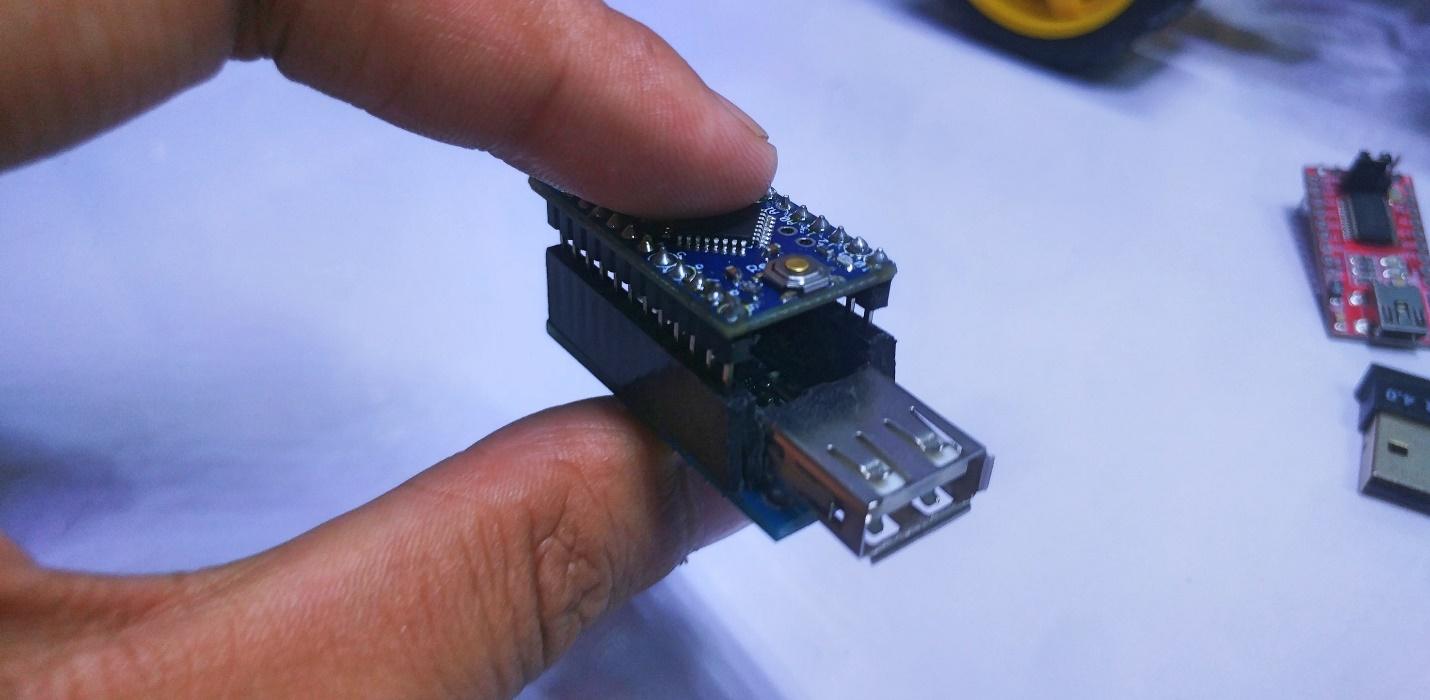
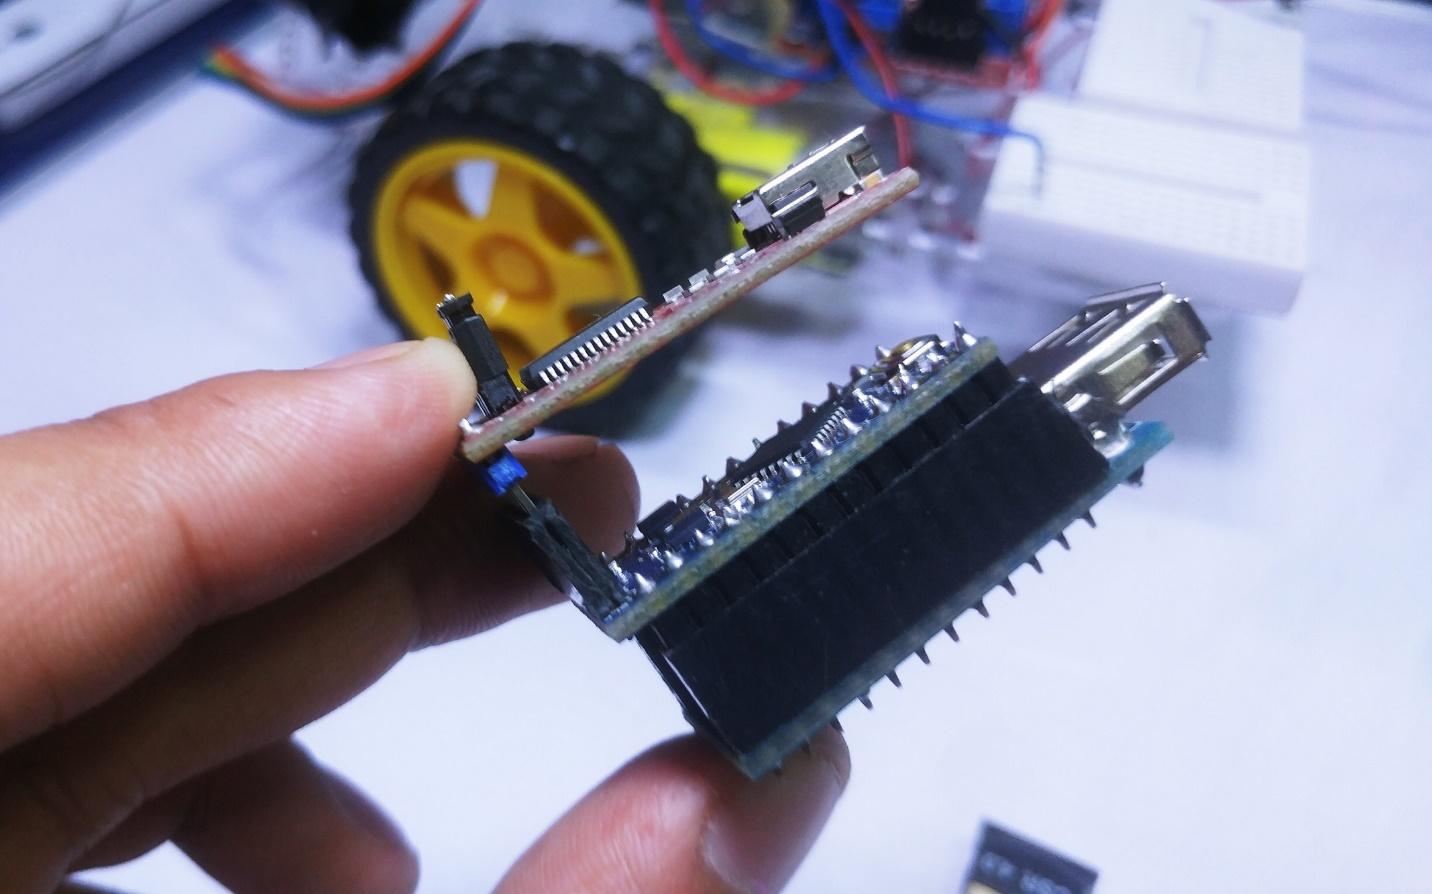
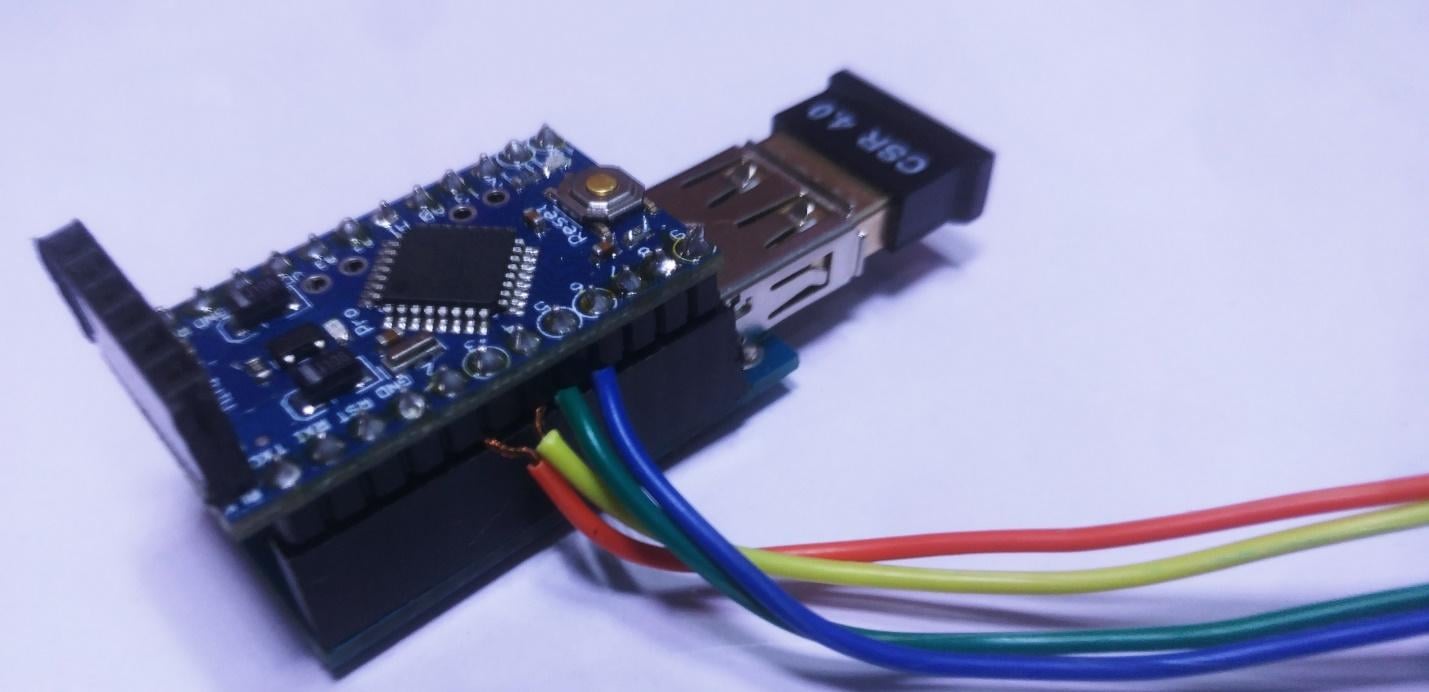
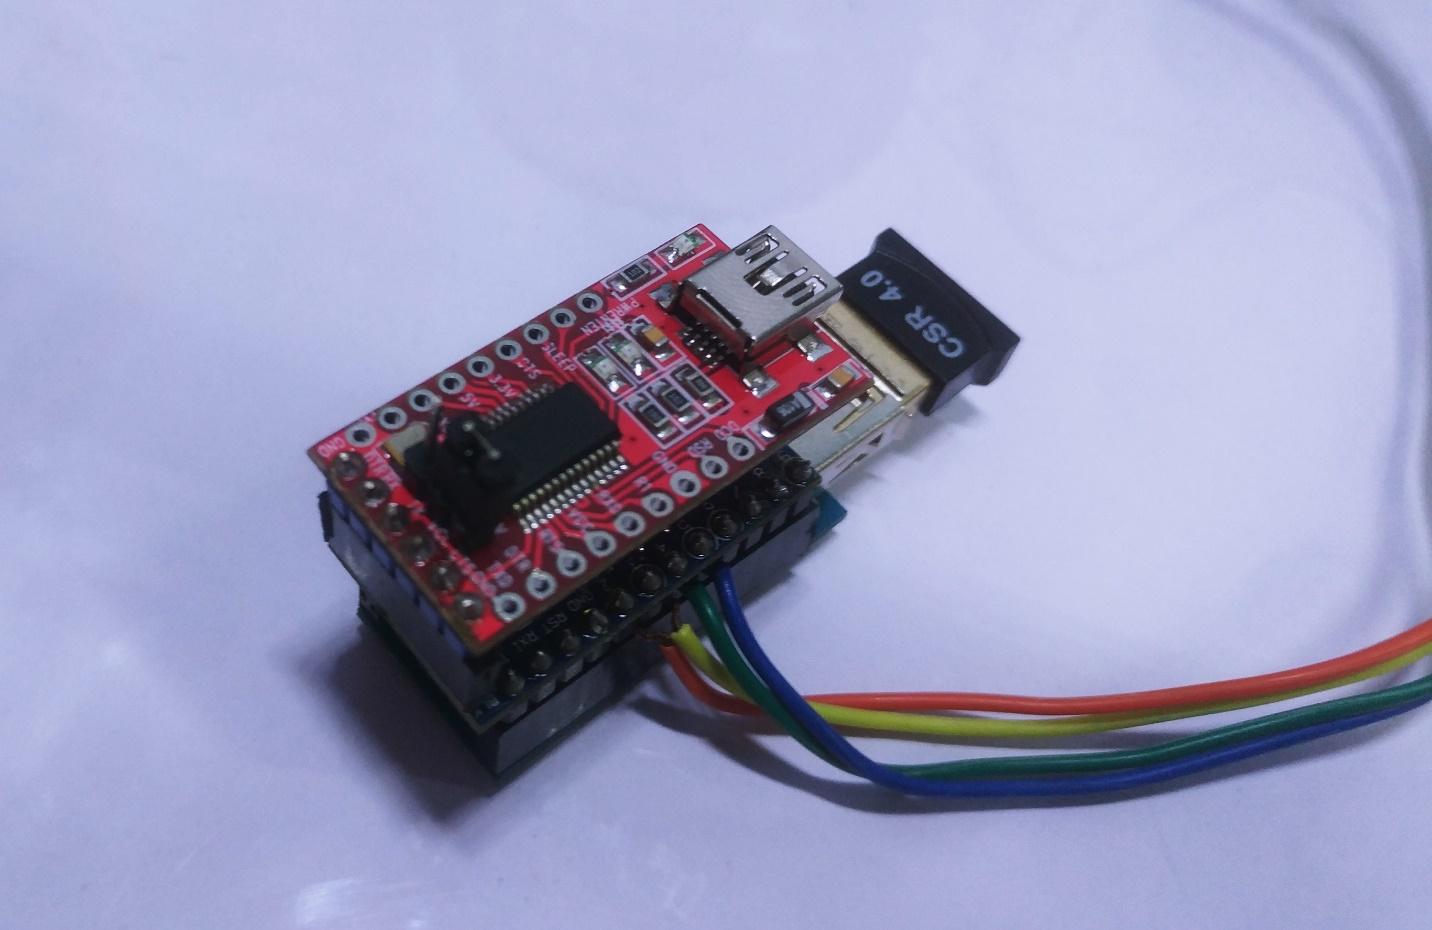
if you have an Arduino Pro Mini, assemble the hardware as shown in the image below. Solder the female headers to your USB host, male headers for Arduino Pro Mini and assemble the Arduino micro board at the top of the USB host shield into their female headers.
The Arduino Pro Mini and USB host shield.
Another angle of the connected Arduino Pro Mini and USB host shield.
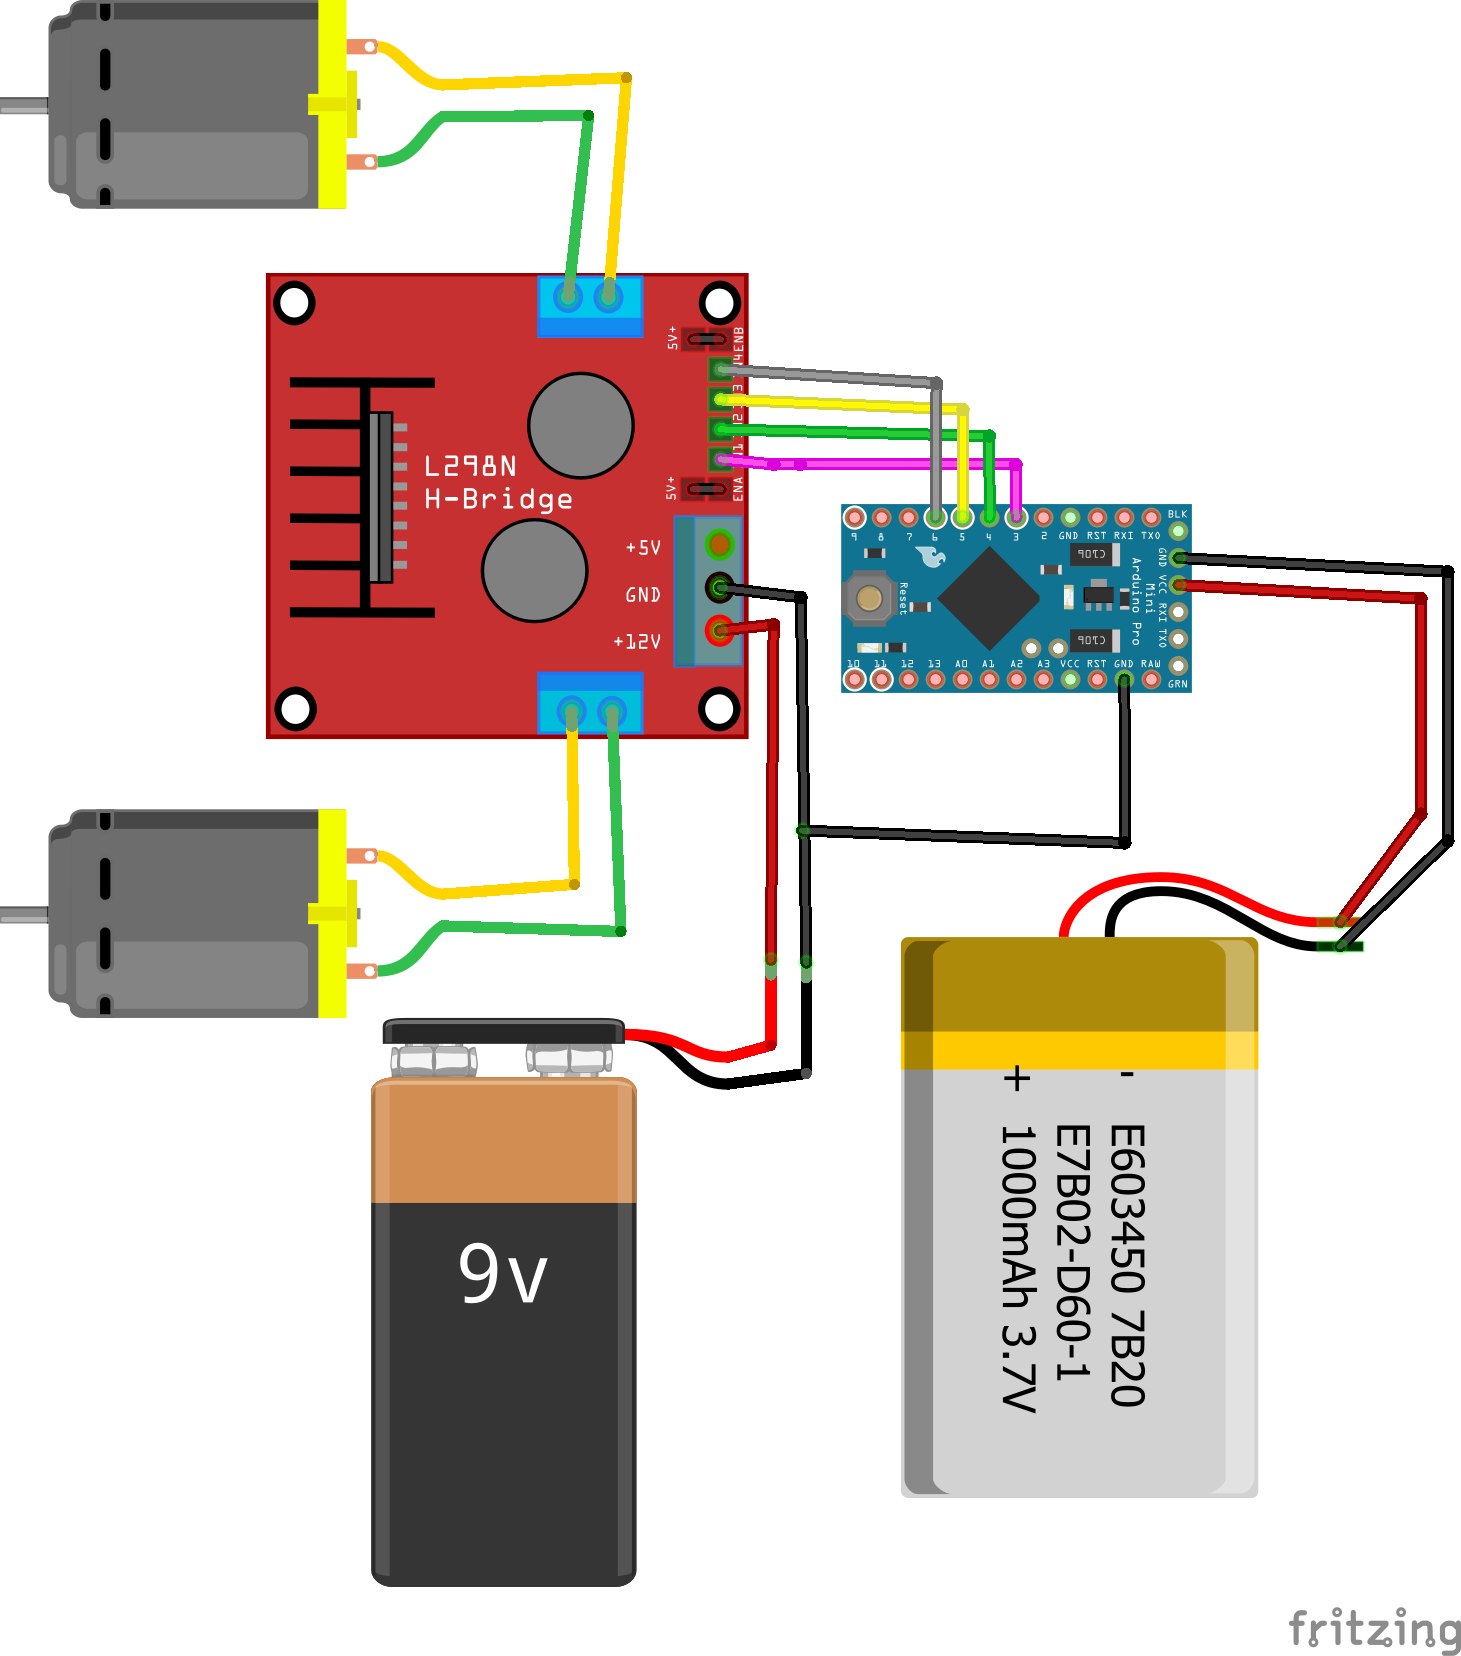
After assembling the USB Host Shield with Arduino Mini, add the connections for the L298N motor driver module, by following this Fritzing diagram:
If you are not using an Arduino Mini or not utilizing the shield setup, these are the connections you need to the USB host:
Fritzing diagram if you are not using an Arduino Mini or the shield setup.
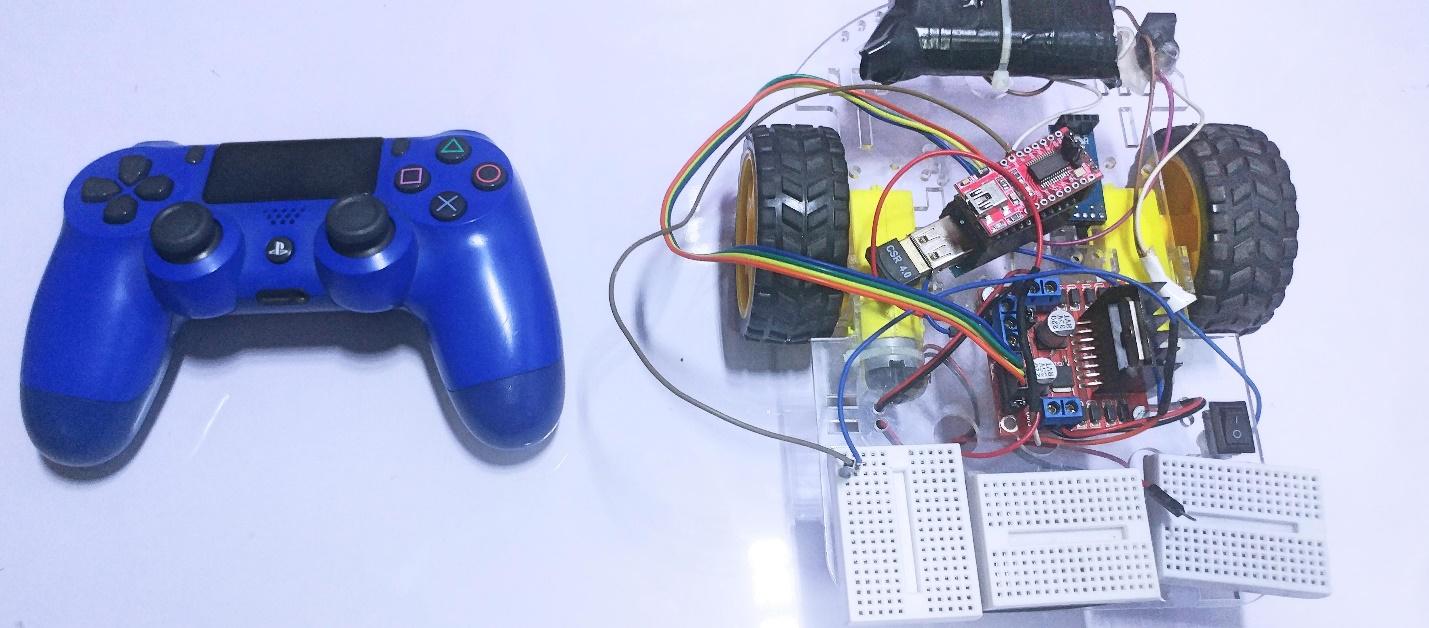
The properly connected hardware.
Upload Source code
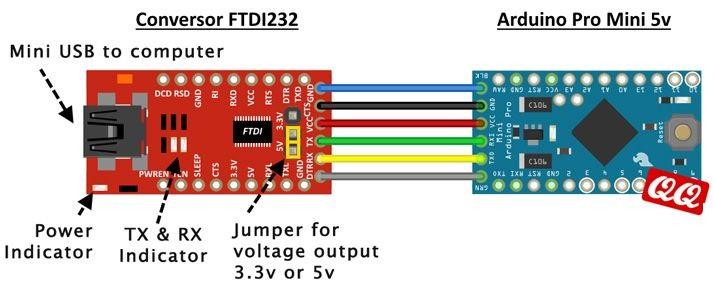
The following connections will be used for uploading the source code:
Arduino Pro --> FTDI
- GND --> GND
- CTS --> GND
- VCC --> VCC
- TXD --> RXD
- RXD --> TXD
- DTR --> DTR
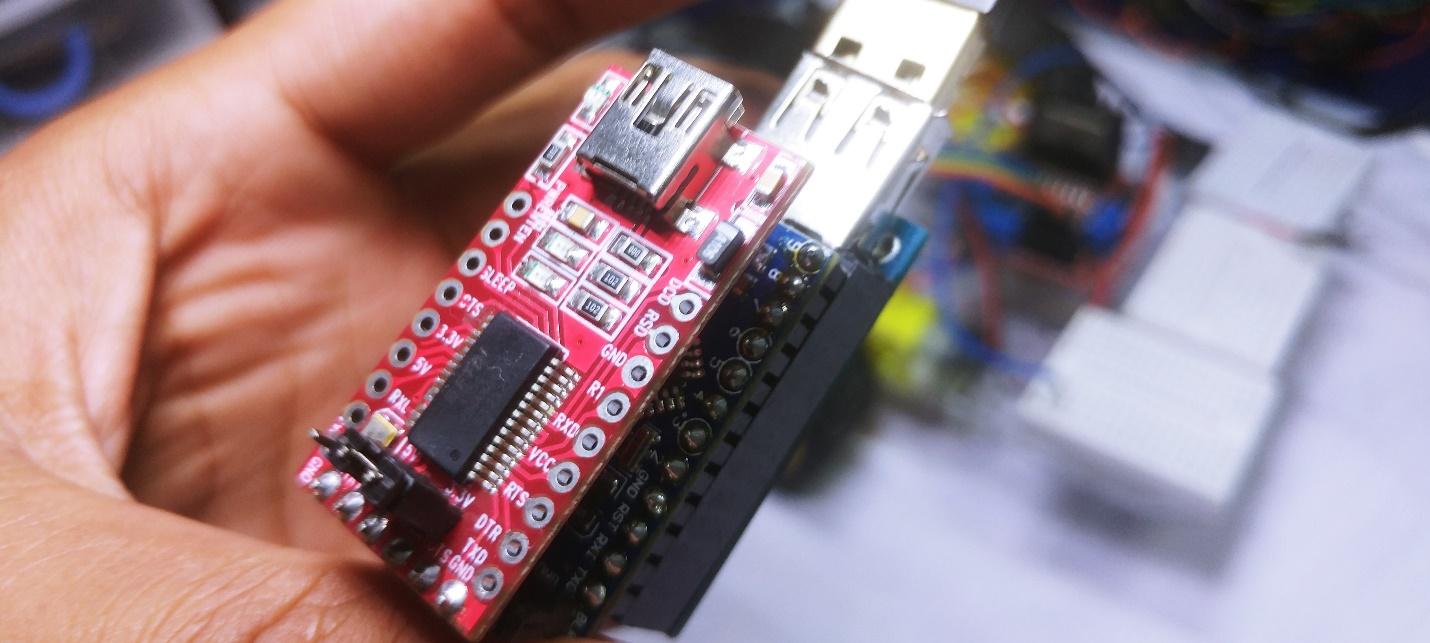
Or you can simply add a female header to the Arduino Pro Mini and plug the FTDI module into the female headers as I did in the image below.
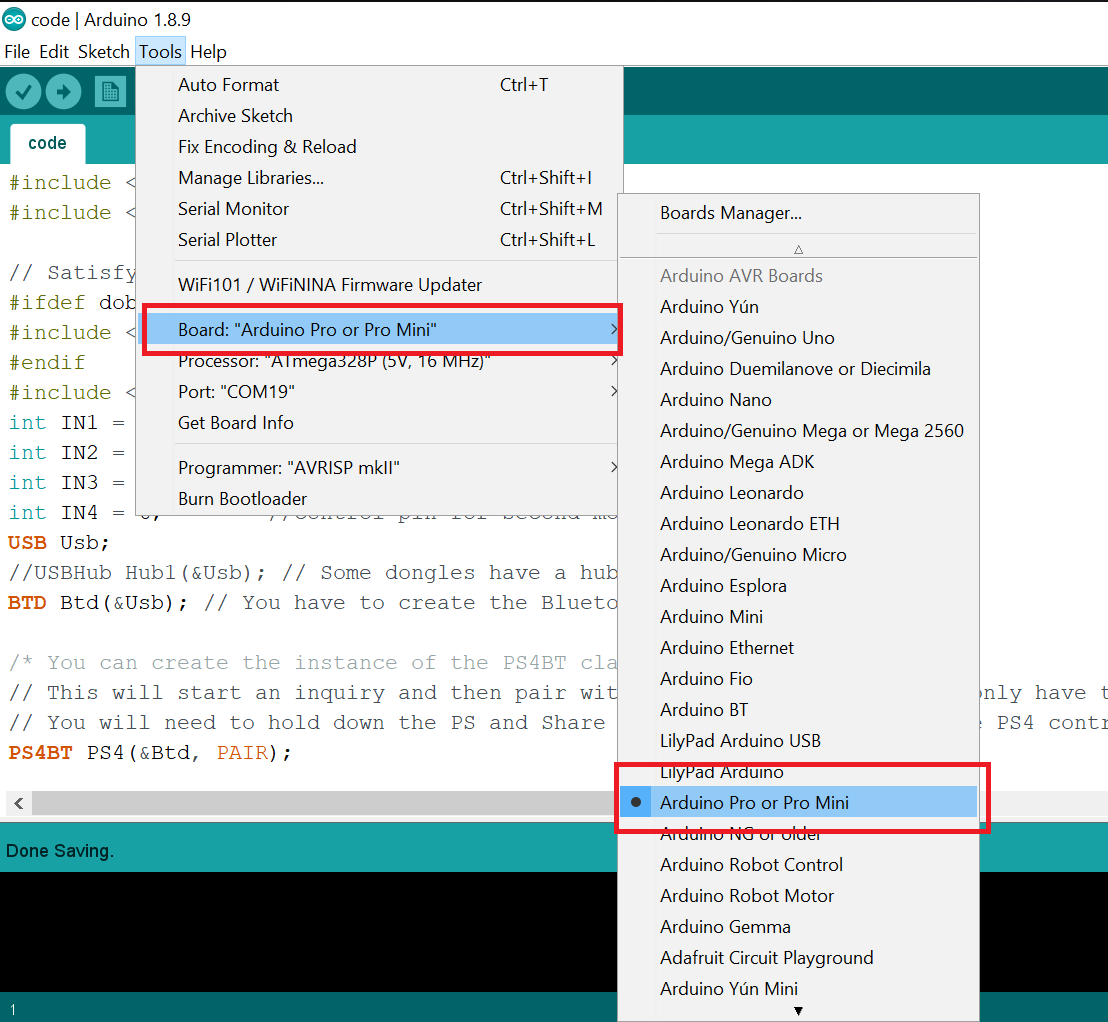
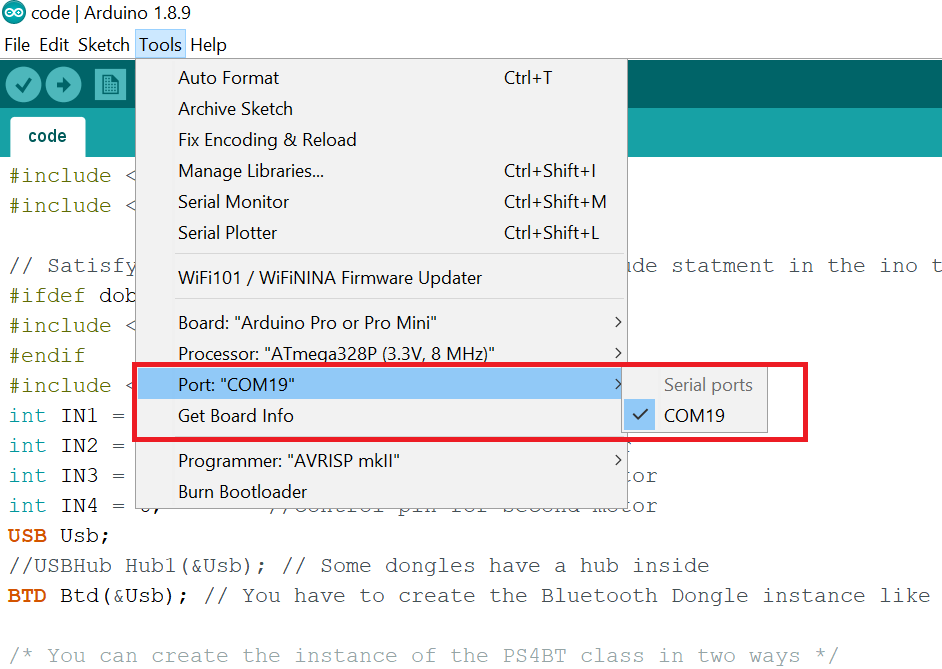
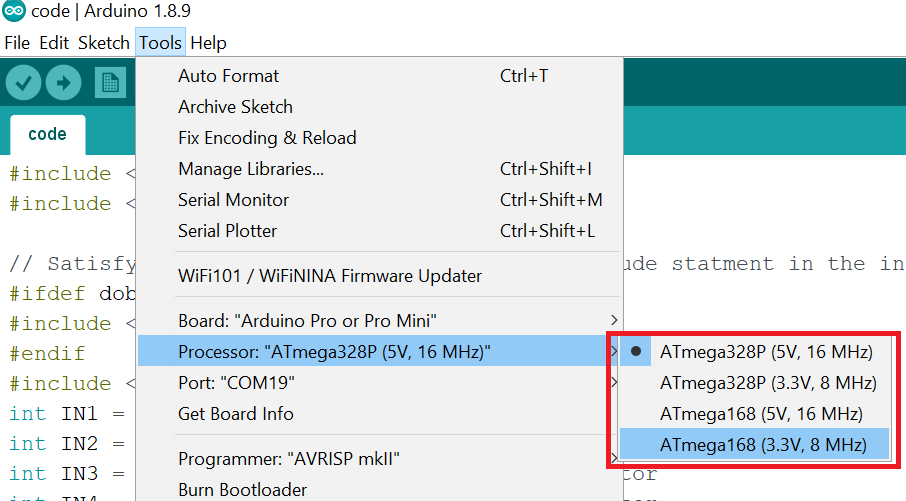
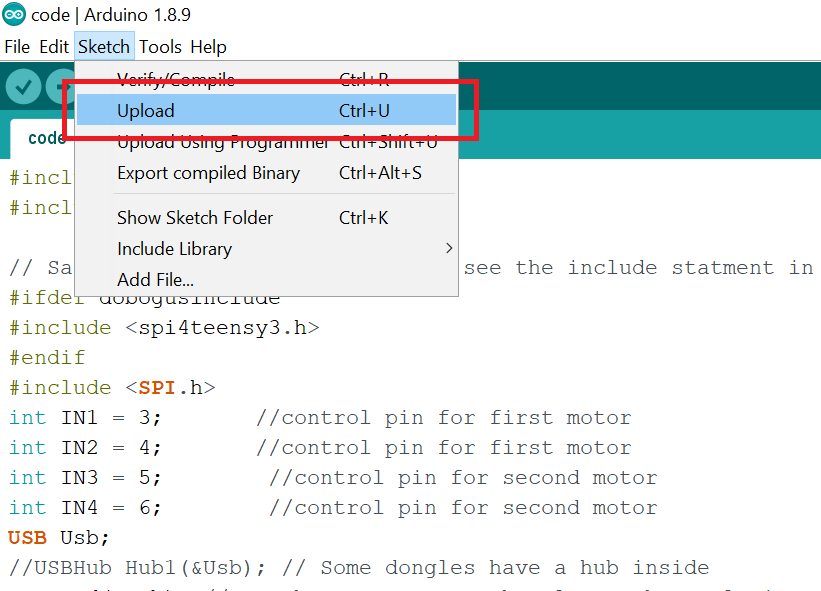
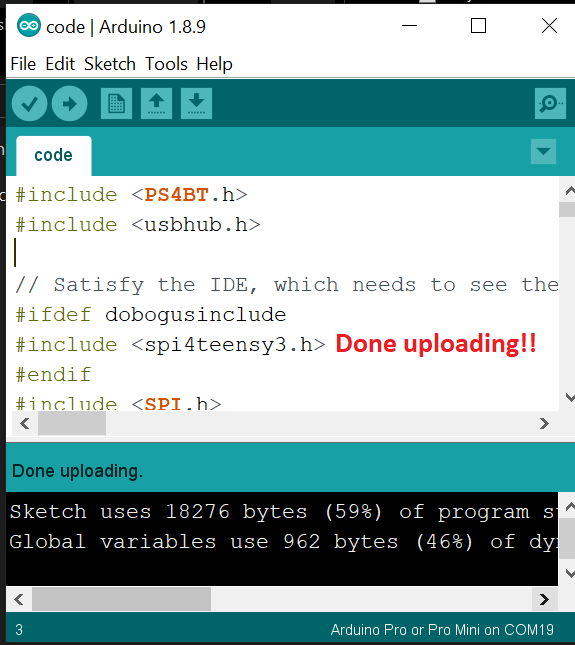
Upload the source code to your Arduino Pro Mini with the following steps. You can find the full source code at the bottom of this page.
After uploading the source code just insert the Bluetooth dongle into the USB host shield and start pairing with your PS4 controller.
Attach the dongle to you completed build.
Pairing the PS4 Controller
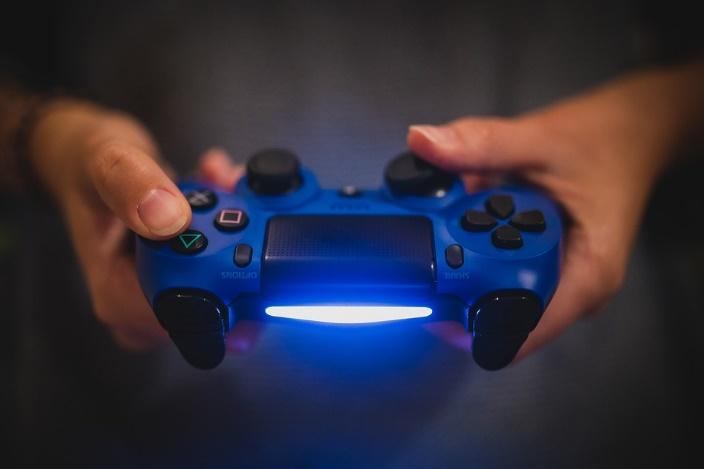
In order to pair the Bluetooth based PS4 controller with Arduino. Set the gamepad controller into pairing mode by pressing and holding the “PlayStation button” and ”Share button” at the same time. Hold these two buttons until the light on the PS4 controller starts flashing rapidly. Now the Arduino should automatically detect your PS4 controller.
Once the PS4 controller is connected with your Arduino robot, the controller’s light will turn blue.
When pairing is complete, the light will turn blue!
Check out this build in action in the video below!
//Source Code
#include <PS4BT.h>
#include <usbhub.h>

// Satisfy the IDE, which needs to see the include statement in the ino too.
#ifdef dobogusinclude
#include <spi4teensy3.h>
#endif
#include <SPI.h>
int IN1 = 3;       //control pin for first motor
int IN2 = 4;       //control pin for first motor
int IN3 = 5;        //control pin for second motor
int IN4 = 6;        //control pin for second motor
USB Usb;
//USBHub Hub1(&Usb); // Some dongles have a hub inside
BTD Btd(&Usb); // You have to create the Bluetooth Dongle instance like so

/* You can create the instance of the PS4BT class in two ways */
// This will start an inquiry and then pair with the PS4 controller - you only have to do this once
// You will need to hold down the PS and Share button at the same time, the PS4 controller will then start to blink rapidly indicating that it is in pairing mode
PS4BT PS4(&Btd, PAIR);

// After that you can simply create the instance like so and then press the PS button on the device
//PS4BT PS4(&Btd);

bool printAngle, printTouch;
uint8_t oldL2Value, oldR2Value;

void setup() {
   pinMode(IN1, OUTPUT);
  pinMode(IN2, OUTPUT);
  pinMode(IN3, OUTPUT);
  pinMode(IN4, OUTPUT);
  Serial.begin(115200);
#if !defined(__MIPSEL__)
  while (!Serial); // Wait for serial port to connect - used on Leonardo, Teensy and other boards with built-in USB CDC serial connection
#endif
  if (Usb.Init() == -1) {
    Serial.print(F("\r\nOSC did not start"));
    while (1); // Halt
  }
  Serial.print(F("\r\nPS4 Bluetooth Library Started"));

}
void loop() {
  Usb.Task();

  if (PS4.connected()) {
  //  if (PS4.getAnalogHat(LeftHatX) > 137 || PS4.getAnalogHat(LeftHatX) < 117 || PS4.getAnalogHat(LeftHatY) > 137 || PS4.getAnalogHat(LeftHatY) < 117 || PS4.getAnalogHat(RightHatX) > 137 || PS4.getAnalogHat(RightHatX) < 117 || PS4.getAnalogHat(RightHatY) > 137 || PS4.getAnalogHat(RightHatY) < 117) {
      if(PS4.getAnalogHat(LeftHatX)<10)
      {
    digitalWrite(IN1, HIGH);
    digitalWrite(IN2, LOW);
    digitalWrite(IN3, LOW);
    digitalWrite(IN4, HIGH);
    Serial.print("\nHatX: 50 ");
        }
      else if(PS4.getAnalogHat(LeftHatX)>240)
      {
    digitalWrite(IN1, LOW);
    digitalWrite(IN2, HIGH);
    digitalWrite(IN3, HIGH);
    digitalWrite(IN4, LOW);

    Serial.print("\nHatX: 200 ");
        }
        else if(PS4.getAnalogHat(LeftHatY) < 20)
        {
    digitalWrite(IN1, HIGH);
    digitalWrite(IN2, LOW);
    digitalWrite(IN3, HIGH);
    digitalWrite(IN4, LOW);

    Serial.print("\nHatY: 50 ");
          }
          else if(PS4.getAnalogHat(LeftHatY) > 200)
        {
    digitalWrite(IN1, LOW);
    digitalWrite(IN2, HIGH);
    digitalWrite(IN3, LOW);
    digitalWrite(IN4, HIGH);
        Serial.print("\nHatY: 200 ");
          }
        else {
    digitalWrite(IN1, LOW);
    digitalWrite(IN2, LOW);
    digitalWrite(IN3, LOW);
    digitalWrite(IN4, LOW);
        Serial.print("\nrotate the joystick ");


          }

}
}