The Arduino uses the ATMega328p chip. We can get that in an SMD format (ATMega328p-AU) or the DIP format for trough hole soldering (ATMega328p-PU). But, the chip by itself can’t work. It needs a few more components and altogether is called the bare minimum configuration of this chip. So In this tutorial, we are going to design our own custom-made “Arduino UNO PCB” using an ATMega328p chip.
JLCPCB is the foremost PCB prototype & manufacturing company in china, providing us with the best service we have ever experienced regarding (Quality, Price Service & Time).
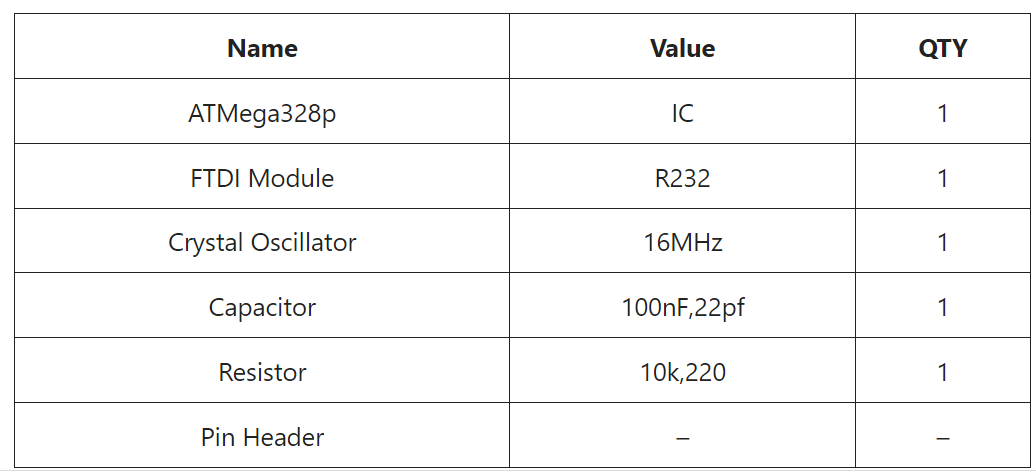
Hardware Table
You will require the following components to make your own Arduino UNO.
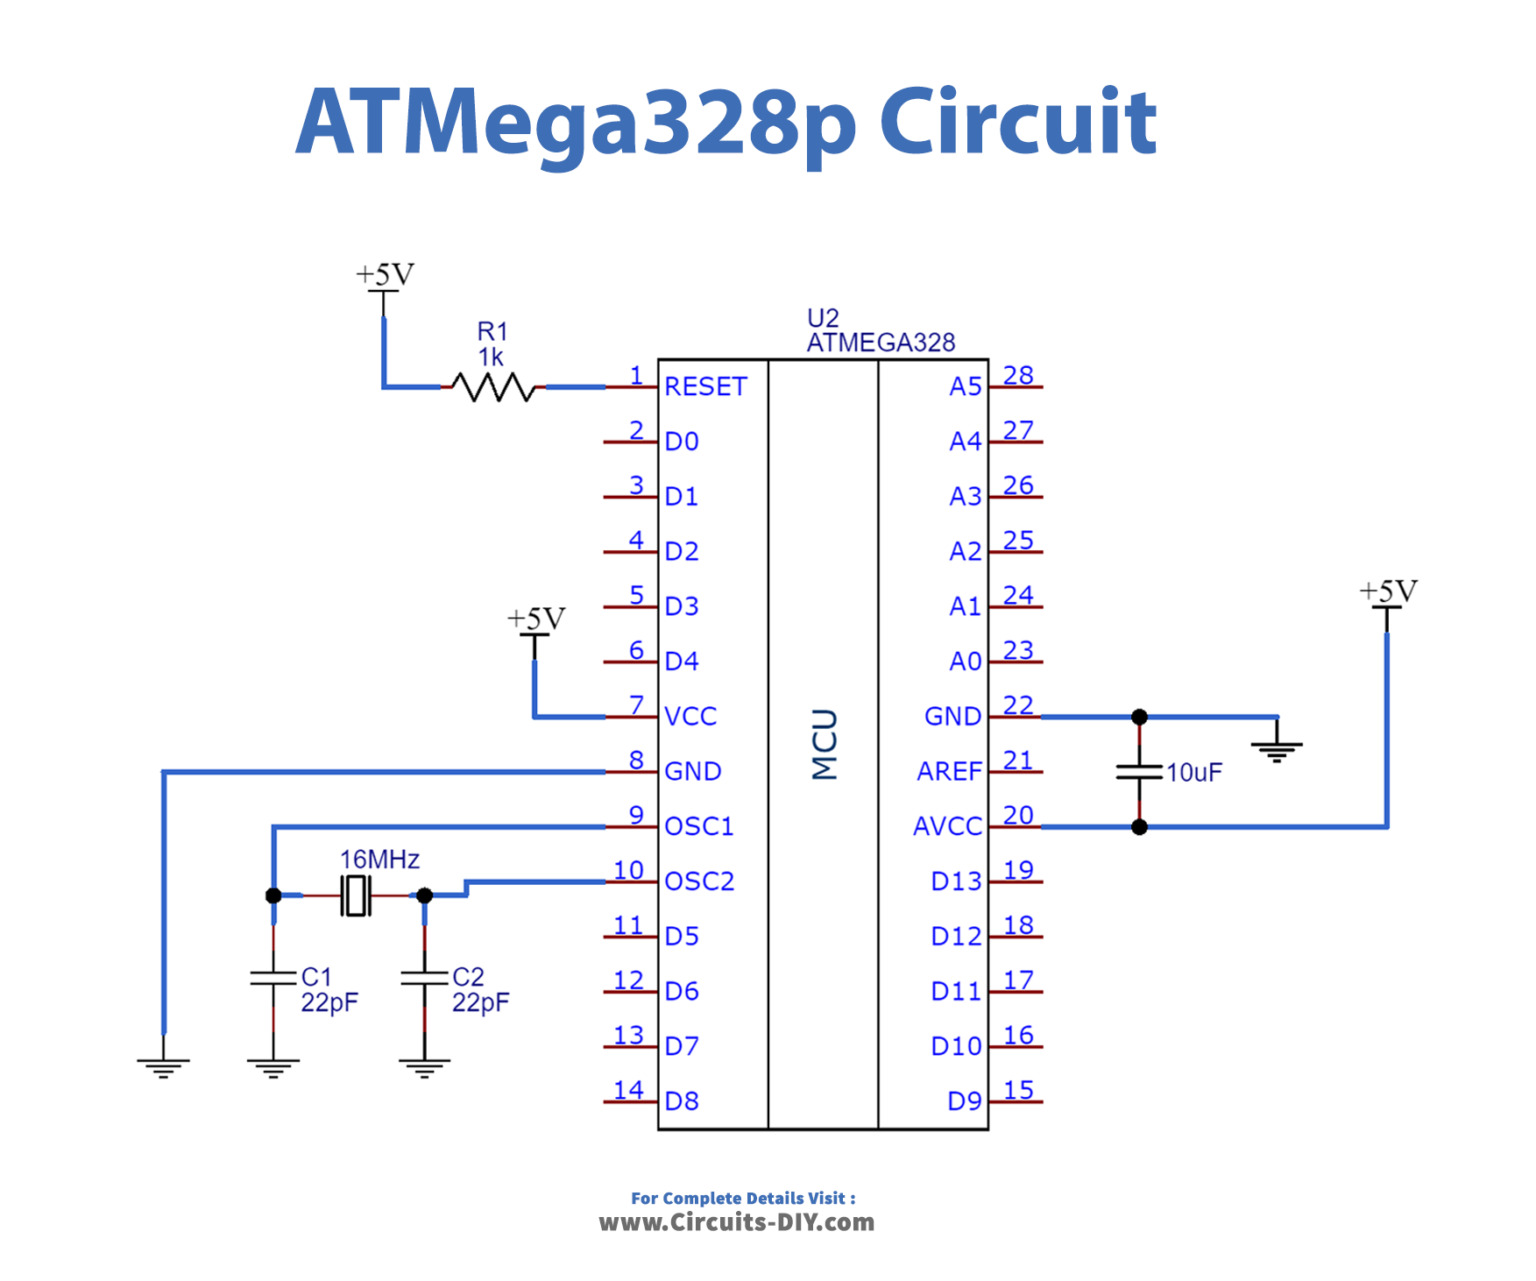
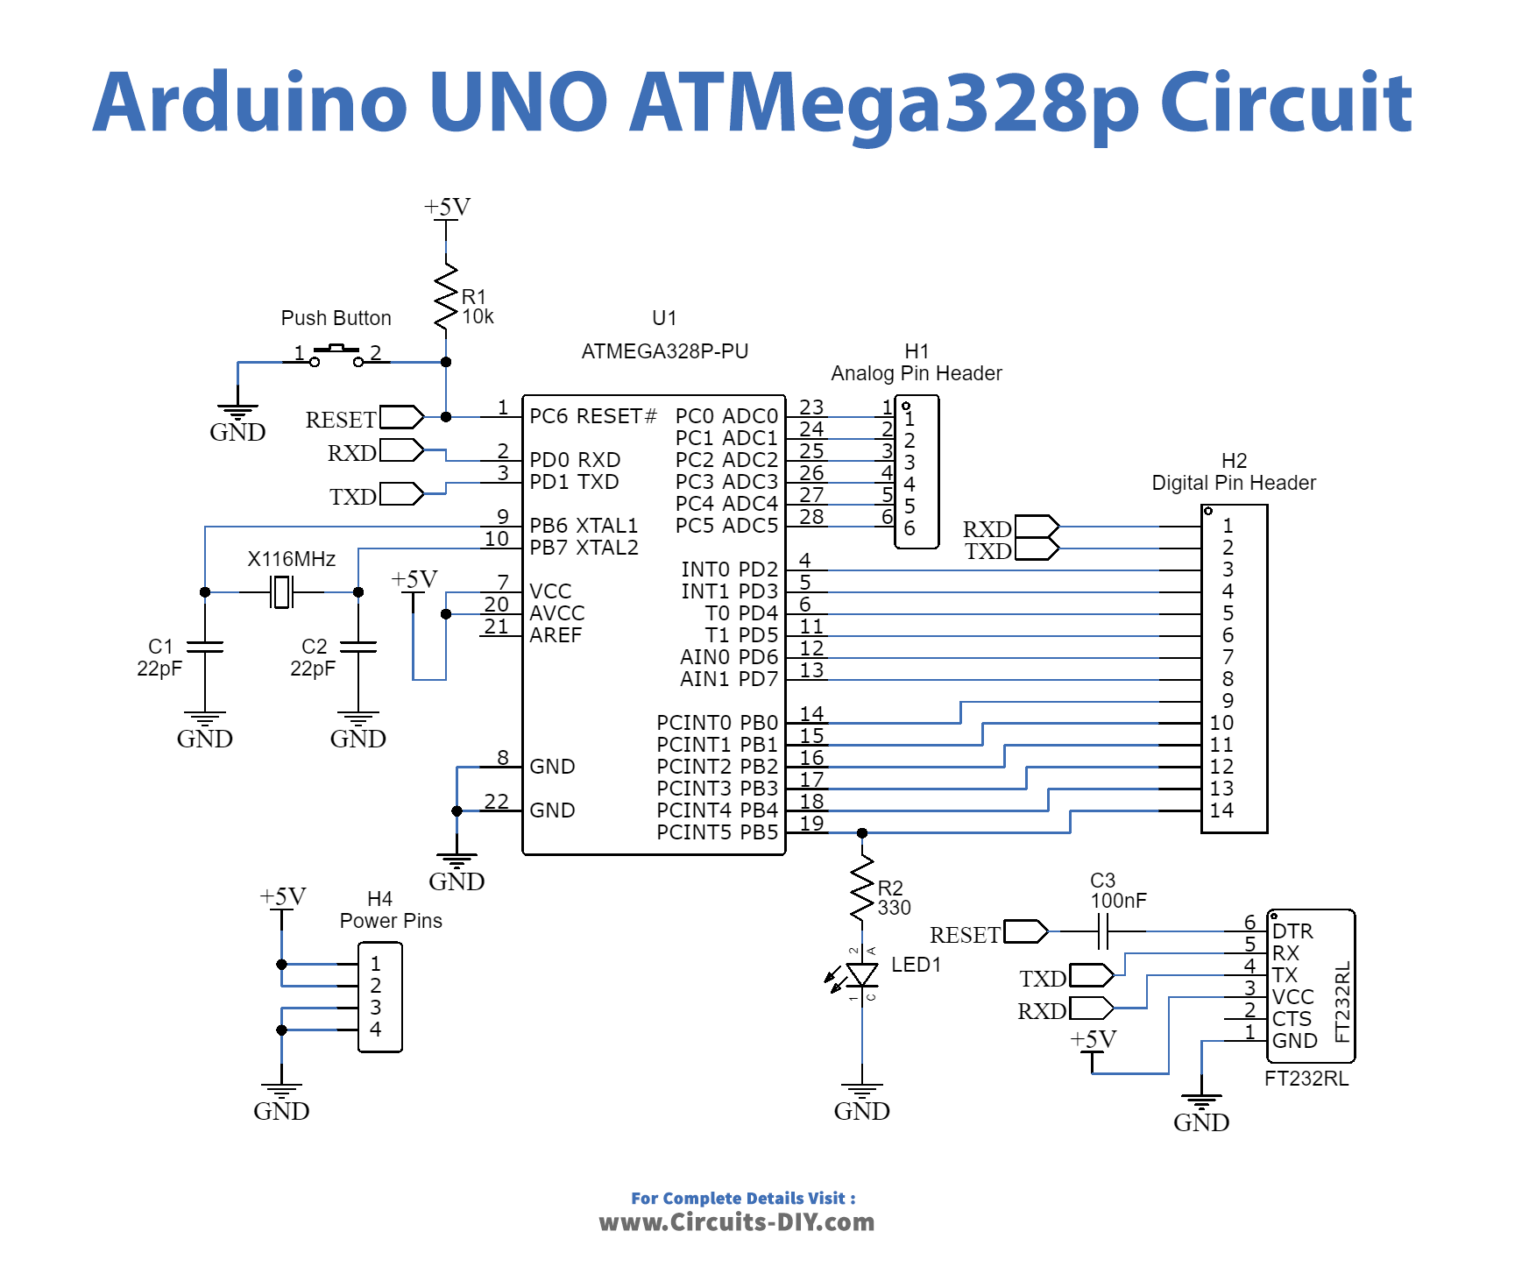
Step 1 – The Simple ATMega328p Circuit
Below we have the schematic for this configuration. As you can see we need a supply of 5 volts. This supply has to be very well regulated with no voltage spikes. For that and an extra 10uF capacitor between 5V and GND. Also, the reset pin is negatively enabled. So, in order to have it disabled, we need to apply 5V to it. For that, a 10k ohms resistor is placed between RESET and Vcc
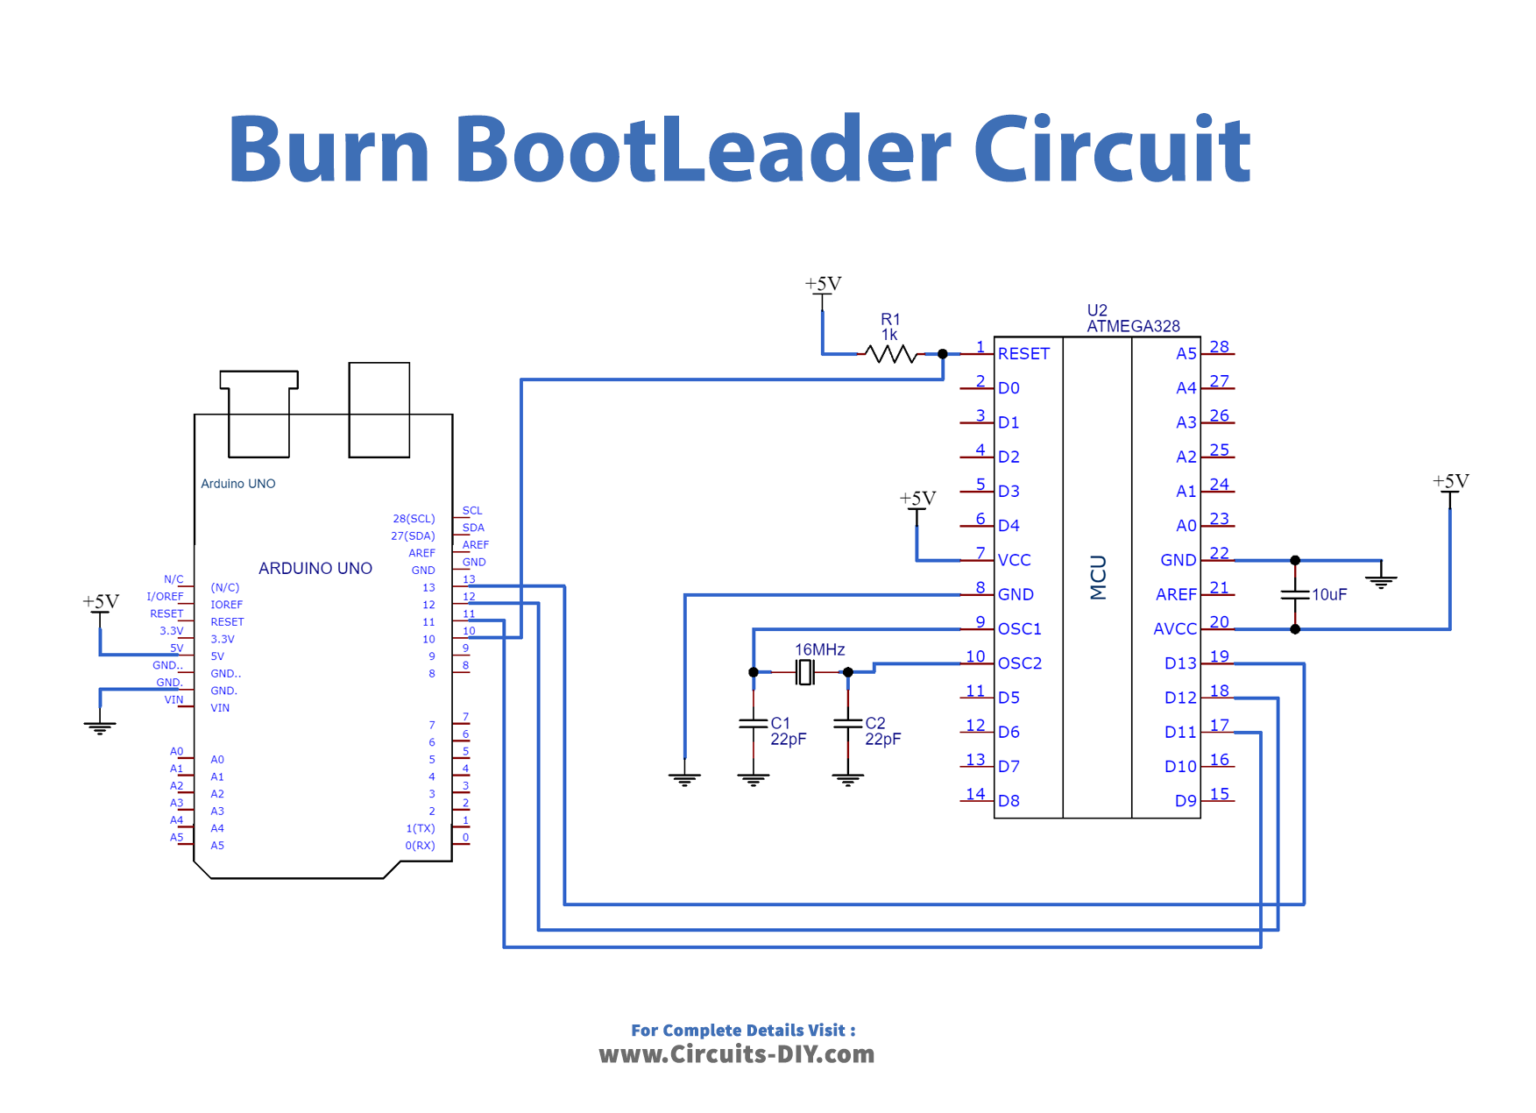
Step 2 – Burn Bootloader
Now, let’s imagine the chip doesn’t have the bootloader (virgin chip). For that, you have to make the next connections from an Arduino UNO. These are the SPI pins, CLOCK, MISO, and MOSI.
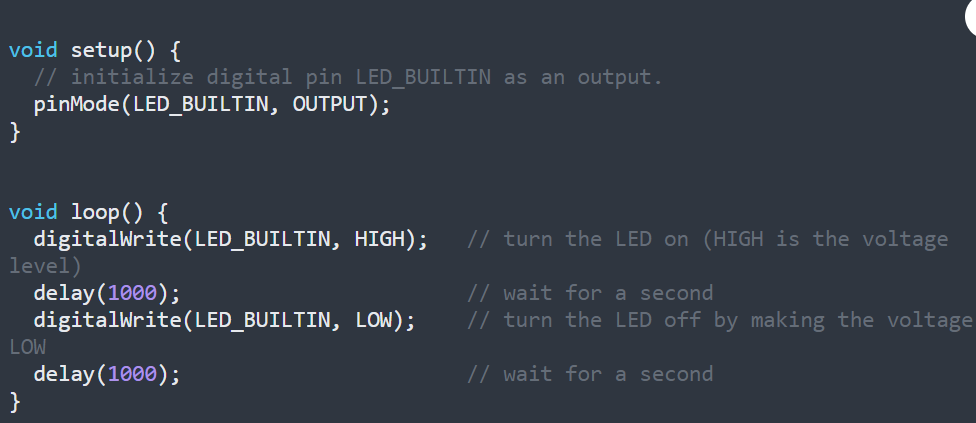
Step 3 – Upload a Test code
Before Uploading a test code you first need to Install FTDI Module Drivers. Download FTDI 232 Driver and Install It according to your operating system.
Now, we have the bootloader so we can communicate with the RX and TX pins and upload a code. For that, we need an FTDI module. Make the next connections and Upload this code to our designed Arduino board. If LED is blinking so it means you have successfully designed your own custom Arduino board.
Test Code