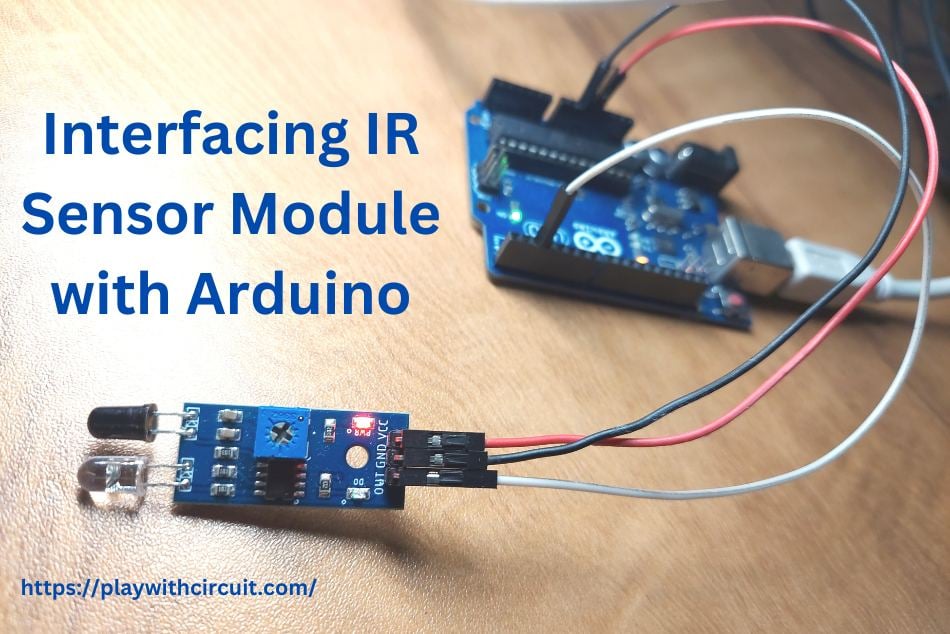
In this project, we’ll connect an IR proximity sensor module to an Arduino Uno and use its digital output to detect whether an object is near the sensor.
An IR proximity sensor is one of those simple components that can be useful in many Arduino projects. It can detect a nearby object without making physical contact, which makes it useful for applications such as obstacle detection, robotics, automation, and object counting.
In this project, we’ll connect a common IR proximity sensor module to an Arduino Uno and use its digital output to determine whether an object is close to the sensor.
How the IR Sensor Works?
The sensor module uses two main components: an IR LED and an IR receiver. The IR LED continuously emits infrared light. When an object comes within the detection range, some of that light is reflected back toward the receiver.
The amount of reflected IR light changes with the object's distance. The sensor's circuit processes this change and produces a digital signal that the Arduino can read.
This module typically operates from 3.3V to 5V and has a detection range of approximately 2 to 10 cm, with a detection angle of around 35°.
A small trim potentiometer on the module allows you to adjust the detection distance or sensitivity. The board also has two indicator LEDs: one for power and another for the sensor output.
Project Setup
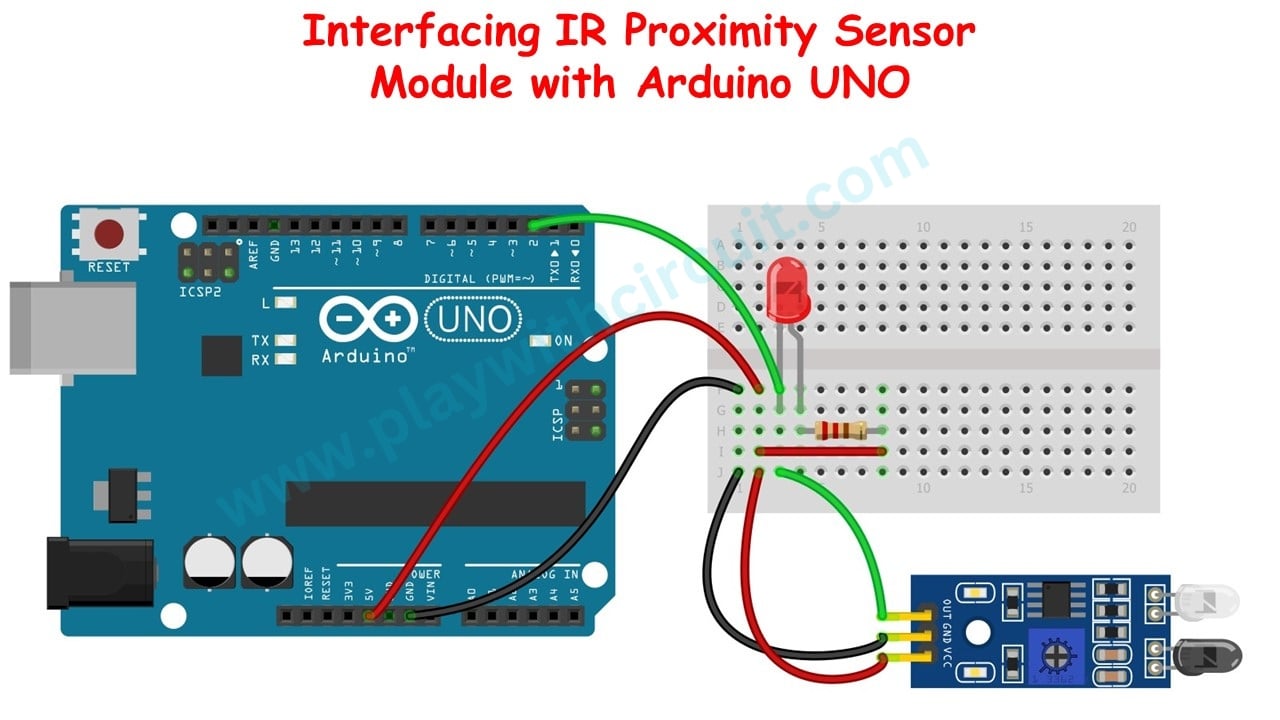
The connection between the IR sensor and Arduino Uno is simple. The sensor needs power, ground, and one digital connection for its output.
The IR sensor provides a LOW output when an object is detected nearby and a HIGH output when the object is far away.
IR Sensor to Arduino Uno Connections
- VCC → Arduino 5V
- GND → Arduino GND
- OUT → Arduino Digital Pin 2
The OUT pin is the important connection for the Arduino because it carries the sensor's digital detection signal.
Understanding the Sensor Output
The module uses an LM393 dual comparator to convert the signal from the IR receiver into a digital output.
In the circuit, the second comparator is used. Its positive input is connected to pin 5, while its negative input is connected to pin 6. The comparator output is available at pin 7, which is connected to the module's OUT pin.
When the object is far away, the receiver gets very little reflected infrared radiation. The voltage at the positive input is approximately 5V and is higher than the voltage at the negative input. The comparator therefore produces a HIGH output.
When an object moves close to the sensor, more infrared light is reflected back to the receiver. The voltage at the positive input becomes lower than the voltage at the negative input, causing the comparator output to become LOW. The module's signal LED also turns on.
So, the basic logic is:
Object near → LOW
Object far → HIGH
Connecting the IR Sensor to Arduino
With the sensor powered from the Arduino's 5V supply, connect its ground to Arduino GND and its OUT pin to digital pin 2. Once connected, the Arduino can monitor pin 2 and respond whenever the sensor detects an object. For example, the same basic setup can be extended to control an LED, activate a motor, trigger an alarm, or become part of a larger automation project.
The adjustable potentiometer is useful during testing because you can fine-tune the distance at which the sensor changes its output.
Final Thoughts
This is a simple project, but it demonstrates an important concept used in many larger electronics systems: converting a physical event—in this case, an object approaching the sensor—into a digital signal that a microcontroller can use.
Because the IR module only requires VCC, GND, and OUT, it is particularly easy to experiment with using an Arduino Uno.
For the complete original tutorial, including the detailed circuit, Arduino code, and additional explanation, see:
Interfacing IR Sensor Module with Arduino