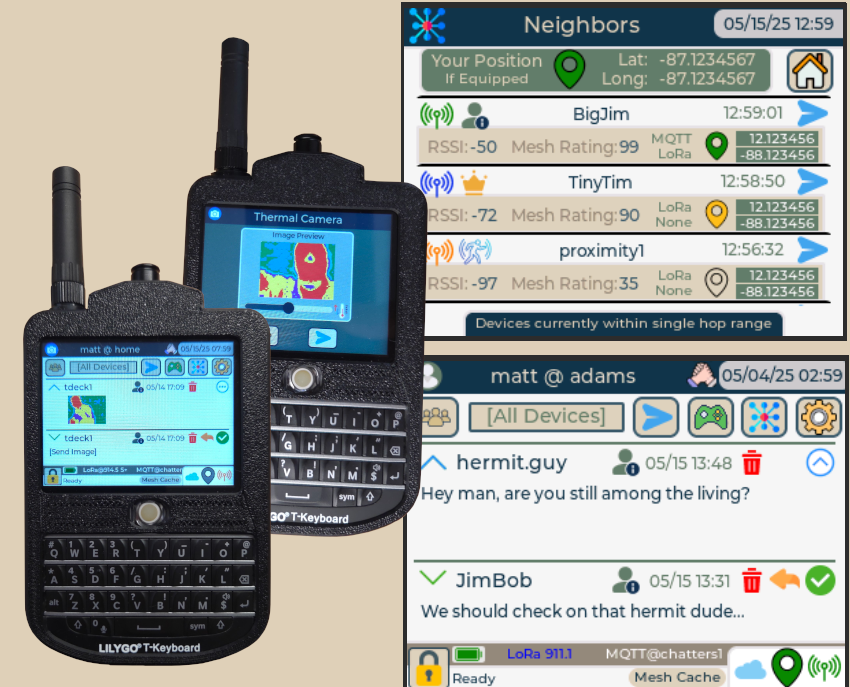
We will build a thermal camera, off-grid encrypted texting device, and location-sharing device. Our platform is Lilygo's T-Deck, along with an Adafruit thermal cam, and a few other components.
You'll be able to securely text, track, and share thermal images with other trusted devices in your private cluster. Communication is via mesh over LoRa.
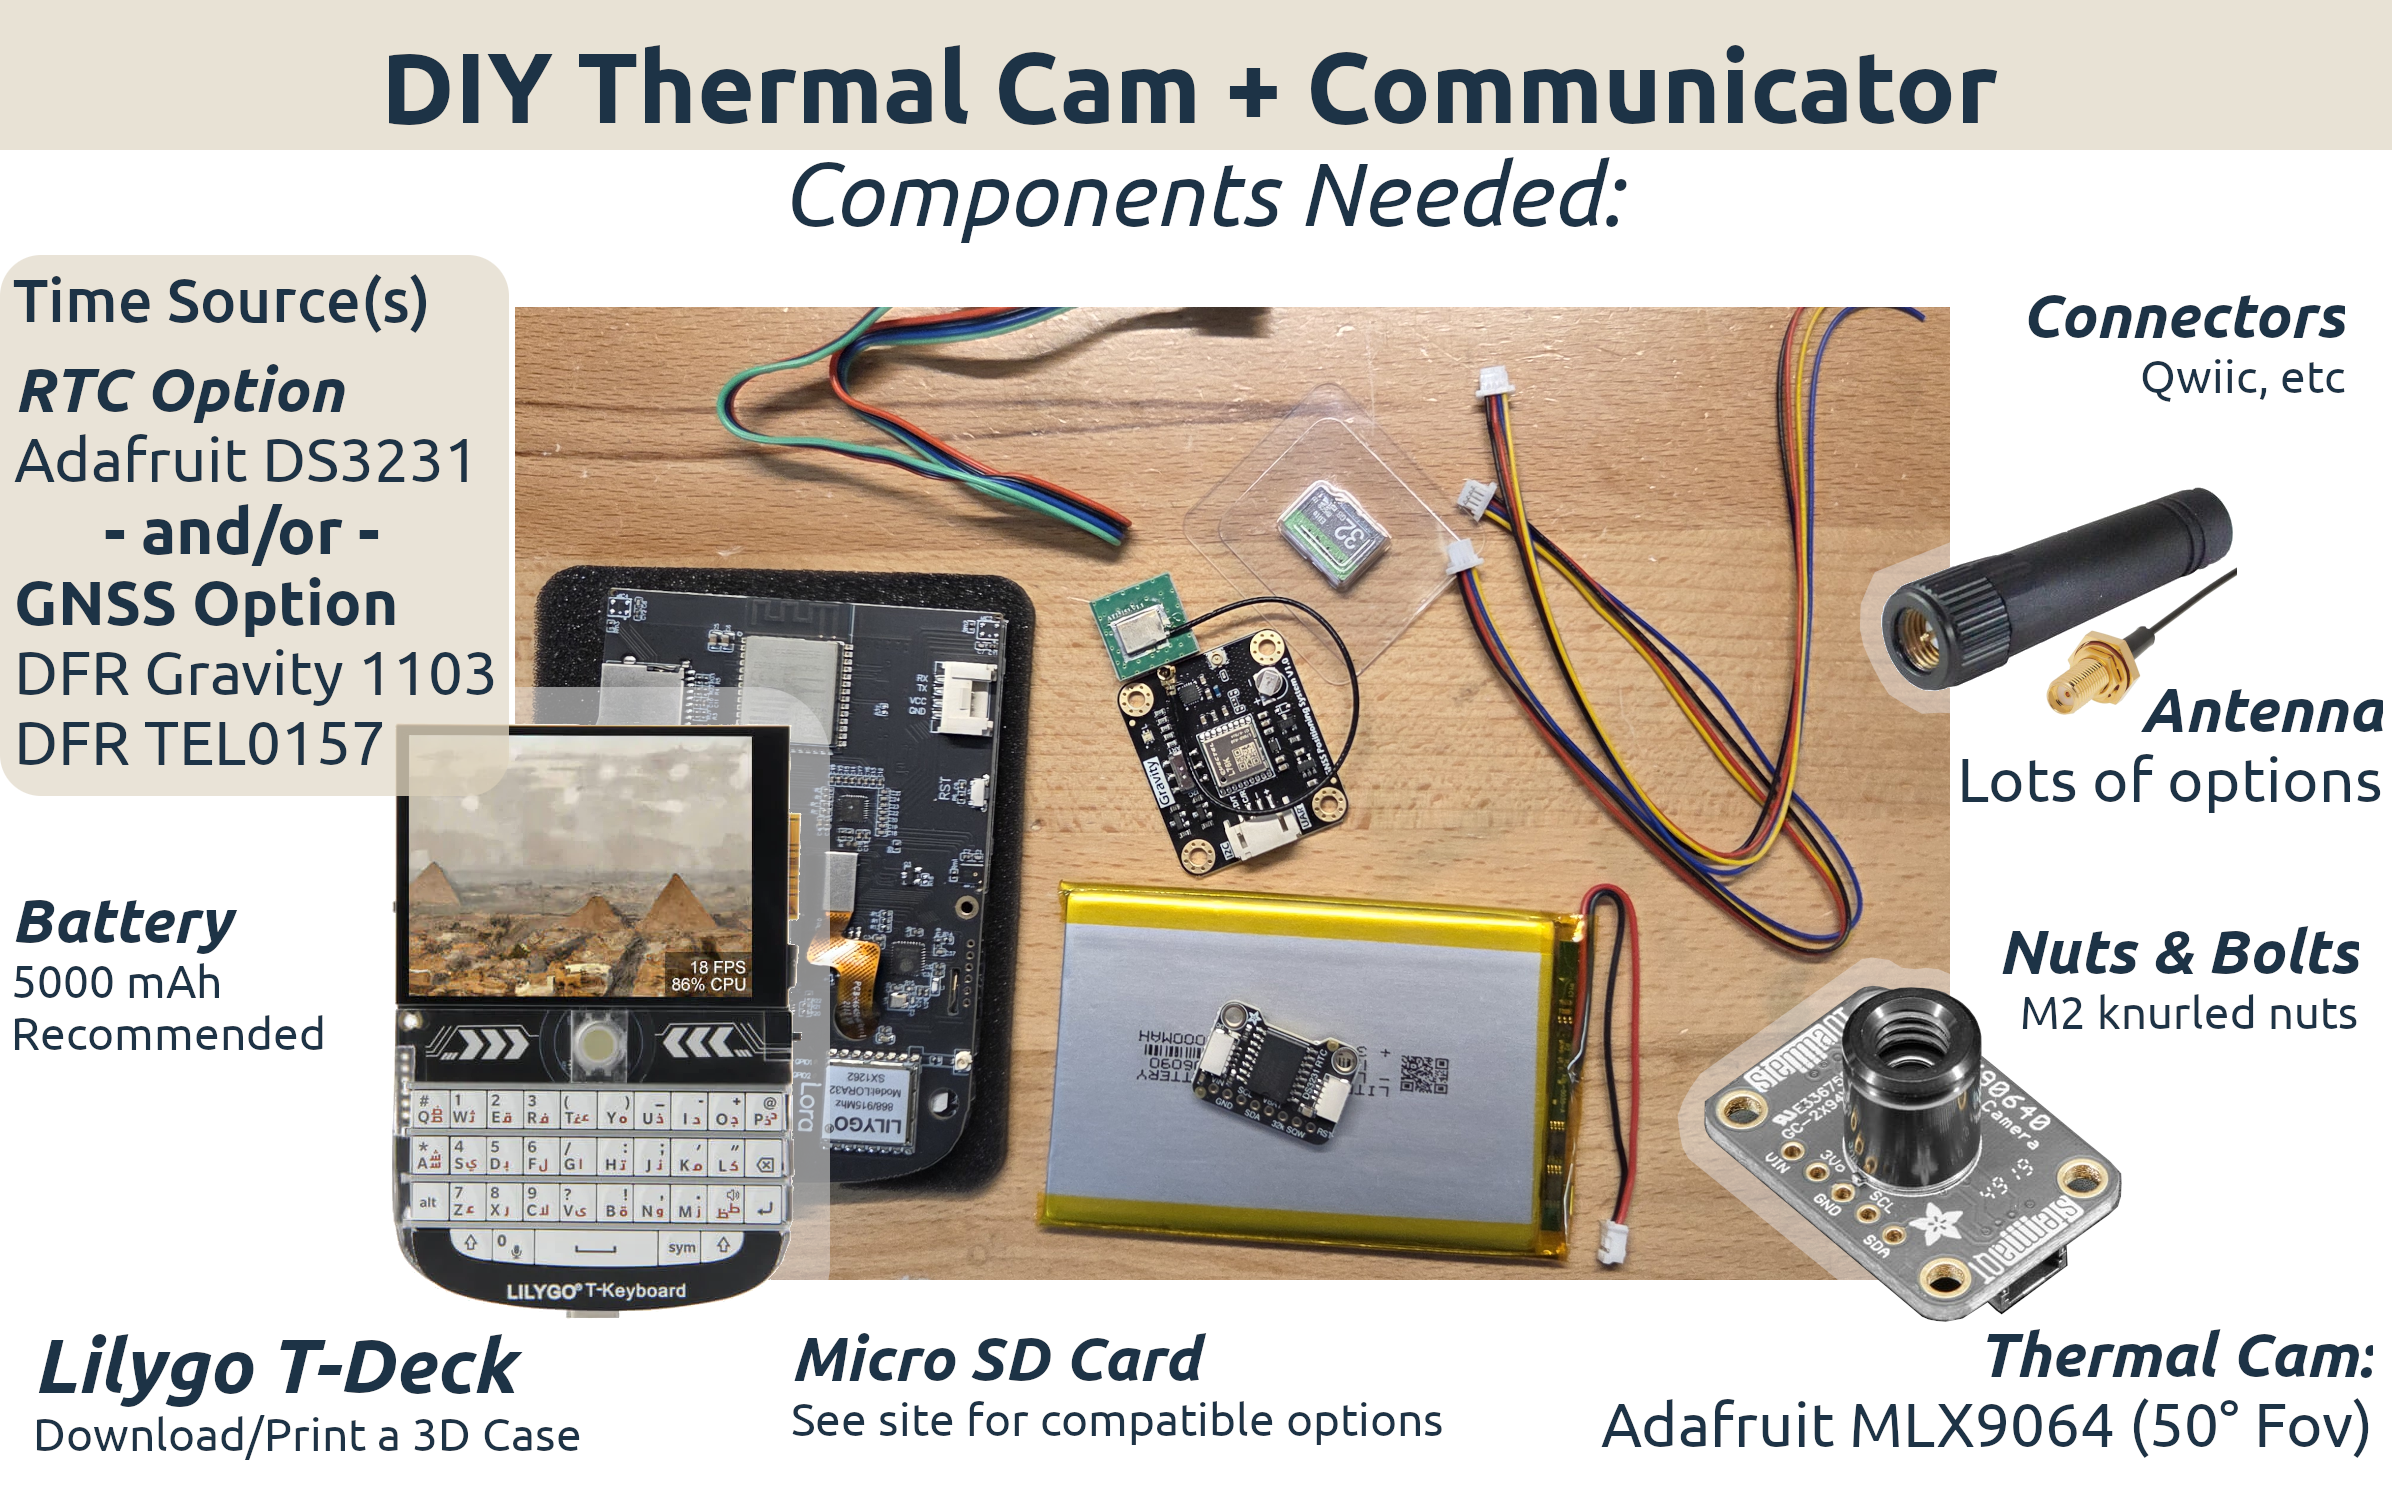
Parts List
Direct links to all parts in this project (Amazon, Lilygo, etc) can be found in the attached PDF.
Accurate Time Source
You do have some options as far as component. ChatterBox firmware requires at least one time source. That time source can be a compatible GPS module, a DS3231 realtime clock...or better yet, both.
Encrypted Storage
ChatterBox stores encrypted data on either a compatible SD card or on the T-Deck's flash storage. SD card is highly recommended, as it allows you to transfer your identity/data over to any other T-Deck, simply by swapping the SD card like a SIM card.
If you stick with flash storage, if the device ever croaks, you will lose your data...which may or may not matter to you.
Antenna
This can be fun to experiment with. If you get fancy with well-placed antennas (and even amps) you can get some impressive connectivity. I routinely have connectivity at > 20 miles in the midwest between locations that have nothing but air between. Since these devices mesh (and cache), you don't necessarily need direct connectivity to push a message to someone. Messages can be delivered synchronously or asynchronously (up to 24 hours).
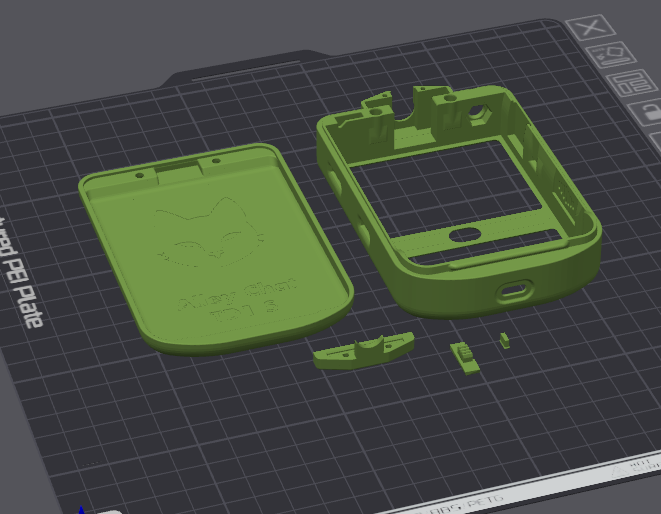
3D Print a Case
I slightly modified a case that was designed by AlleyCat (excellent case!). I'm sorry to say, I don't have the 3D design skills she does, but luckily I didn't have to change much. All I did was make space for a grove connector and an area for the Adafruit thermal cam to be.
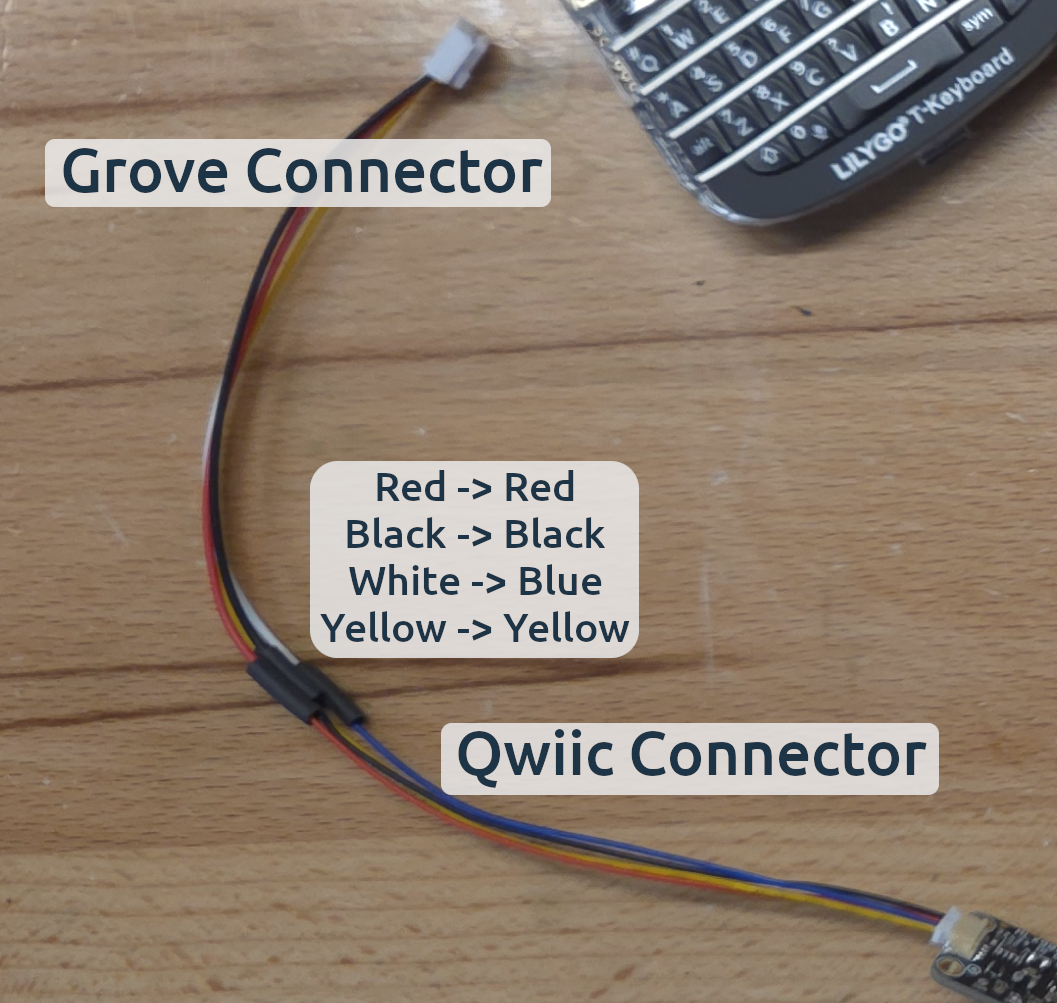
Make a Grove / Qwiic Connector or Use the Adafruit Adapter
Adafruit makes a Grove / Qwiic adapter that would work here (mentioned in the parts list), but I didn't have one at the time, so I just went ahead and cut a Grove 4-Pin cable and Qwiic 4 Pin cable, making one myself. The mappings are shown in the image.
If you have the Adafruit Grove / Stemma QT / Qwiic adapter cable, you do not need to make this cable, just use the Adafruit cable.
Yellow/Clk → Grove Yellow → T-Deck RX
Blue/Data → Grove White → T-Deck TX
Red → Red → T-Deck VCC
Black → Black → T-Deck GND
Make a DFRobot Qwiic Adapter
If you are not adding GPS, but just relying on the DS32320 realtime clock, you do not need to do this. However, it's very nice having GPS for a variety of reasons, including not having to set the time.
As soon as you add another communicator or node to your private cluster, the devices will automatically be able to track and locate one another (unless you disable that feature).
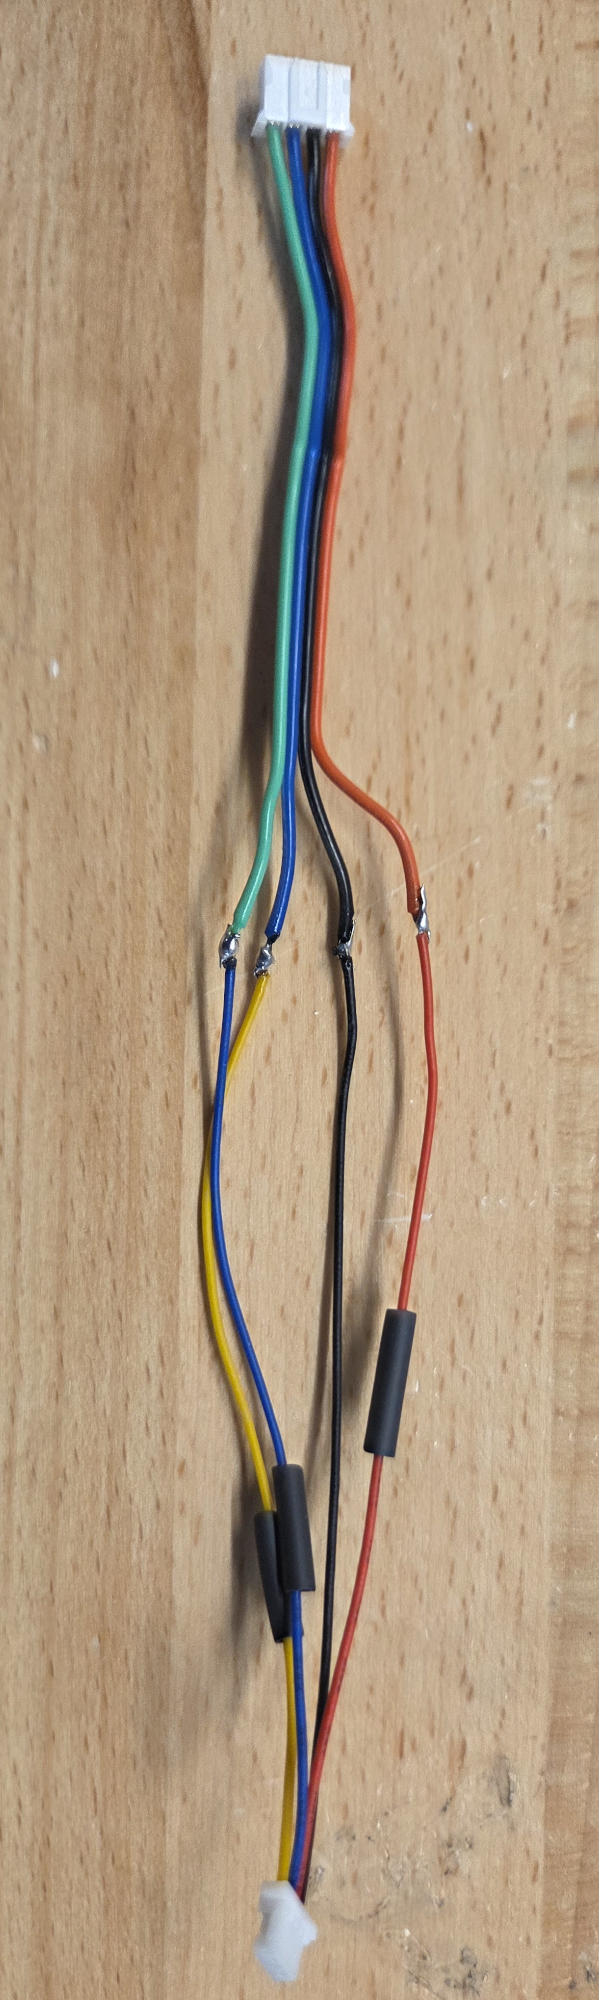
Create an adapter wire that will allow the DFR cables to attach directly to any Stemma/Qwiic plug. I heat-shrink wrap the connections (they must be insulated). This one there is no pre-made adapter I could find, so you'll have to make this one if you want GPS.
Qwiic Yellow/Clk → DFR Blue/Clk
Qwiic Blue/Data → DFR Green/Data
Qwiic Red → DFR Red
Qwiic Black → DFR Black
Prepare the DFRobot GNSS
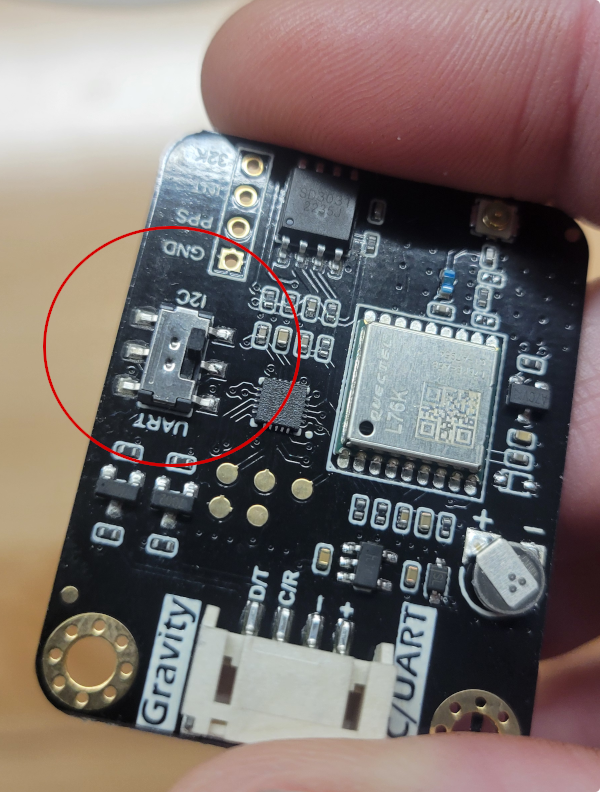
Move the DFR’s switch to IIC, and then use a wire cutter/clipper to clip the long plastic switch much shorter. It will just be in the way later on if you don’t.
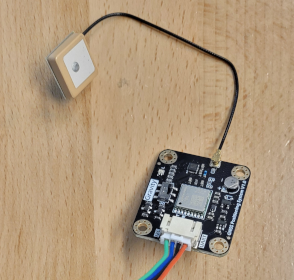
Also, attach the GPS antenna, as well as the cable you just made.
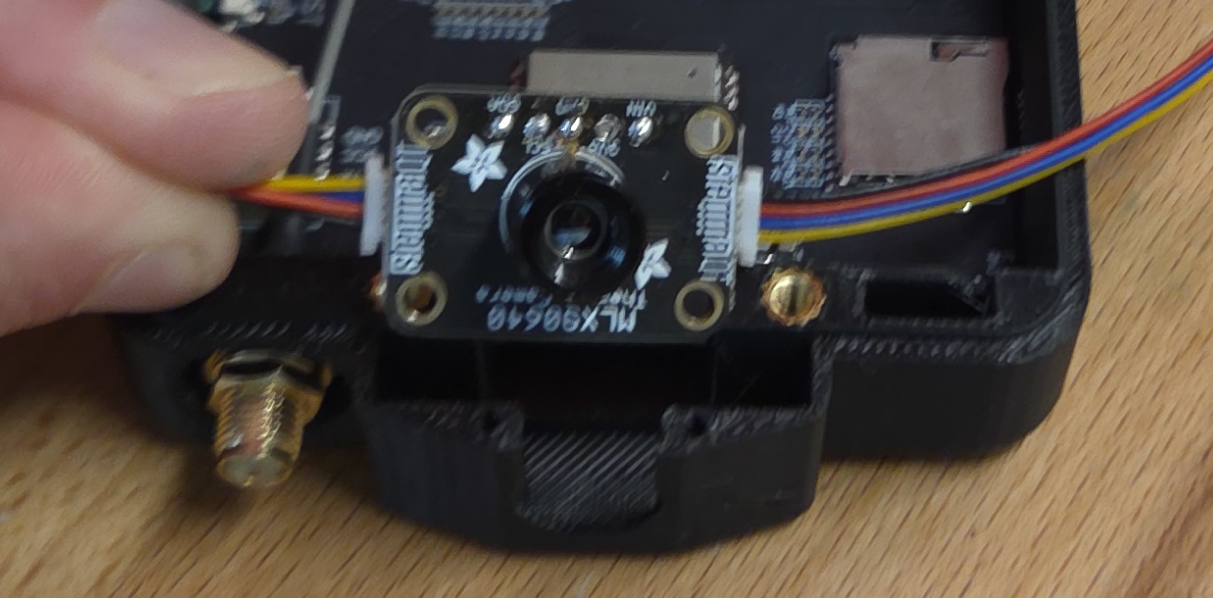
Add Enclosure's Knurled Nuts and Switch Covers
Insert the power switch cover and reset button cover into the T-Deck enclosure. You may need to trim the button areas of the enclosure slightly so the switches slide easily.
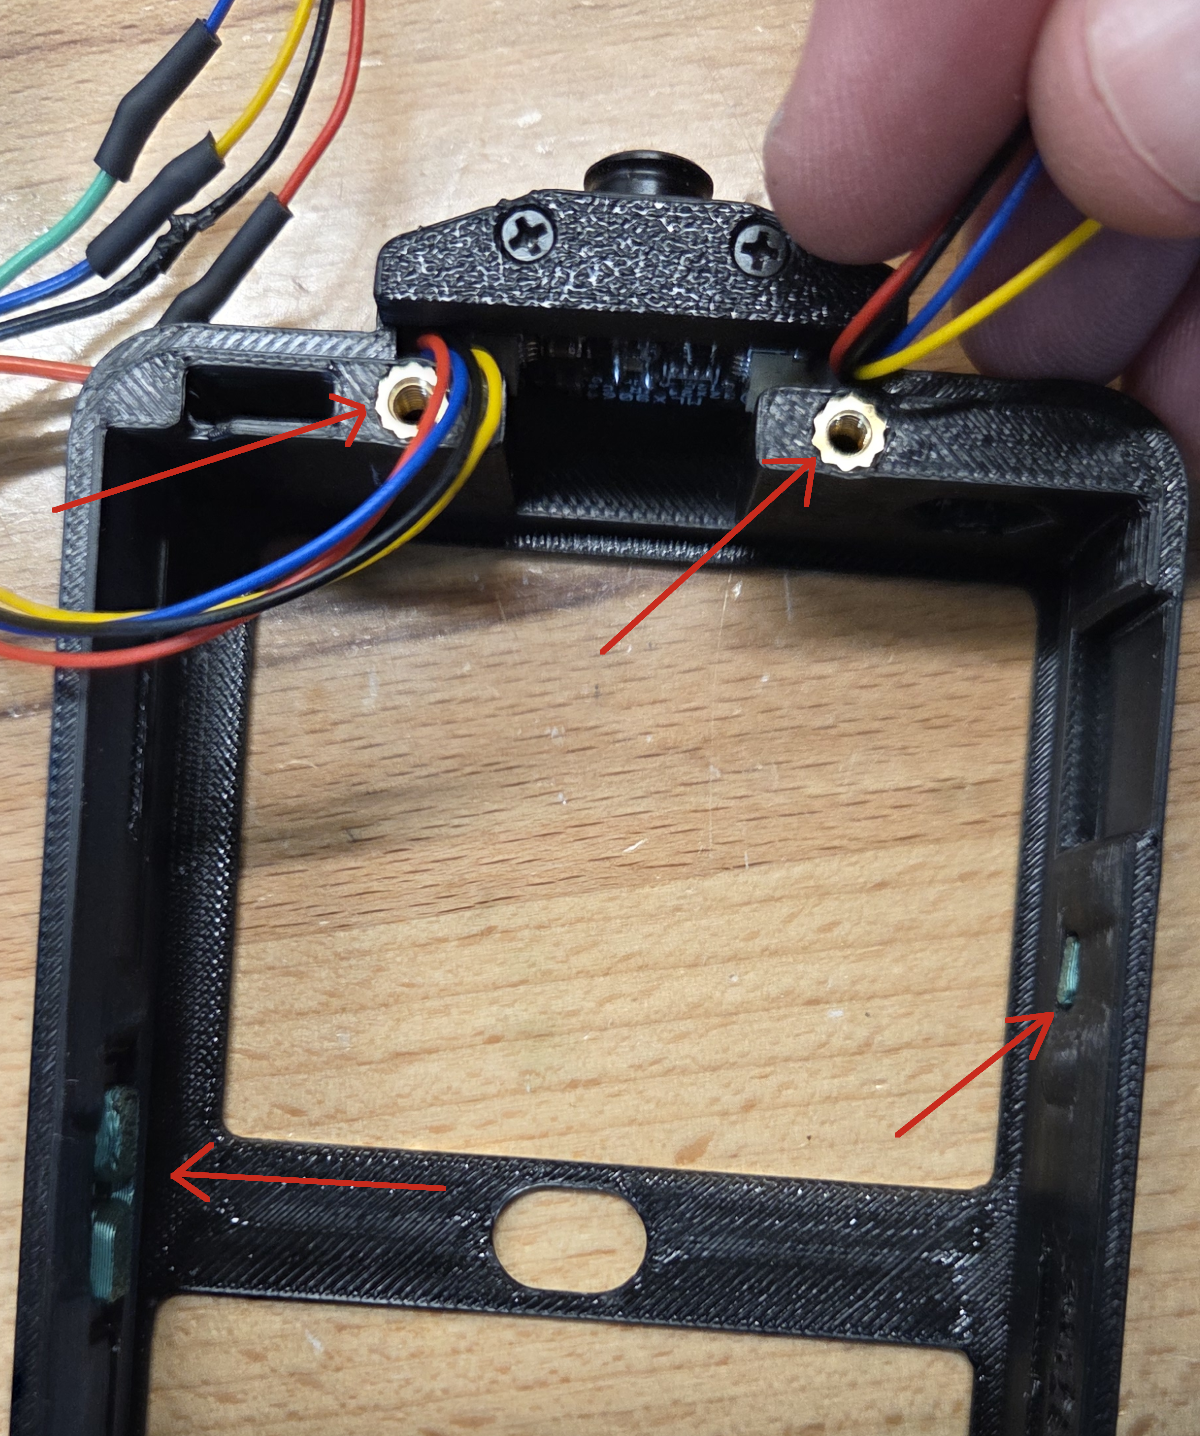
Insert the two heat-sink nuts into the enclosure. A special soldering tip makes this extremely easy, but you can also use a heat gun and apply pressure with a phillips screwdriver.
Finally, add the thermal cam (upside down as shown) and attach the cover tiny laptop screws. The second image shows the T-Deck inserted, but don't do that yet, I'm just showing how you should orient the thermal cam.
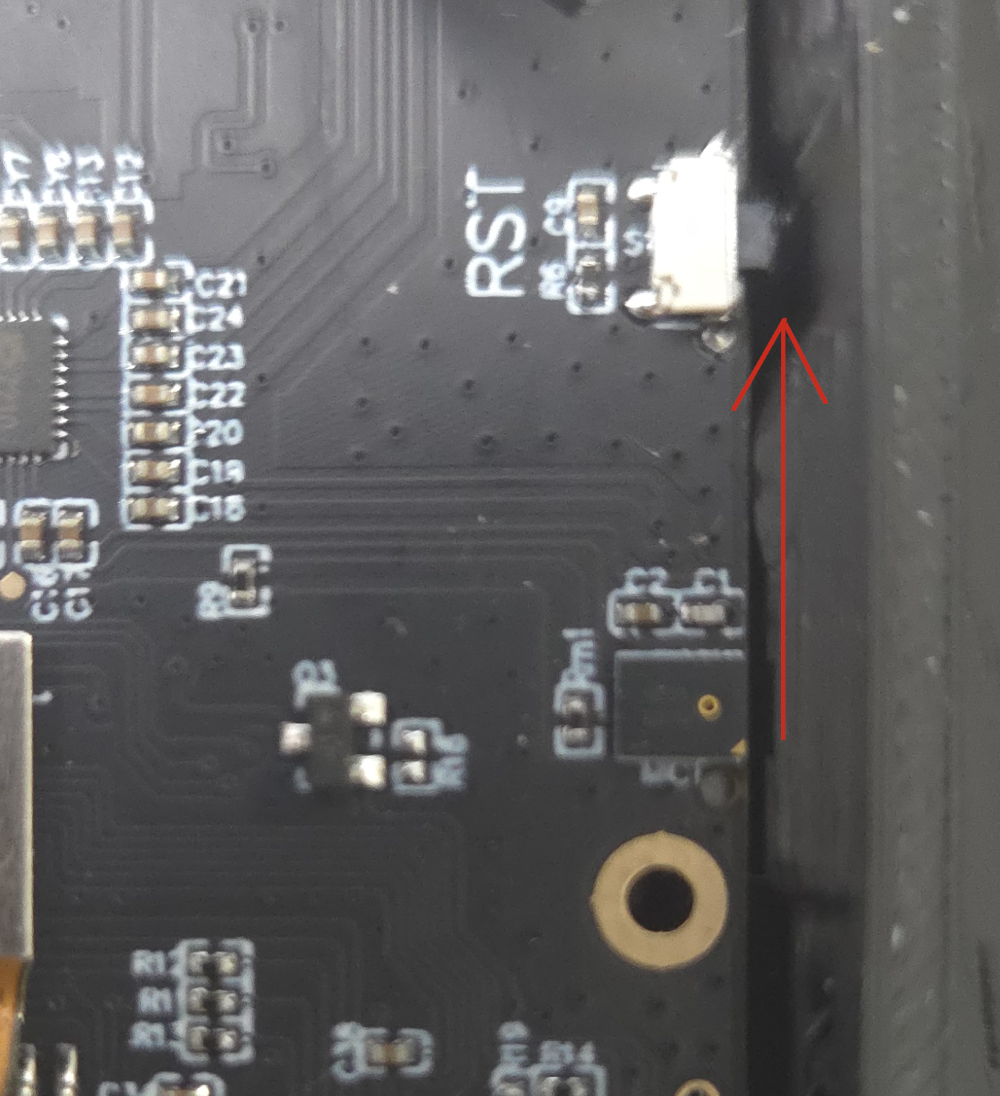
Clip the T-Deck's Reset Button
I don't know why it's so long, but if you leave it like that, the enclosure's reset button will press into it and make you think the T-Deck is dead, when really it's just having its reset button held constantly.
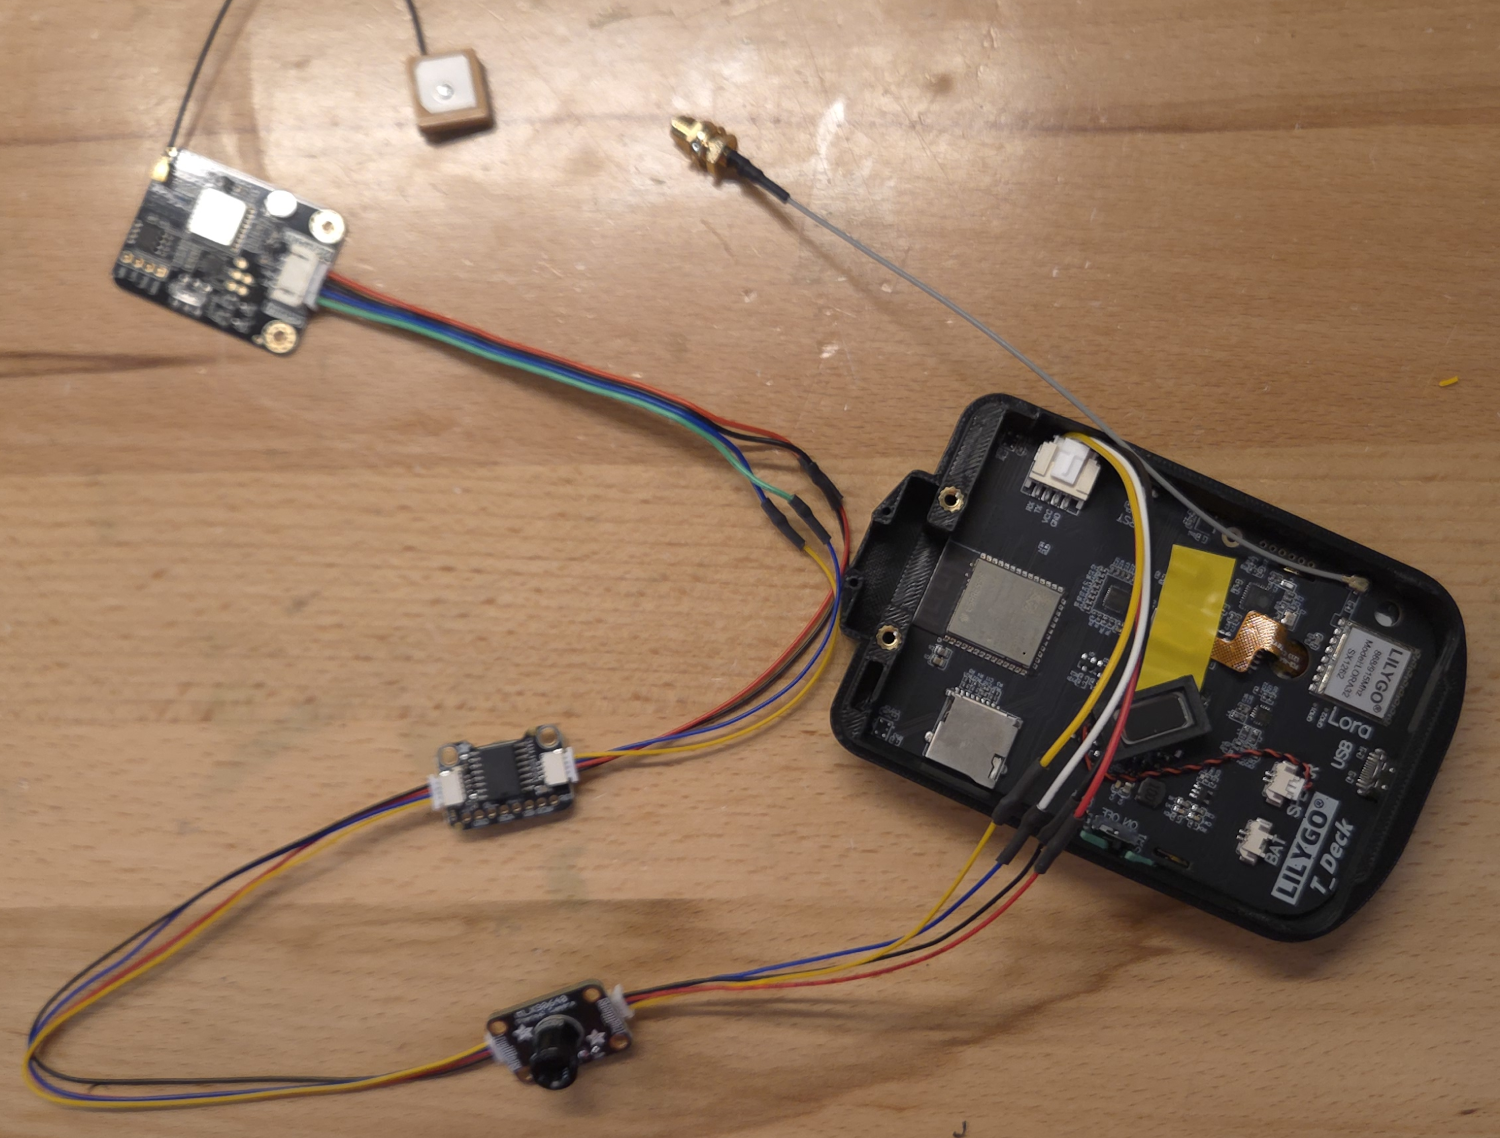
Connect Components to T-Deck & Insert the T-Deck
- Plug the Grove Connector into the T-Deck.
- Remove the T-Deck Screen Protector.
- Insulate metal surfaces of the GNSS and RTC, using electrical tape. Insulate the metal surface of the GNSS, as it could short the thermal camera when inserted.
- Finally - Insert the T-Deck as shown (without breaking it).
This is tricky, you’ll have to align the USBC port of the T-Deck to the enclosure, and then carefully wedge the top of T-Deck into place. You’ll have to slightly pry apart the edges and top of the enclosure to make room, while not applying too much pressure to the T-Deck screen...all while making sure the enclosure button covers don’t fall out.
Now, pack all those components and wires into the back of the T-Deck enclosure, while still leaving room for that LiPo battery.
The arrangement show below works pretty well. I sometimes use electrical tape to hold wires down until they eventually learn their place.
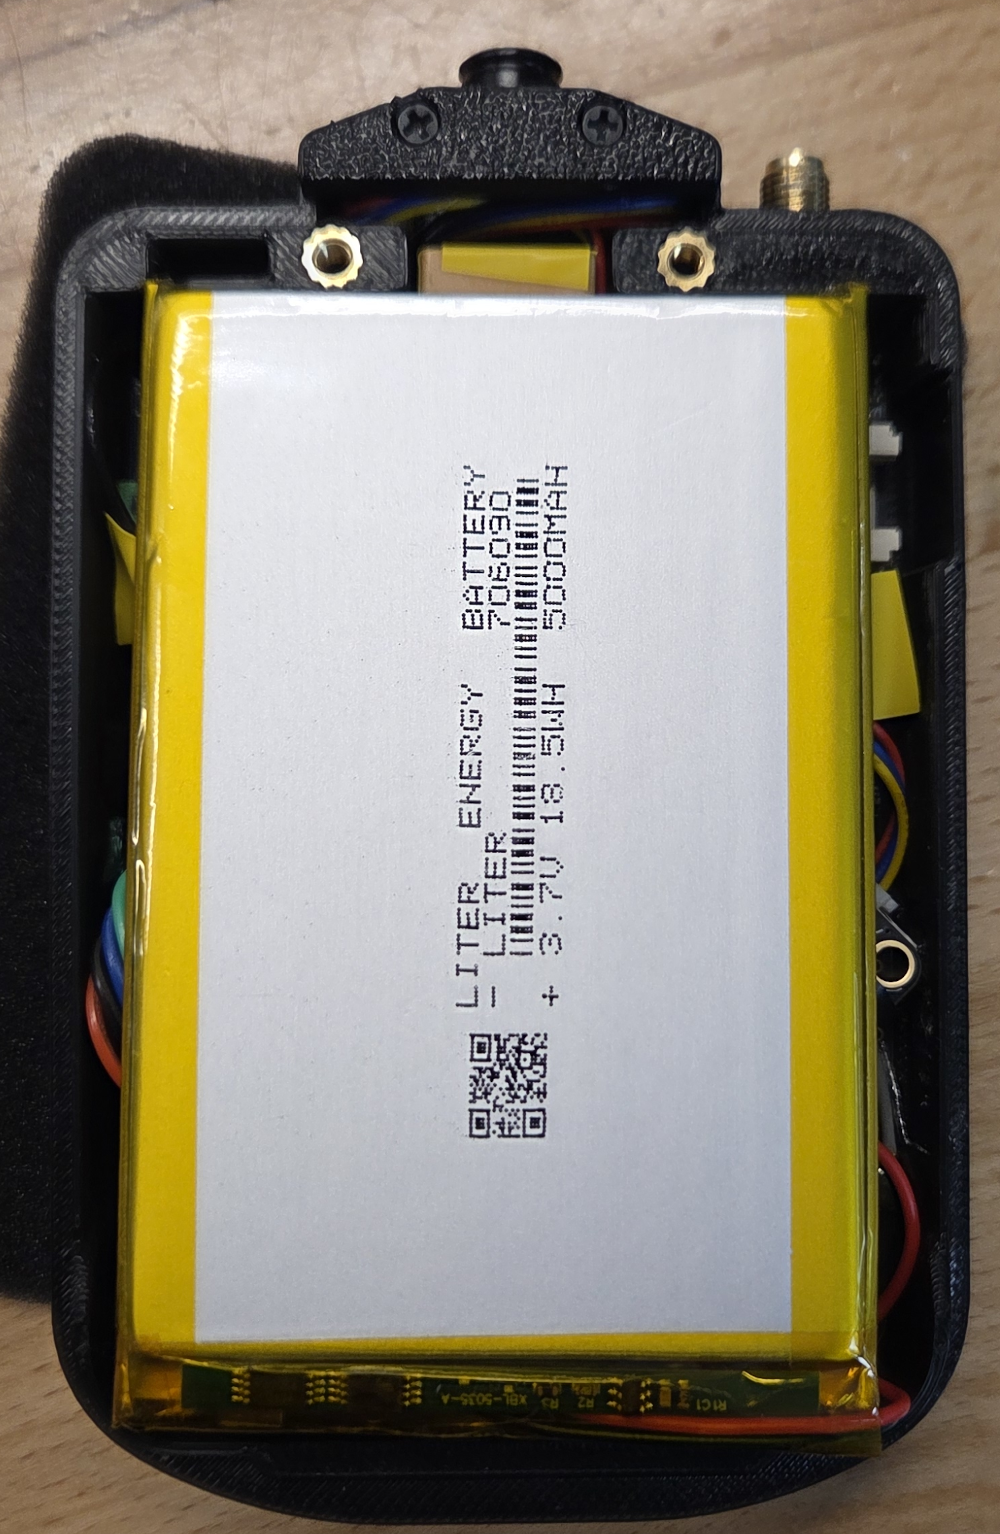
Add the Battery
Pay special attention to battery polarity vs T-Deck polarity!
For my particular battery and T-Deck, the adapter shown on the right matches up perfectly, as it switches the T-Deck’s polarity to match the battery. Yours may be different! Do not connect any battery to the T-Deck unless you are sure the polarity is correct, or you could ruin the T-Deck or worse.
When I buy LiPo batteries from Amazon, it seems like the polarity is randomly selected for me, so I'm not kidding, double-check this. It would be terrible to get this far and then smoke the thing.
Attach the Enclosure Cover & LoRa Antenna
Attach the enclosure’s back using a couple of M3 screws.
Insert a compatible SD card.
Now you are ready to flash the firmware.
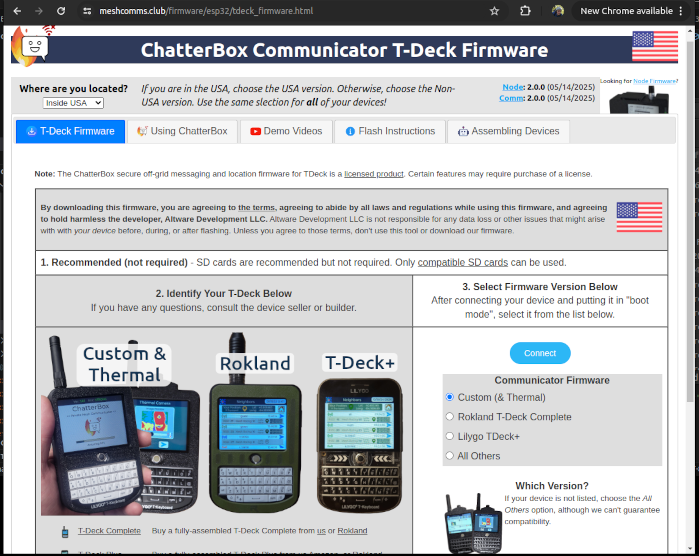
Flash ChatterBox Firmware Onto the T-Deck
This is pretty straightforward, you just connect the T-Deck via USB to your computer, point Chrome (or other supported browser) at the ChatterBox firmware flash page, choose your device, and continue.
It should finish so you can restart the device and select your time zone / etc.
Build More Devices
You now have a one-device cluster. Assuming you want to be able to securely text off-grid, do tracking, and other things, you will want more devices. The easiest way is to either build more, get yourself a T-Deck+ (you can buy these straight from Amazon or other sources), and maybe build a node or two, and put some nice antennas on them.
The more devices you add to your private cluster, the more resilient it becomes.
You can learn more at the ChatterBox website or on the YouTube channel.
Watch Me Build One