Created a touchless Covid Free Electronic Dice using Arduino to play some board games with my son.
Created a touchless Covid Free Electronic Dice using Arduino to play some board games with my son.
My new project is an amazing way of giving our younger generation the taste of board games while staying COVID free.
Total cost: AU$12
Time taken: 4hrs
For this project we need:
1 x Push Button Switch
1 x Arduino Nano R3 (or ESP8266)
1 x 8x8 Led Matrix with MAX7219 IC
1 x Step Up Power Module [MT3608]
1 x IR Sensor
1 x AA Battery Holder and Batteries
and Some Connecting Cables
Using a Step Up Power Module connected to 2 x AA batteries I am powering up the Arduino Nano.
In my logic, I am using an IR Module to send interrupts, which changes the face of the dice which is then displayed using a 8x8 LED Matrix.
If you want to know more about the DIY IR module please check out my "Tutorial No. 21: DIY - IR Module". Link is in the description below.
Video: https://youtu.be/_M8FQIPi1qk
Blog : http://diy-projects4u.blogspot.com/2020/10/diy-ir-module.html
If you want to change the face of the dice by shaking it, you can use a tilt sensor to generate the interrupts.
If you want to store the results in a database, you can use a ESP8266 board and send the result over WiFi and store it in a database.
The possibilities are endless, however, I just want to keep my circuit simple.
The code is very simple.
Lets start by including the "LedControll.h" library. I have included the link to the library in the description below.
Next, lets define all the pins that we are going to use in our code.
After that, you will find few functions that work in combination to generate the dice faces and the dice animation.
In the setup() section, we are setting up the pinMode of the IR Sensor and initializing the display. We are also showing the initial animation where in my case, number 6 flies from right-to-left and fills up the led display.
In the loop() section I am reading the IR sensor to check if someone has moved their hand over the sensor module. If a motion is detected, then a random number between 1 and 6 is generated, and based on that the face of the dice changes using ShowDicePic() function.
Now lets create the body of the dice.
From a broken piece of chipboard, I extracted the 6 sides of the dice.
Next, using a double-sided tape I attached the AA battery holder to the bottom of the dice. Then, I soldered the step-up converter to the AA battery holder.
The step-up boost converter has to be adjusted to approximately 5V before installation by twisting the variable resistance in it.
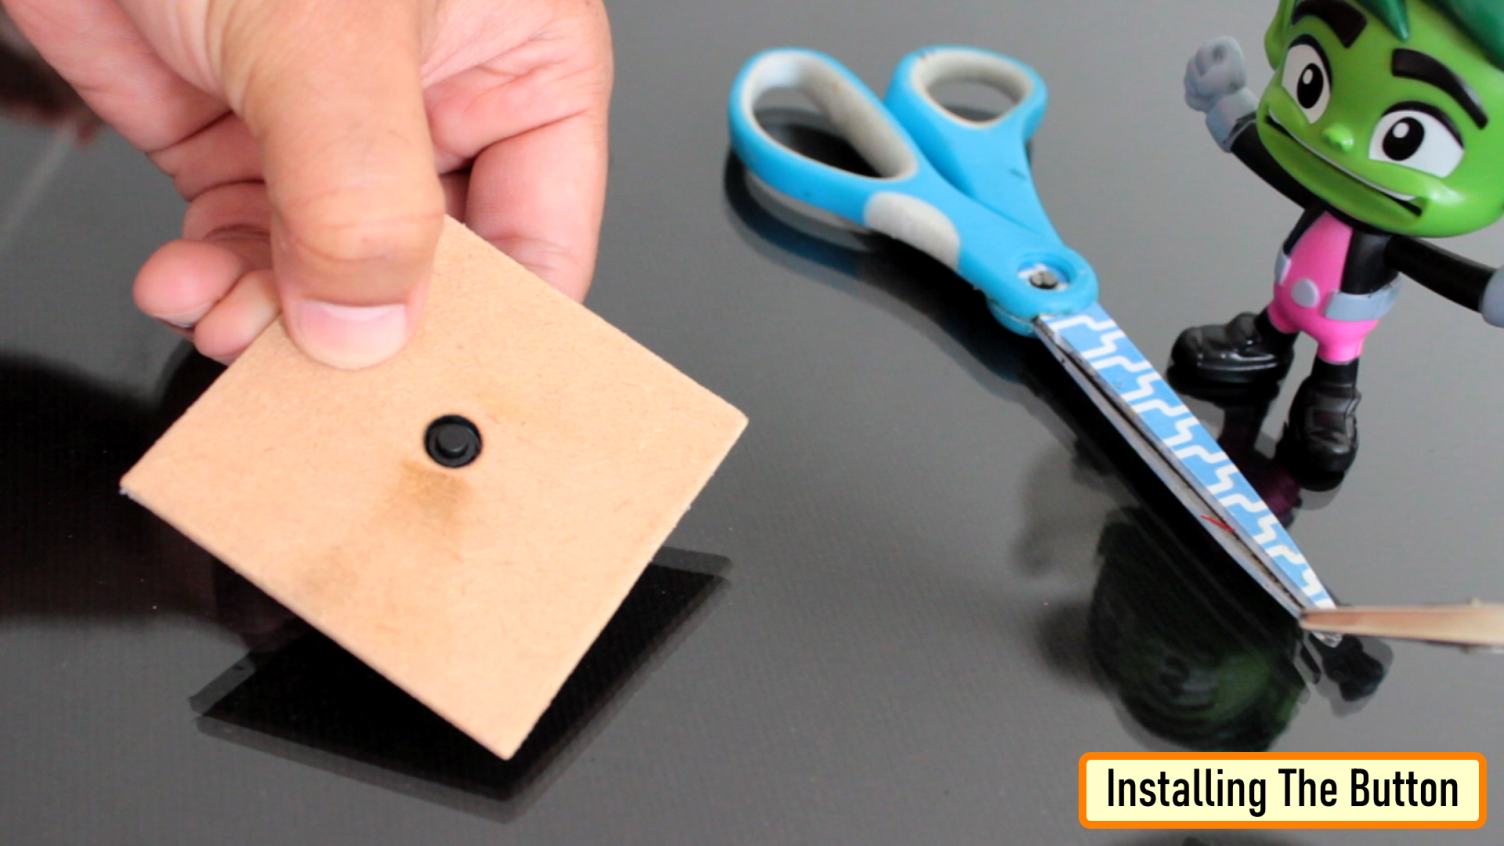
I made a hole on one of the sides for the push button switch, and then glued the push button switch to it.
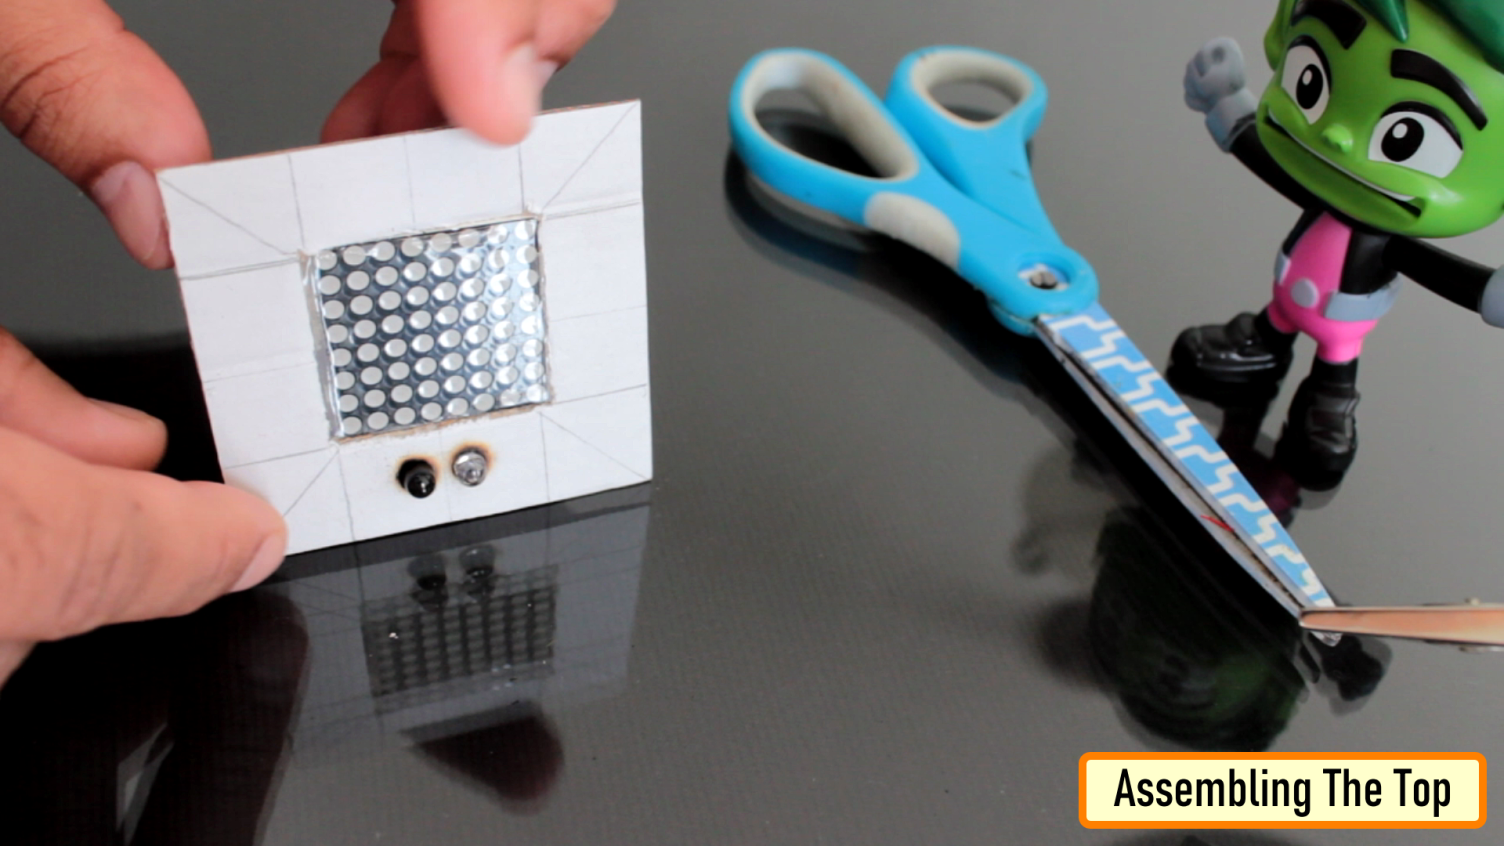
I hot-glued the 8x8 LED matrix to the top section of the dice. 8x8 LED matrix with MAX7219 driver IC, is a very cheap, easy to code and it takes up very little space in your project. The top section also has the IR transmitter and receiver LEDs. Pretty much I hot glued them all and then attached them to a Arduino Nano.
Then, I made 4 holes on the bottom plate and attached the all the sides to it.
Lets do a quick test before finalizing the project. Looks promising, isn't it?
Cool, so this is how my final setup looks like. I covered the LED Matrix with a translucent black sheet.
Let me know what you guys think of this project. If you have any suggestions or advises please feel free to drop a comment below.
Thanks
Thanks again for checking my post. I hope it helps you.
If you want to support me subscribe to my YouTube Channel: https://www.youtube.com/user/tarantula3
Blog Posts:
1. Arduino Dice : https://diy-projects4u.blogspot.com/2021/10/arduino-dice.html
2. DIY IR Module: http://diy-projects4u.blogspot.com/2020/10/diy-ir-module.html
Video references:
1. Arduino Dice : https://www.youtube.com/watch?v=a4CnaDDR2x0
2. DIY IR Module: https://www.youtube.com/watch?v=_M8FQIPi1qk
Schema: https://drive.google.com/file/d/168eiuHINb_5dGh9wBQ1qDsTv3bXY39Hj/view?usp=sharing
Code : https://drive.google.com/file/d/1jLRFUFD3P037GIfAIZJU2GpHcbZOxgpc/view?usp=sharing
LedControll.h : https://drive.google.com/file/d/1U5SFjC8Q6bB_X8ZQeJ6Ifq7ID5iecZ0K/view?usp=sharing
Support My Work:
BTC: 1M1PdxVxSTPLoMK91XnvEPksVuAa4J4dDp
LTC: MQFkVkWimYngMwp5SMuSbMP4ADStjysstm
DOGE: DDe7Fws24zf7acZevoT8uERnmisiHwR5st
ETH: 0x939aa4e13ecb4b46663c8017986abc0d204cde60
BAT: 0x939aa4e13ecb4b46663c8017986abc0d204cde60
LBC: bZ8ANEJFsd2MNFfpoxBhtFNPboh7PmD7M2
Thanks, ca again in my next tutorial.