Smart phone controlled car equipped with an ESP32 camera!
This project is perfect for anyone keen on learning about ESP32-based devices and remote-controlled systems. We'll be using the ESP32 camera module to build a surveillance car that's not only energy-efficient but also budget-friendly. Let's get started! This project leverages the versatility of the ESP32 camera module, offering a budget-friendly, energy-efficient and easy-to-make solution. Designed with simplicity and functionality in mind, it's an ideal starting point for newcomers to start learning web controls and the WiFi functionality of ESP32. If you are an ESP32 fan you can also check out our other ESP32 projects which we built earlier.
Feature Of ESP32 Cam Surveillance Car
- Based on ESP32 Cam Module.
- Easy to build.
- No need for any additional remote control, can be controlled via web controls.
- Low-cost design.
- Easy to find components.
- Fully open source.
- Compact and Portable.
- Easy upgradability.
- Scalable.
Components Required to Build the ESP32 Cam Surveillance Car
The components required to build the DIY ESP32 Cam Surveillance Car are listed below. The exact value of each component can be found in the schematics or the BOM.
- ESP32 Camera Module Module – x1
- CH340K USB - UART controller – x1
- TP4056 Li-ion charger IC – x1
- MX1508 motor driver module – x1
- AO3401 P - MOSFET – x1
- Type C USB Connector 16Pin – x1
- LiPo Battery – x1
- N20 Motor – x4
- 44mm N20 Motor Wheel – x4
- SMD resistors and capacitors
- SMD LEDs
- Slide Switch
- Connectors
- Custom PCB
- Mounting screws
- Other tools and consumables.
Circuit Diagram
Now let’s look at the circuit diagram. The circuit itself is very simple and easily understandable. We have divided the entire circuit into different sections.
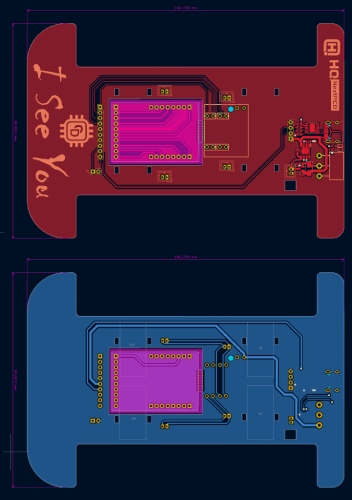
Custom PCB Design
Here is the 3D preview of the ESP32 Cam Surveillance Car.
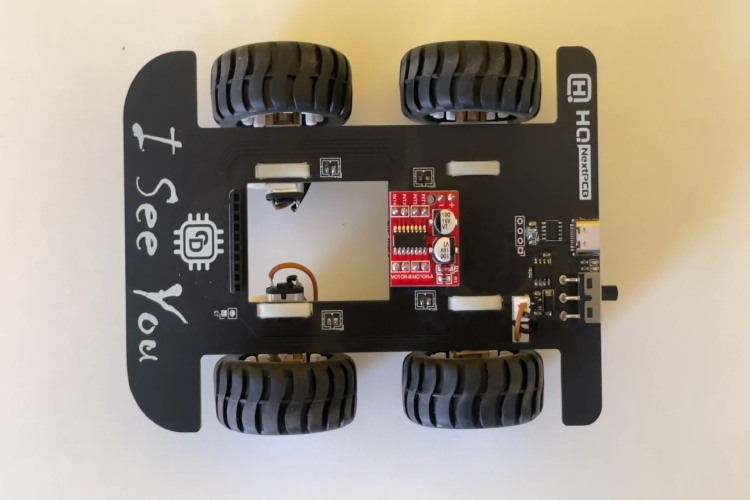
Assembling the ESP32 Cam Surveillance Car
Once the PCBs are delivered, gather all other required components and start assembling the ESP32 Cam Surveillance Car. For soldering it is recommended to use a temperature-controlled soldering station. Start with the SMD components first. Once soldered all the SMD components start assembling the modules and connectors. Once all the components are soldered, plug in the modules connect to the PC and make sure you are able to communicate with the the ESP32 Cam module. Now secure the N20 motors to the PCB using cable ties, utilizing the holes provided in the PCB. Do the same for the battery. Make sure everything is secured and then couple the wheels to the motor shafts. Here is the image of a fully assembled ESP32 Cam Surveillance Car
Using ESP32 Cam Surveillance C
Once the code is compiled and uploaded to the ESP32 Cam module, turn the switch off and disconnect it from the PC. Now connect all the motors to the PCB using the provided connectors. Then switch on the ESP32 Cam Surveillance Car using the slide switch. The ESP32 will create an access point with the SSID and password provided in the code. The default SSID and Password are ‘circuitdigest’. Connect your smartphone to the access point using these credentials. Once connected, open any browser on your phone and navigate to 192.168.4.1. It will open up a web page with the video stream and control buttons.