Learn how to control servo motors using an Android app on a mobile device, an Arduino UNO, and an HC-06 Bluetooth module
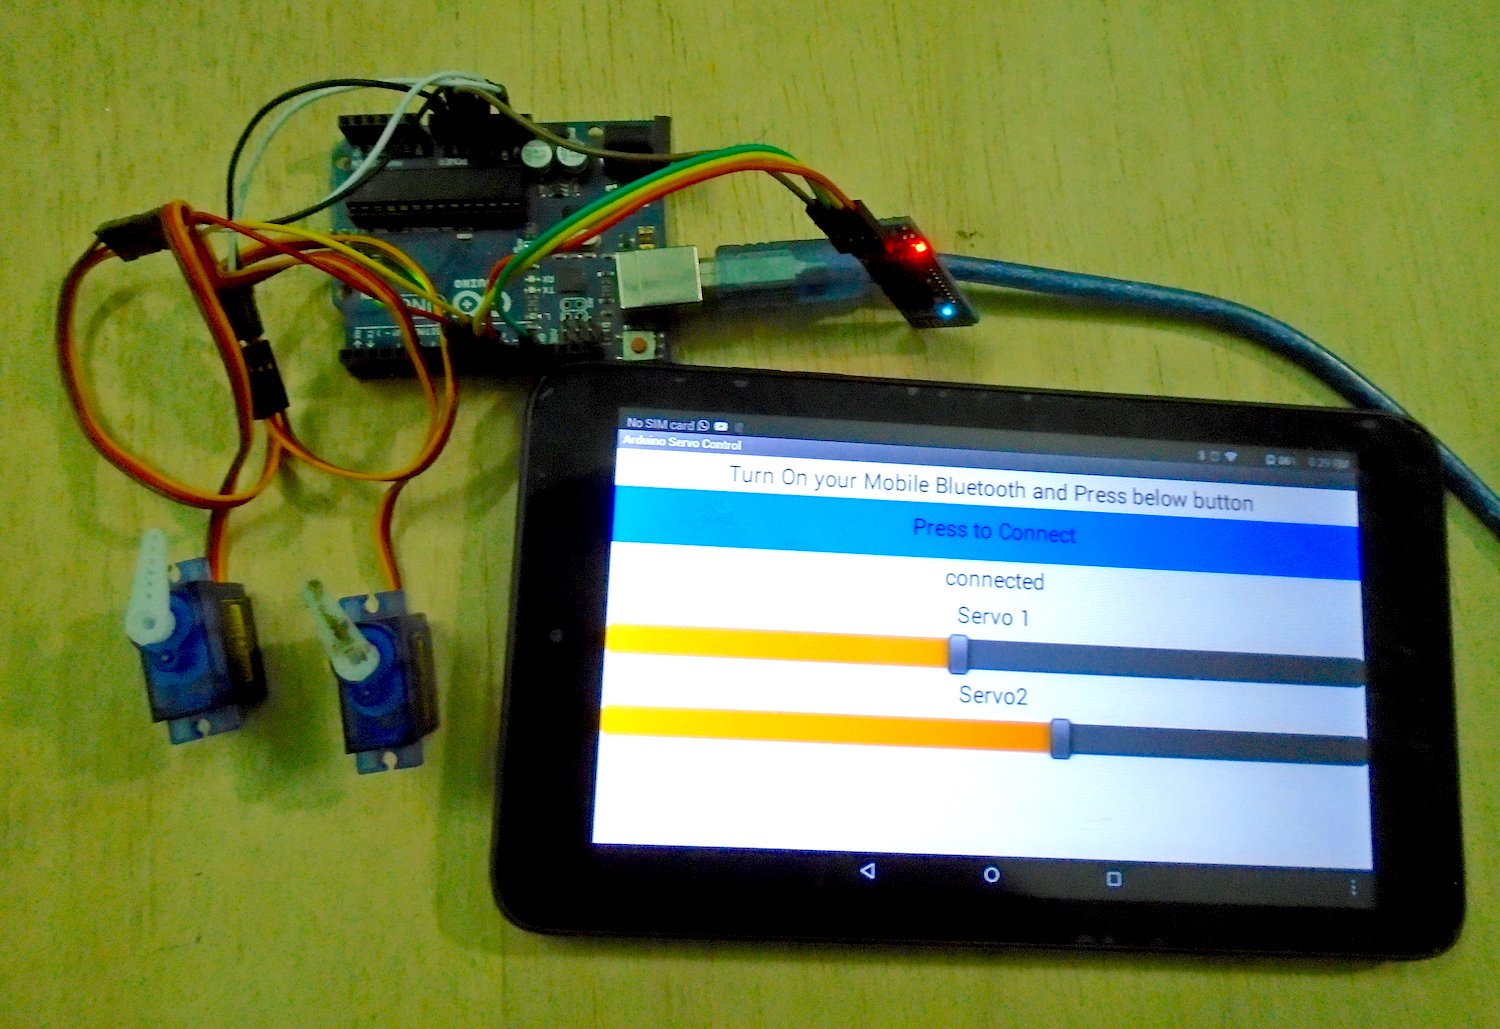
In this project, we are going to control two servo motors using an Arduino UNO and an Android app on a mobile device.
Whenever the slider on the app is moved, the Bluetooth module will send the data from the Android app to the Arduino. The Arduino will get this data through the serial communication.
When the first slider is moved, Arduino receives a value from 0 to 90. We will map this value to 0–180 to move the first servo motor. When the second slider is moved, we will receive the value from 91 to 180. Similarly, we will map this value to move the second servo.
Circuit Diagram
First, make the connections for the servo motors with the Arduino.
- Connect the black wire of both the servo motors with the GND of Arduino
- Connect the orange wire of both the motors to the 5V of Arduino
- Connect the yellow wire of the first motor to pin 9 of Arduino
- Connect the yellow wire of the second motor to pin 8 of Arduino
After that, make the connections for the Bluetooth module with the Arduino.
- Connect the VCC of the Bluetooth module to 5V of Arduino
- Connect the GND of Bluetooth module to the GND of Arduino
- Connect the TX of Bluetooth module to pin 10 of Arduino
- Connect the RX of Bluetooth module to pin 11 of Arduino
How to Run
Click here to download the android app.
Then turn ON your mobile Bluetooth and open the Android app. Connect to the Bluetooth module, and when you move the sliders on the app, the servos will move accordingly.
Code Explanation
First, include the libraries that are needed for this project. The software serial library will allow us to use the TX and RX on the other Arduino pins. The default TX, RX pins of Arduino are 0 and 1. The servo library will allow us to control the servo motors.
#include <SoftwareSerial.h>
#include <Servo.h>
Next we initialize two variables to access the library functions for servo motors. After that, we initialize pin 10 as TX and pin 11 as RX and tell the Arduino to use the TX and RX communication on these pins.
Servo servo1;
Servo servo2;
int TX = 10;
int RX = 11;
SoftwareSerial HC_06(TX, RX);  //Bluetooth TX to 10 and Bluetooth RX to 11.
In the setup function, we give the command to control pins 8 and 9 for servo motors because we have attached the servo motors at these pins. Then we start the serial and Bluetooth communication.
servo1.attach(9);
  servo2.attach(8);
  Serial.begin(9600);
  HC_06.begin(9600);
In the loop function, we check if the Bluetooth module has sent some data or not. If some data will be available, then it will read the data and will store in the variable. If the data will be between 0 and 90, then it will move the first servo. To move the servo, we will map the value from 0–90 to 0–180.
if(HC_06.available()> 0 )
  {
    int value = HC_06.read();
    if(value>=0 && value<=90){
      Serial.println(value);
      int servo1_position = map(value, 0, 90, 0, 180);
      servo1.write(servo1_position);
    }
If the received value will be between 91–180, it will move the second servo.
if(value>90 && value<=180){
      Serial.println(value);
      int servo2_position = map(value, 91, 180, 0, 180);
      servo2.write(servo2_position);
    }
You can see a demonstration of this project here:
Full Project Code
#include <SoftwareSerial.h>
#include <Servo.h>

Servo servo1;
Servo servo2;
int TX = 10;
int RX = 11;

SoftwareSerial HC_06(TX, RX);  //Bluetooth TX to 10 and Bluetooth RX to 11.

void setup()
{
  servo1.attach(9);
  servo2.attach(8);
  Serial.begin(9600);
  HC_06.begin(9600);
}

void loop()
{
  if(HC_06.available()> 0 )
  {
    int value = HC_06.read();
    if(value>=0 && value<=90){
      Serial.println(value);
      int servo1_position = map(value, 0, 90, 0, 180);
      servo1.write(servo1_position);
    }
   if(value>90 && value<=180){
      Serial.println(value);
      int servo2_position = map(value, 91, 180, 0, 180);
      servo2.write(servo2_position);
    }
  }
}