Connect an XBee wireless module to an Arduino Uno using XCTU, and learn how to configure addresses and networks.
The XBee module is one of the most popular wireless platforms around. It allows data to be passed over the air to another device hundreds of feet away.
In this tutorial, we are going to learn about the XBee and cover how you can connect your XBee to your Arduino Uno. We’ll cover how to set up wireless XBee communication between a computer, an Arduino/XBee Shield Combo, and an XBee Explorer. Note that this particular tutorial uses the XBee Series 1 module. We’ll also introduce you to XCTU and explain how to configure XBee networks and addresses.
What is XBee?
Before we start tinkering with the wireless kit, let us introduce you to the XBee. The XBee Module was created by Digi International and is primarily used as a radio communication transceiver and receiver. It is a mesh communication protocol that sits on top of the IEEE 802.15.4 ZigBee standard. XBee supports peer-to-peer as well as point-to-multipoint network communications wirelessly with a speed of 250 kbit/s.
Required Hardware
- Sparkfun XBee Wireless Kit (includes XBee shield, XBee Explorer USB, and 2 XBee modules)
- Jumper Cables
- Soldering Iron
- SCTU
- Computer
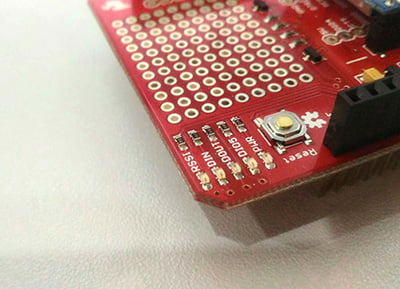
To use your XBee Shield with an Arduino, you'll need to solder in some stackable headers.
You will need to solder stackable headers onto your XBee.
XBee Shield LED Indicators
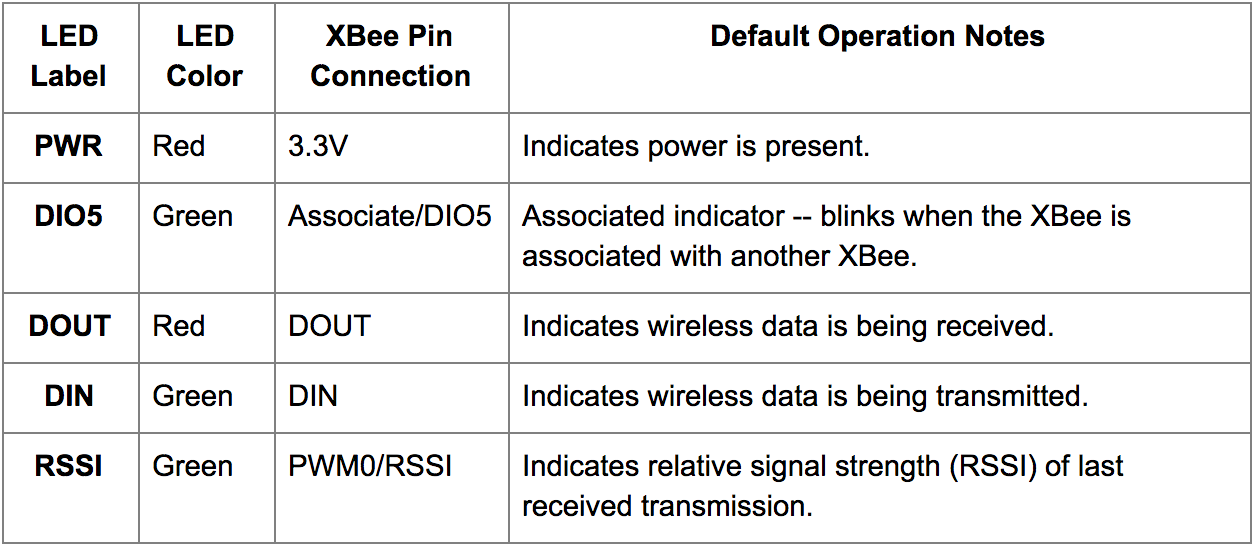
The XBee shield has five LEDs connected to a pin on the XBee which indicates the different operations on the shield. You should be familiar with what each indicator means, this can be very useful when debugging later on. The table below will guide you through each operation the LED indicates:
LED indicator table. Image Credit: Sparkfun
The DIO5 LED should blink once the XBee is paired with a compatible device. This also happens when you first connect your XBee modules. The RSSI LED, on the other hand, will shine brighter once the paired XBee is nearer indicating a stronger signal strength.
Plugging your XBee to the Shield
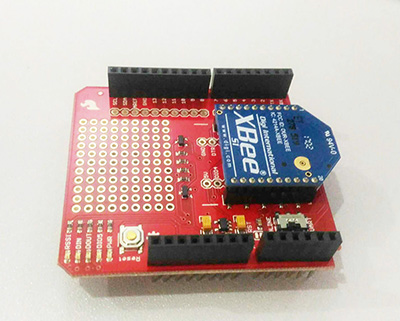
At first, plugging the XBee to the shield can be quite confusing especially without proper markings. Luckily, the shield has some white silkscreen to help orient your XBee as you're plugging it in. The XBee's two diagonal edges should match with the two diagonal lines on the PCB. Now your XBee is all set.
How your XBee will look on top of the shield.
Starting with XCTU
XCTU is a free multi-platform application with an easy-to-use graphical interface designed for developers working with Digi RF modules. It is equipped with new tools that make it easy to set-up, configure, and test XBee® RF modules.
Once XCTU is done installing, open it. You'll see this window:
Make sure you've plugged an XBee (correctly) into your Explorer before, and have the Explorer plugged into your computer.
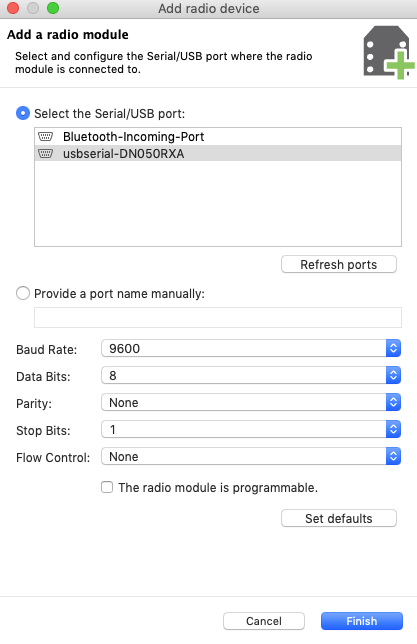
Now we are ready to add your XBee(s). To add, click the add device icon in the upper-left portion of the window.
The add device window in XCTU.
Click the new module button and wait a few seconds as XCTU reads the configuration settings of your XBee. You should then be presented with the entire configuration of your XBee.
The full configuration of XBee on XCTU.
There are a lot of configurable settings listed, but for now, use the following listed below:
- Channel = C
- PAN ID = 3332
- DH = 0
- DL = 0
- MY = 0
If you have changes in the settings that you want to have written on your device, just change the values and click on the pencil symbol beside it. Now you are ready to test your connection.
Software Serial Passthrough
Here is a sample sketch we'll use to create communication between your Arduino's serial monitor and another XBee using XCTU.
#include <SoftwareSerial.h>
SoftwareSerial XBee(2, 3);

void setup()
{
  XBee.begin(9600);
  Serial.begin(9600);
}

void loop()
{
  if (Serial.available())
  {
    XBee.write(Serial.read());
      }
  if (XBee.available())
  {
    Serial.write(XBee.read());
      }
}
What You Should See
After you've uploaded the code, verify everything is working by following these steps:
- Open the Arduino's Serial Monitor. Make sure the baud rate is set to 9600.
- On your XCTU and click over to console mode. Also click the plug icon to close the serial connection with the radio module.
- Type something in the console view, it should show up on the Serial Monitor.
- Now try typing something into the Arduino's Serial Monitor (and press "Send"), it should show up in the console view.
- Yay!
A successful XBee sample sketch!
Now you are ready to do a variety of projects using an XBee Module with your Arduino!