In this article, we will explore how to program and use an Arduino Uno with the microcontroller family called ATMega.
Whether you have a product or project in mind, you may find yourself needing to use hardware other than a PC or some components that you can find in your local hardware shop. One piece of hardware ideal for beginners, the Arduino, may just be up your alley. But what can you expect from such a device, and will it be suitable for your needs?
A Unique Hardware Controller
PCs, tablets, and phones are commonly used platforms that most people have access to. Because of this, many individuals and companies have taken advantage of the demand for software and have produced apps, with the industry making more than $77 billion annually. But one major issue that these devices face is their limited I/O capabilities, and controlling something as simple as a relay can be a demanding task. This is where a different computing device is needed, and for most newcomers, two main devices come to mind: the Raspberry Pi and the Arduino. The Raspberry Pi is a very powerful single-board computer that has multiple IO connections, including a general purpose I/O (GPIO) connector that allows for connections to circuits. But the Raspberry Pi also has some disadvantages. First, it requires a lot of power to run (2A @ 5V), and second, it is not the simplest device to get working and program. This is where the Arduino comes in!
The Arduino, unlike the Raspberry Pi, is a much smaller computational device with an emphasis on hardware instead of software. So while the Raspberry Pi has 4 64-bit cores with 1GB of RAM, the Arduino has a single core running at 16MHz, 2KB of RAM, and 32KB storage. But unlike the Pi, the Arduino has plenty of IO pins that can do much more than the Raspberry Pi, including analogue-digital conversions and PWM (pulse width modulation). The Arduino is also dedicated to the user’s program, and is the only thing that runs, unlike the Pi, which requires an OS to run the user program (which means while your program runs, so do many other processes).
How Is the Arduino Programmed?
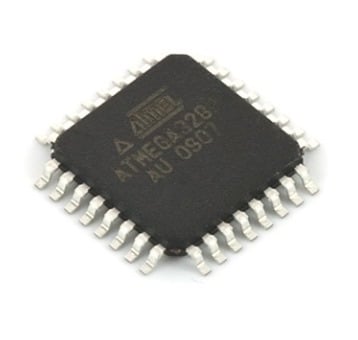
The Arduino is built around a microcontroller family called ATMega with the Arduino Uno board using the Atmega328P. These microcontrollers are very similar to the millions on the market, including the PIC devices produced by Microcontroller. The issue with such devices is that they often require a dedicated programmer device to get user programs into their FLASH memories (such as the PICKIT 3). This makes them complicated to use, especially by those who do not have experience with microcontrollers. But this is where the Arduino differs! The designers of the Arduino realized that dedicated programmers are problematic, so they designed a bootloader into the Arduino that allows a USB port to load user programs. So, when you connect the Arduino into the USB port, it will be recognized as a generic serial port, and the connected PC may even recognize it as an Arduino.
With the Arduino connected to the USB port, we are one step closer to putting our first program onto it. But what language do we use and what app do we need to download to make an Arduino program? Well, the designers of the Arduino not only made it easy to connect the Arduino to a PC but they also decided to make a FREE IDE (integrated development environment), which will have you blinking an LED in less than five minutes after installing. The IDE can be downloaded from the Arduino website by visiting the link below:
Arduino IDE download page
Once downloaded, install the IDE. Once that is done, run the IDE by launching the Arduino program. In Windows 10 you can open the start menu and type “Arduino” (this should bring up the IDE).
If not, look at your desktop for the Arduino Icon.
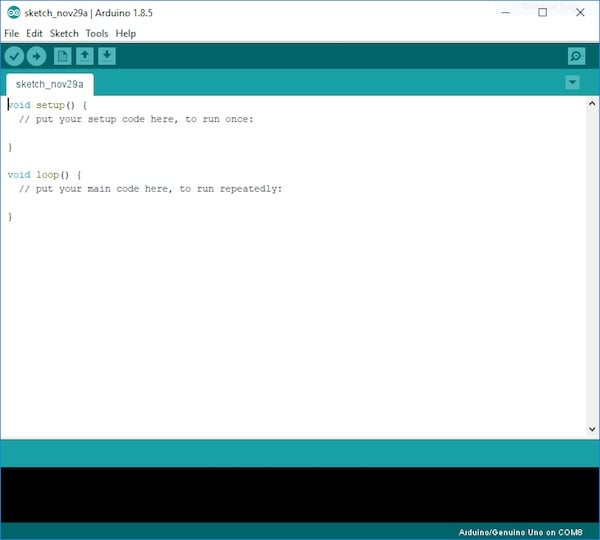
If all goes to plan, you should see the Arduino IDE load with a blank program, as shown below.
Your First Program
The language the Arduino IDE uses to make Arduino programs is C++, which is an object-oriented language. C++ itself will not be discussed in depth or taught, as the objective of this tutorial is to demonstrate how easy using the Arduino is.
In your blank project, you should see two different functions: setup() and loop(). When the Arduino first turns on and starts running, it will execute the code found in setup. This function is used to configure hardware and variables so your program runs in a known state and all the needed hardware is correctly configured for your use (such as turning on ADC ports). The next main function that is executed after setup() is loop() which runs indefinitely and is used to run your program (after executing the last instruction found in loop, the Arduino will jump to the first instruction found in loop). In our project we will be using the Arduino Uno, and our goal will be to make the onboard LED flash.
Thankfully, the designers of the IDE have included many examples, and we will load the blink example, which is done by clicking File > Examples > 01.Basics > Blink. If all goes well, you should see the following code (you may have some grayed out comments above it, but that does not matter):
Before we can go any further, we have to tell our IDE what Arduino board we are using. In my case, I have an Arduino Uno, so I need to select this by going Tools > Board > Arduino Uno/Genuino Uno.
So now that we have our blink example open and the correct board selected, it’s time to program the Arduino with this code. The first task to do this is to compile the code, which is done by clicking the verify icon (shown below):
Once the code has been compiled, you should see the following message in the bottom console window:
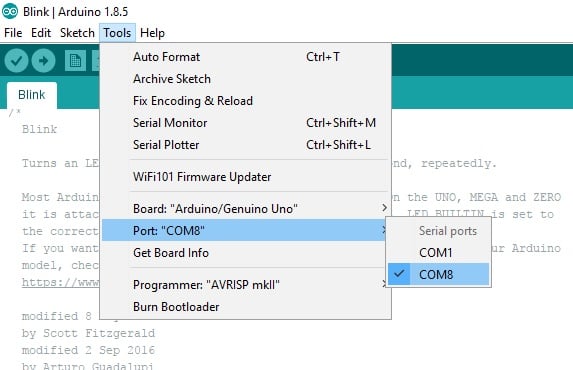
The last step is to load the program into the Arduino. The first task is to ensure that the IDE knows which serial port to use, so to do this we navigate to Tools > Port and then select the serial port. Thankfully, most modern devices do not have serial ports, so there should be one of two choices: COM1 and some other COM. COM1 is generally not an accessible serial port and is used internally by the OS, so choose the alternative COM port. For example, mine is COM8. BE WARNED! The computer may decide to change the COM port in the future, so if the IDE can't find the Arduino when connected, go to the port list and look for an alternative port. For example, my Arduino used to be COM7, but for some reason got changed to COM8.
Now it's time to program the Arduino by clicking the Upload button!
The Result?
Once the IDE has successfully uploaded the blink program, you should see the onboard LED turn on for a second, turn off for a second, and then repeat. But how does our program work? How does the Arduino turn LEDs on and off?
We discussed earlier that the heart of the Arduino Uno is an Atmel Atmega328 microcontroller, which has many metal pins connected to the integrated circuit (I will assume that you have some level of circuit knowledge here). Some of these pins are for power, some are for an external oscillator, and the rest are for inputs and outputs (such as switches, LEDs, data ports, etc.). The LED on the Uno is connected to pin 13, so in order to use the LED, we have to configure that pin to be an output (one that can control an external device).
To do this, we use a simple function called pinMode(). This function takes two arguments: the pin that we are configuring, and the type of pin, whether it be an output or input. So in our code, we configure the LED pin to be an output. You may be wondering why the function uses LED_BUILTIN instead of 13. This is because different Arduino boards may use a different pin for the built-in LED, so the designers of the Arduino IDE have cleverly created a variable called LED_BUILTIN. When you select a board type (Uno, Nano, etc.), this variable is changed to the correct pin that the built-in LED is connected to, so your blink project will still work!
After you’ve set up the Arduino, the main loop function is executed. The first instruction that we come across is digitalWrite(), which is used to either turn an output on or off (HIGH or LOW). This function takes two arguments: the pin that we are writing to, and the value. The first instruction turns the LED on by writing HIGH (1) to the LED pin.
The next instruction that is executed after turning the LED on is delay(1000). This function causes the Arduino to delay for n number of milliseconds where n is the argument passed to the delay function. In other words, delay(1000) will wait for 1000ms, which is equal to one second. If delay(1) is called, the Arduino will delay for 1ms.
The last two instructions are similar to the previous two executed, with the exception that instead of turning the LED on, we turn it off by writing LOW to the LED pin using the digitalWrite() function. Once turned off, the Arduino executes a final one-second delay before repeating the whole loop indefinitely.
Conclusion
While this example may seem simple, it demonstrates how easy it is to code and program an Arduino. Other microcontrollers exist, such as the PIC range, but they require custom circuits and specialized programmers, whereas the Arduino only needs a USB port and USB B cable. Of course, the Arduino is not practical in some cases where precise control is needed, such as advanced sensors, interrupt control, DMA, and digital signal processing. So if your product is a simple IoT device or a robot controller, then the Arduino may be just for you!
Read More