Another probable reason why some engineers are unable to solder is that it’s not formally taught at most universities. Nonetheless, it’s a great skill to have! Soldering could come in handy for your job or when you need to make some quick repairs in your projects.
So, what are the basics of soldering, and how does it work?
What is Soldering?
Soldering is the process of securing electronic components on a circuit board or creating a joint between two or more parts using a soldering iron and some soldering material.
Soldering: The Tools You’ll Need
Soldering Iron
You can purchase a soldering iron from an online store or local electronics vendor. Depending on the type of material you want to solder, you can choose a low-wattage or high-wattage device.
Solder
Commonly used solder materials are made of Tin and Lead (leaded solder) or Tin with Silver or Copper (lead-free solder). If you’re attempting to fix a device that is utilised in high-temperature conditions (e.g., data acquisition tools used for oil and gas exploration thousands of feet below sea level), use high-temperature solder to protect soldered joints from melting.
Solder Iron Holder (with foam sponge)
The holder is a ring-like structure that sits on a metal base. Many holders come with a small foam sponge at the base that you can use to clean the tip of the soldering iron.
Safety Goggles
Personal protective equipment (PPE) you can use to safeguard your eyes from solder splurts or fumes.
Tweezers
Small handheld tools you can use to grip the wires or components to be soldered. Tweezers are useful for handling components too small to handle with your hands or a vice.
Desoldering Pump
A portable manually-operated tool which is used to loosen soldered joints by removing old solder from PCBs. Two common types are plunger-type and bulb desoldering pumps. Desoldering pumps use suction to remove molten solder from the PCB.

Soldering tools. Image courtesy of Pixabay.
How to Solder a Joint
-
Plug the soldering iron to a power outlet and allow some time for it to heat up sufficiently.
-
Clean the tip of the iron on the damp foam on the holder.
-
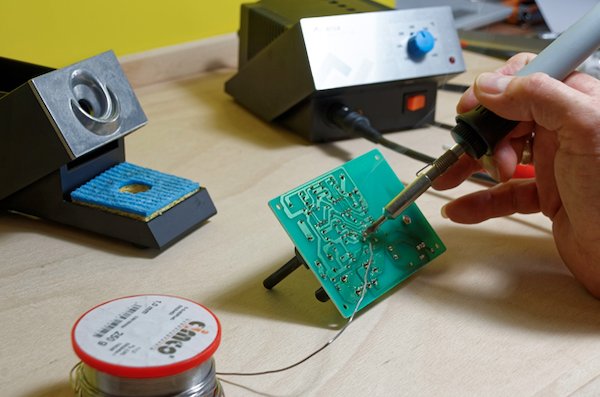
To solder a wire joint, twist the bare conductors together using a plier, then touch the soldering iron on one end of the joint and place the solder close to the tip. For PCBs, use your tweezers to grip components, pass the terminals through the holes and apply solder on the opposite side. Be sure to adjust the placement of your finger holding the lead to avoid burning yourself. Ideally, this finger should be at least 3 centimetres away from the soldering iron.
-
Disconnect the solder from the power supply when you’re done soldering.

An electronic engineer's soldering station. Image courtesy of Pixabay.
Testing the Integrity of a Soldered Joint
Whether you’re an engineering professional or hobbyist, it’s great to find out how sturdy your soldered joints are. Strong joints should hold up throughout the life of the device while weak ones will break down within a few months.
You can test the strength of a soldered joint using visual inspection. Look out for cracks and gaps. A strong bond should be thick and shiny, cover every part of a component’s terminal and feel sturdy when you touch it. A weak joint will have a dull grey look and terminals that move a bit when you apply some pressure. Engineers can ensure durable soldering by purchasing high-quality solder, maintaining adequate temperature, and using the right soldering techniques.
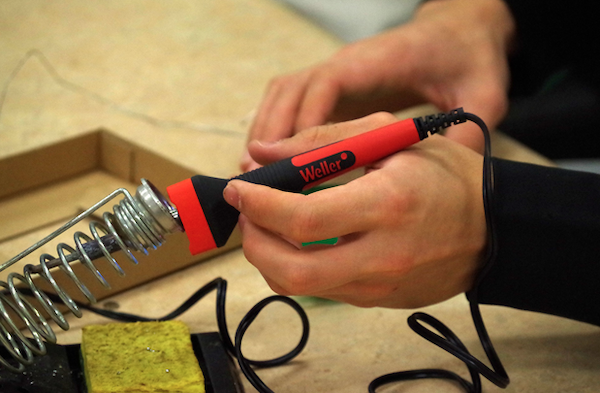
Placing the soldering iron in its holder. Image courtesy of Pixabay.
Safety Tips for Soldering
-
Bear in mind that your health and safety is more important than carrying out any engineering task, soldering included. Below are a few tips for safe soldering in the workshop:
-
Never touch the surface of the soldering iron while it is plugged in. If you’re trying to find out if it’s hot enough for use, simply touch the tip on the wet foam on the holder.
-
Avoid holding the wires or components you want to solder with your bare hands. Use a pair of tweezers to avoid burning yourself.
-
Place your soldering iron in the holder when not in use, and not on the workbench. Hot irons can melt nearby components or cause bodily injuries.
-
Use eye protection when soldering. Fumes from the hot solder can irritate your eyes and molten solder can splurt towards your face if you’re not careful.
-
If you’re asthmatic, use a nose mask while soldering to prevent respiratory tract irritation from the fumes. Always do your soldering in well-ventilated environments.
-
If you accidentally burn yourself while soldering, you could apply first aid (if you’re trained to do so). If the injury is serious, consult a doctor immediately.
-
Always wash your hands after soldering, particularly if you use leaded solder. Lead is a toxic substance that can accumulate in the body when ingested.
If you’re trying out soldering for the first time or you do it only occasionally, remember that it’s a skill that gets better with practice! Be sure to test the integrity and neatness of soldered joints afterwards and hone your expertise soldering small components in your spare time.