Before delving into troubleshooting and repairs, however, it’s essential to understand the basics of PCB construction.
Parts of a Printed Circuit Board
Modern PCBs comprise four main layers, outlined below:
Conductive layer
The conductive layer (or traces) are thin foils of copper that are laminated onto the board and secured with an adhesive. Multi-layered PCBs have two or more copper layers etched onto the board.
Substrate
The substrate is the base circuit board material that contains holes where components are fixed. Most substrates are made of polyester epoxy resin that’s reinforced with glass fibres.
Silkscreen
The silkscreen is the layer of ink traces that allows a PCB designer and/or engineer to identify the various board components, test points, electrical symbols, manufacturer logos, and more. You can find them on one or both sides of the board.
Solder Mask
the solder mask (or solder resist) is a thin layer of polymer material that forms a protective barrier on the conductive traces of a PCB. It prevents both metal oxidation and the bridging of terminals.
With the basic construction of PCBs still in mind, let’s now move on to some of the major causes of faults during use.

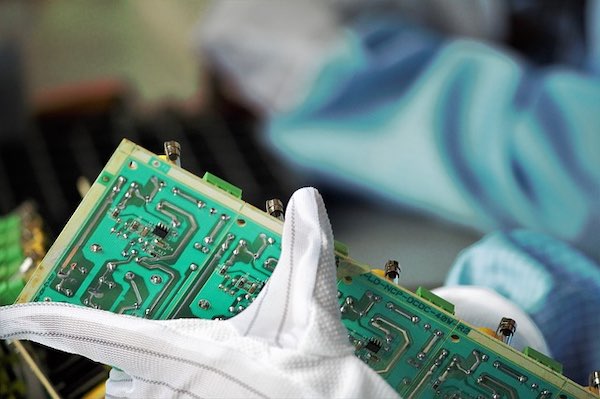
A PCB that shows the conductive traces, silkscreen, and circuit components on the substrate. Image Credit: Pixabay.
Causes of Problems in PCBs
The three most frequent causes of PCB issues are as follows:
Defective or Burned-out Components
Blown components caused by overheating can damage the conductive traces on a PCB, and this leads to electrical discontinuity, malfunction, and other problems. A quick inspection of the board will show charred metal with black (carbon) deposits.
Physical Damage Due to Misuse/Environmental Factors
High ambient temperatures (such as in industrial environments) can affect the reliability of circuit components and cause physical damage to PCBs. Misuse due to improper handling is also a factor.
The Age and Lifespan of the PCB
With extended use, several components on PCBs will reach the end of their useful lives, leading to failures. Where possible, these components must be swapped out to prevent further damage.
Tools Required for PCB Troubleshooting and Repair
The tools you’ll need to troubleshoot circuit boards will depend on the complexity of the design. Basic troubleshooting may require only a digital multimeter, while intricate or component-dense PCBs require specialised test equipment, such as oscilloscopes, logic analysers, and LCR meters.
Some basic tools for carrying out PCB repairs include:
-
a clamp
-
a hot air gun
-
tweezers
-
copper braids
-
isopropyl alcohol (ISP)
-
wipes, and
-
soldering equipment

An engineer's first-person view as they replace a heat sink on a printed circuit board. Image Credit: Unsplash.
Steps for PCB Troubleshooting and Repair
The following steps are useful for troubleshooting and fixing problems on PCBs:
Visual Inspection
Performing a visual inspection of a circuit board can help identify several issues and defects. For example, excess solder on the surface can cause bridging of terminals. A fairly common issue that occurs during the soldering process in PCB manufacturing is the ‘Tombstone effect’: this is where a component on the PCB is tilted at one end (just how even a well-set tombstone may tilt with time) and therefore does not make contact with the board.
Discrete Component Testing
Testing various components of a PCB, such as resistors, diodes, and capacitors can be carried out using a digital multimeter. Components that output values significantly lower than those specified by the manufacturer may be defective. On the other hand, a measured value that is much greater than the specified value may indicate a problem with the soldered joint.
PCB Maintenance
Over time, moisture, dust and other contaminants may accumulate on the surface of PCBs, and this can also lead to component failures. An essential step in troubleshooting and repairs is wiping down the surface. PCB cleaning is a delicate process that requires both special care and the right solvents to avoid causing damage to any of the soldered components.
How to Clean PCBs
To clean printed circuit boards manually, use a soft-bristled brush or Q-tip dipped in ISP alcohol. Ensure that the cleaning is carried out under a fume hood or in a well-ventilated room. You can also use a compressed air blower to dislodge any dry particles. To remove greasy contaminants, wipe the surface using a piece of cloth dipped in, again, ISP (or otherwise demineralised water).
Alternatively, you can clean PCB surfaces using an ultrasonic cleaning machine. These machines remove stubborn dirt and grease using ultrasonic frequency cavitation (produced by transducers) as well as suitable cleaning liquid to scrub down the surface.
How to Replace Components
Of course, replacing defective components on a PCB requires special care and attention. Using the right tools is crucial to avoid causing damage to the board layer’s surrounding components. With the earlier ‘Tools Required’ list still in mind, follow the below steps to replace a component:
-
Place the PCB on a flat surface and hold the component in place by using the clamp
-
Hold the hot air gun five inches over the component to melt the solder for a few seconds
-
Using the tweezers, gently pull the component off the board and turn the heating device off
-
Heat the soldering iron and use the tip to melt the leftover solder, which will otherwise remain on the pads where you removed the component. Afterwards, use the copper braid to absorb the last of the excess solder
-
Clean the surface of the component with wipes and/or a soft cloth dipped in ISP
-
Place the new component on the now-vacant pad and solder it onto the board, while making sure the terminals are accurately aligned
As discussed, preventive maintenance and correct operation can ultimately help combat issues that impact the reliability of electronic devices. After all, while they may well fail, at least engineers can always try to troubleshoot them and return them to their optimal working operation. They do this by isolating faults, testing several components on the PCB, and—of course—making repairs or replacements when and where necessary.