In this tutorial, we are going to create an IoT-based garden you can care for from your phone using Blynk!
Gardening is a very gratifying hobby. However, because of our busy lifestyles, plants in our gardens might not always get the attention they deserve. What if we could remotely monitor their conditions and give them the care they need? There is a way! In this tutorial, we are going to create an IoT-based smart gardening system using the Blynk App.
This smart garden project is a plant environment monitoring system that monitors soil moisture level, air temperature, humidity, and water level. Then, depending on the conditions, the system allows users to deliver what is needed remotely through a mobile app. Moreover, this system can be scaled and expanded to automate the entire gardening process!
Required Hardware
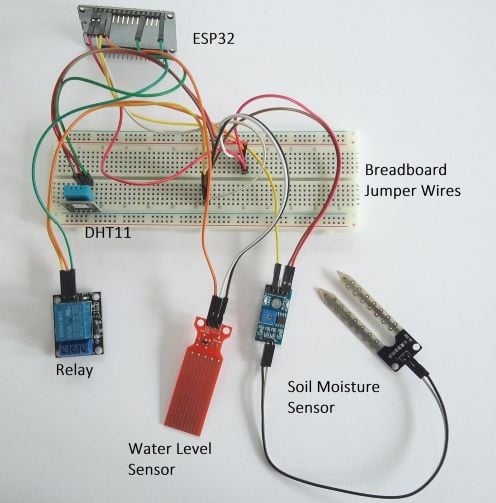
- ESP32
- DHT11 Temperature and Humidity Sensor
- Water Level Sensor
- Soil Moisture Sensor
- Relay Module
- Breadboard and Jumper Wires
- Smartphone with the Blynk app installed
Wiring the Hardware
In this project, we will use a soil moisture sensor to measure the volumetric water content in the soil. The DHT11 sensor will measure temperature and humidity levels in the plant’s surroundings, and the water level sensor will measure the water level in a small tank.
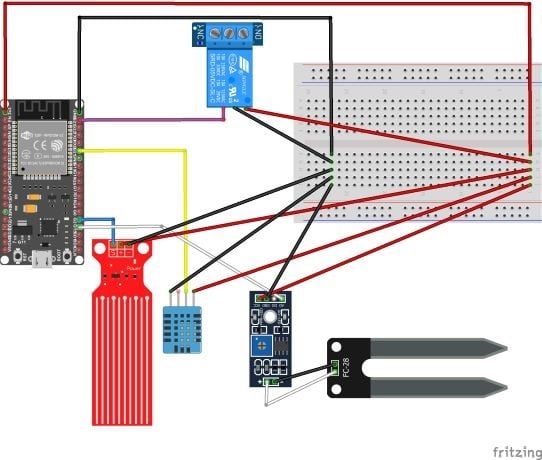
The Fritzing diagram showing the hardware connections is shown below.
The following diagram shows how each sensor is connected to the analog pins of the ESP32 development board.
In this setup, we are monitoring the sensor data and interfacing a relay module to control high voltage devices such as motors and lighting devices. Through the Blynk app, we can remotely monitor various parameters in our garden and activate devices as needed.
If the water level in the tank is reduced to the minimum value, we can switch ON a motor remotely to fill the tank. If the temperature is reduced to the minimum requirement, we can switch ON the lighting to increase the temperature to a certain value. If your plants need more water, you can open a valve remotely to water the plants.
Setting up the Blynk App
Now it’s time to set up the Blynk App to monitor sensor values. The first step is to install the Blynk App on your smartphone.
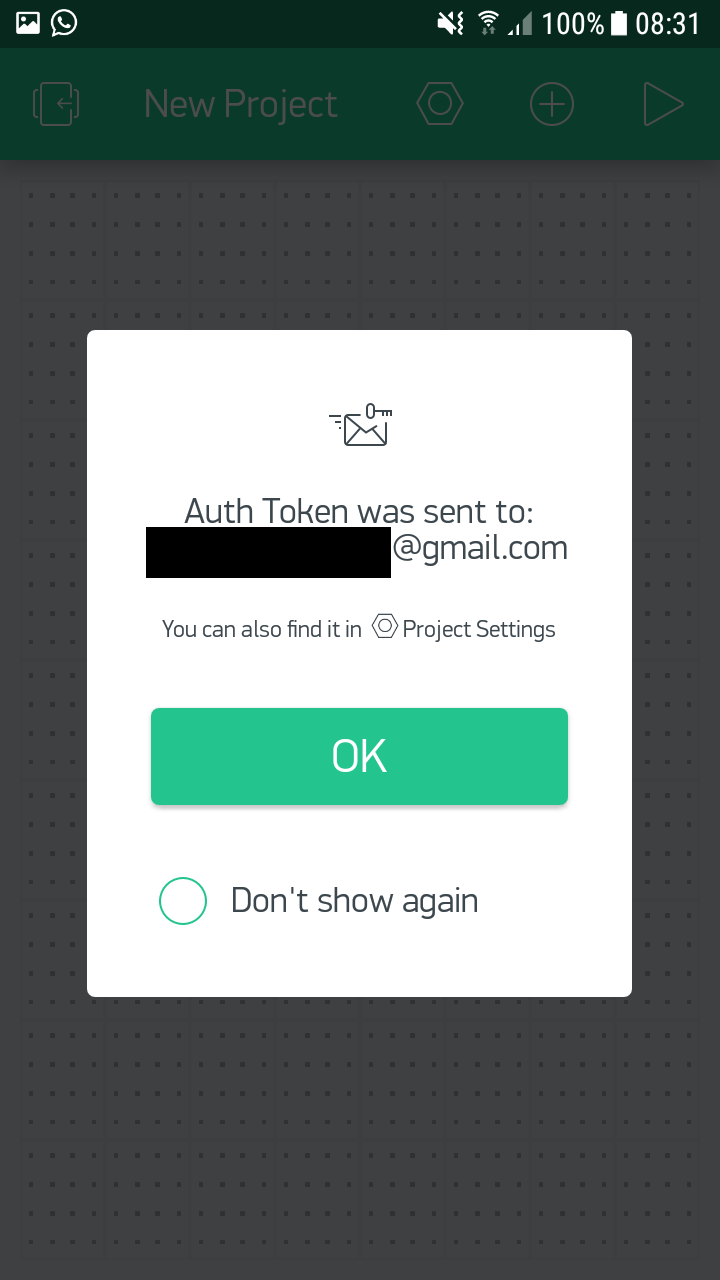
Upon installation, you’ll need to create a new Blynk account. This step is important as the app will send a unique authentication code to your email. You’ll need this to continue using the Blynk app.
After creating a new account, create a new project and select your hardware.
The Blynk app automatically sends you a unique authentication code for every new project you create. You need this code to connect your smartphone to the hardware. The authentication code will be sent to the email address you used for registration.
Creating our Smart Garden Monitoring System in Blynk
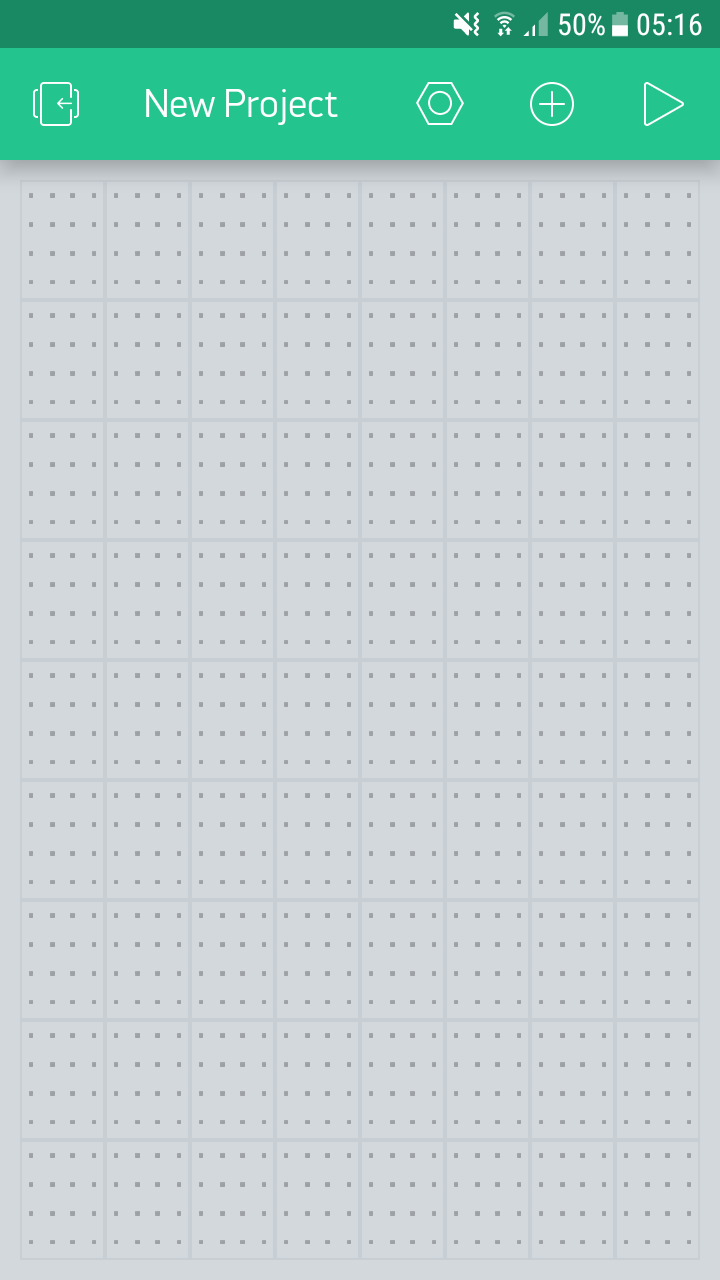
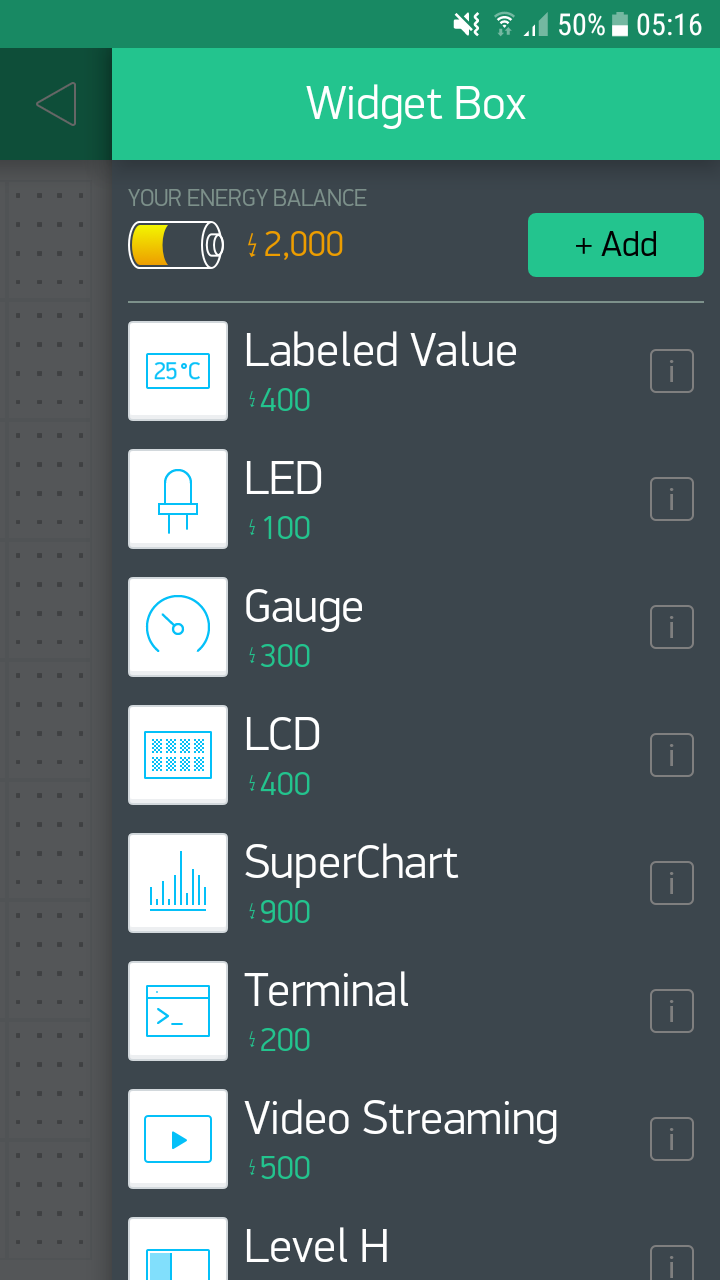
Now you have an empty canvas as shown below. We need to add four gauge widgets to monitor temperature, humidity, water level, and soil moisture level.
Tap on the canvas to open up the widget box. Now pick a gauge.
Tap and drag the widget on to the canvas.
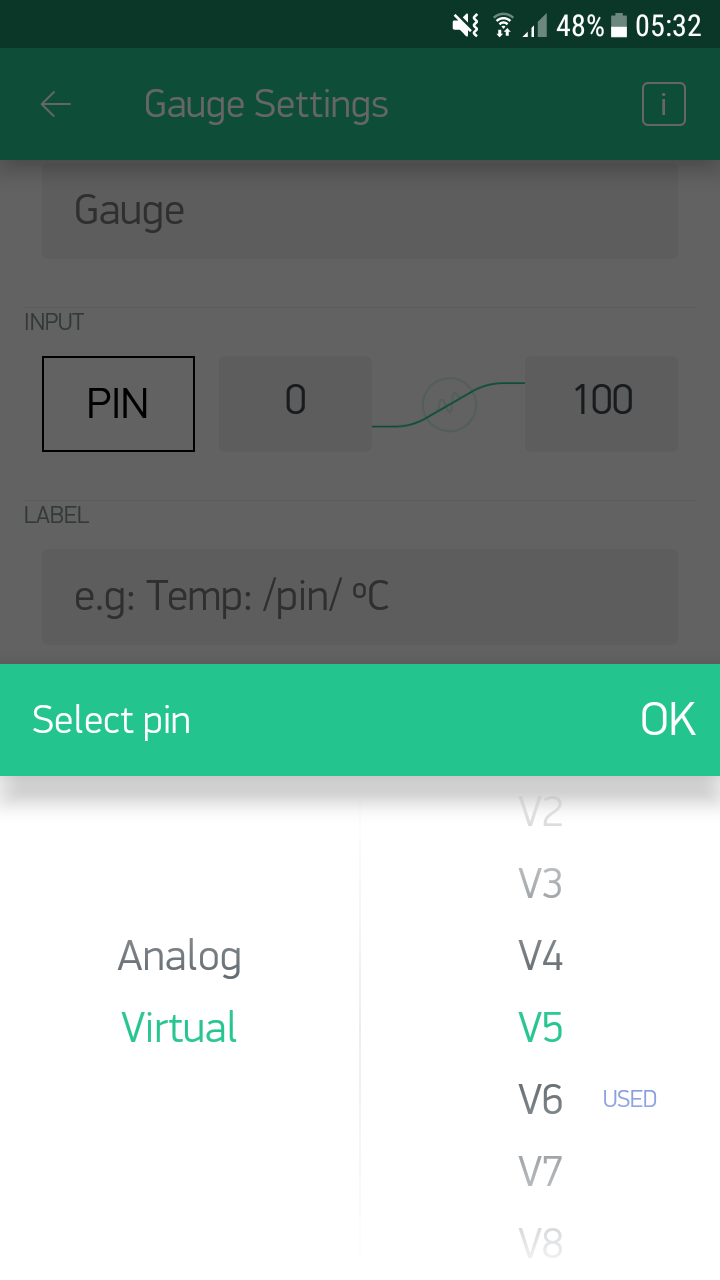
Tap on the widget to change its settings. There, you can change the name, size, text size, and color of the gauge.
The two most important settings are the pin and the refresh rate. Set a virtual pin for each gauge with two seconds of refresh time for temperature and humidity values. Set five seconds of refresh time for water level and moisture level.
Now your canvas should look like this:
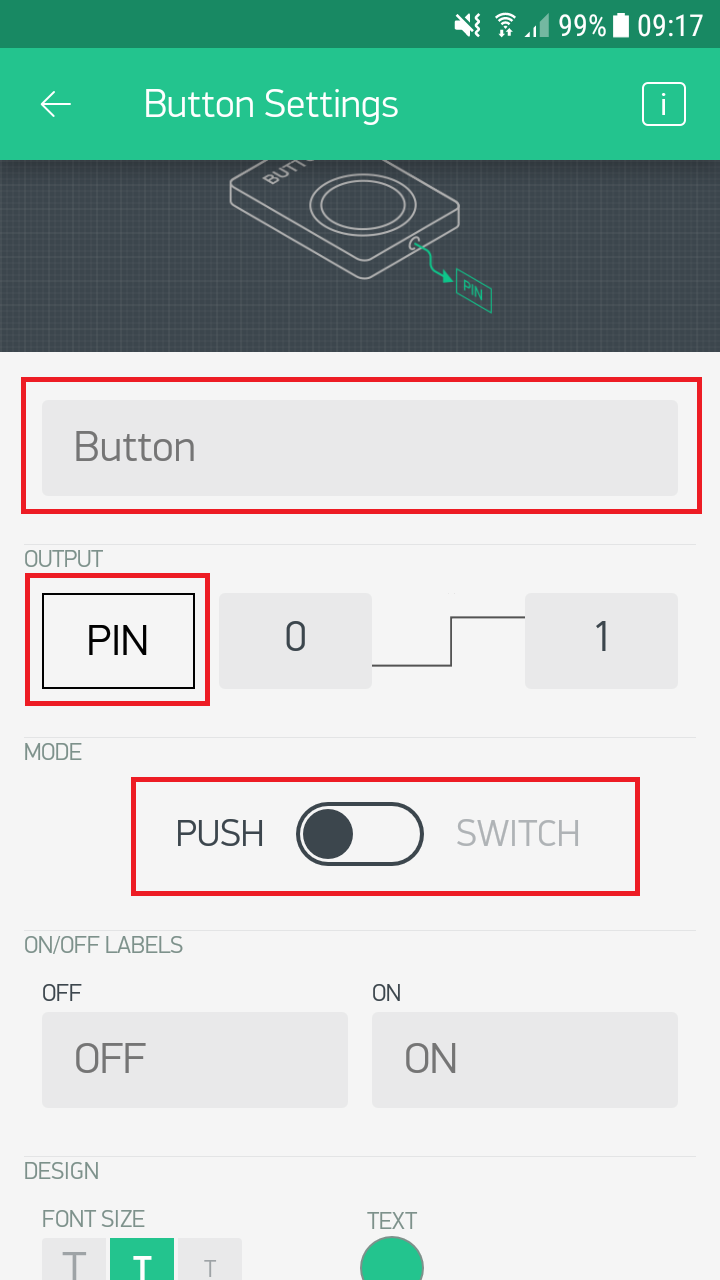
Finally, add a button widget to control the relay. There, change the name of the button, button type, and pin. The pin is the GPIO pin of the ESP32 where the relay is connected.
Now the Blynk App project configuration is finished and you are ready to go!
Arduino Code
Download the Arduino source code.
The Arduino code is pretty straightforward and easy to understand. I have used the DHT11 sensor library to get the temperature and humidity. Water and soil moisture levels are just analog readings. According to your environment and sensor constraints, these analog values can be mapped into a range.
There are two functions to send data to the Blynk App. The first function sends temperature and humidity values and the second one sends water and soil moisture levels.
The Arduino Blynk library has a method called virtualWrite ( ) to write the sensor reading into virtual pins we have already configured in our Blynk app.
Before sending the values, we must configure the Wi-Fi settings.
The Blynk timer object sends temperature and humidity readings every two seconds and water and soil moisture levels every five seconds. That data will update in the gauges of the Blynk App.
Running the System
Press the Run button to start the Blynk App. You can see that your gauges will start to display the sensor readings and these values update every two and five seconds. You can turn ON and OFF the relay by pressing the button remotely from anywhere.