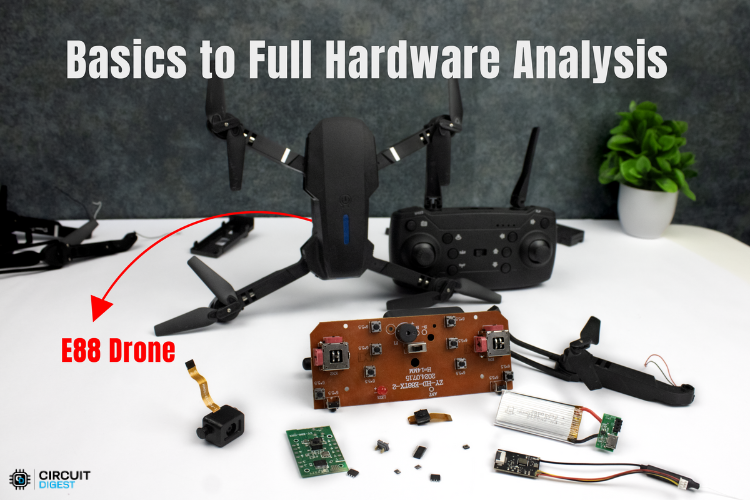
Explore a deep hardware teardown of the E88 budget quadcopter — from microcontrollers to sensors — and learn how inexpensive drones really work.
The E88 Drone Teardown is a compact, entry-level consumer drone designed primarily for recreational use by beginners. Affordable and foldable, it comes with basic flying features like altitude hold, headless mode, and a built-in Wi-Fi camera, making it popular in the sub-₹2000 price segment. But beyond its outer shell lies an intricate assembly of hardware components that make this small flying machine work. In this detailed teardown and analysis, we go well beyond user manuals and superficial video reviews to explore the drone’s internal electronics, identifying key integrated circuits, sensors, and power systems that enable its flight control and communications.
📦 What’s Included in the E88 Drone Package
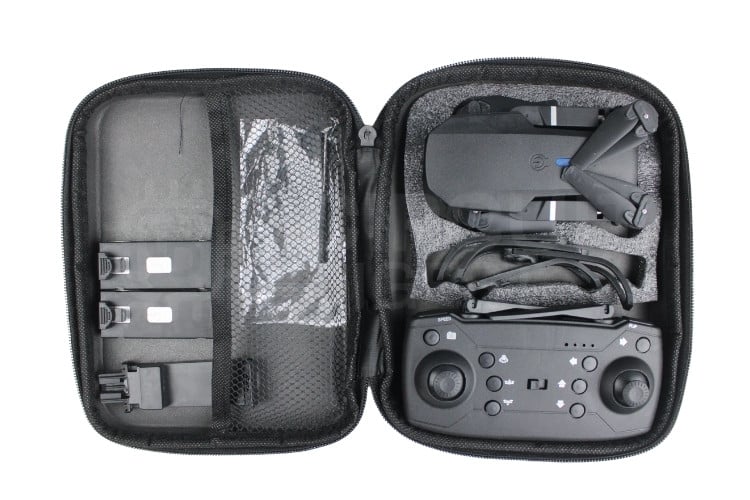
Out of the box, the E88 arrives almost ready for flight:
- A foldable quadcopter frame with four motors
- A 2.4 GHz remote controller with a Mode-2 stick layout and function buttons
- Two rechargeable 3.7 V Li-ion batteries
- USB charging cable and protective case
- Extra propellers — clearly marked for clockwise (CW) and counterclockwise (CCW) installation
- Basic instruction manual and optional propeller guards
The careful packaging ensures that even beginners can start flying with minimal setup.
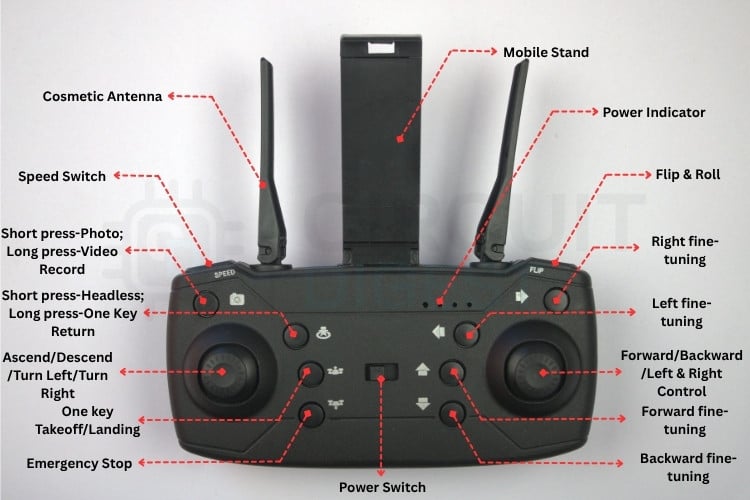
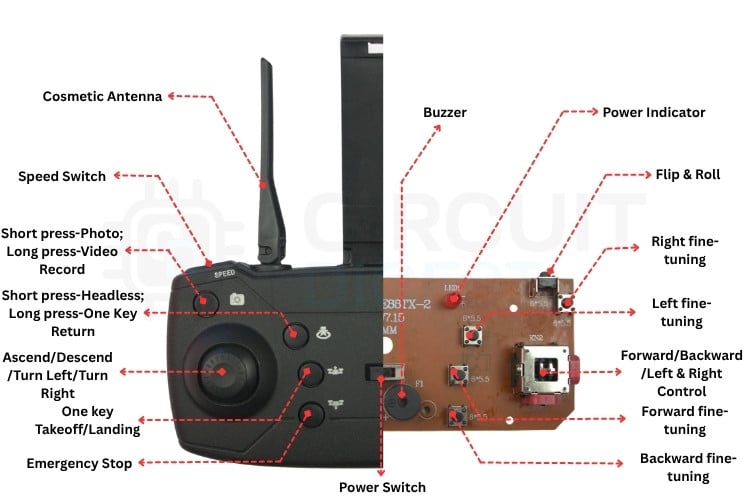
🎮 Controller Overview: Layout and Functions
The E88 uses a standard Mode-2 controller configuration, with dual joysticks and additional buttons that go beyond basic throttle and direction control. The left stick handles altitude and yaw, while the right stick manages pitch and roll. Special buttons include:
- One-key takeoff/landing
- Headless mode for orientation-independent flying
- Speed level selector (low, medium, high)
- Photo/video capture
- Emergency stop
Visual feedback is provided by multifunction LEDs that communicate status like bind success, signal strength, and flight mode through different blinking patterns.
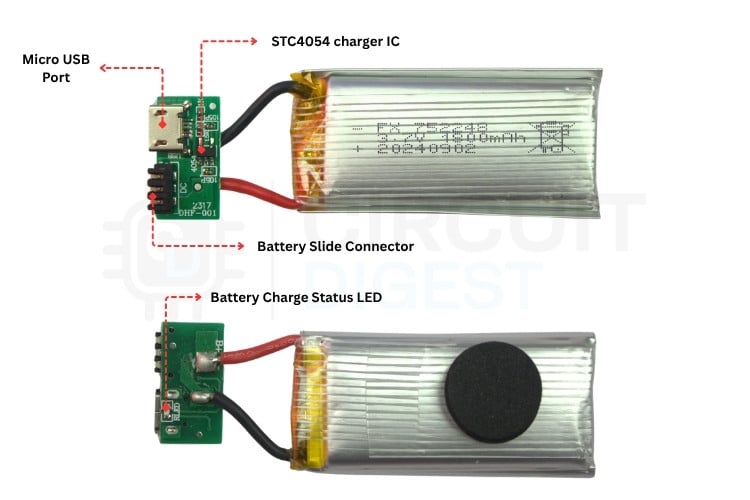
🔋 Power and Battery Details
The E88 controller runs on three AAA batteries (4.5 V), while the drone uses a dedicated 3.7 V Li-ion rechargeable battery. Before first use, the Li-ion battery must be fully charged using the supplied USB cable. A red charging LED turns off when charging is complete, typically within 60–90 minutes depending on the USB power source.
🛠️ Propellers and Binding Process
The drone’s quadcopter configuration requires correct placement of propellers — two marked “A” (CW) and two “B” (CCW) — to ensure controlled flight. Misplacing them can cause unstable or uncontrollable behavior. Once properly assembled, the controller and drone must be bound via a simple procedure involving powering up the controller first and then connecting the drone’s battery. Successful binding is indicated by solid LED lights on both units.
✈️ Flight Controls and Modes
🧭 Control Scheme
The E88’s flight controls are intuitive but robust for its class:
- Throttle & Yaw: Left stick
- Pitch & Roll: Right stick
- Manual Mode: Full pilot control
- Altitude Hold: Uses barometric pressure sensor to maintain height
- Headless Mode: Controls relative to pilot direction rather than drone orientation
- Speed Levels: Tailor response for beginners or advanced flyers
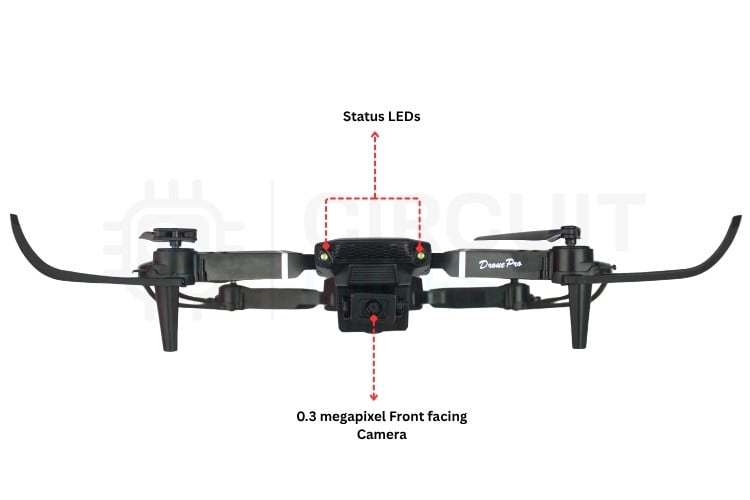
🪩 Special Features
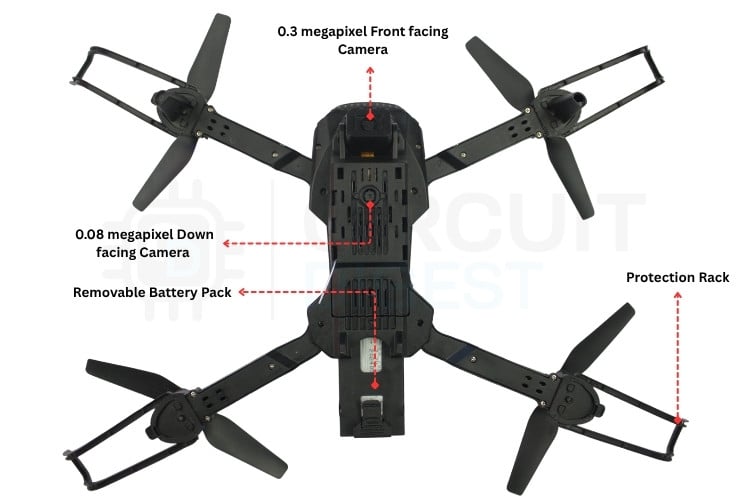
Beginner-friendly functions like one-key takeoff/landing, flip & roll, and automatic stabilization help ease the learning curve. The included Wi-Fi FPV camera streams up to 720p to a smartphone app, although the signal quality may vary depending on interference and bandwidth.
🔍 Internal Hardware Architecture
A core reason to tear down the E88 is to understand how budget drones integrate complex systems in a small footprint. The teardown reveals two main subsystems: the flight controller inside the drone and the controller electronics.
🧠 On the Drone Side
Key components include:
- STM32F030F4P6 MCU — Main flight microcontroller
- XN297LBW RF transceiver — 2.4 GHz wireless communication
- L3GD20H gyroscope & BMP180 barometric sensor — Flight stabilization and altitude hold
- Power regulators and MOSFETs — For motor and subsystem power management
- Wi-Fi camera module — Provides FPV capability
🎮 Controller Electronics
Inside the handheld controller is a microcontroller (BS83B08C) that reads stick positions and sends commands via the same RF transceiver protocol. Power comes from voltage regulators to maintain stable operation.
⚙️ Power Management and Flight Control
The E88’s power system uses a 1200mAh (nominal) Li-ion battery that provides 8–10 minutes of flight time. Voltage regulators ensure clean power for sensors and the camera, while transistor-based switching reduces unnecessary power drain. Reverse polarity protection prevents damage if the battery is connected incorrectly.
The flight controller’s firmware uses sensor fusion — combining gyroscope and barometric data — to maintain stable flight. This includes a control loop that runs at 250 Hz with real-time PWM motor driving.
🧠 What Hackers and Makers Can Learn
This teardown is more than a hardware breakdown. It’s a real-world example of how embedded systems, RF communication, sensors, and power electronics combine in a cost-optimized consumer product. For students, hobbyists, and DIY enthusiasts, it’s an excellent reference for learning about:
- Microcontroller integration
- Sensor fusion for flight control
- RF protocol basics
- Power distribution strategies
📌 Final Thoughts
The E88 drone teardown shows that even budget drones are intricate systems — blending hardware design, firmware control, and user-friendly features. While it’s not a platform for advanced drone engineering or open-source tweaking, it’s perfect as an educational example for makers and learners who want to peek under the hood of consumer-grade electronics. Dive into the best electronics projects to discover a wide range of builds from simple circuits to advanced systems.