DMX light strips are different from light strips with SPI signal protocol. The DMX LED strip need to set the address before control, because DMX signals are sent in a sequential manner, with each channel of the DMX controller corresponding to a specific light fixture or group of fixtures.
DMX LED strips use external ICs for a more stable performance. With dual signal transmission, the DMX512 LED strips have better fault tolerance that usually called breakpoint resume function.
Generally, the DMX LED strips have 5 wires: V+, address, Data A, Data B, and GND.
Connect
The connection steps of DMX LED strips are similar to the SPI addressable LED strips.
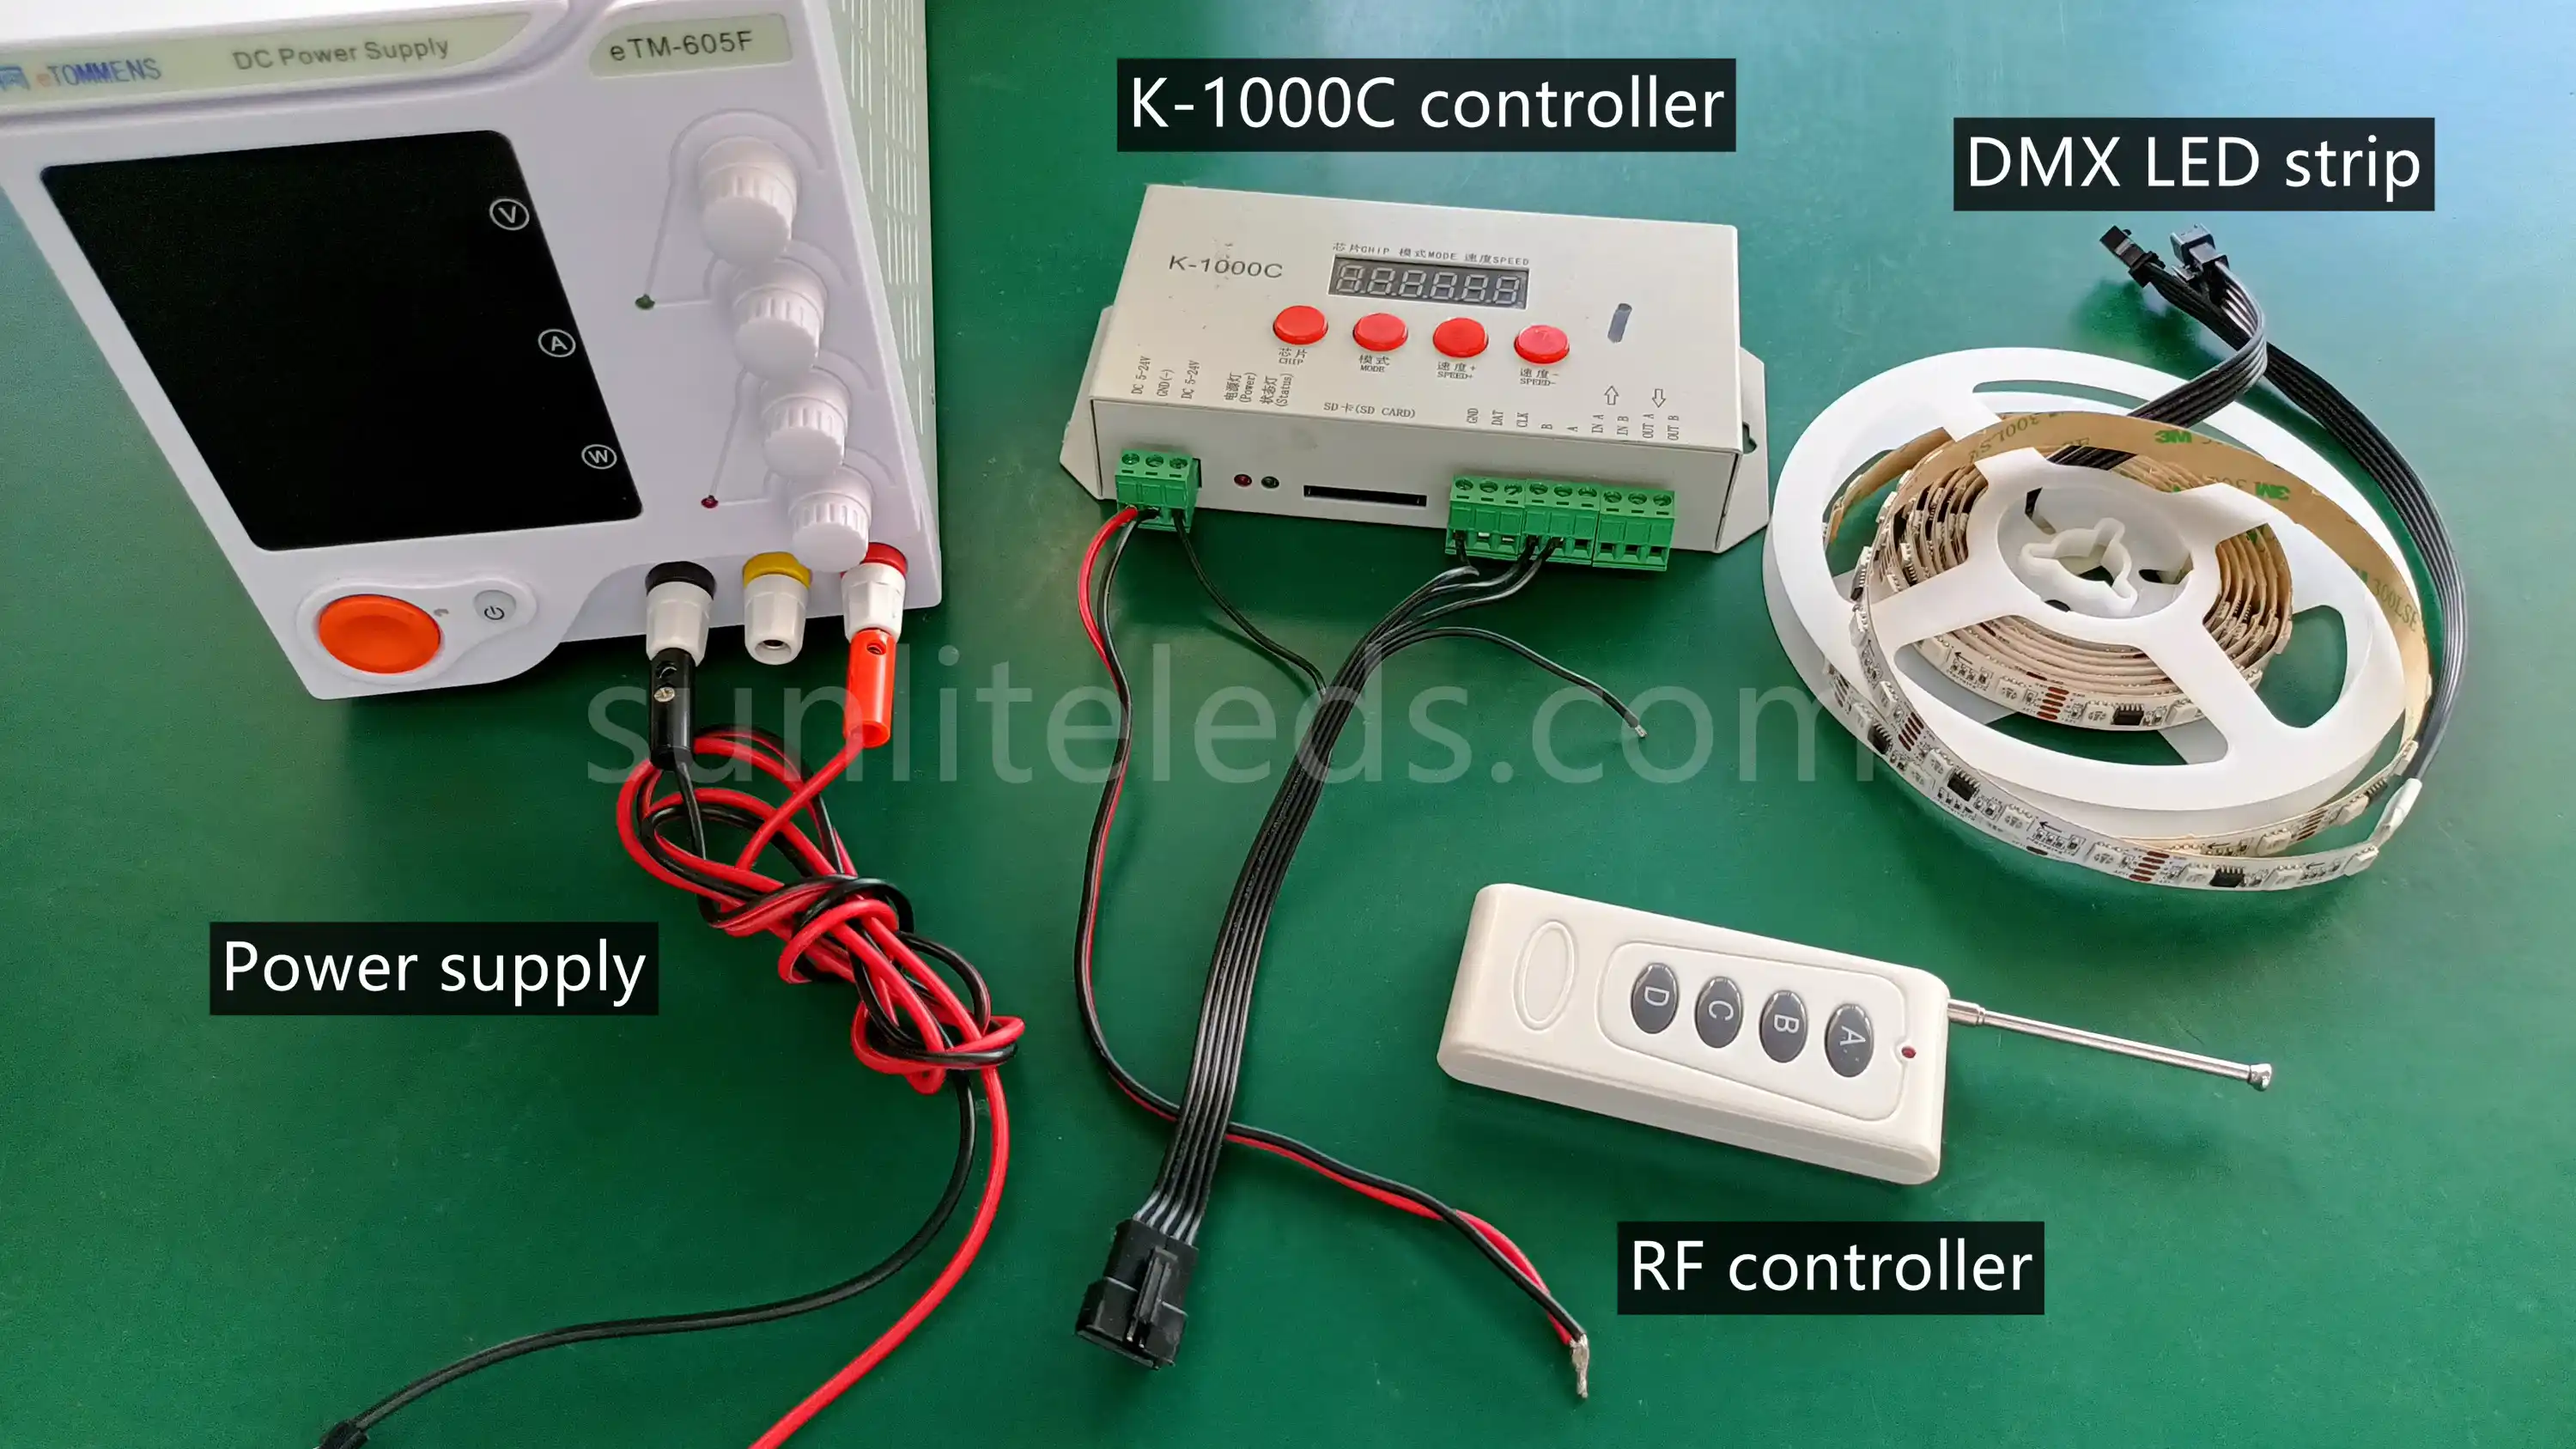
Step1: prepare a power supply, a controller, and a roll of DMX LED strips. Here we use an adjustable power supply, a K-1000C controller, and a roll of DC24V DMX512 RGB LED strip.
Second, connect the power wire and LED strip connector to the controller. There are 5 cords on the connector, but you just need to connect 4 wires. The second address wire is only for address setting, and we don’t connect it when lighting. Please refer to the following picture to connect:
Third, connect the controller to power supply. Note that the V+ and GND terminals of the power supply and controller port correspond.
Fourth, connect the DMX strip input terminal to the controller. Please check the signal direction before each connection to avoid damage to the strip light caused by reverse signal transmission.
Ok, now the connection work is done. Turn on the power to light up the light strip.