Design your own mug using SelfCAD, a 3D modeling software program.
I'm going to show you how to make a mug with 2 different handles that you can choose fro, a square one and rounded one.
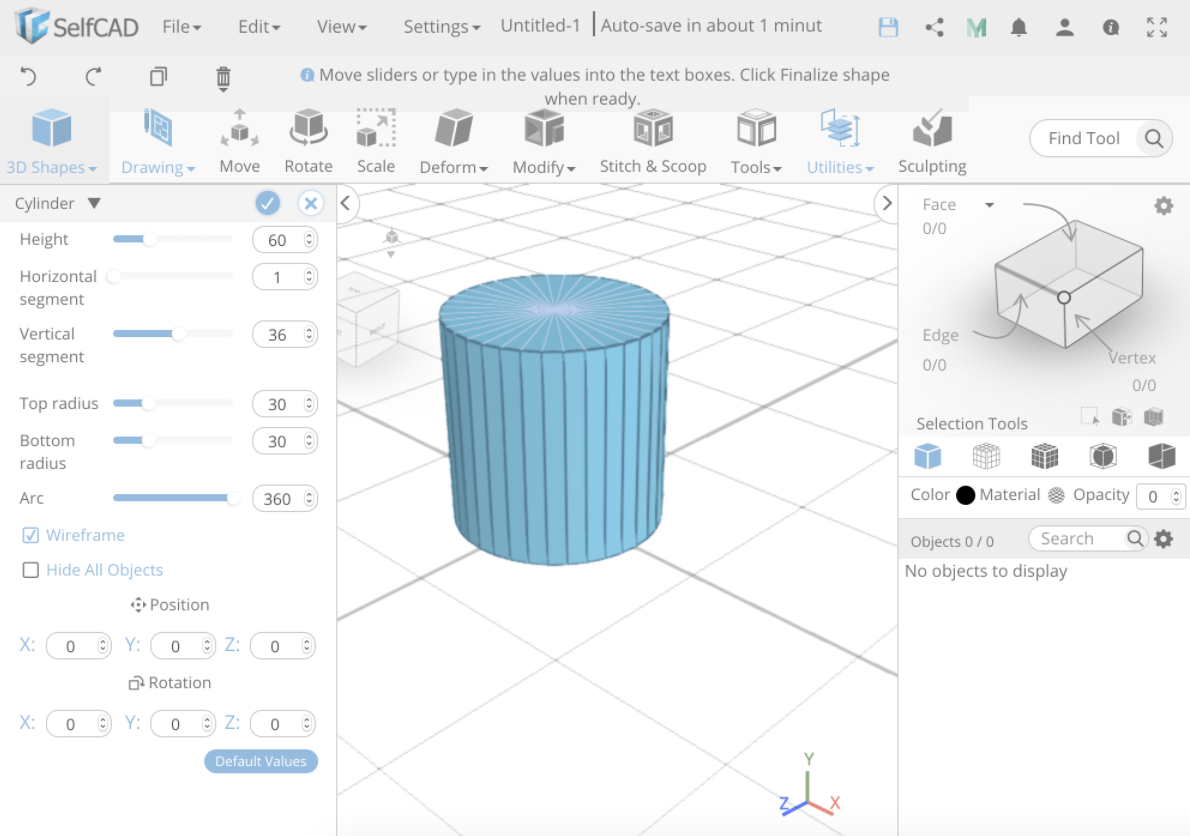
To make the cup part, first let’s place a cylinder. We want our mug to be very round and nice shaped so let’s increase the vertical segments and it’s always good to keep it as a multiple of 4 so I’ll pick 36, just eyeing it and keeping with that rule.
Let’s make the height 60 and the radius 30 so our object is in proportion (a radius is half the length of the diameter which is the size of the top circle).
First let’s try the square one.
This time let’s drop in a cube, I’m using the position to make it higher than my mug so I can see how thick I want my handle to be.
It might be helpful at this point to change your perspective to be right so you can see the next step clearly.
Now we will use the deform tool bend.
Open up the bend tool and click the drop down for advanced settings and click dynamic origin. Dynamic origin repositions the center (where it’s rotating from) as it rotates to give your bend a more even look. You can use the gizmos to pull the handle and bend to one side, you might need to pull it a few times in the same direction to give it the look you want.
Let’s place it into position.
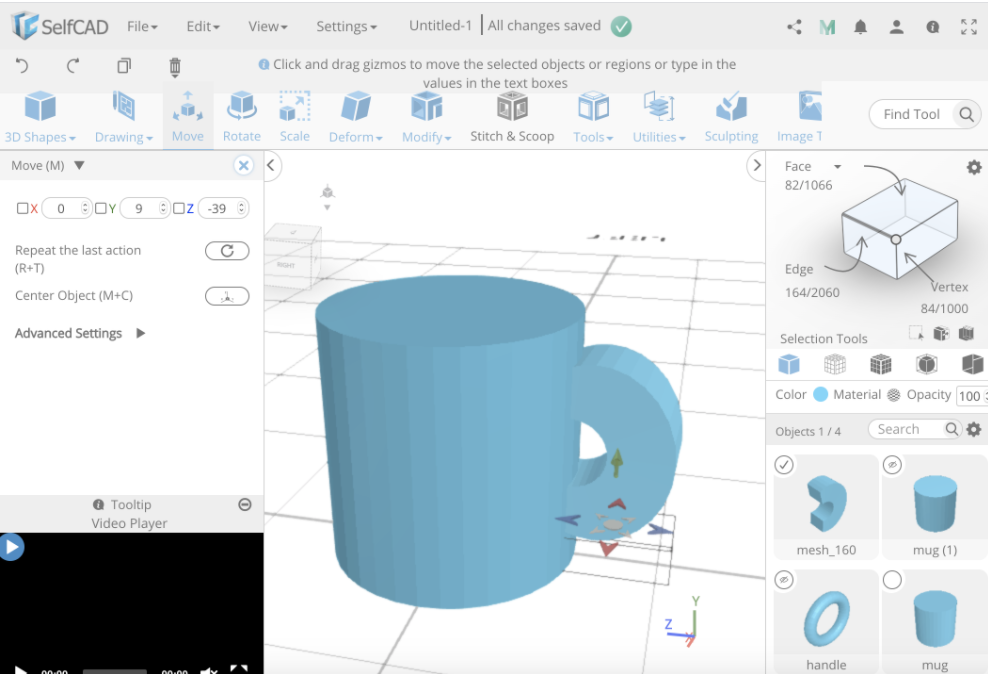
Good job! OK, now for the rounded one, hide what you have so far and show the first mug that we previously hid. Then we will drop in a torus.
Using the move tool that we discussed before we’re going to move it into place.
See, that was simple right? You didn’t even need me, but don’t worry you will for the next step!
To get the best view of this it will probable be helpful to view your object on wireframe.
Now we’re going to select both objects, hit stitch and scoop and click difference, subtract the mug but before you click confirm make sure to keep subtracted objects!
Now select both objects again, hit utilities and marge objects to make it one shape!
This part is where we turn our simple shapes that we dropped in, into a mug we can use. Also here is where you choose which handle you want to use or use the following steps for both!
Use the face selection to select the top face of our mug. Being on the wireframe plus mesh selection will help with this.
If you have trouble selecting the face you can use the marquee selection and make a small box over the center of your mug and it will select the top face for you.
Here's a trick, if you drag your marquee from right to left it will select any of the polygons you have partially passed over, but if you select from left to right it will only select the one you have fully covered!
Now click modify, inset and we’re going to make a cut where we want the hollow part of our mug to be. I think 6 looks nice but you can choose how you like yours to look.
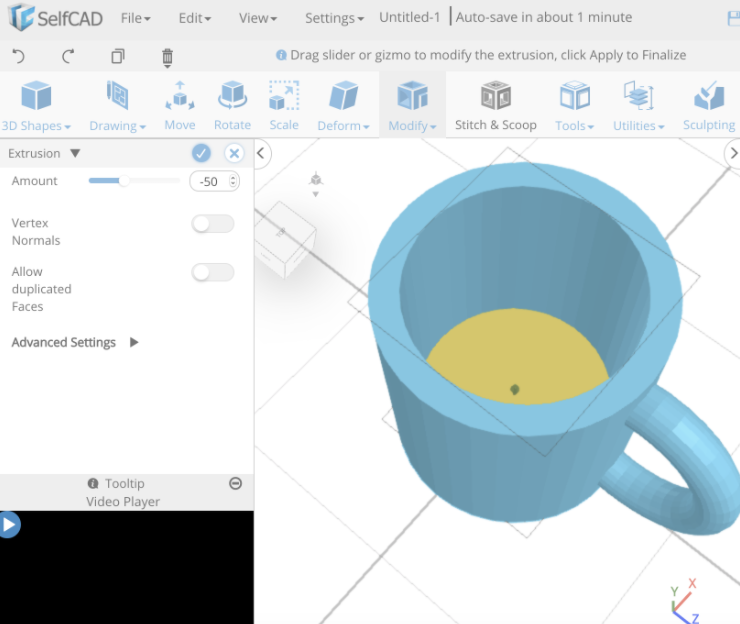
Now let’s extrude it. Go to modify, extrusion and since our mug is 60 in height let’s set the extrusion to -50 so it almost reaches the bottom but not quite.
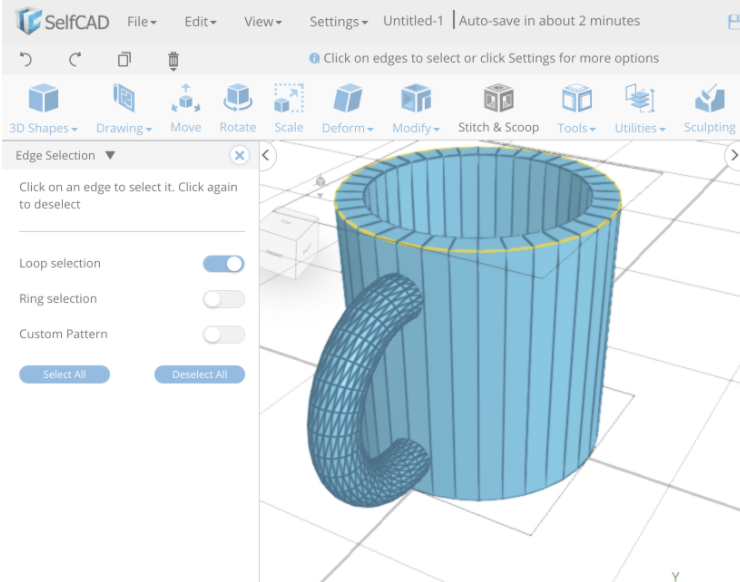
On the visualization window select to make sure you have edges selected and click on the gear next to the selection window to open up advanced settings. Click to use loop selection, and select two of the edges of the lip of the mug that are next to each other, this will automatically select the full lip of the mug.
Now click modify, fillet. Choose the intensity and level to change how round you want your edge to be.
Let’s do that again for the inside lip.
Ok, now we’re done! Go print your mug and enjoy! (Please use food safe printing material in your 3D printer)