Make your own signal generator that can output square waves, triangular waves, and PWM (pulse width modulation).
Signal generators are a valuable tool when prototyping and debugging circuits. They allow for various waveforms to be injected into circuit nodes with specific amplitude and frequency. Purchasing one can set you back a large amount of money so, in this DIY Hacking Series, I will show you how to make your own signal generator that can output square waves, triangular waves, and PWM (pulse width modulation).
How Does the Signal Generator Work?
The first stage of the signal generator is a VCO, which stands for voltage controlled oscillator. This VCO is made up of op-amps U3A and U3B where U3A is configured as an integrator and U3B is configured as a Schmitt trigger. When an input voltage is applied to the VCO (via RV4), the integrator U3A integrates this constant voltage which results in the output of U3A being a downward steady slope (falling edge of the triangular waveform). Eventually, the output from the integrator goes below the lower threshold of the inverting Schmitt trigger (U3B) which results in the output of the Schmitt trigger switching to 5V. When this happens, Q1 is fully saturated which results in C1 discharging (through R3). As this happens, the integrator's output begins to rise (the rising edge of the triangular waveform). Eventually, this output crosses the upper threshold of the inverting Schmitt trigger which results in the Schmitt trigger's output switching to 0V. This turns off Q1 and results in the integrator's output falling starting the entire process all over again.
The PWM waveform is generated by feeding the triangular waveform (found on the output of U3A) into an op-amp (U1A) configured as a comparator. The positive input of the comparator is connected to a potentiometer (RV1) and the negative input is connected to the triangular waveform source. When the triangular waveform goes above the voltage from the potentiometer, the output switches to 5V. When the triangular waveform goes below the voltage from the potentiometer, the output switches to 0V. By adjusting the potentiometer, the op-amp U1A will turn on and off at different levels which results in a PWM square wave.
Each waveform source is further connected to a unity gain buffer followed by a potentiometer. The unity gain buffer prevents further circuits from affecting the VCO and the potentiometer adjusts the amplitude of the output wave. Each waveform is then connected to another unity gain buffer at the end to improve output impedance.
Construction
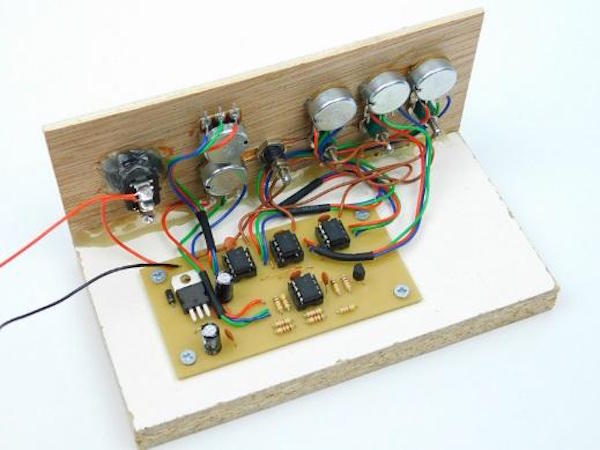
This circuit can be made using standard construction techniques including solderless breadboards, strip boards, and PCBs. Attached in the project files is the CNC information needed to mill your own signal generator including auto-levelling code. It is advised that this project is used in conjunction with a project box or casing if the intent is to build you own bench tool. The example shown here is in an open case design to show internal wiring and construction methods.
Frequency Adjustment
If you find the frequency of this VCO is too small or too great, you can adjust C1 to a large range of values but remember that the frequency of this oscillator is also limited to the frequency response of the LM358. Realistically, frequencies above 500kHz are not possible unless a different op-amp is used.
Voltage Control
Another neat trick that you can do is to replace the potentiometer RV4 with a unity gain buffer and then connect the input of that buffer to a banana plug. Therefore, you can have a signal generator whose frequency can be controlled by an external circuit (more specifically, an external voltage). This could be used for FM generation or to create a close loop feedback where the frequency generated is turned into a voltage which in turn controls the VCO.
Project Files
DIY Signal Generator Files