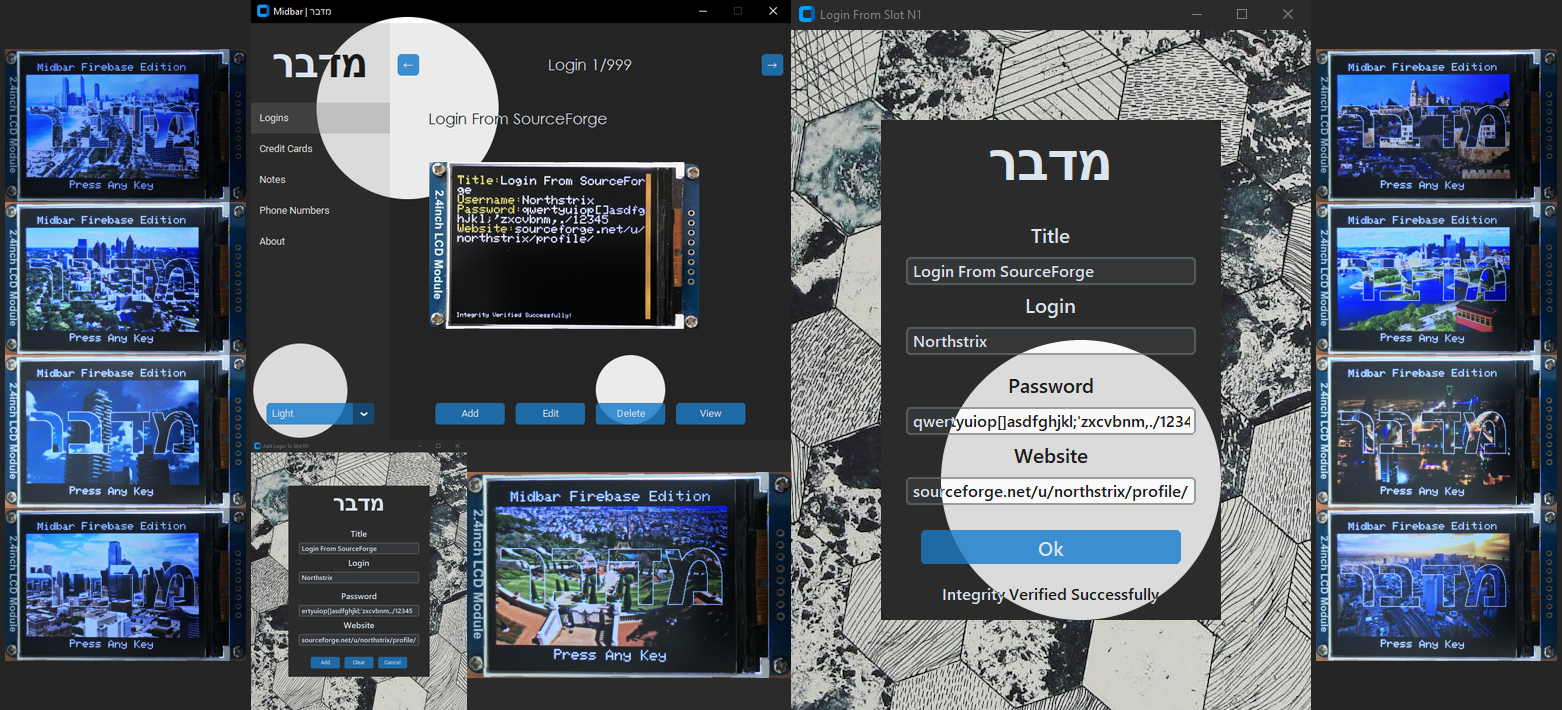
After making the Midbar Firebase Edition V2.0, I realized that even though it’s a fully functional vault synced with the desktop app, it’s still insufficient. For starters, it only allows the user to store login credentials on it, not to mention that the desktop app provided with that version was raw and a bit slow as it had to load the whole record from the Google Firebase and not just its title, in other words, there was no preview function. In addition to that, the hardware vault utilized a small 160x128 screen and couldn’t emulate the USB keyboard. To negate these flaws, I took Midbar V6.0 as the base, replaced the encryption algorithm, and modified it to utilize the Google Firebase as the filesystem. I also made a new desktop app that enables users to work not just with login credentials but also with credit card details, notes, and phone numbers. The desktop app provided in that version only loads the whole record when it’s being viewed or edited, allowing faster movement between the slots in the main menu.
This version of Midbar stores the encrypted data in the cloud while keeping the cryptographic keys on the edge!
*By the way, some pictures demonstrated in this tutorial are taken from the tutorial for Midbar V6.0 because, aside from a few minor modifications, the GUIs utilized by both Midbars are basically the same.
This tutorial is also available on Instructables and Hackster
Updated: A version of this device that's much easier to set up is available at: https://maker.pro/everything-esp/projects/how-to-turn-esp32-cyd-into-a-secure-iot-data-vault
Supplies
- ESP32 x1
- 2.4 Inch TFT LCD with ILI9341 x1
- PS/2 Keyboard x1
- PS/2 Port x1
- Wi-Fi Access Point x1
- STM32F103C8T6 x1 *optional
Encryption Algorithm
Midbar Firebase Edition V3.0 uses the same encryption algorithm as Midbar Firebase Edition V2.0.
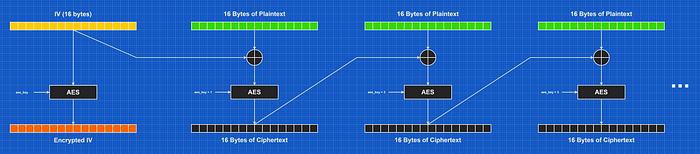
Midbar takes the user input, splits it into the 16-byte blocks, and passes each block to the AES-256.
The only difference between the implementation of the cipher block chaining (CBC) mode utilized by both versions of Midbar and the usual implementation of that mode is that I also added the key incrementation to it. When the encryption algorithm takes input data, it backs up the AES key and then increments it each time after the AES processes a block. When the whole input is processed, the AES key is restored to its initial state.
Note that the key incrementation starts from the 16th byte and goes down to the first.
Here’s the key incrementation function written in Python.
def incr_aes_key():
   global aes_key
   aes_key = bytearray(aes_key)
   i = 15
   while i >= 0:
     if aes_key[i] == 255:
       aes_key[i] = 0
       i -= 1
     else:
       aes_key[i] += 1
       break
Key Derivation
Midbar Firebase Edition V3.0 is the first version of Midbar that uses the PBKDF2 to derive cryptographic keys from the users’ master password.
The PBKDF2 derives 96 bytes. The first 32 bytes produced by the PBKDF2 are used as the AES key, the following 32 bytes are used as the HMAC key, and the remaining 32 bytes are encrypted and stored in the Google Firebase to check whether the user entered the right master password when they unlock Midbar.
Integrity Verification
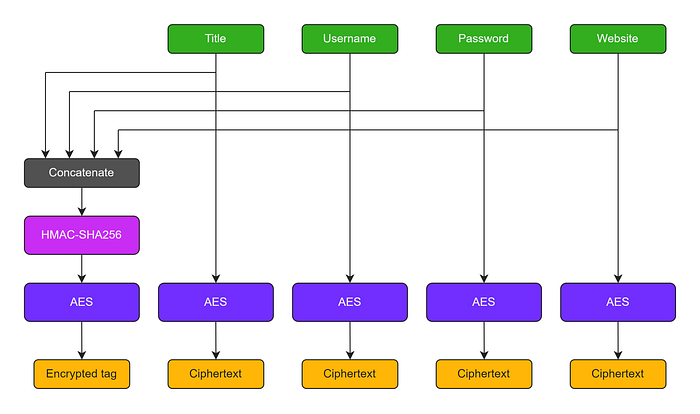
The integrity verification feature of Midbar is based on “HMAC-SHA256.” When you enter data into Midbar, it consolidates all the data into a single string, computes a tag for that string, and saves the newly computed tag in encrypted form. When you decrypt your data, Midbar also decrypts the previously saved tag and computes a new one for the decrypted data. It then compares both tags. If they don’t match — Midbar notifies you that the integrity verification failed.
Install CP210x Driver and Configure Arduino IDE
If you’ve never flashed ESP32 before you need to configure Arduino IDE and install CP210x driver to upload the firmware into the board, you can download the CP210x driver for ESP32 here: https://www.silabs.com/developers/usb-to-uart-bridge-vcp-drivers
Configuring IDE isn’t a part of this tutorial. You can read about it here: https://randomnerdtutorials.com/installing-the-esp32-board-in-arduino-ide-windows-instructions/
Download Firmware
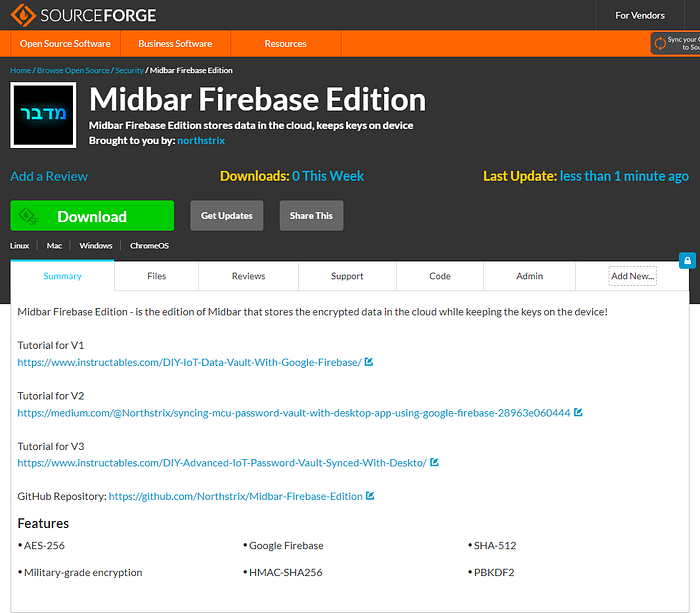
You can download the firmware for Midbar from one of these sources:
https://sourceforge.net/projects/midbar-firebase-edition/
https://github.com/Northstrix/Midbar-Firebase-Edition
Download and Install the Libraries
TFT_eSPI: https://github.com/Bodmer/TFT_eSPI
PS2KeyAdvanced: https://github.com/techpaul/PS2KeyAdvanced
PS2KeyMap: https://github.com/techpaul/PS2KeyMap
Firebase-ESP32: https://github.com/mobizt/Firebase-ESP32
The process of unpacking libraries is typical. You can unpack the content of the archive into the folder: …\Arduino\libraries. Or open the Arduino IDE, click to the Sketch -> Include Library -> Add .ZIP Library… and select every archive with libraries.
Other required libraries are already present in one way or another.
Replace the Preset File for the TFT_eSPI Library
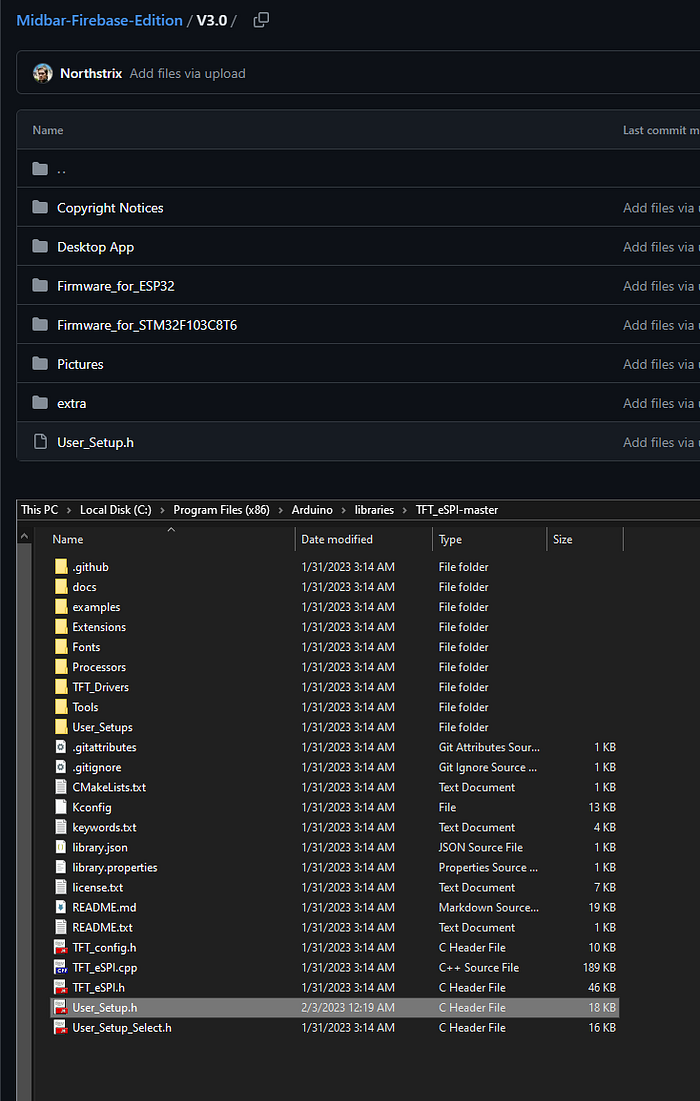
TFT_eSPI Library requires the config to be adjusted depending on the display and the board that drives that display. Initially, I wanted to write the mini-guide on adjusting the config for the ILI9341 display to be properly used on the ESP32’s HSPI. But then I realized that it would be more convenient to attach the adjusted config to the firmware and tell you where to place it.
Take the “User_Setup.h” file from the “Midbar-Firebase-Edition\V3.0” directory and place it in the “C:\Program Files (x86)\Arduino\libraries\TFT_eSPI-master” folder.
Set Up Google Firebase
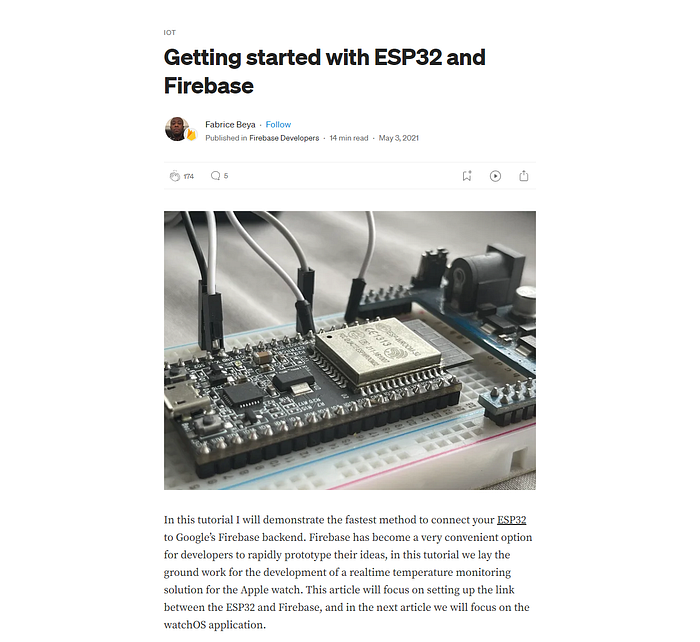
I would be happy to explain to you how to set up Google Firebase. However, I believe that the article at https://medium.com/firebase-developers/getting-started-with-esp32-and-firebase-1e7f19f63401 does a better job on that. I suggest reading the article up until the “Development Environment Setup” headline.
When setting up the database, save the “Realtime Database URL” and “Web API Key.”
These values will be needed later.
Modify the Firmware
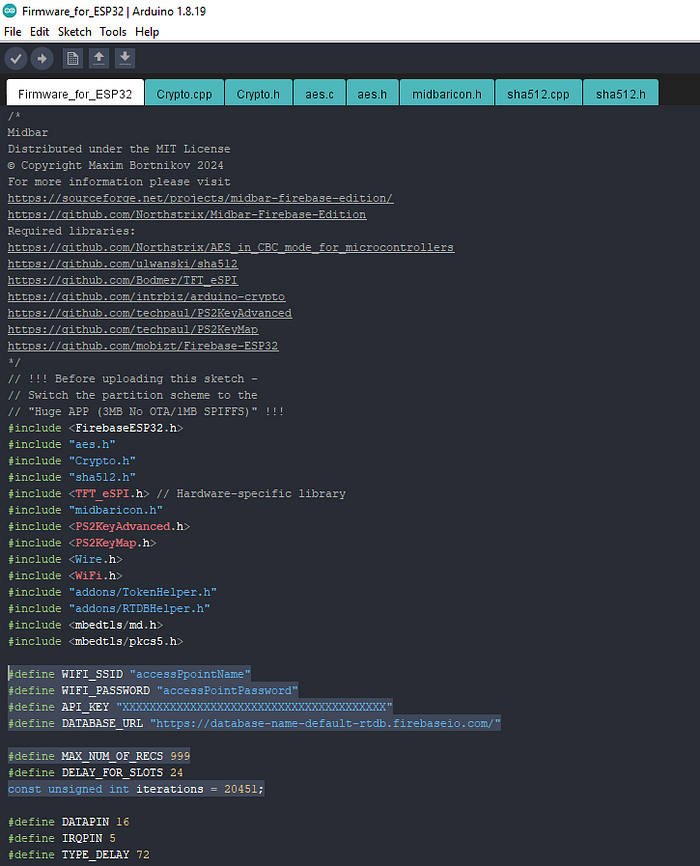
Open the “Firmware_for_ESP32.ino” file from the “…\V3.0\Firmware_for_ESP32” folder and modify the values of these four variables:
WIFI_SSID
WIFI_PASSWORD
API_KEY
DATABASE_URL
Also, adjust the values in these two lines if needed:
#define MAX_NUM_OF_RECS 999
const unsigned int iterations = 20451;
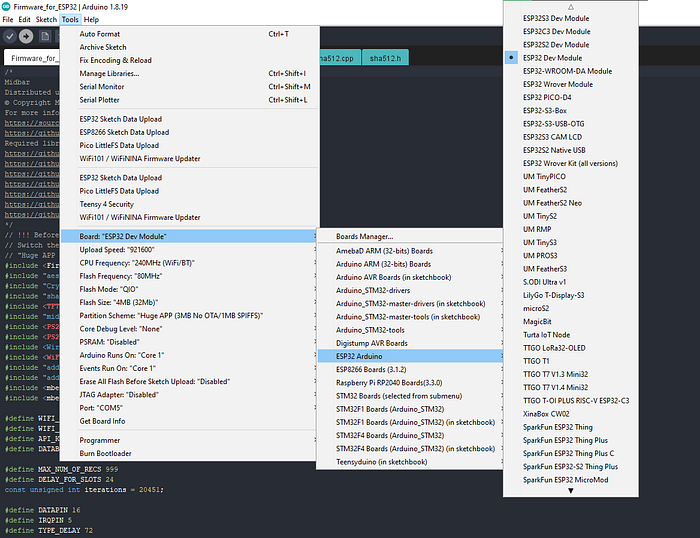
Switch the Partition Scheme to the “Huge APP (3MB No OTA/1MB SPIFFS)”
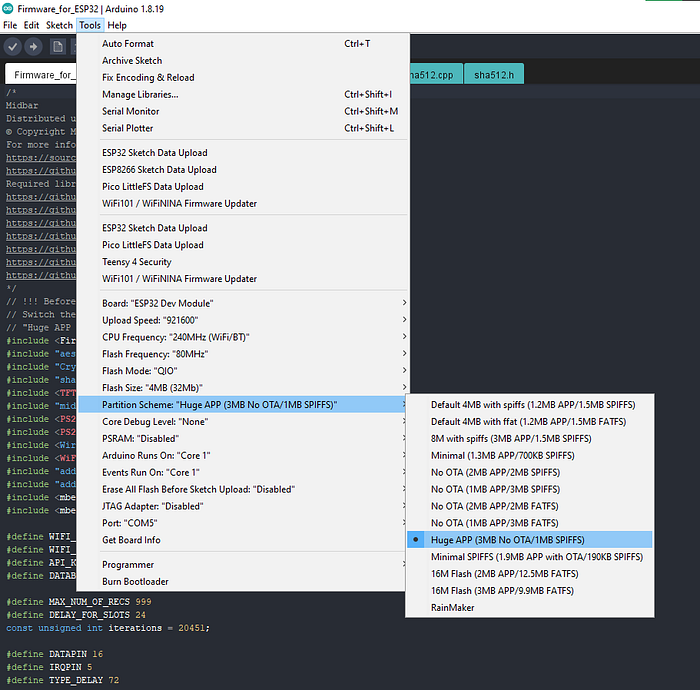
You have to switch the partition scheme to the “Huge APP (3MB No OTA/1MB SPIFFS)” before you continue working with ESP32 because the firmware is too big for the default partition.
Flash ESP32
Upload the modified firmware from the “…\V3.0\Firmware_for_ESP32” into the ESP32.
Flash STM32
If you want Midbar to emulate the USB keyboard, you’ll need to upload the firmware from the “…\V3.0\Firmware_for_STM32F103C8T6” folder into STM32F103C8T6.
The process of setting up the Arduino IDE and flashing the STM32F103C8T6 is quite complex and relatively time-consuming.
Here’s the link to the Google Translate version of the helpful tutorial that explains how to properly flash STM32F103C8T6: https://habr-com.translate.goog/ru/articles/395577/?_x_tr_sl=auto&_x_tr_tl=en&_x_tr_hl=en-US&_x_tr_pto=wapp&_x_tr_hist=true
You can find the original version of the tutorial at https://habr.com/ru/articles/395577/
Assemble the Device
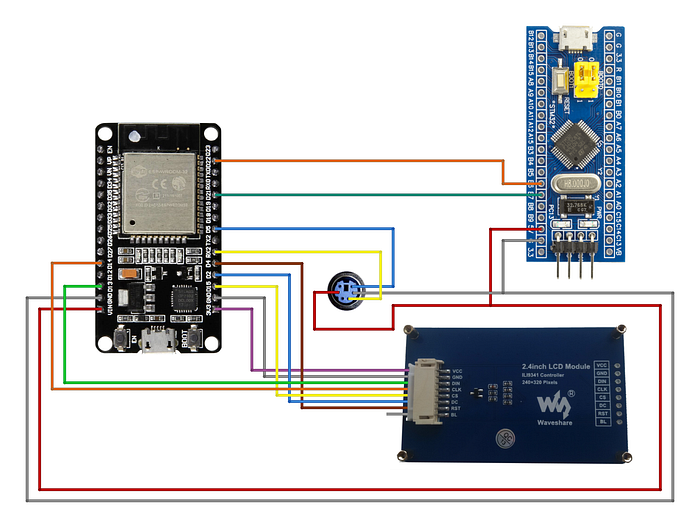
Assembling the device shouldn’t be hard, simply connect all required components to the ESP32. When it comes to the “BL” pin of the ILI9341 display, different versions of the display have different requirements on what to do with it. Some versions specify that it must be connected to the +3.3V, some require it to be grounded, and others allow you to leave it unconnected.
Get the Firebase Private Key

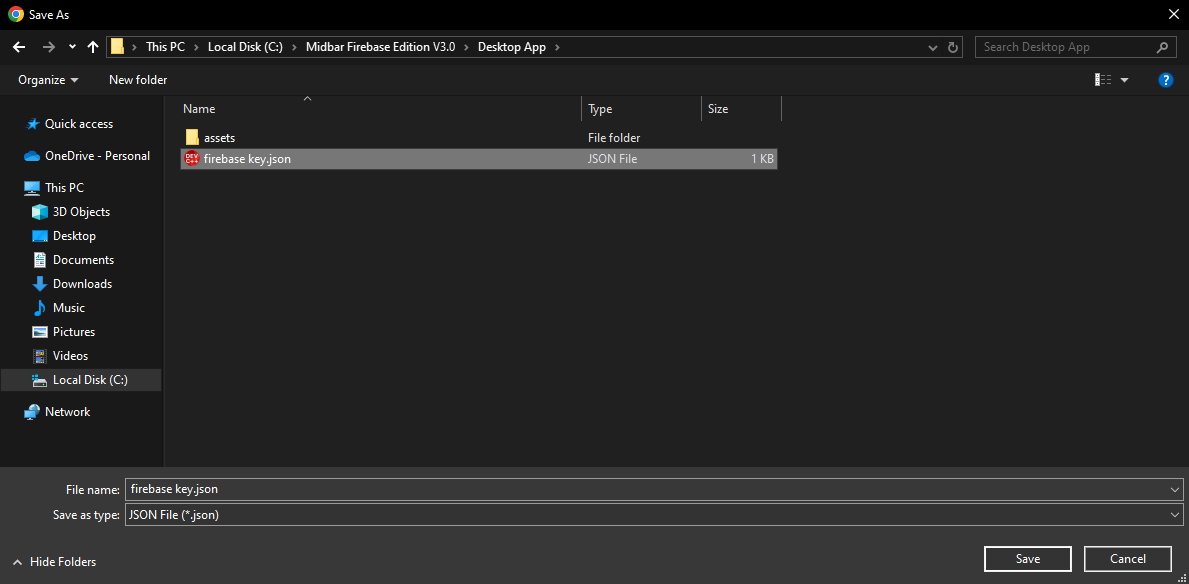
To enable the desktop app to interact with the Firebase, you need to get the private key and place it in the same folder as the desktop (client) application.
To do so:
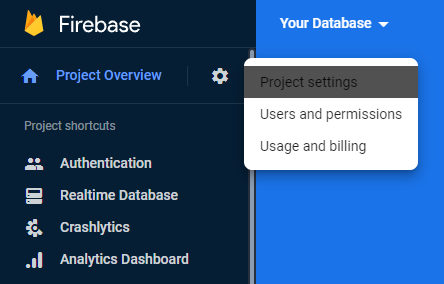
- Open your database;
- Click on the “Settings” icon;
- Click on the “Project settings” line;
- When the next tab loads, go to the “Service accounts” tab;
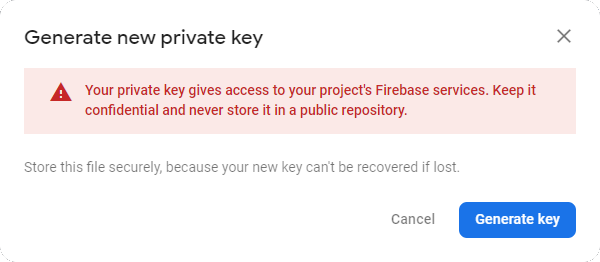
- Click the “Generate new private key” button;
- Click the “Generate key” button in the pop-up window;
- Save the private key to the “…\V3.0\Desktop App” folder under the “firebase key.json” name.
Add Database URL to the Desktop App
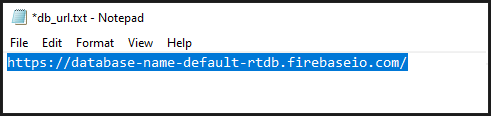
Navigate to the “…\V3.0\Desktop App” folder, open the “db_url.txt” file, replace my database URL with yours, press “Ctrl + S” and close the file.
Power the MCU Vault Up


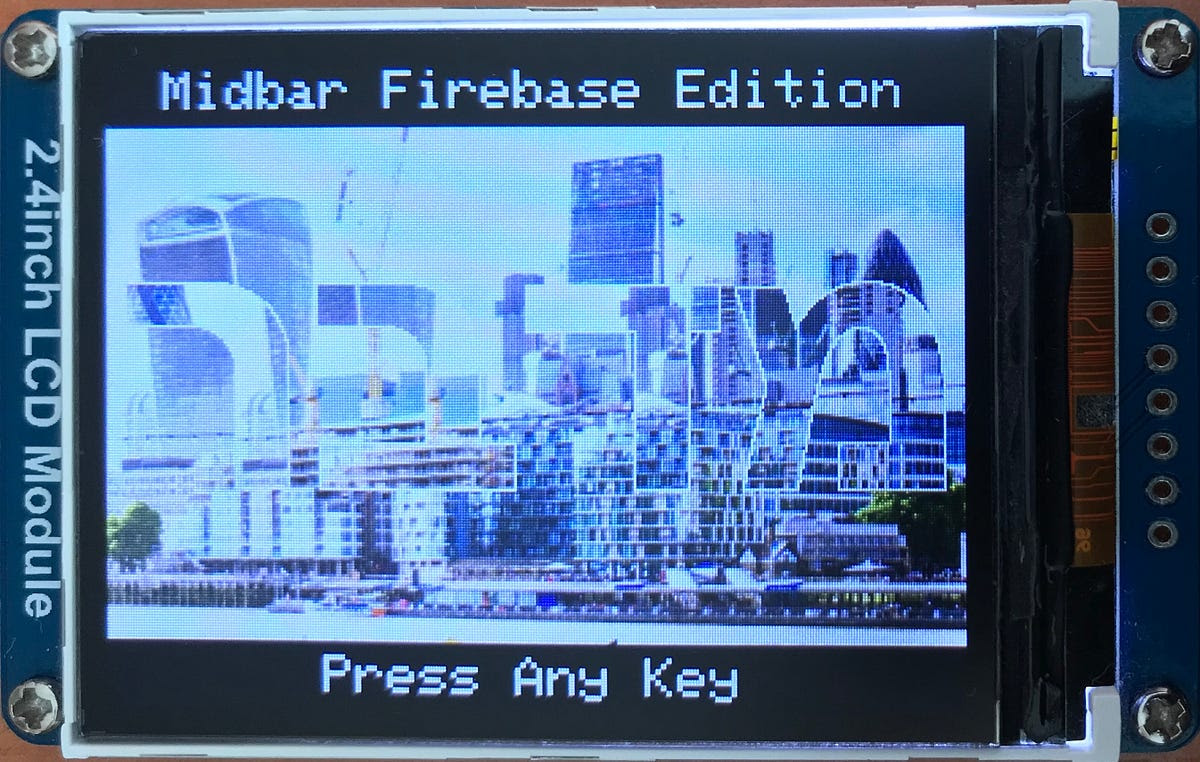


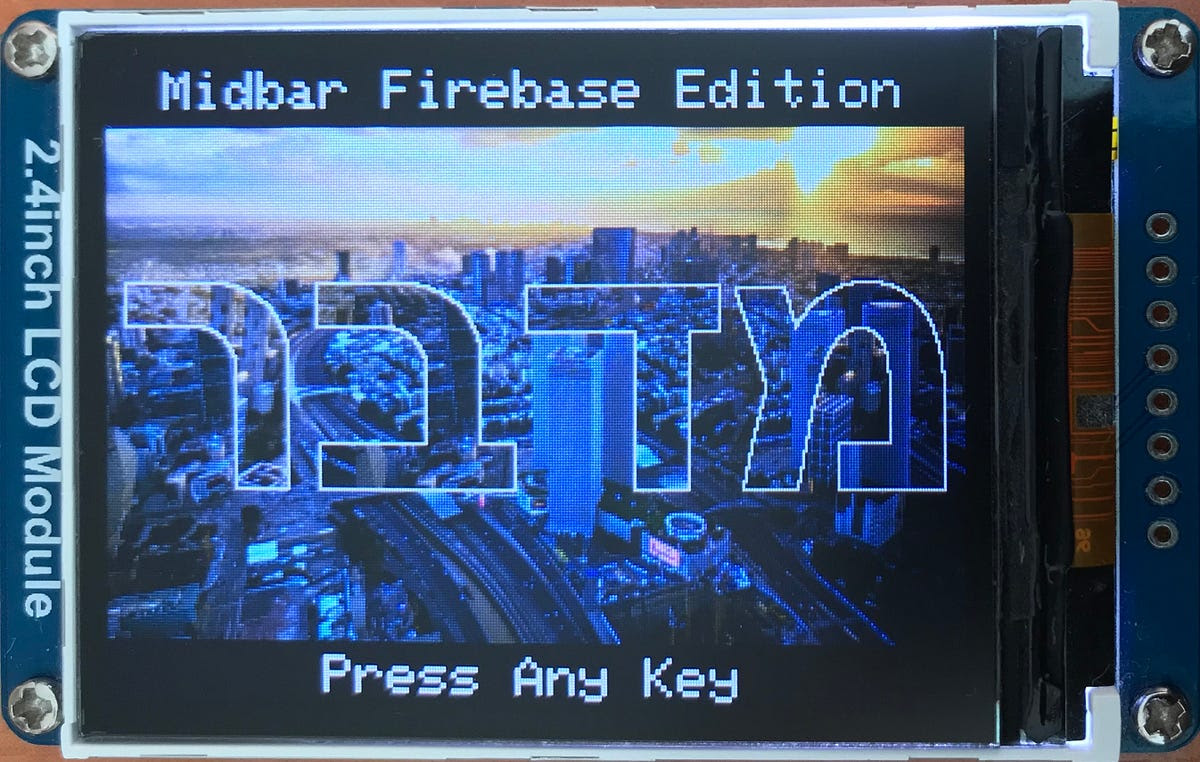
That version of Midbar offers you 14 lock screens. It randomly chooses a lock screen when it initializes the connection to the Google Firebase and then chooses another one when it asks you to press any key to continue.
If you want the Midbar to emulate a USB keyboard, connect a data cable to the STM32.
Credit for photos:
Abu Dhabi:
Photo by Kevin Villaruz from Pexels
Atlanta:
Photo by Kelly from Pexels
Buildings:
Photo by Francesco Ungaro from Pexels
Dallas:
Photo by R K on Unsplash
Haifa:
Image by Volker Glätsch from Pixabay
Jakarta:
Photo by Afif Ramdhasuma from Pexels
Jerusalem:
Image by krystianwin from Pixabay
London:
Photo by Mike Stezycki on Unsplash
Miami:
Photo by Alejandro Luengo on Unsplash
Milan:
Photo by Samuel Agbetunsin on Unsplash
Pittsburgh:
Photo by Yuhan Du on Unsplash
Riyadh:
Image by apriltan18 from Pixabay
Singapore:
Photo by Jay Ang on Unsplash
Tel Aviv:
Photo by Shai Pal on Unsplash
Set Master Password


Once you configure the MCU password vault and the desktop app, set the master password. The master password can be set using the MCU password vault or the desktop app, whichever you choose.
Enjoy the Result


Although using the desktop app to access your records downgrades the overall security of Midbar by exposing it to side-channel attacks, It might be more convenient for some users. If you prefer extended security over convenience — check out the Midbar (Teensy 4.1) V3.0. Or, if you prefer it the other way around, you can just use the desktop app without the hardware vault.
And while Midbar is no guarantee of world peace or social harmony, I do believe that it’s an important contribution to the protection of your data from unauthorized access.
I think it’s also worth mentioning that Midbar’s source code is distributed under the MIT license. That grants you the freedom to customize, adapt, and modify Midbar according to your needs and preferences. In other words, you can create your own version of Midbar or use it as a starting point for building new projects without the need for external permission.
*As for the origin of the patterns:
I made 80x80px patterns myself, the full-height flower pattern was generated by Bing Image Creator on December 5th, 2023.
You can view each pattern individually if you want.