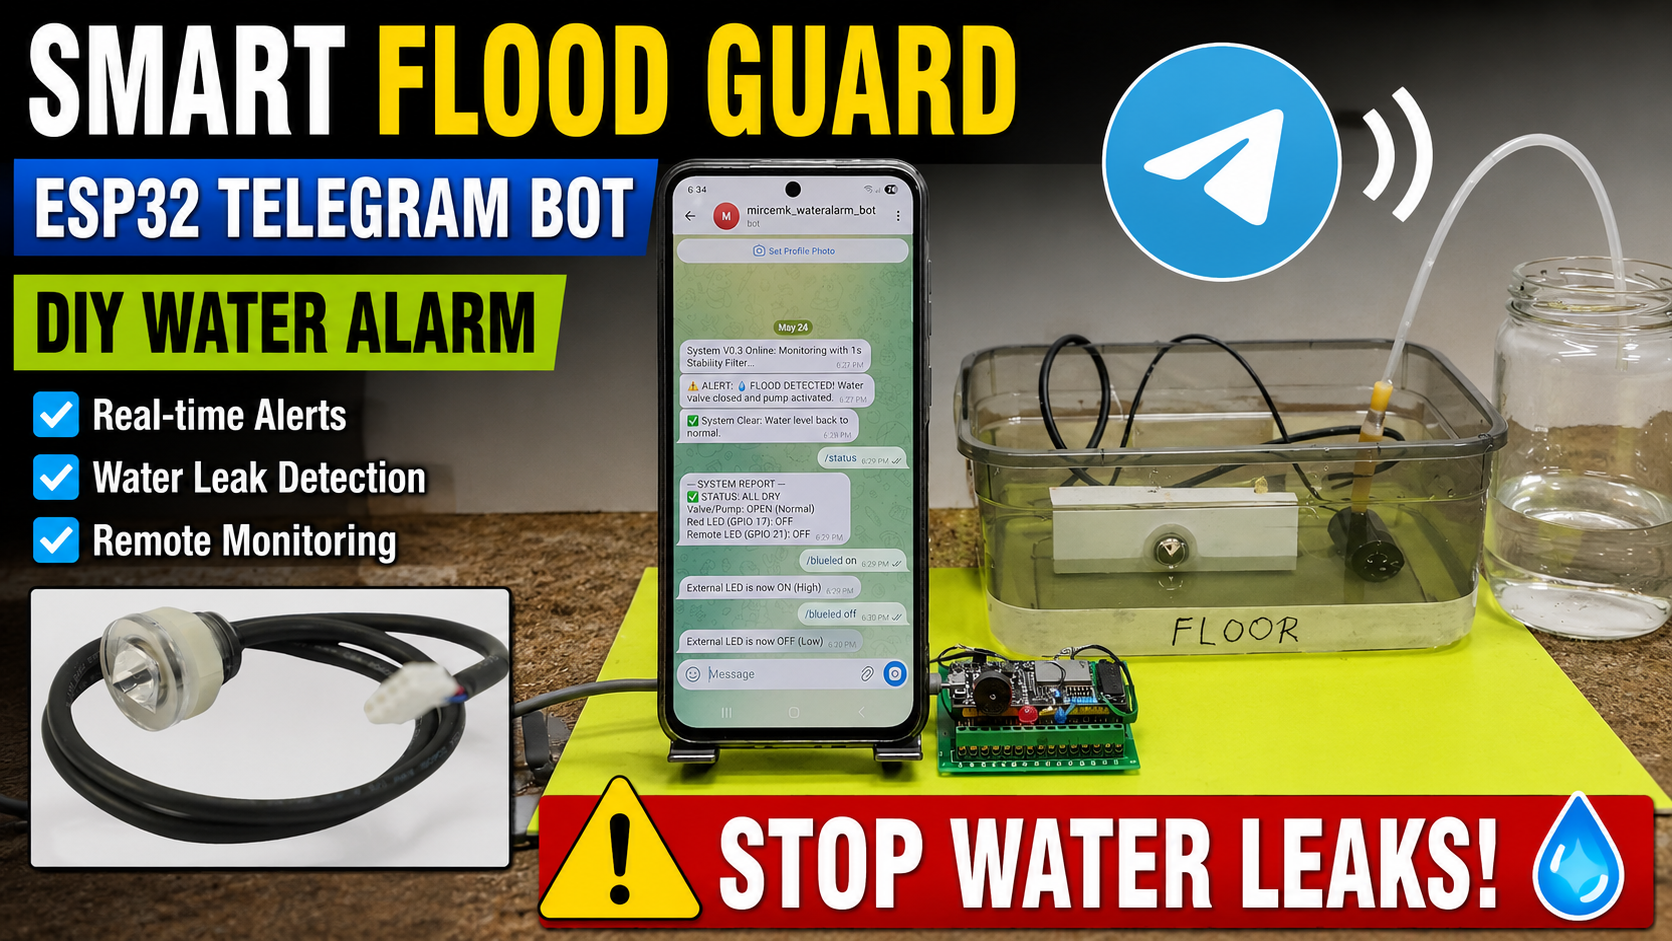
How to build a highly reliable, automated Flood Protection System using an ESP32 microcontroller and a Telegram Bot for real-time remote monitoring and control.
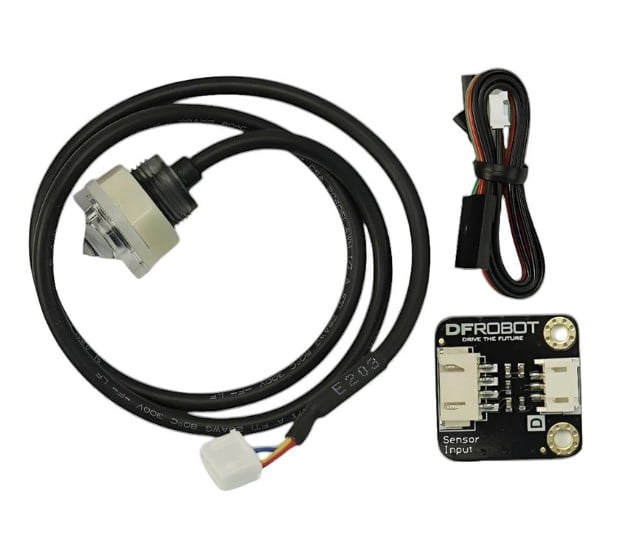
Recently I had an unpleasant experience in my home, specifically my ground floor was flooded as a result of a burst water pipe, and at that moment I was absent. So I decided to develop a warning system for such phenomena that would also take some action in order to prevent greater damage from occurring. For this purpose, I purchased the Gravity: Photoelectric High Accuracy Liquid Level Sensor for Arduino from DFRobot which has good sensitivity and no need for mechanical parts and is also corrosion resistant and can handle high temperature and high pressure.
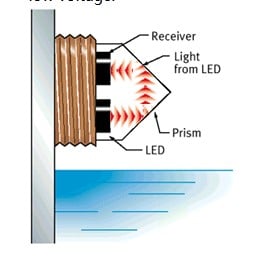
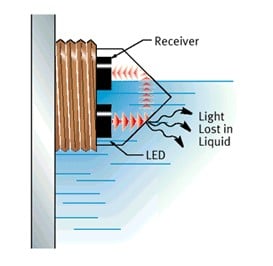
The way this photoelectric sensor works is as follows:
- When the detected level is in air, due to reflect of the prism, most of light will enter receiver LED, optical level sensor will output high voltage.
- When the detected level is in water, due to refraction of the liquid, just less of light enter receiver LED, optical level sensor will output low voltage.
The level of the output voltage from this sensor is the same as the power supply, and since it can be powered by 3V3, I can connect it directly to the ESP32 Input. It can be mechanically installed in any direction, and specifically for this demonstration I made a small stand on which the sensor is mounted. The tip of the sensor should be just above the floor to detect even the slightest accumulation of water. As I mentioned earlier, I plan to use an ESP32 microcontroller for several reasons. It is cheap, has low power consumption, supports Wi-Fi and Bluetooth, and has other advantages over most Arduino boards.
A basic requirement when planning my project was the option to receive information about the current situation no matter where I am, via the mobile network on my smartphone. There are several services for this purpose, and I chose the Telegram platform because it allows the creation of bots that can perform automated tasks, and completely free of charge, so because of these conveniences it is often called a programmer's paradise.
This project is sponsored by PCBWay . From July 1st to July 31st, 2026, PCBWay is organizing 12th anniversary campaig. Grab your discount and unlock more rewards in the form of Exclusive Coupons, PCB Order for Just $5, Turnkey Electronic Design Services, Up to 50% off for 3D printing & CNC Machining, and Special Sales in PCBWay Store. Next, Join the fun with interactive games and receive your exclusive Engineer Color Personality, Click the Box to Participate in the Lucky Draw, Show Your Colorful Projects, and Vote for the Most Popular Badge.
So, if you haven't had one before, you need to open a Telegram account and create a bot.
Step-by-Step Guide: How to Create a Telegram Bot and Get Your Chat ID
Part 1: Creating the Telegram Bot
1. Download and install Telegram if you haven’t already.
2. In the Telegram search bar, type @BotFather and select the official verified account.
3. Press the "Start" button to activate BotFather.
4. In the message box, type and send: `/newbot`
5. Enter a friendly name for your new bot (for example: `micemk_wateralarm_bot`).
6. Next, choose a unique Username for your bot. Note: It must end with `_bot` (for example: `Mircemk_bot`).
7. Once the username is accepted, BotFather will instantly generate an HTTP API Token. Make sure to copy and save this token securely, as you will need it for your ESP32 code.
Part 2: Obtaining Your Chat ID
1. In the Telegram search bar, search for your newly created bot username (e.g., @Mircemk_bot) and press "Start" to initialize it.
2. Go back to the Telegram search bar and search for a utility bot named: @IDBot
3. Open the chat with @IDBot and send the command: `/getid`
4. The bot will instantly reply with your unique, numeric Chat ID. Copy and save this number to use in your Arduino configuration.
It is important that when creating a telegram bot we get two distinct unique strings of characters, one is the HTTP API Token, and the other is the ID. We need this information later when creating the ESP32 code. Having already mentioned the code, I should say that it is designed in a way that can be easily changed several parameters, including the warning text that we receive on the smartphone.
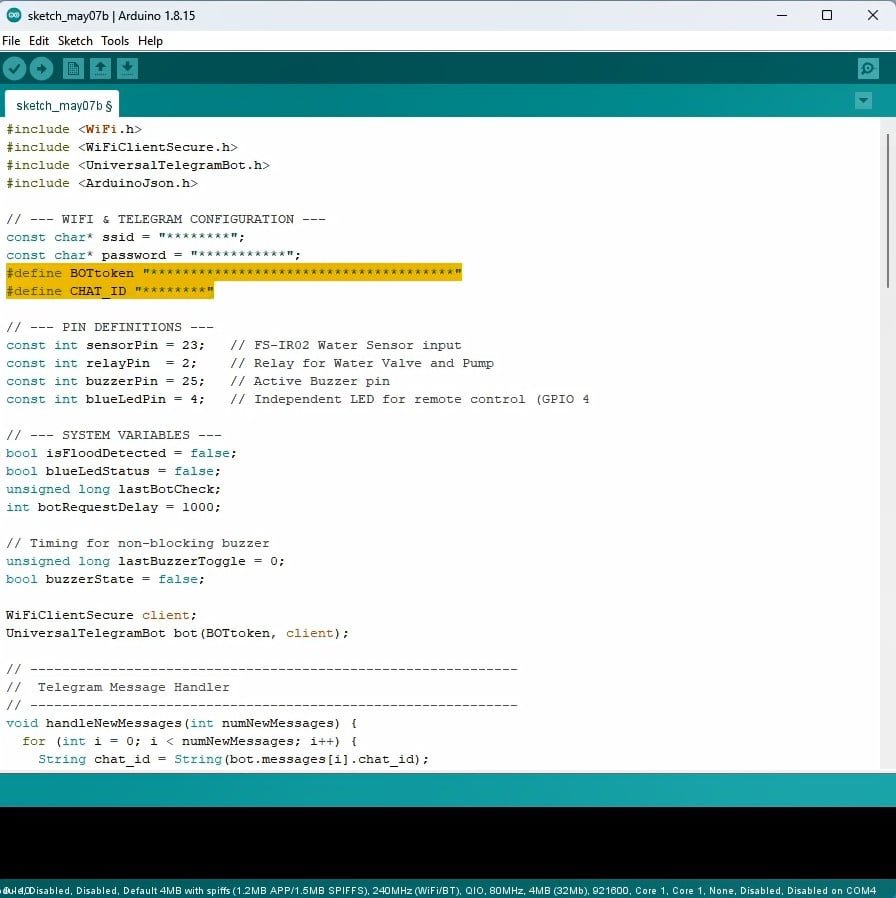
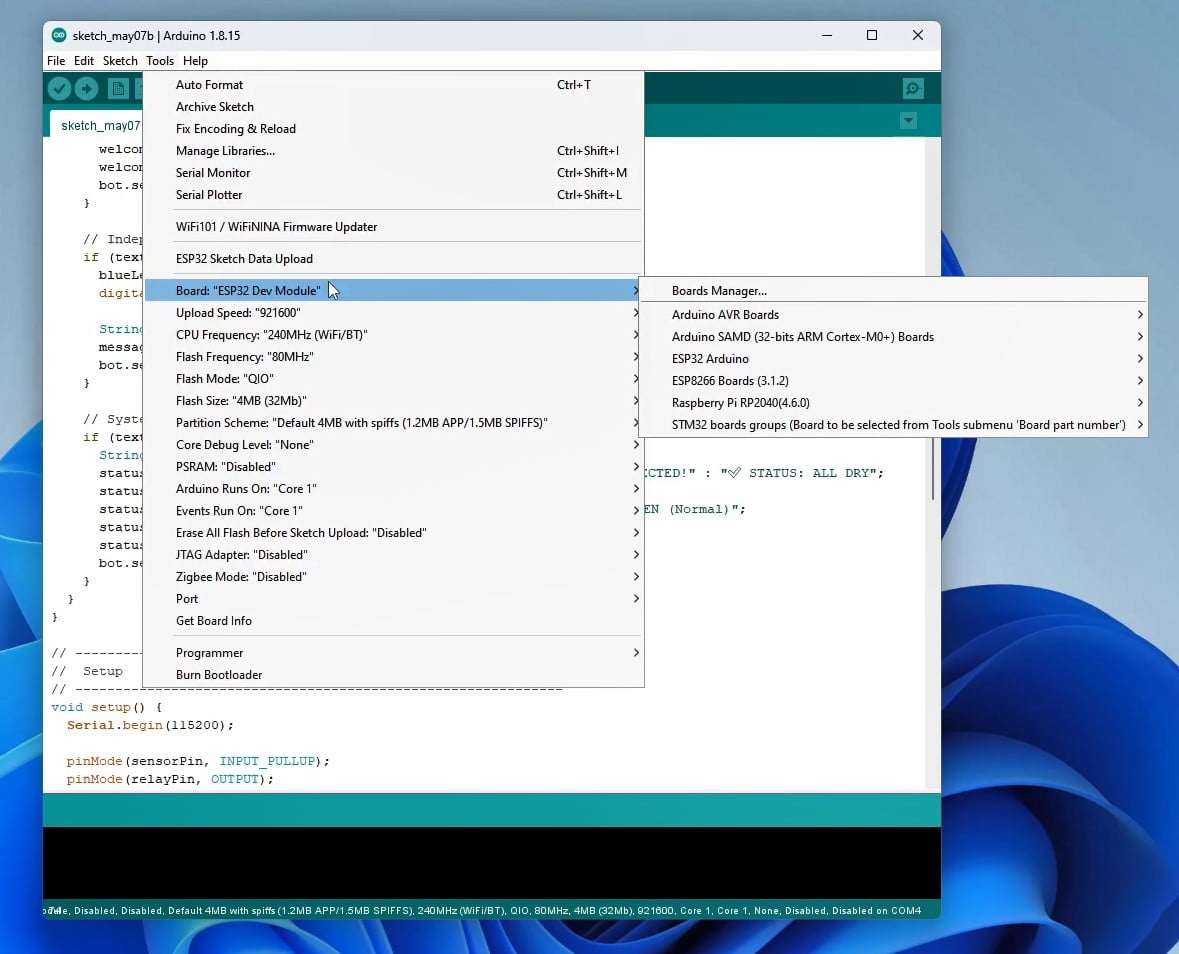
At first, the credentials from the local Wi-Fi network should be entered, and then the received Telegram Token and ID. Next is the definition of the pins that we use on the ESP32, and then the corresponding messages that we receive on the smartphone depending on the state. As I mentioned earlier, these messages can be changed according to our own wishes without any other changes to the code. It is also very important to mention that with this telegram bot we have the possibility of two-way communication, which means that in addition to receiving messages, we can also give commands via the smartphone to perform some tasks remotely. To install the code without errors, we need to select "ESP32 DEV Board" in the board manager and install the provided libraries UniversalTelegramBot-1.3.0 and ArduinoJson 6.21.6
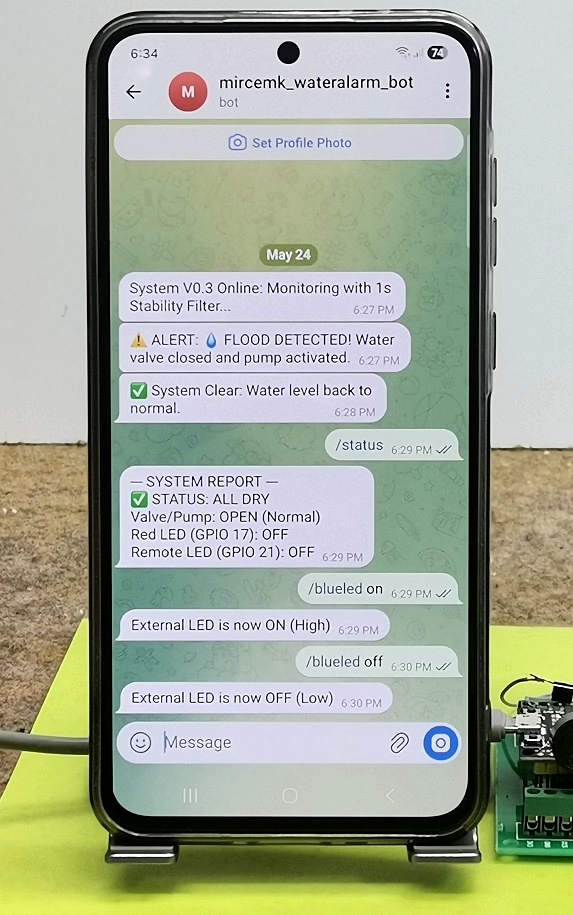
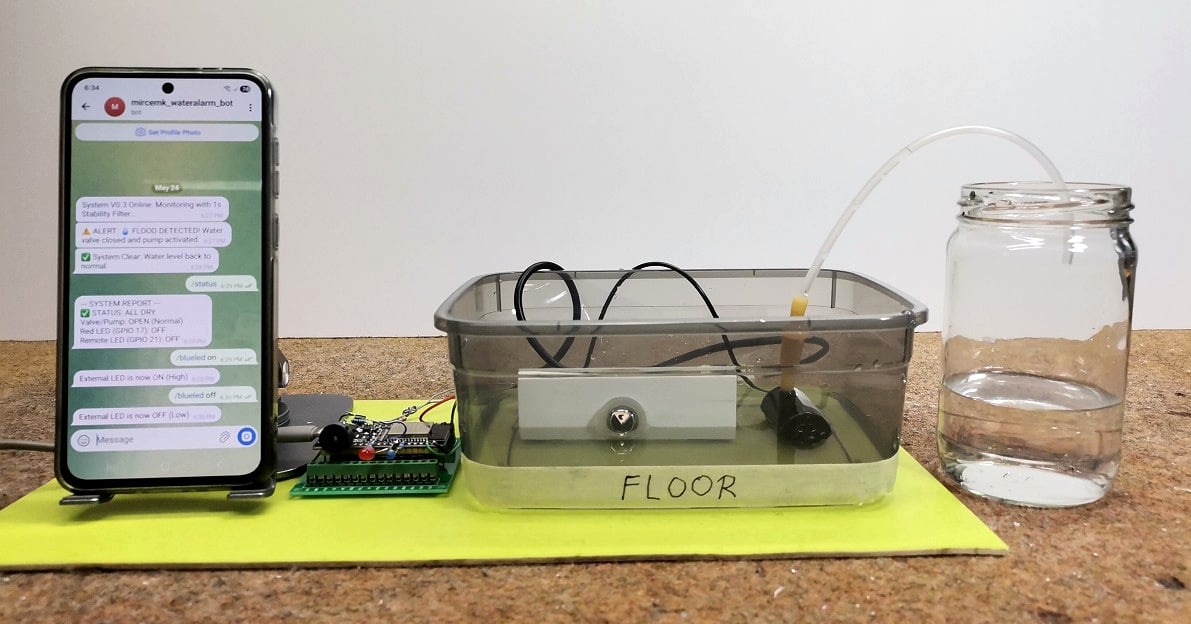
The following is a demonstration of the functionality of the system in real conditions. For this purpose, I will use a container in which I will simulate a flood and a miniature water pump to drain the water. First, I will bring power to the ESP32 via the USB port. After a few seconds, we receive a message on the smartphone that the system is active. Now let's check the status in the room where the system is installed. For this purpose, we write the command: /status. Soon we receive a system report that describes the state in detail, in this case a dry room, the valve is open, and the blue and red LEDs are OFF. These messages arrive at the smartphone via the mobile network, which means we will receive them anywhere in the world .
As I mentioned before, the communication system is two-way, which means that we can also send commands to the ESP32 from anywhere in the world via the mobile network. For this purpose, I installed a Blue LED on the microcontroller, which can be any device in the home. To activate this LED, we type Blueled on. Similarly, to turn it off, we type Blueled off. So instead of this LED, we can connect a device in the home, for example an electronic lock that we can control remotely.
Now I will simulate a flood in the house by filling this container with water. Here is how the system should behave. When the water rises to the sensor, ESP32 should automatically turn on the water pump, while the red LED will light up and the sound alarm will be activated, and at the same time we will receive a message on the smartphone that a flood has occurred. When the pump pumps the water to the required level, it automatically turns off and the user receives a message on the smartphone that the water has been removed and the room is dry. Instead of the blue LED, we can connect the solenoid valve from the main water supply via a relay and thus completely turn off the water supply remotely.
In a real situation, sensor and pump would be located below floor level in a specially designed space for that purpose.
And finally a short conclusion. Integrating a software stability filter transforms a standard DIY sensor into a robust, industrial-grade protection system. Combined with the instant notifications of a Telegram Bot, this ESP32 project offers an incredibly efficient and affordable solution for smart home safety.