In this tutorial blog, we will learn how to design a 3D mushroom paperweight in SelfCAD
In this tutorial article, we are 3D designing a mushroom paperweight in 3D modelling software. We will utilise a few fascinating tools like 3D shapes, move tools, add thickness, and 3D sketch tools of SelfCAD to make this mushroom paperweight.
You can also go through our webpage and check our other similar articles like how to design a 3D hourglass!
How about we get moving!
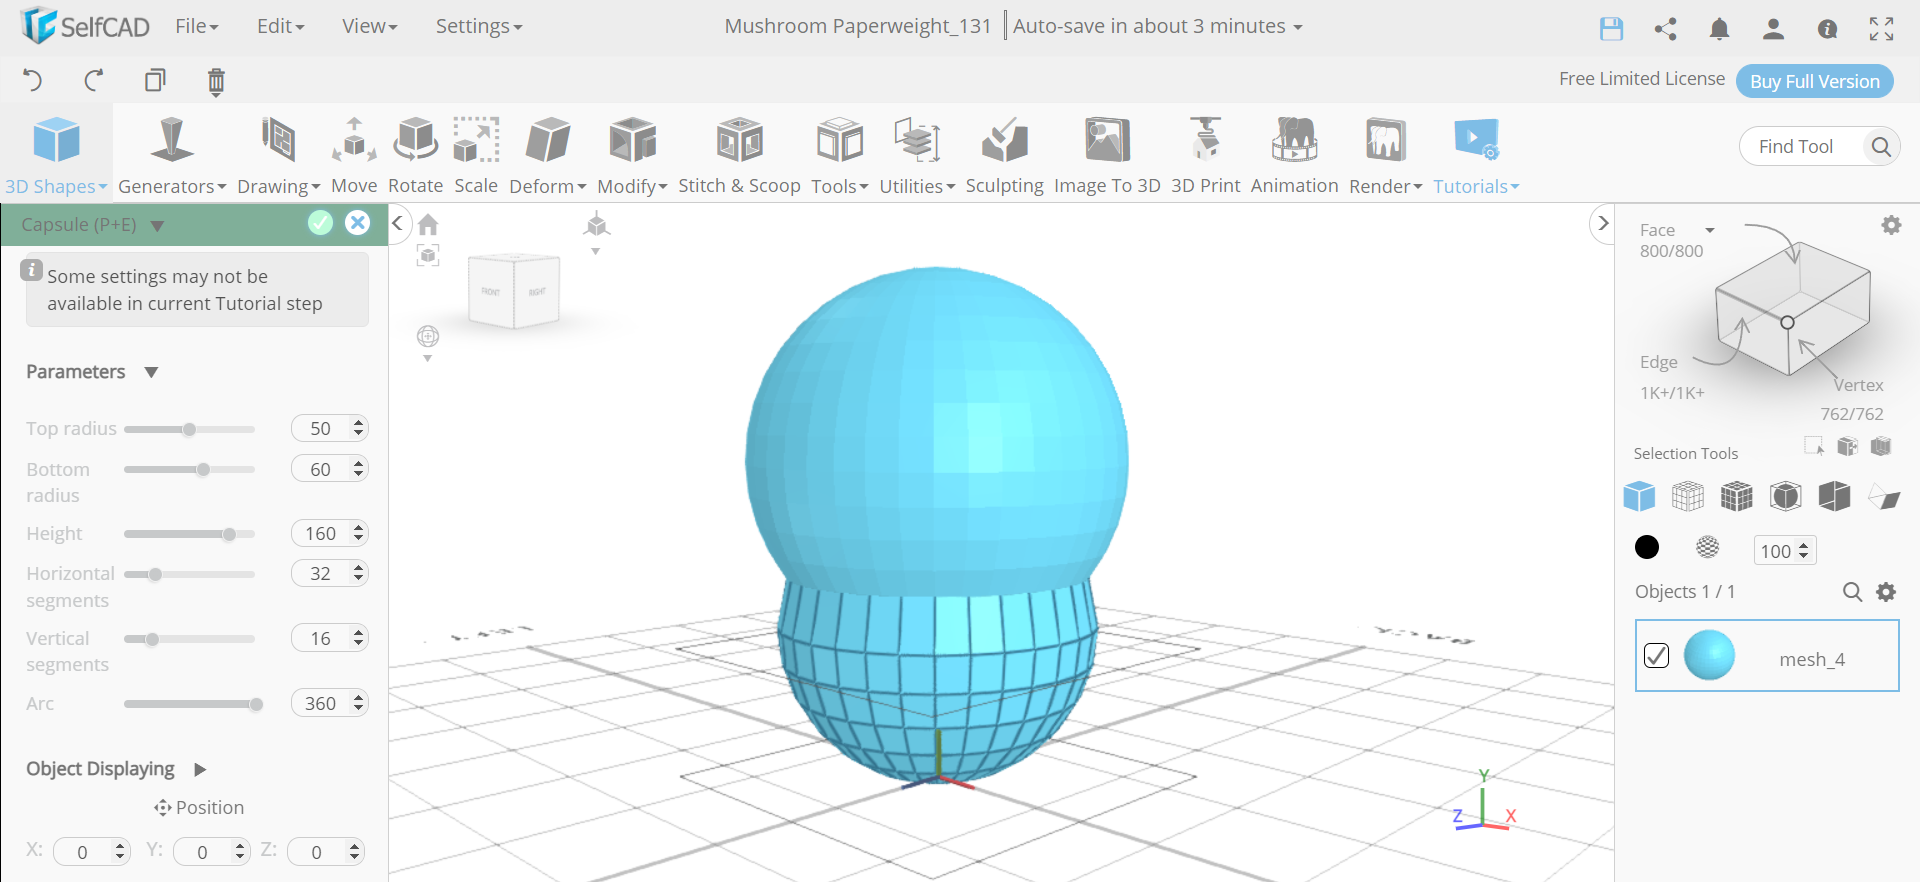
Step1: Insert a sphere and a capsule
First of all, from the 3D shapes category insert a sphere to the working interface. Set radius to 70, vertical segments to 40, vertical segments to 20 and position y to 50. Then insert a capsule and set its top radius to 50, bottom radius to 60, and height to 160.
Step2: Flatten the bottom faces of the capsule
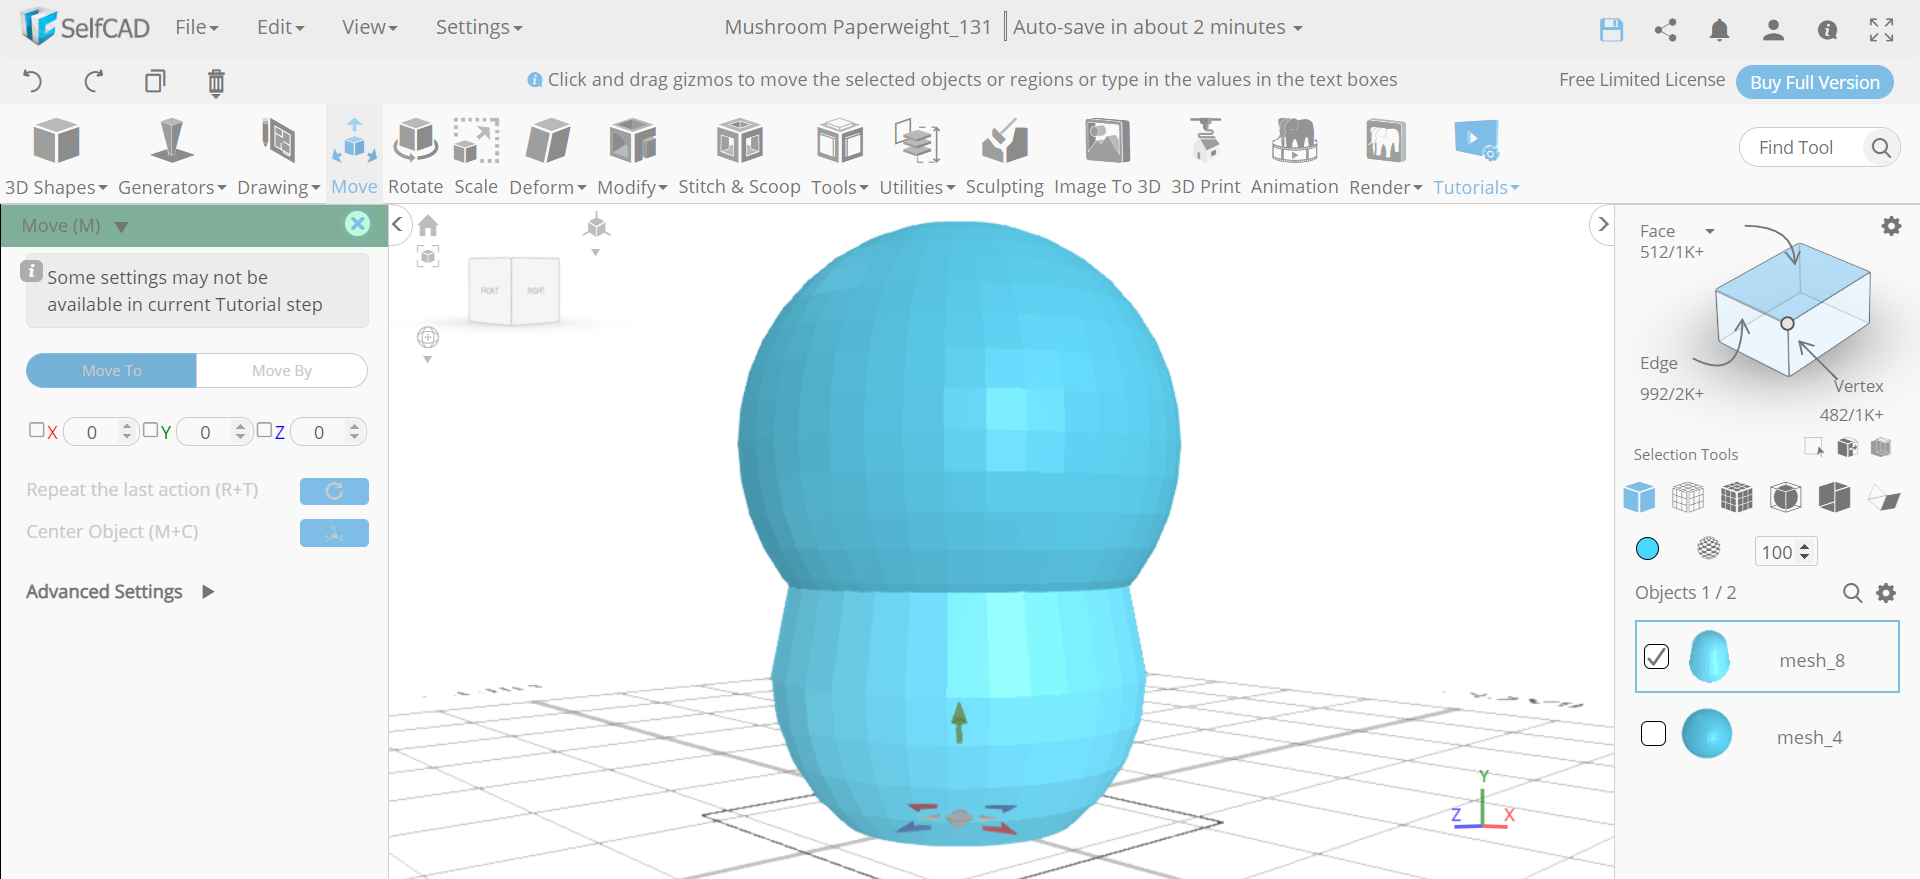
Step3: Move the capsule and scale the sphere
Now, select the move tool and set y to 0. Then select mesh_4 and select mesh_8. After that, select the scale tool and set y to 113, x and z to 160 each.
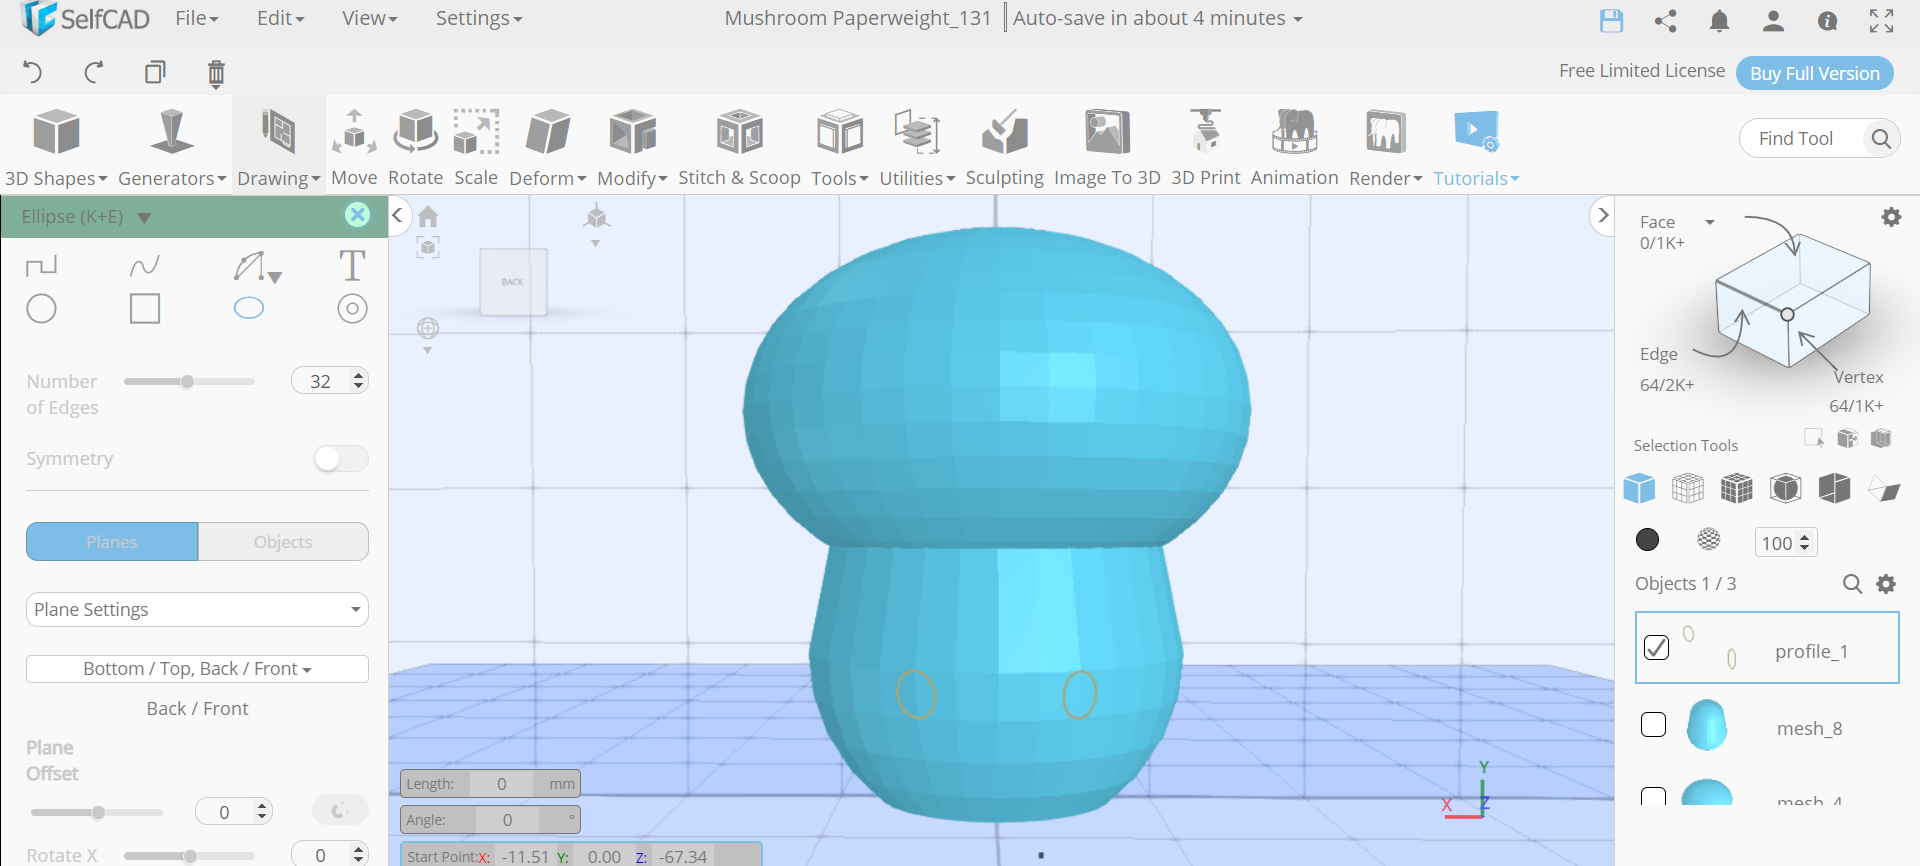
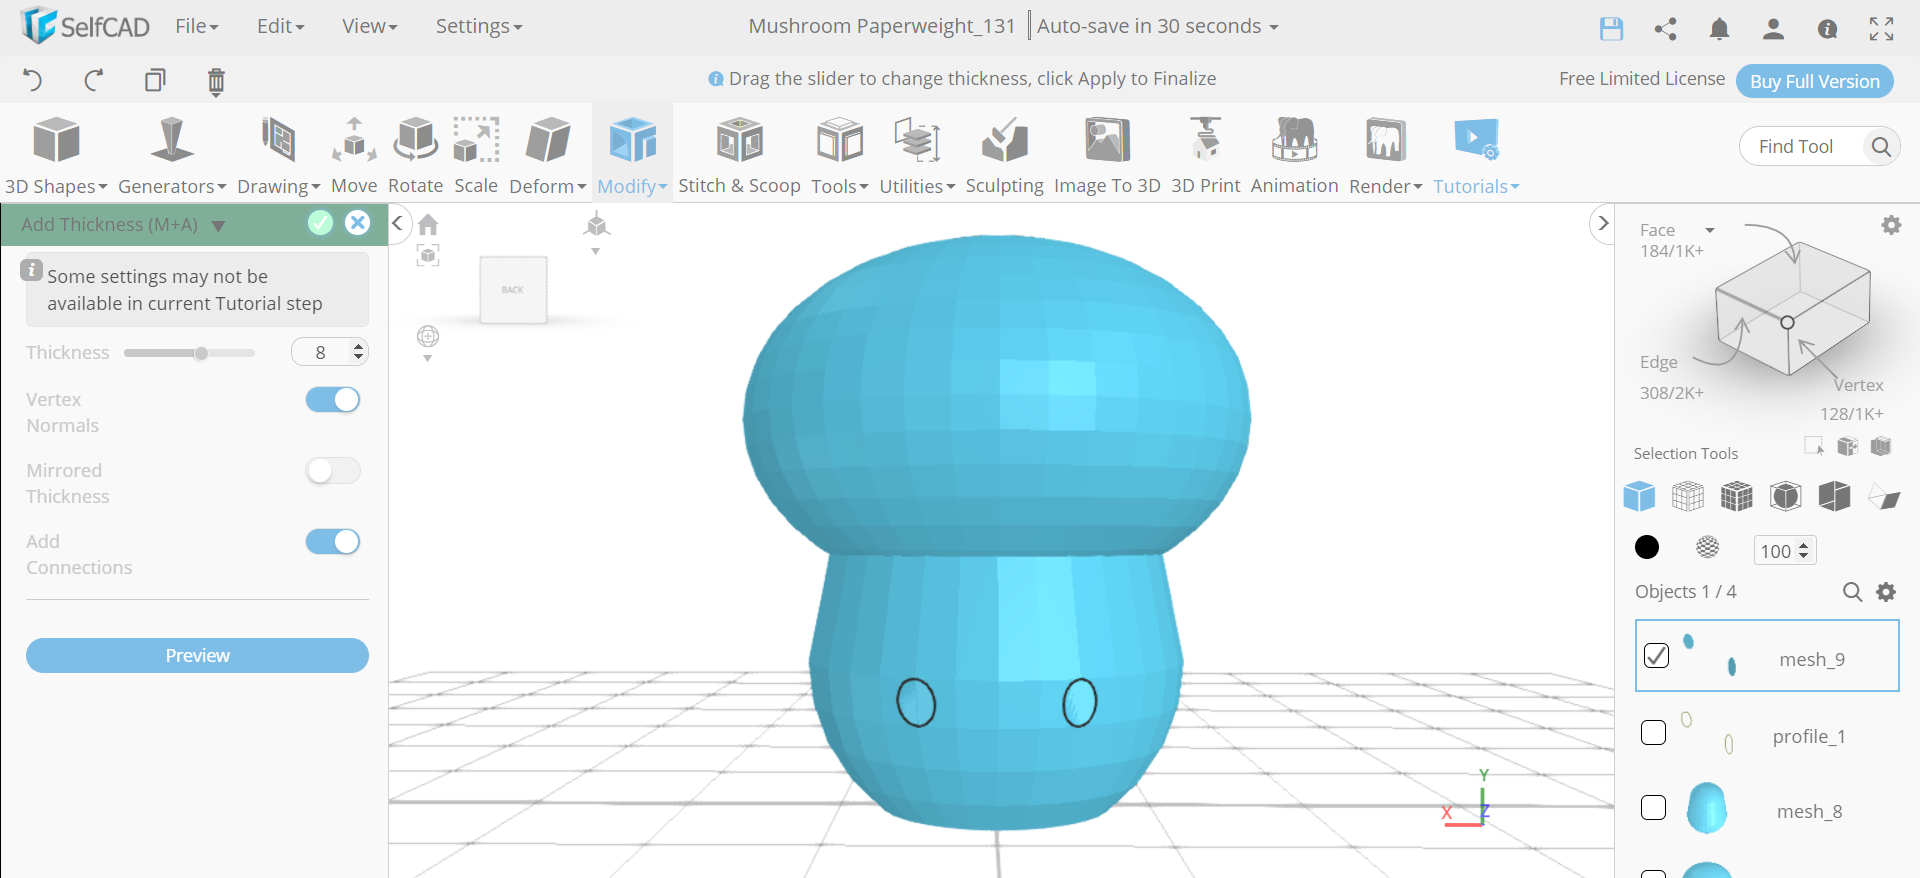
Step4: Draw two ellipses on the bottom part
Step5: Fill the polygons and add thickness to it
Now, from the tools category, select the fill polygons option. Then go to modify and select the add thickness tool. Set thickness to 3 and vertex normals to true.
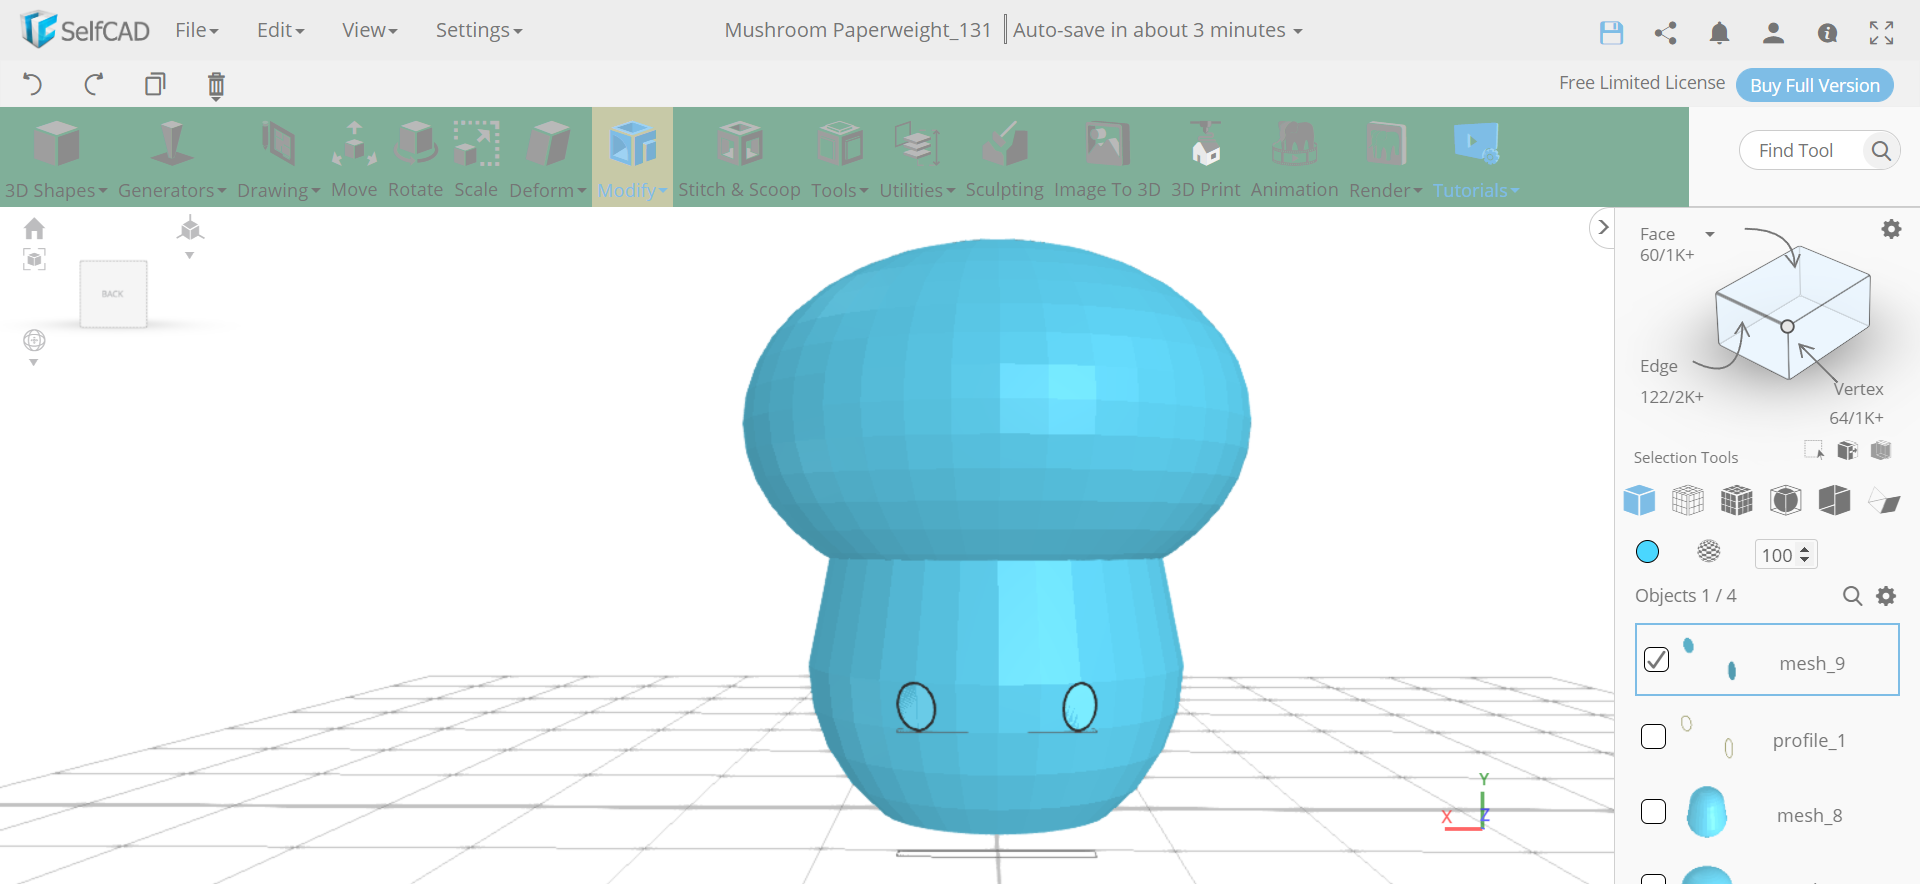
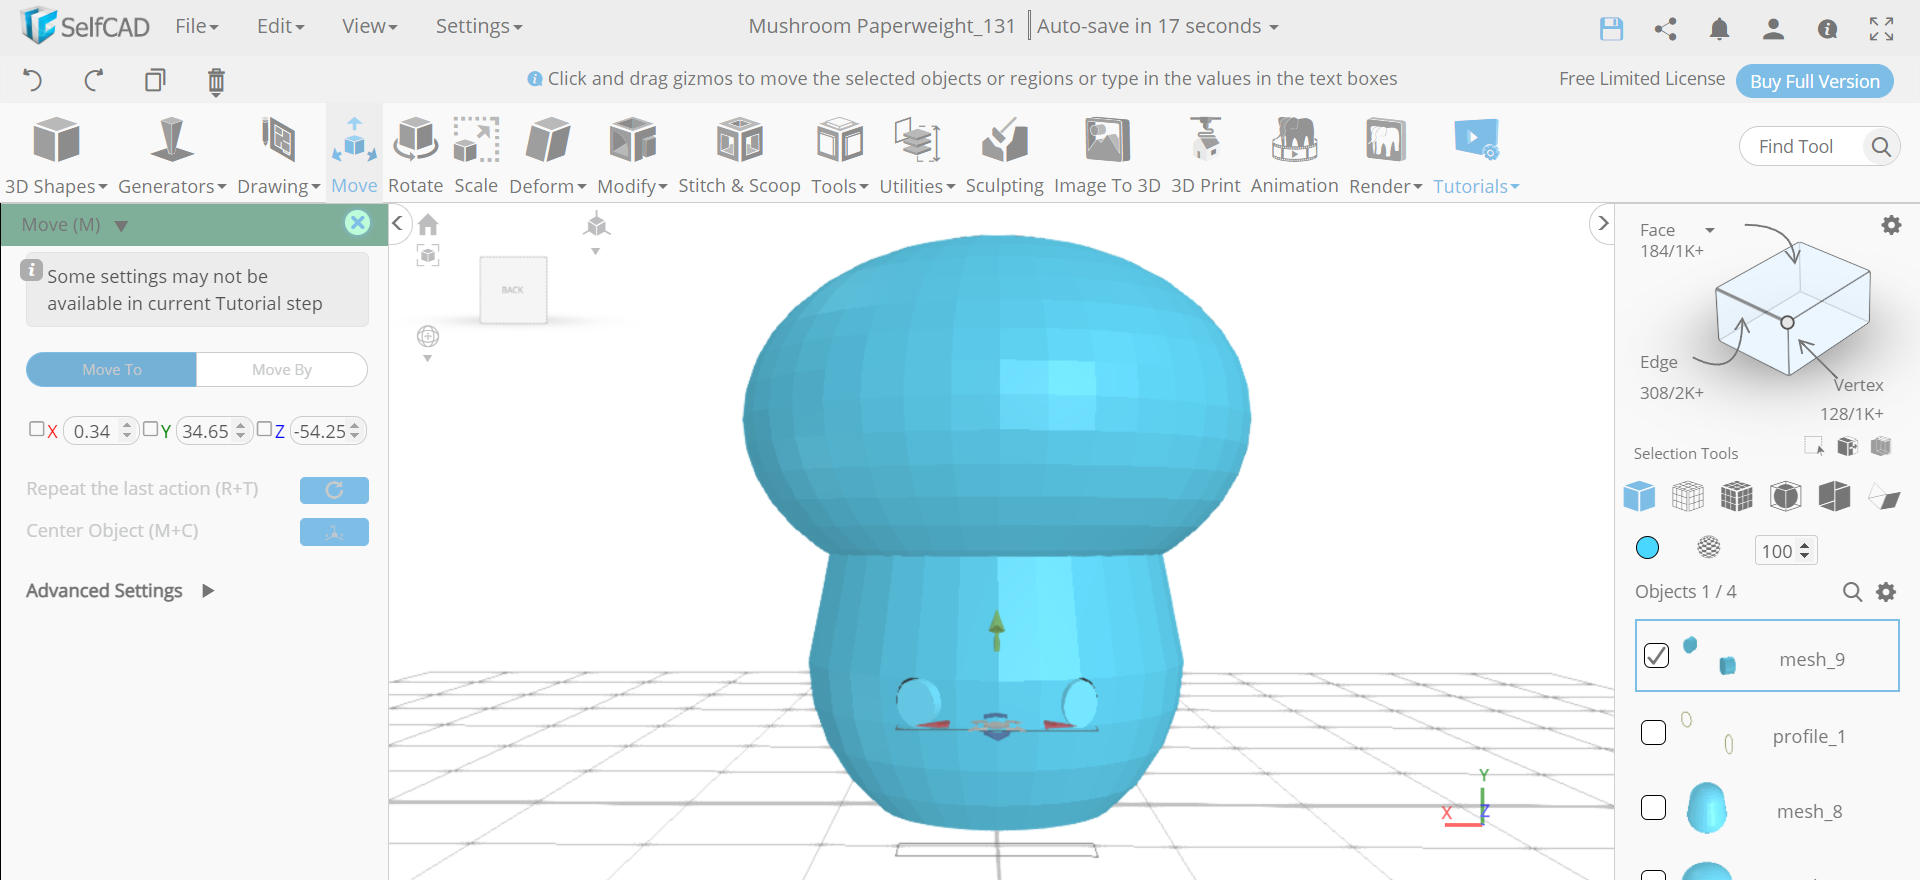
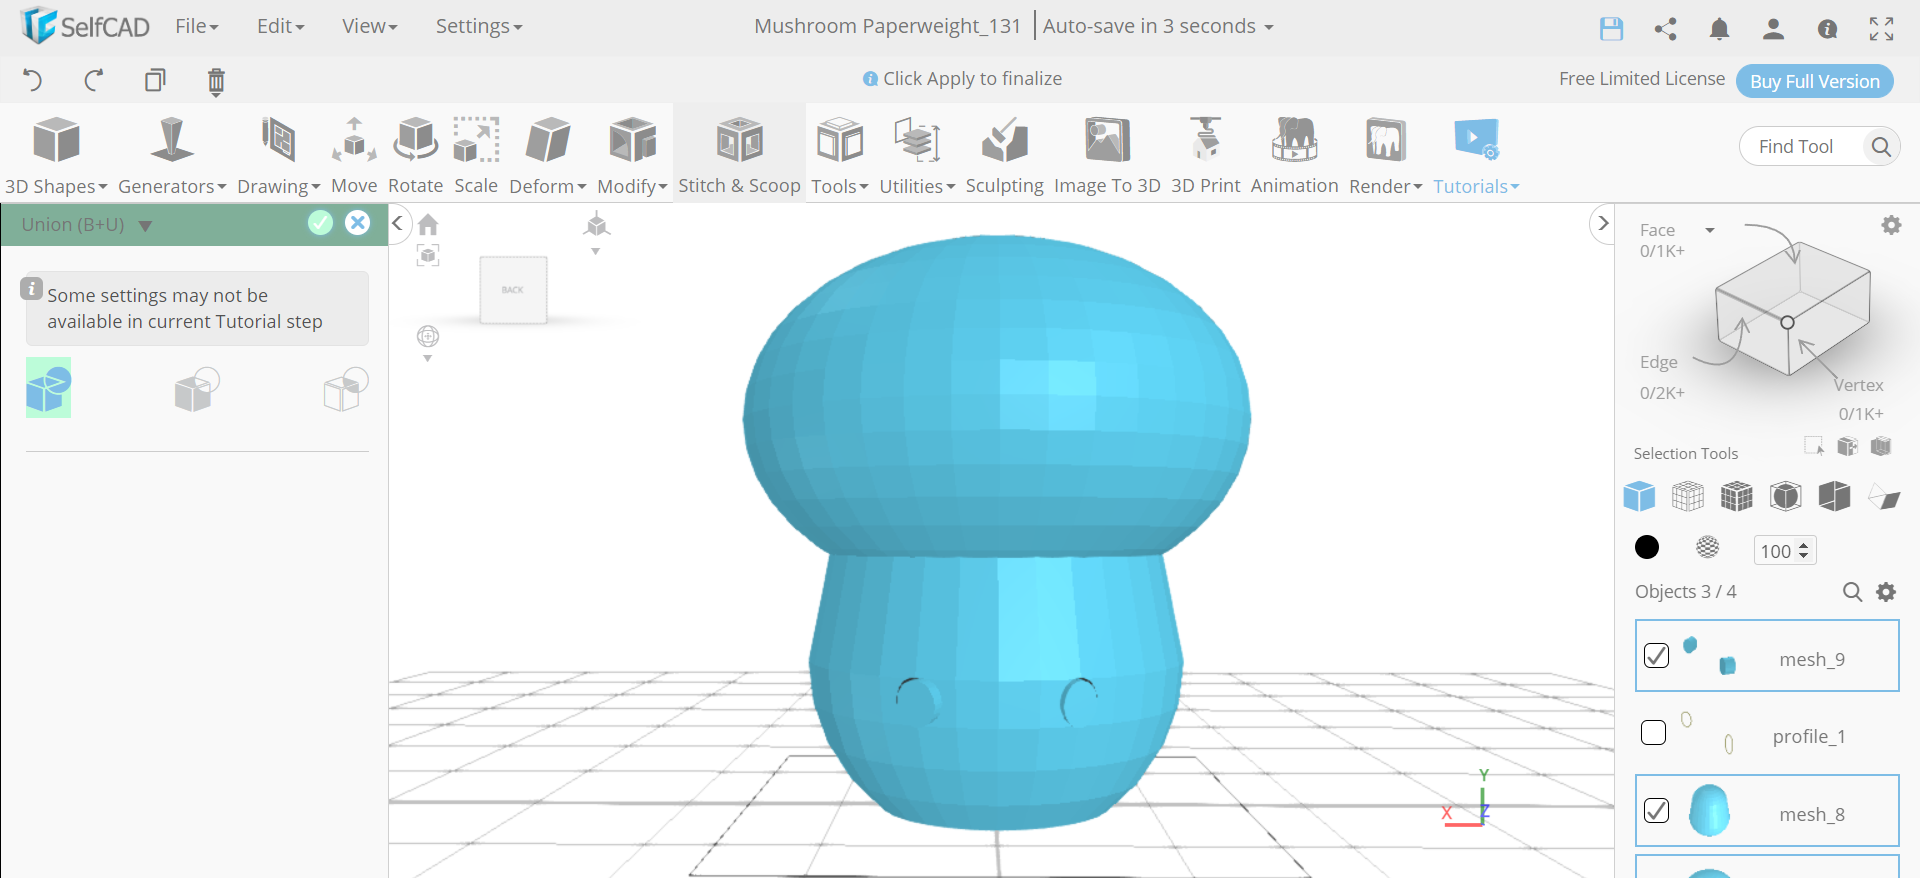
Step6: Move the ellipses and make all the objects a union
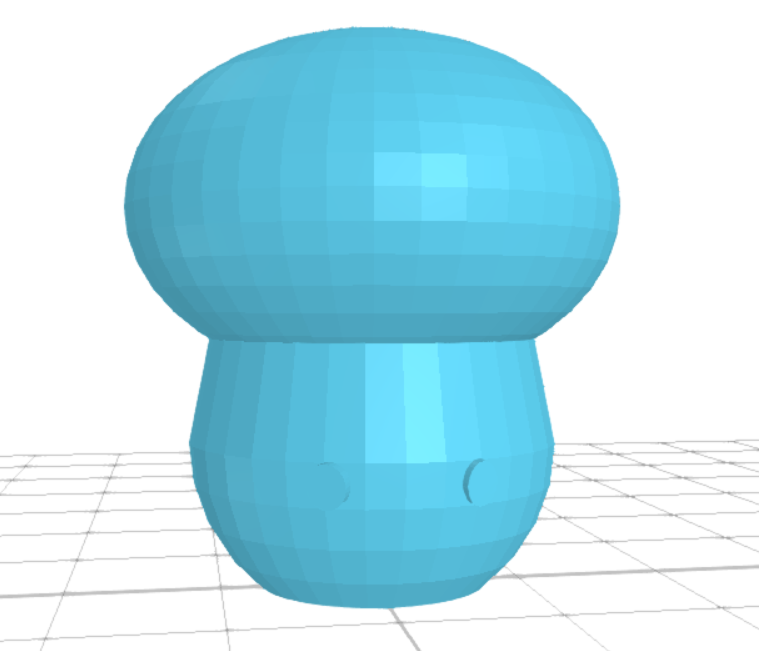
Conclusion: Hence, we have created a 3D mushroom paperweight in SelfCAD
We have at last made one of the norm, essential and magnificent mushroom paperweight designs. We have used 3D shapes and tools that helped us with designing various bits of the mushroom paperweight. With the help of the fill polygons and move, we have modified the shape as need might have arisen. You can make different designs of such amazing relics utilising SelfCAD.