In this tutorial blog we will learn to create the 3D logo of SelfCAD
In this tutorial article, we are going to 3D design the SelfCAD logo. The 3D modelling software that we are utilising is SelfCAD itself. With SelfCAD, you can undoubtedly make 3D models without contributing a gigantic heap of energy learning, and you can make both fundamental and complex designs without taking a ton of time. The tools of SelfCAD that we will use are the 3D shapes, copy, move and so on. We will start by 3D designing a cube and evolving it. By sorting out some way to 3D design this logo, you will get to know how to utilise the different tools of SelfCAD.
You can also check our website and visit our other similar articles like how to design a 3D triangle optical illusion!
Along these lines, we should begin!
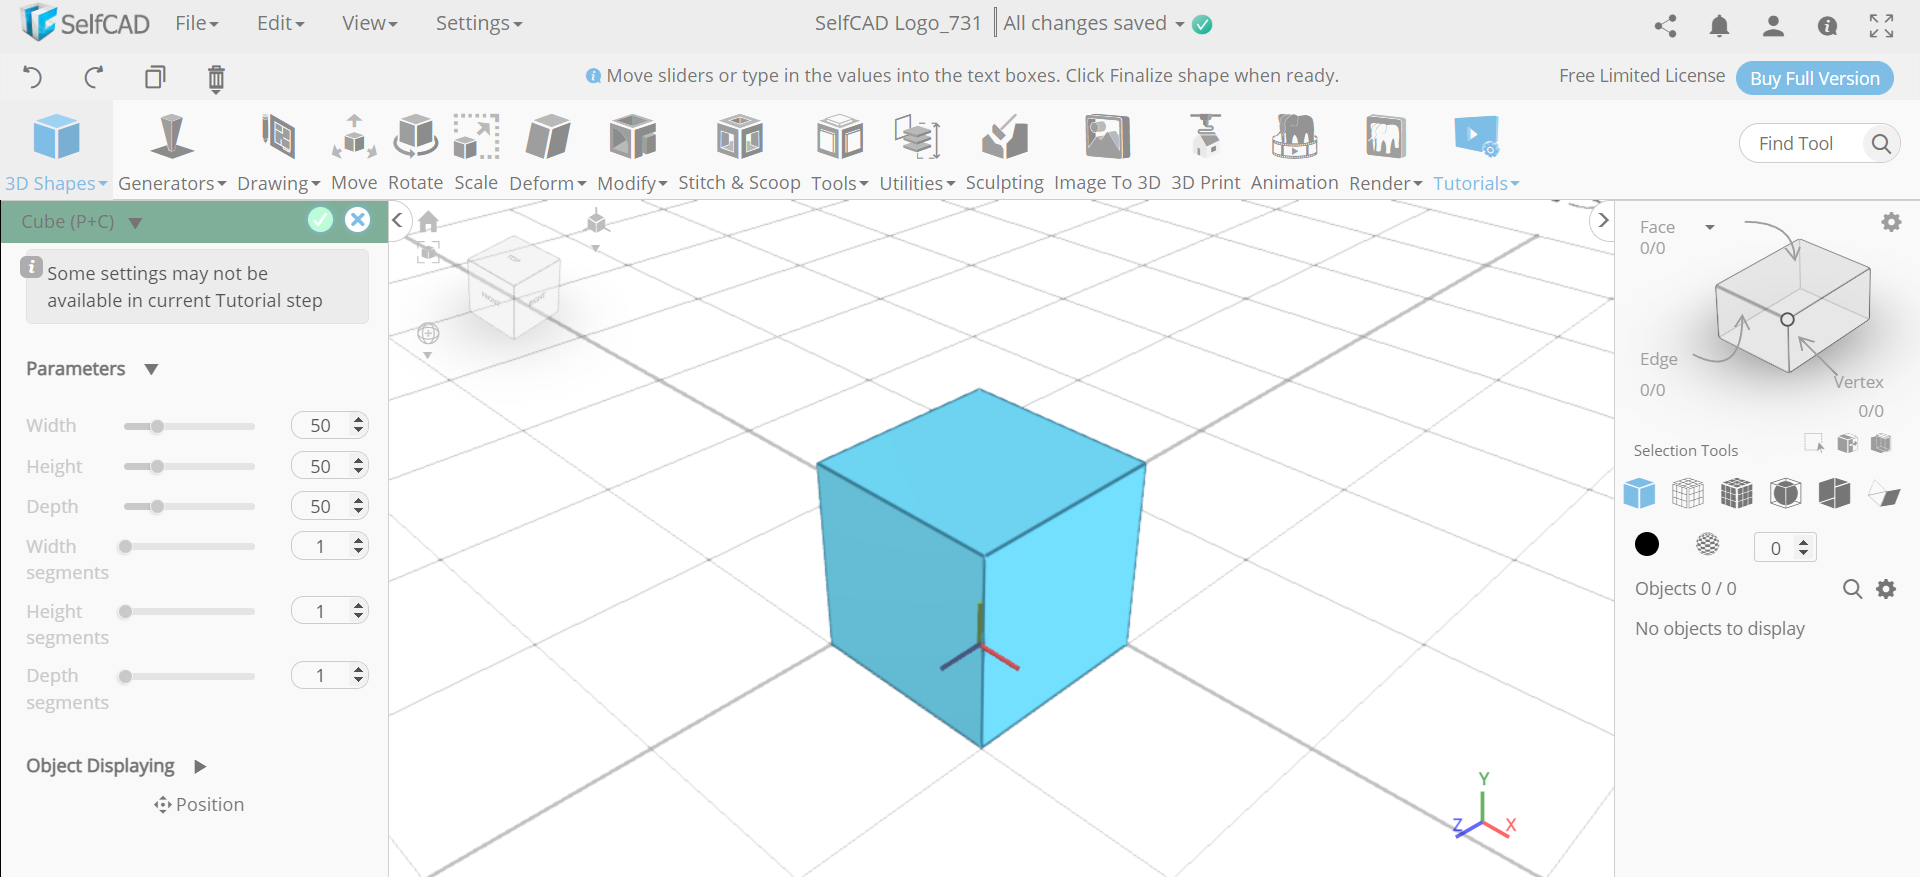
First of all, from the 3D shapes insert a cube to the working interface. Set width to 50, height to 50, depth to 50, position x to 25 and position z to 25. Then click on the copy button.
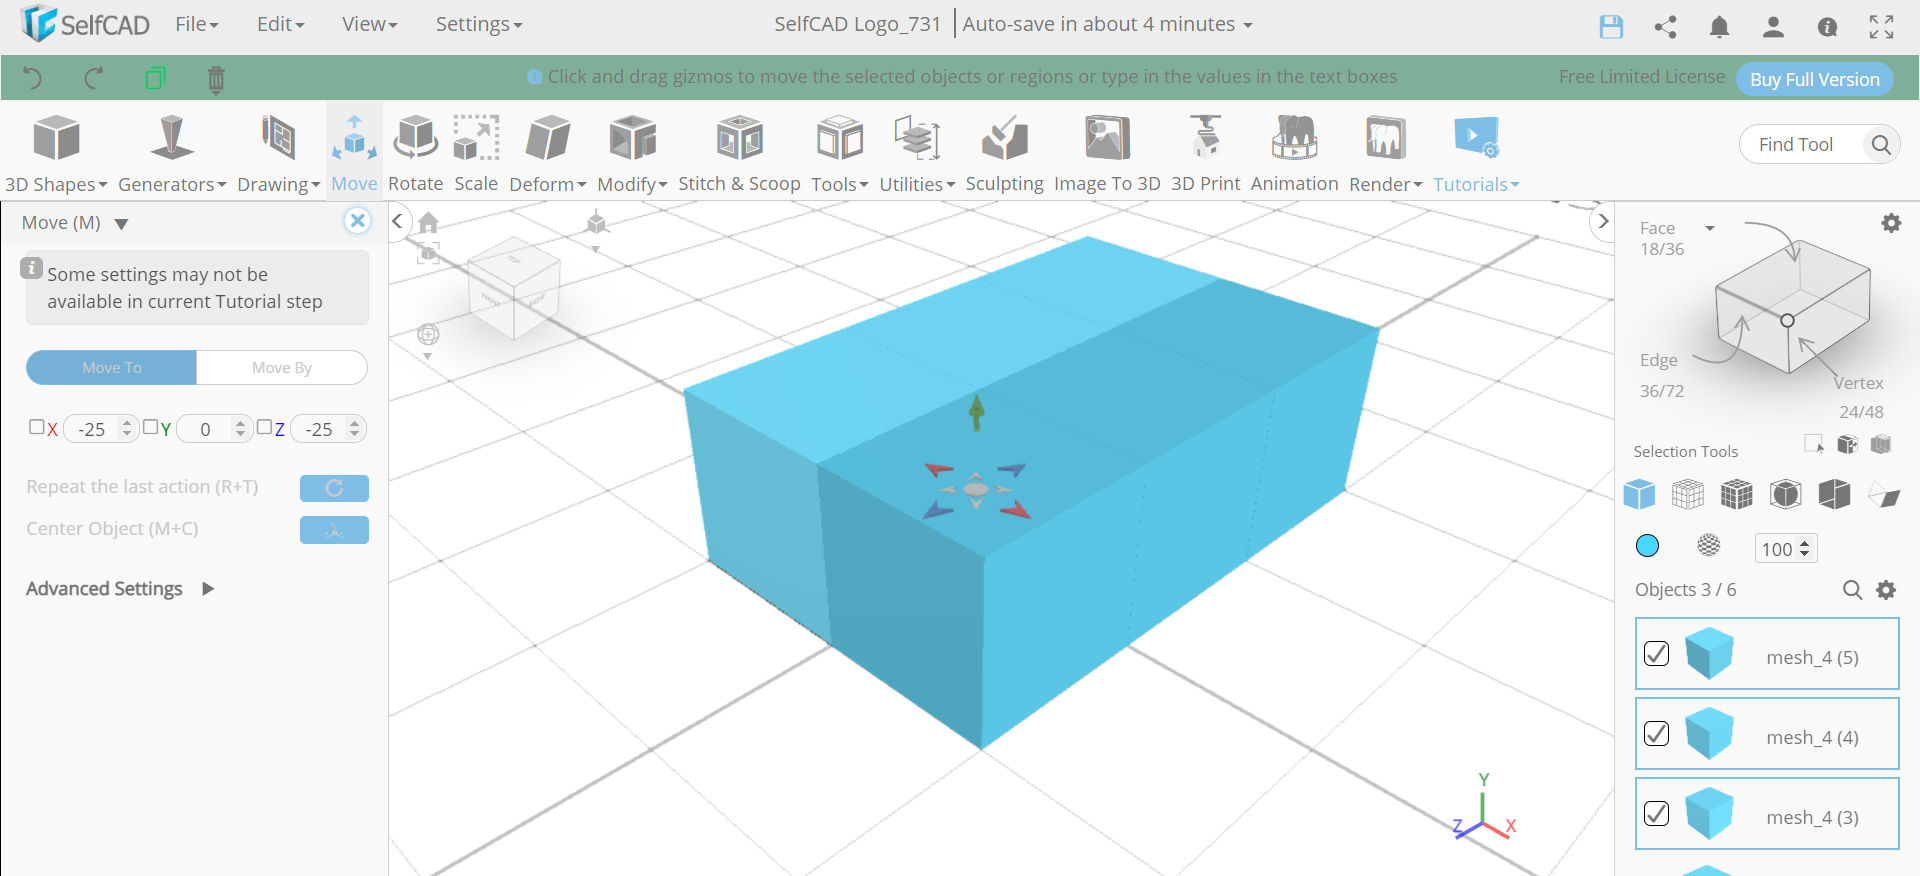
Step2: Move the copied cube and make a set of three cubes
Next, select the move tool and set z to -25. Then click on the copy button again and set the move mode to move by. After that, set z to -25.
Step3: Make a set of 9 cubes by copying them
Now, we will select all the objects and copy them. Then move the object by x axis about -25 degrees. After that repeat the earlier step by keeping z to -75.
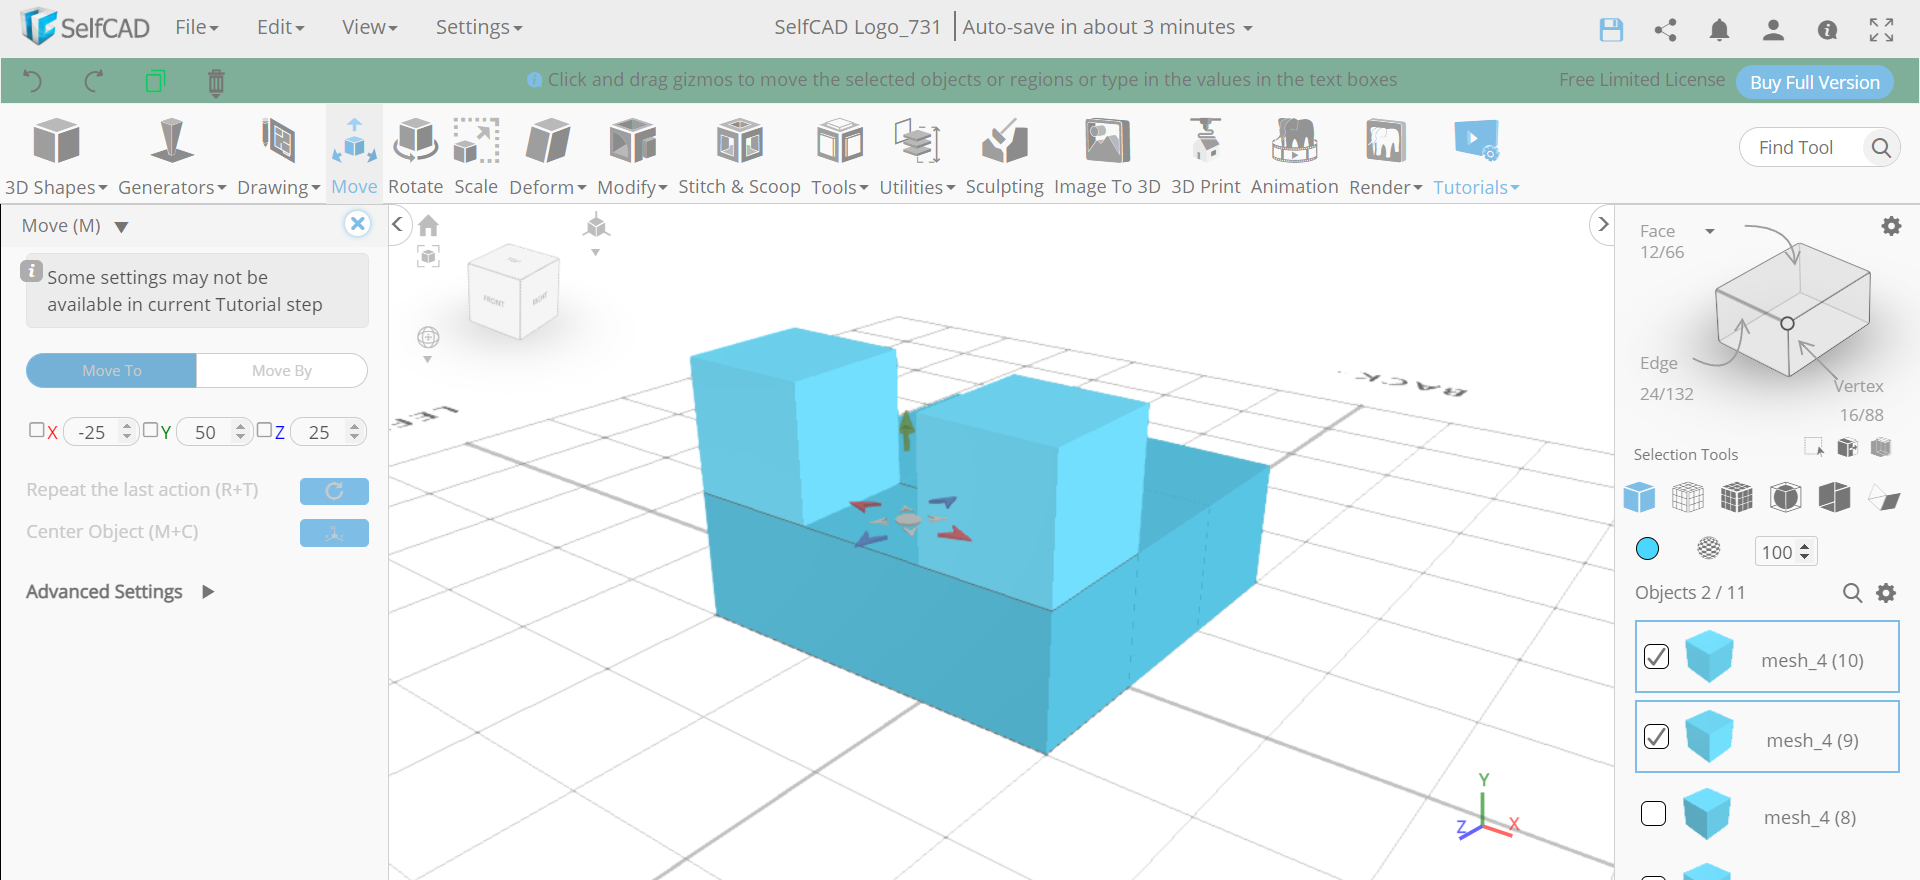
Step4: Copy set of four cubes vertically
Next select mesh_4(6) and move the object by y to 50. Then repeat the step and y to 100. Refer to the image for more clearance.
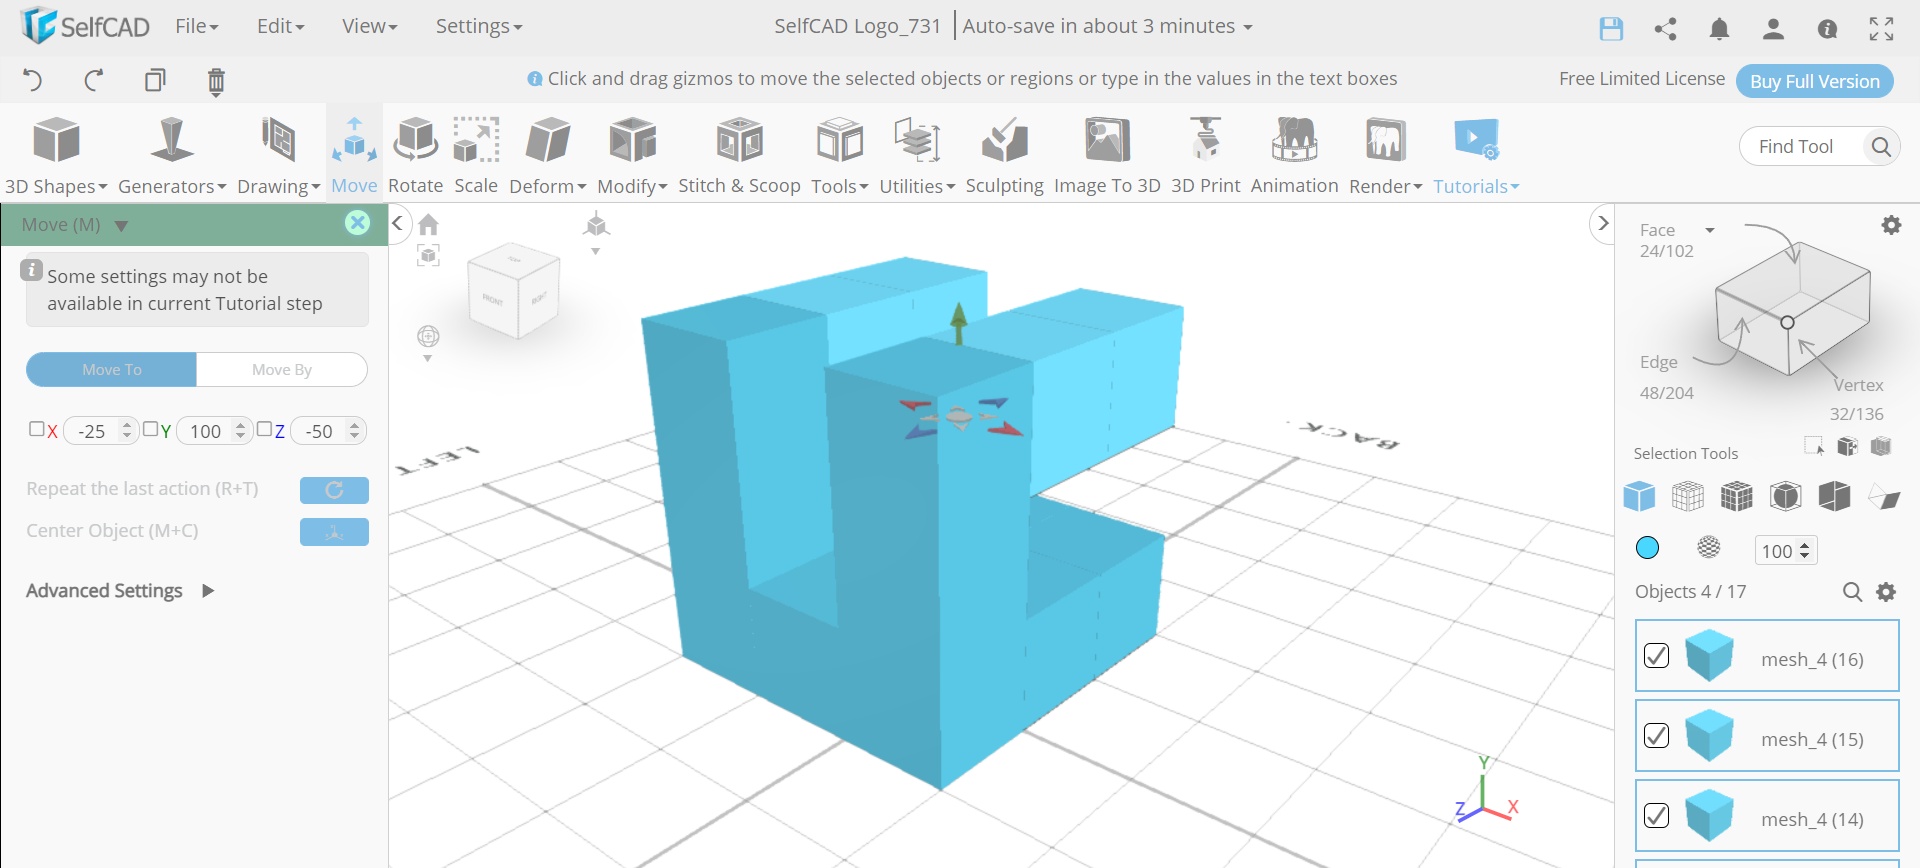
Step5: Copy and move the cubes to get the desired shape
Now, we will select mesh_4(1), mesh_4(2), mesh_4(7), and mesh_4(8); copy them and move them about y to 100. Then select mesh_4(14) and repeat the same step but set x to -25.
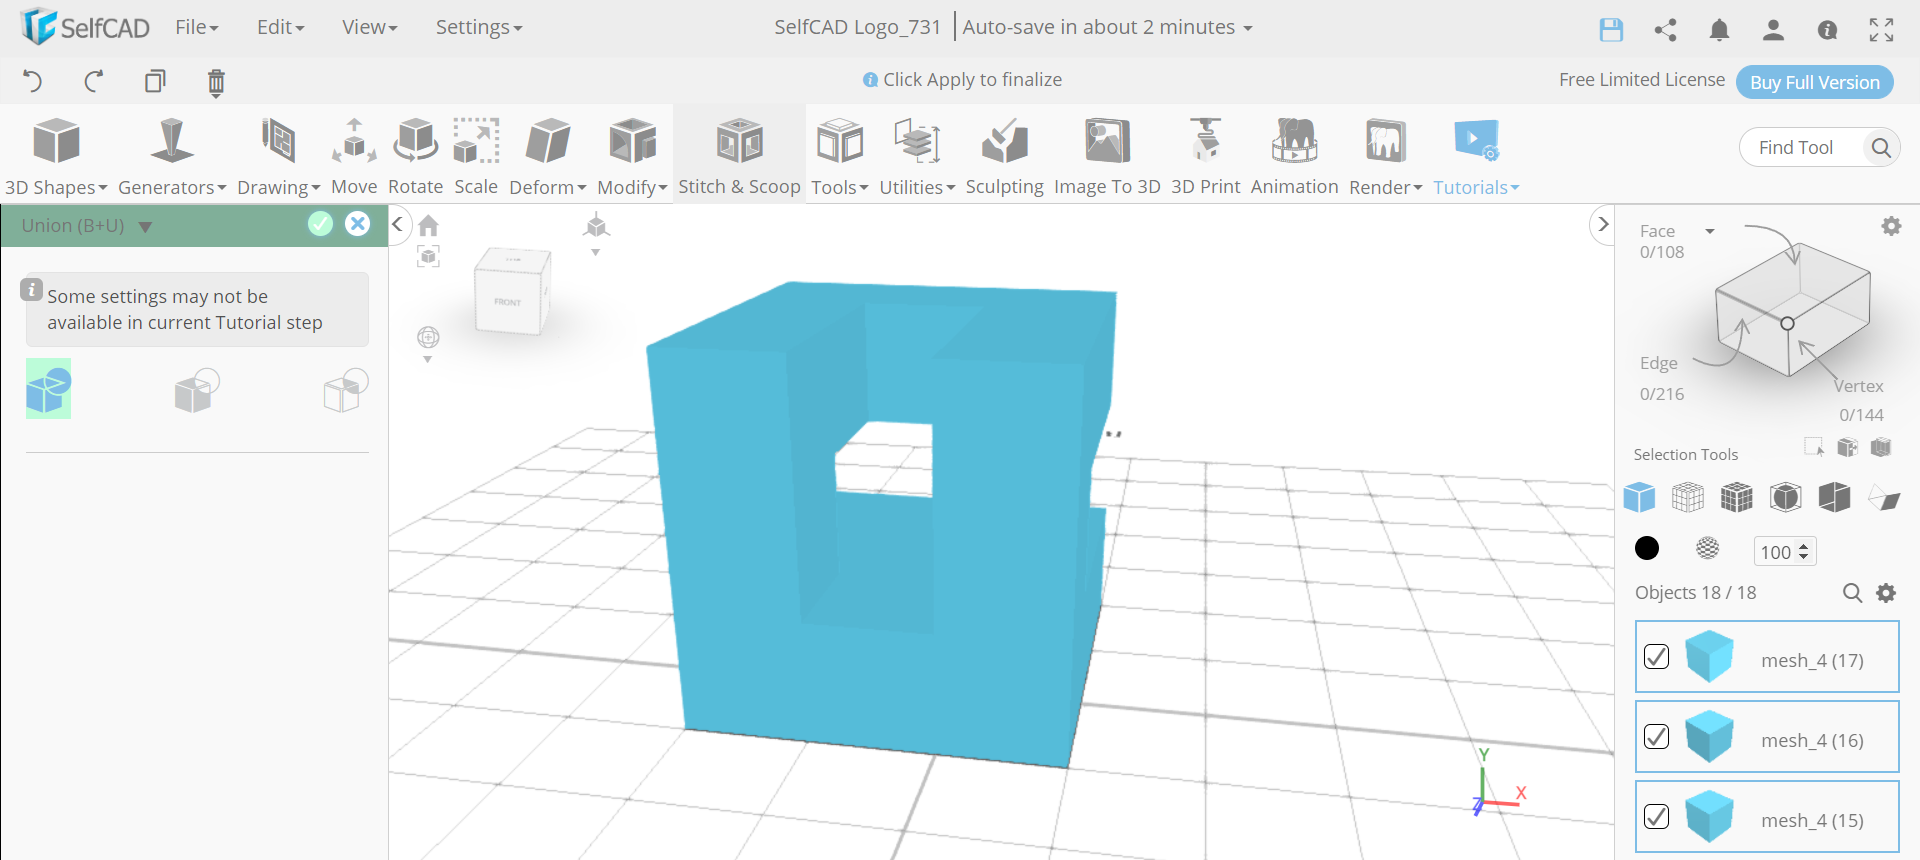
Step6: Make all the objects a union
Next, select all the objects, go to stitch and scoop and make them a union.
CONCLUSION: HENCE, WE HAVE CREATED THE 3D LOGO OF SelfCAD USING SelfCAD ITSELF
We have effectively 3D designed the SelfCAD logo in SelfCAD itself. This tutorial article manages the essential tools of SelfCAD 3D shapes and uses other vital tools like move, and copy. Every one of the 3D models made in SelfCAD are 3D printable as they leave no mathematical screws up that could make game plans hard to print.
Once wrapped up with the plan cycle, you can utilise the in-gathered slicer of SelfCAD to cut your plan and produce the G-Code record that you can ship off your 3D printer.