In this tutorial article, we will go through the steps of designing a 3D unmbrella.
3D Designing is turning out to be notable in various organisations. With 3D designing, one creates 3D models that can be used to envision authentic things. In this tutorial article, we are 3D modeling an umbrella in SelfCAD. Accepting you have not endeavoured it yet, SelfCAD is one of the simple to utilise yet astonishing CAD program for novices and experts. We decided to involve SelfCAD as it has every one of the key elements one expects for their 3D designing and 3D printing errands. Clients can have the option to demonstrate, shape, render, and even cut 3D models. The in-fabricated slicer is key as it assists the 3D fashioners with cutting their 3D models and setting them up for 3D printing without changing to another product.
To 3D design the umbrella, we will begin by picking a sphere, then change it with tools like inflate, Add Thickness, scale, and so on.
You can also go through our other articles on our website such as how to design a 3D paper clip.
So how about we start with the design!
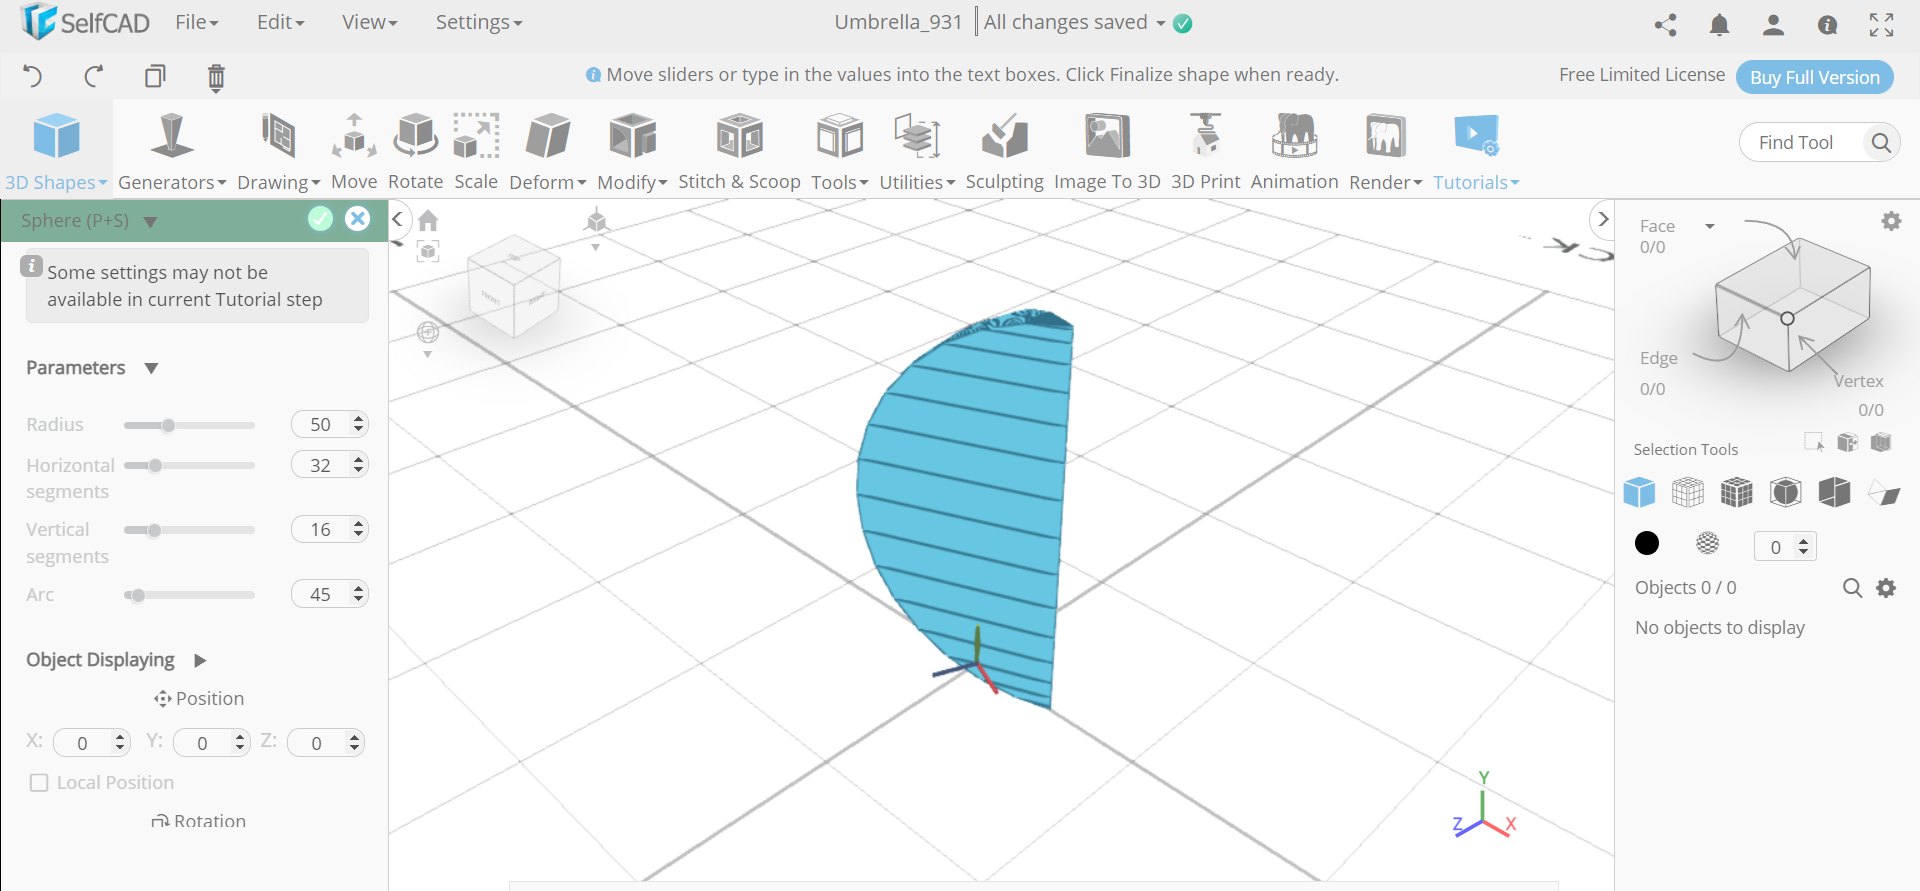
Step1: Insert a sphere and scale it
First of all, go to the 3D shapes and insert a sphere in the working interface. Set arc to 45 and rotation y to -22.5. Then select the scale tool and set y to 50.
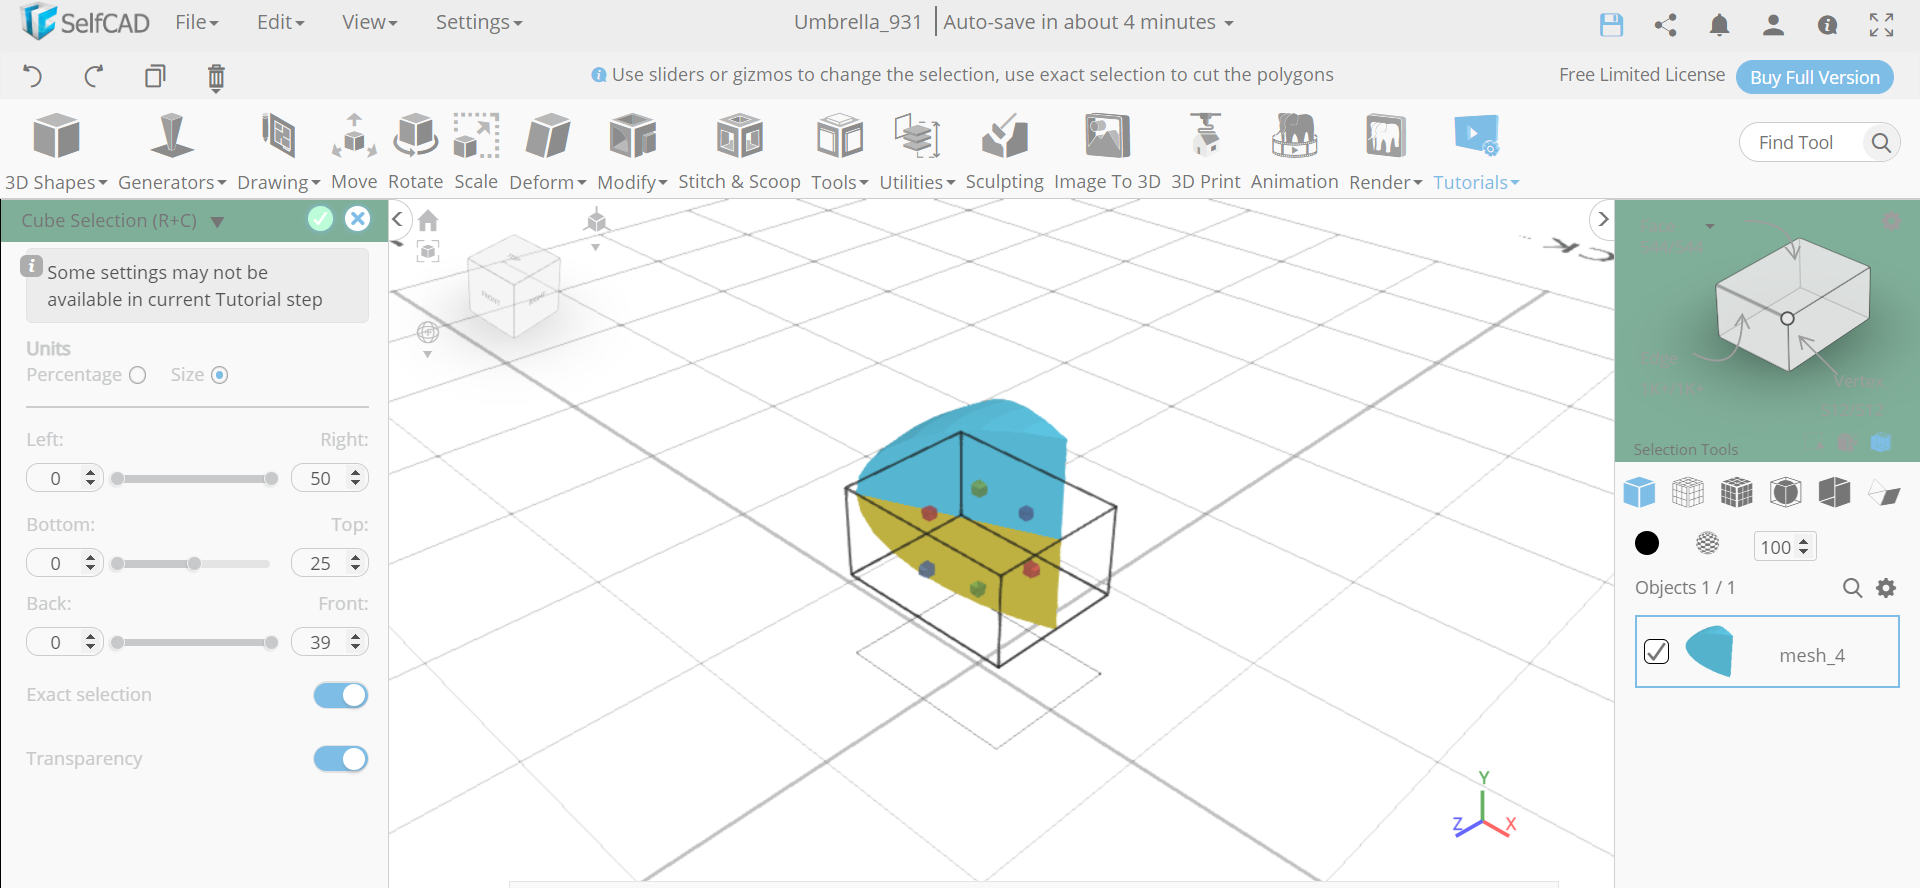
Step2: Opt for cube selection and delete all the parts except the top portion
Next, from the right panel we will opt for cube selection. Set top to 25. Then deselect the top portion of the sphere as shown in the image and delete the rest.
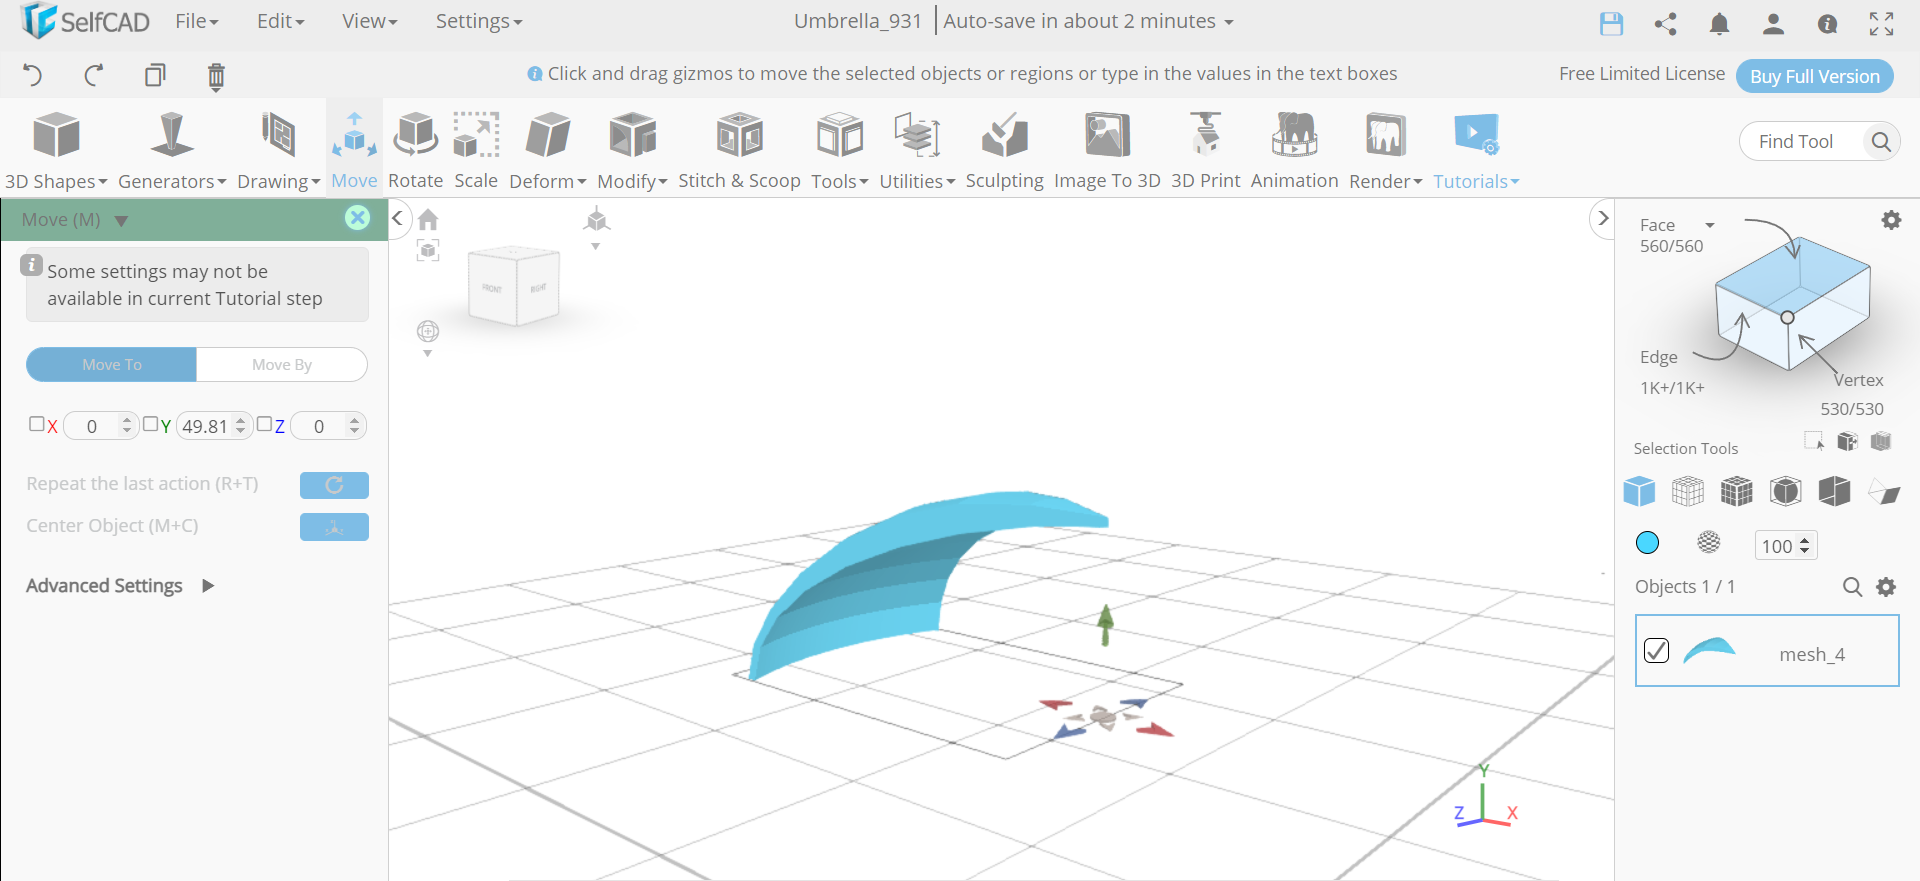
Step3: Add thickness to the object and inflate it
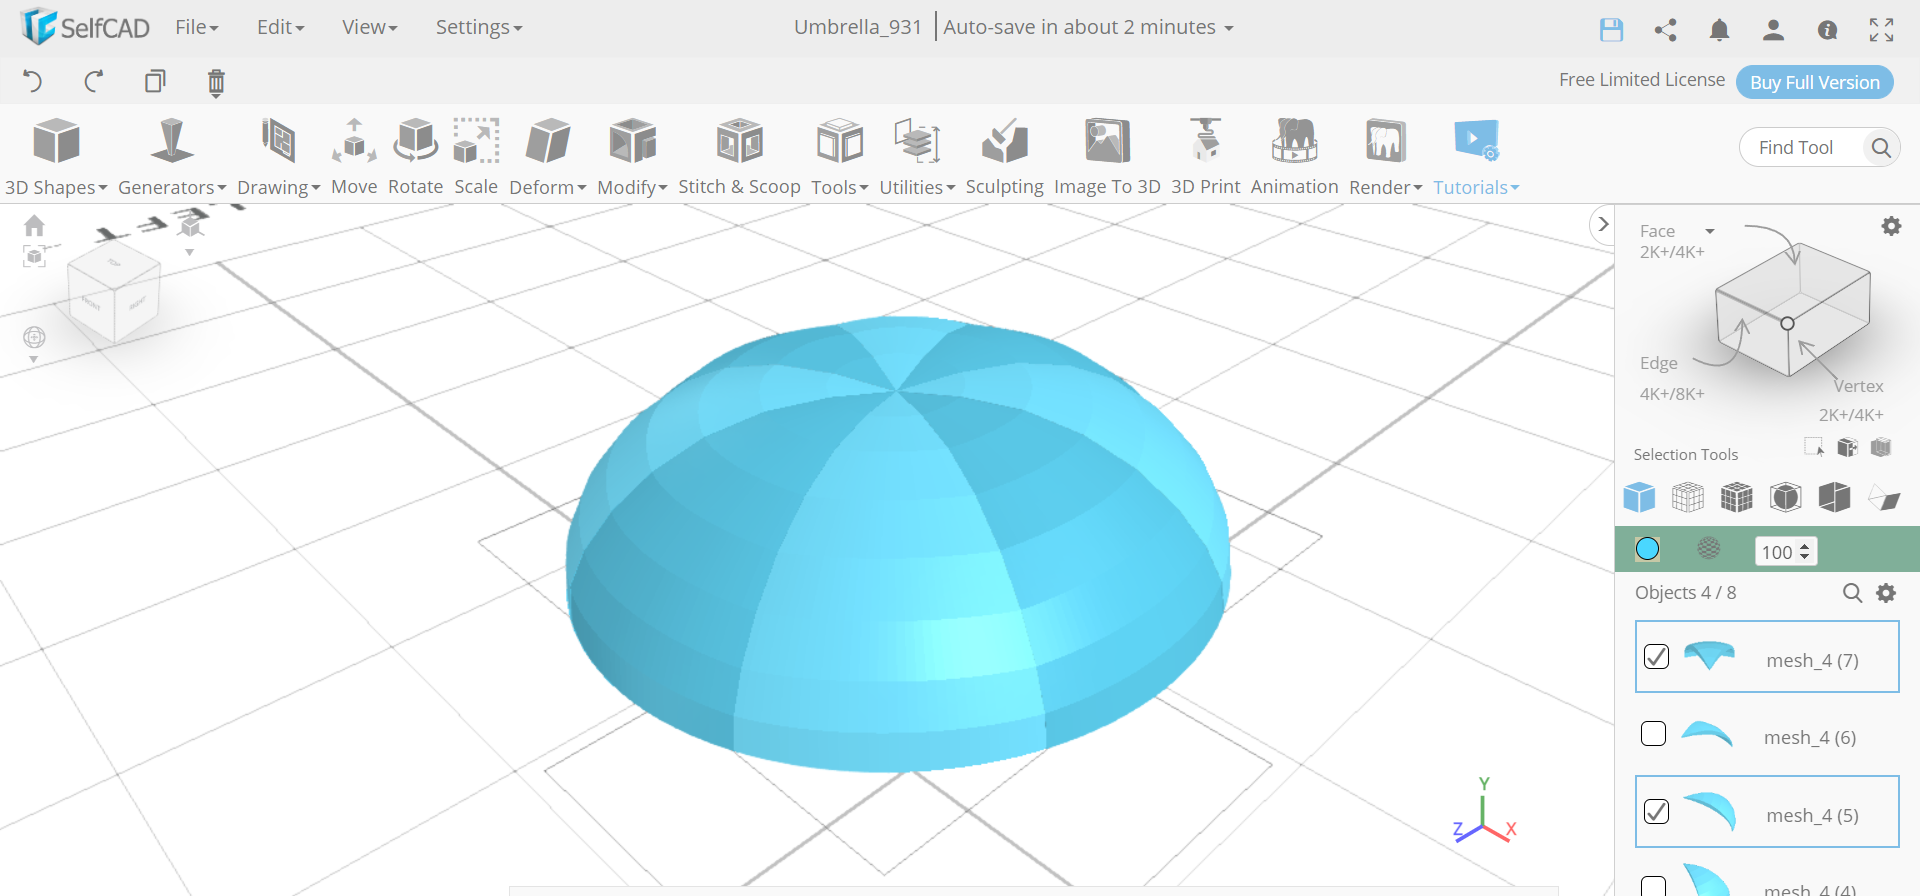
Step4: Create seven copies of the object
Next, select the move tool and move the object from the origin position to right. Set x to 0. Then go to tools and select the copy offsets option. Set operation to pivot. Set the number of copies to 7. After that, click the copy button to create copies.
Step5: Colour the opposite alternative parts into white
Now, click on mesh_4, mesh_4(2), mesh_4(4) and mesh_4(6) to deselect it. Then select the colour picker option and colour the selected object to white colour.
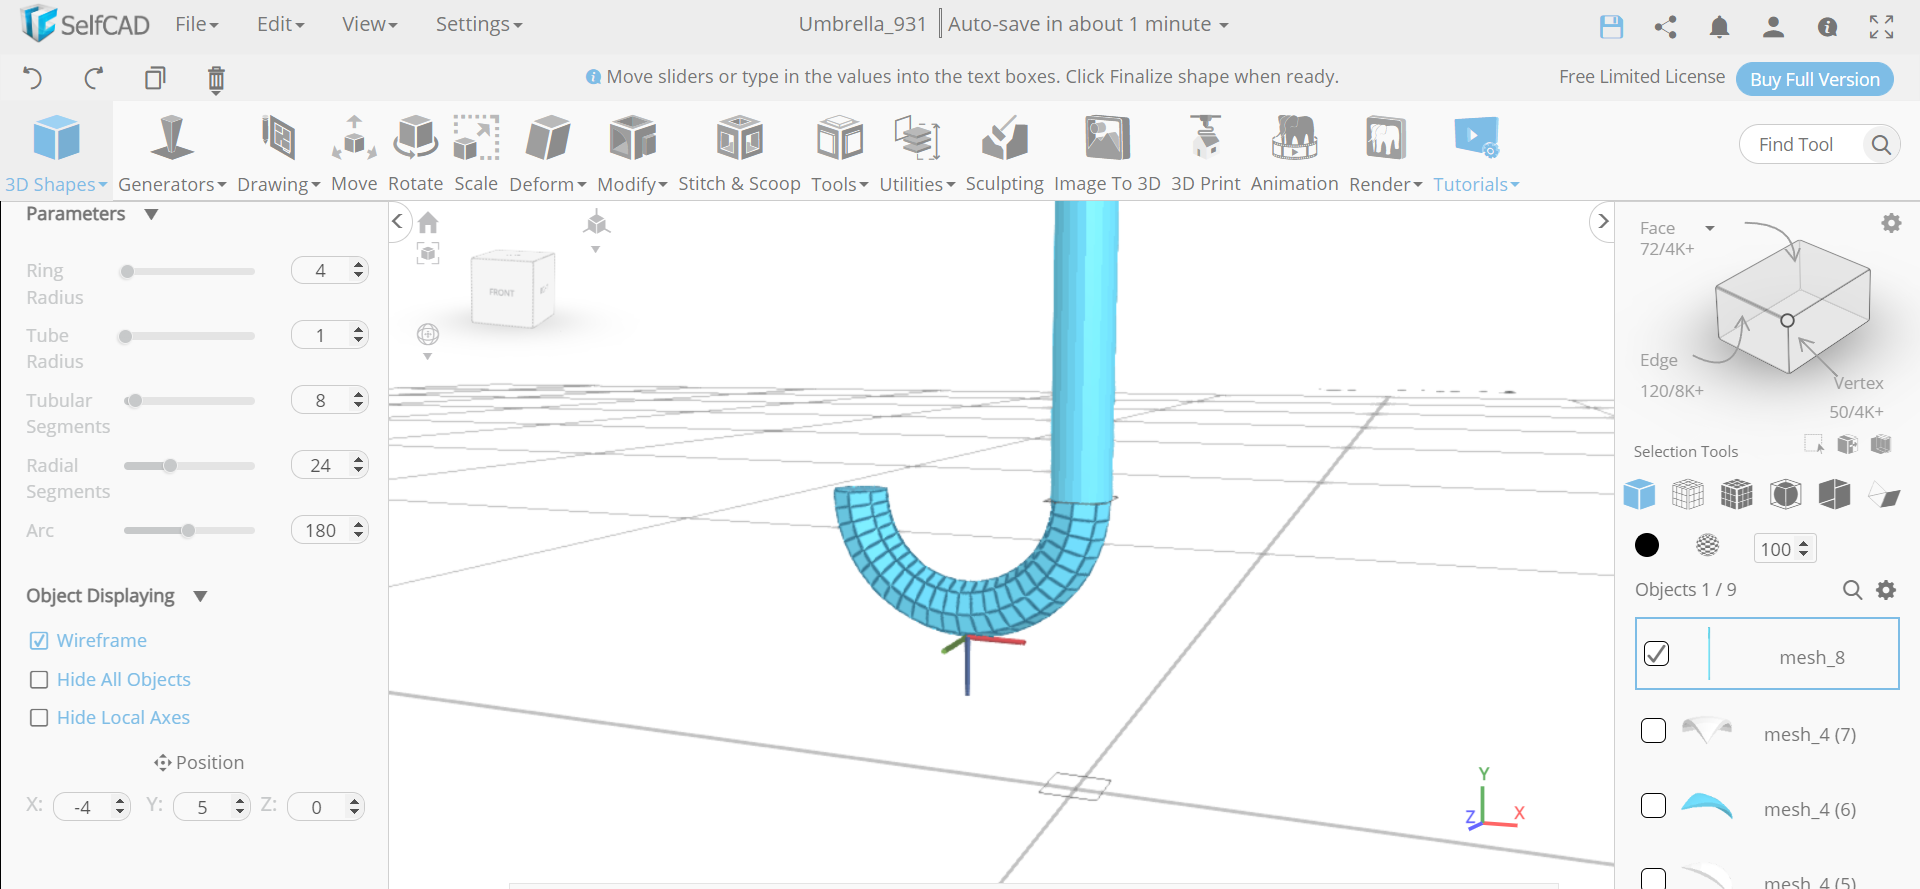
Step6: Insert a cylinder and torus at the bottom
Next, insert a cylinder and set its top radius to 1, bottom radius to 1, height to 65, position y to 10. Then insert a torus in the working interface. Set ring radius to 4, tube radius to 1, arc to 180, position x to -4, position y to 5, rotation x to 90.
Step7: Make them a union and colour it black
Now, select the mesh_8. Then go to stitch and scoop and make them a union. After that, change its colour to black.
Step8: Insert a cone and colour it black
Next, insert a cone to the working interface and set its radius to 2, height to 10, position y to 76. Then colour it to black. After that, make all the objects a union.
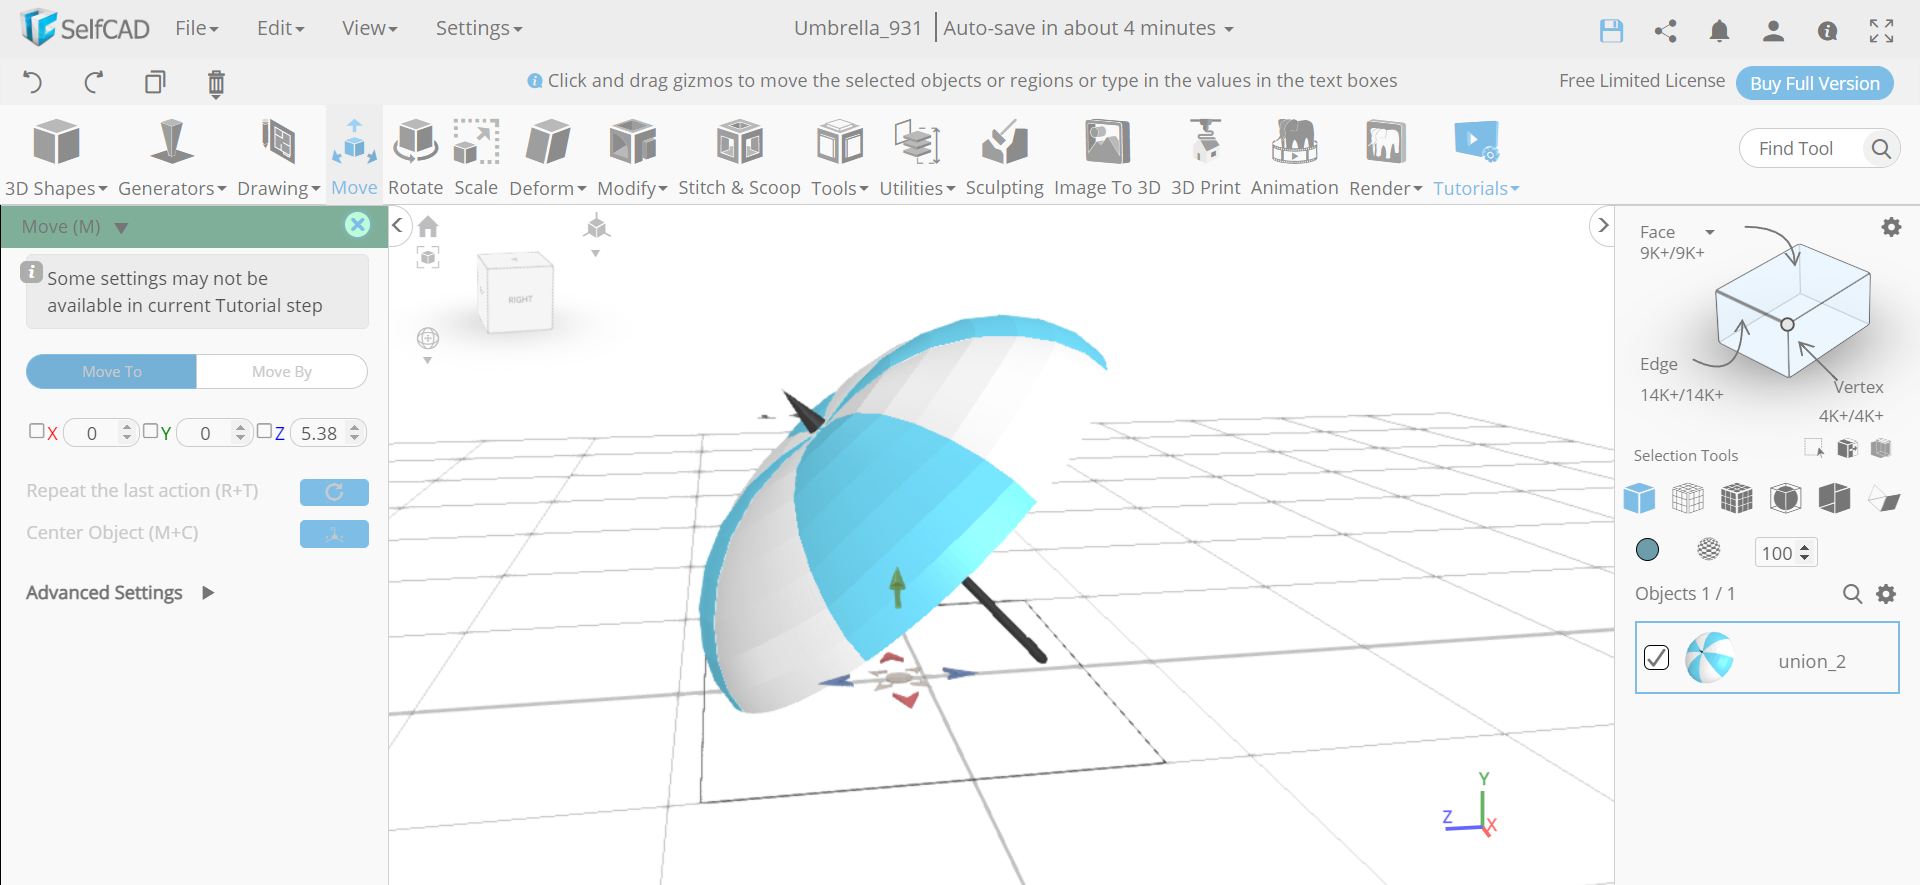
Step9: Rotate the object and move it along y-axis
Now, use the rotate tool and set x to 318. Then move it along the y axis to 0.
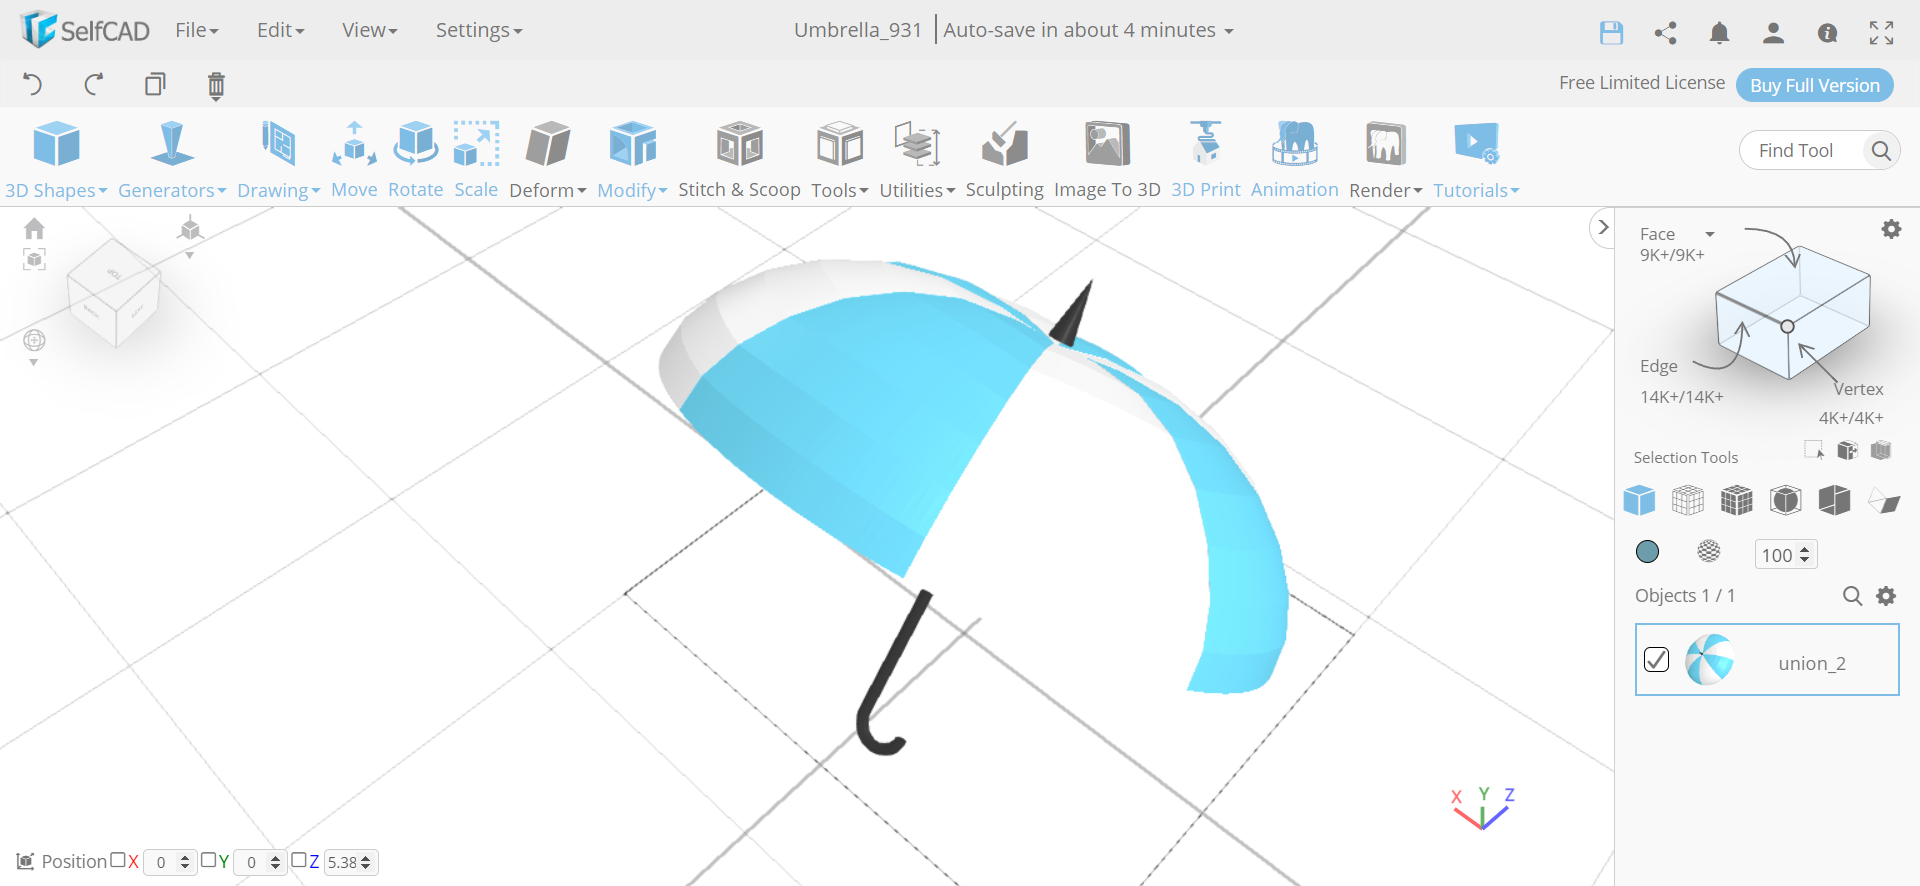
CONCLUSION: Therefore, we have designed a 3D umbrella using SelfCAD
We made a fundamental 3D umbrella involving SelfCAD in simple and basic steps. 3D modeling characters aren't confounded the same length as you have the best tools with you. You can likewise utilise a similar system to 3D design your own designs utilising a similar methodology and after you are finished with 3D modeling, you can utilise the in-constructed slicer of SelfCAD to cut it and create the G-Code that you can ship off your 3D printer for 3D printing.