In this tuturial article, we will go through the process of designing a 3D water fountain and a 3D shield.
To make any surprising 3D model, you ought to, specifically, pick a 3D modeling software to use in your endeavours. Subsequent to deciding the right 3D modeling software, you would then begin learning its tools and different components. We picked SelfCAD as it's more straightforward to learn, and you don't have to have knowledge of 3D modeling to make the decision to utilise it.
Is it right that you are excited about learning 3D designing? Dread not. SelfCAD is here to moderate your interests.
You can also visit our page and check more articles like how to create a 3D plastic water bottle.
So, let’s begin!
HOW TO CREATE A 3D WATER FOUNTAIN
In this tutorial article, we're demonstrating the way that you can design a water fountain in SelfCAD. We will be using tools like 3D sketch, revolve, rotate, move, and so on.
Step1: Opt for 3D sketch and draw a line
First of all, go to the 3D sketch from the drawing category and select the minimum angle step and change the plane settings to precision settings. Then we will choose the line sketch and draw a line of 150 mm.
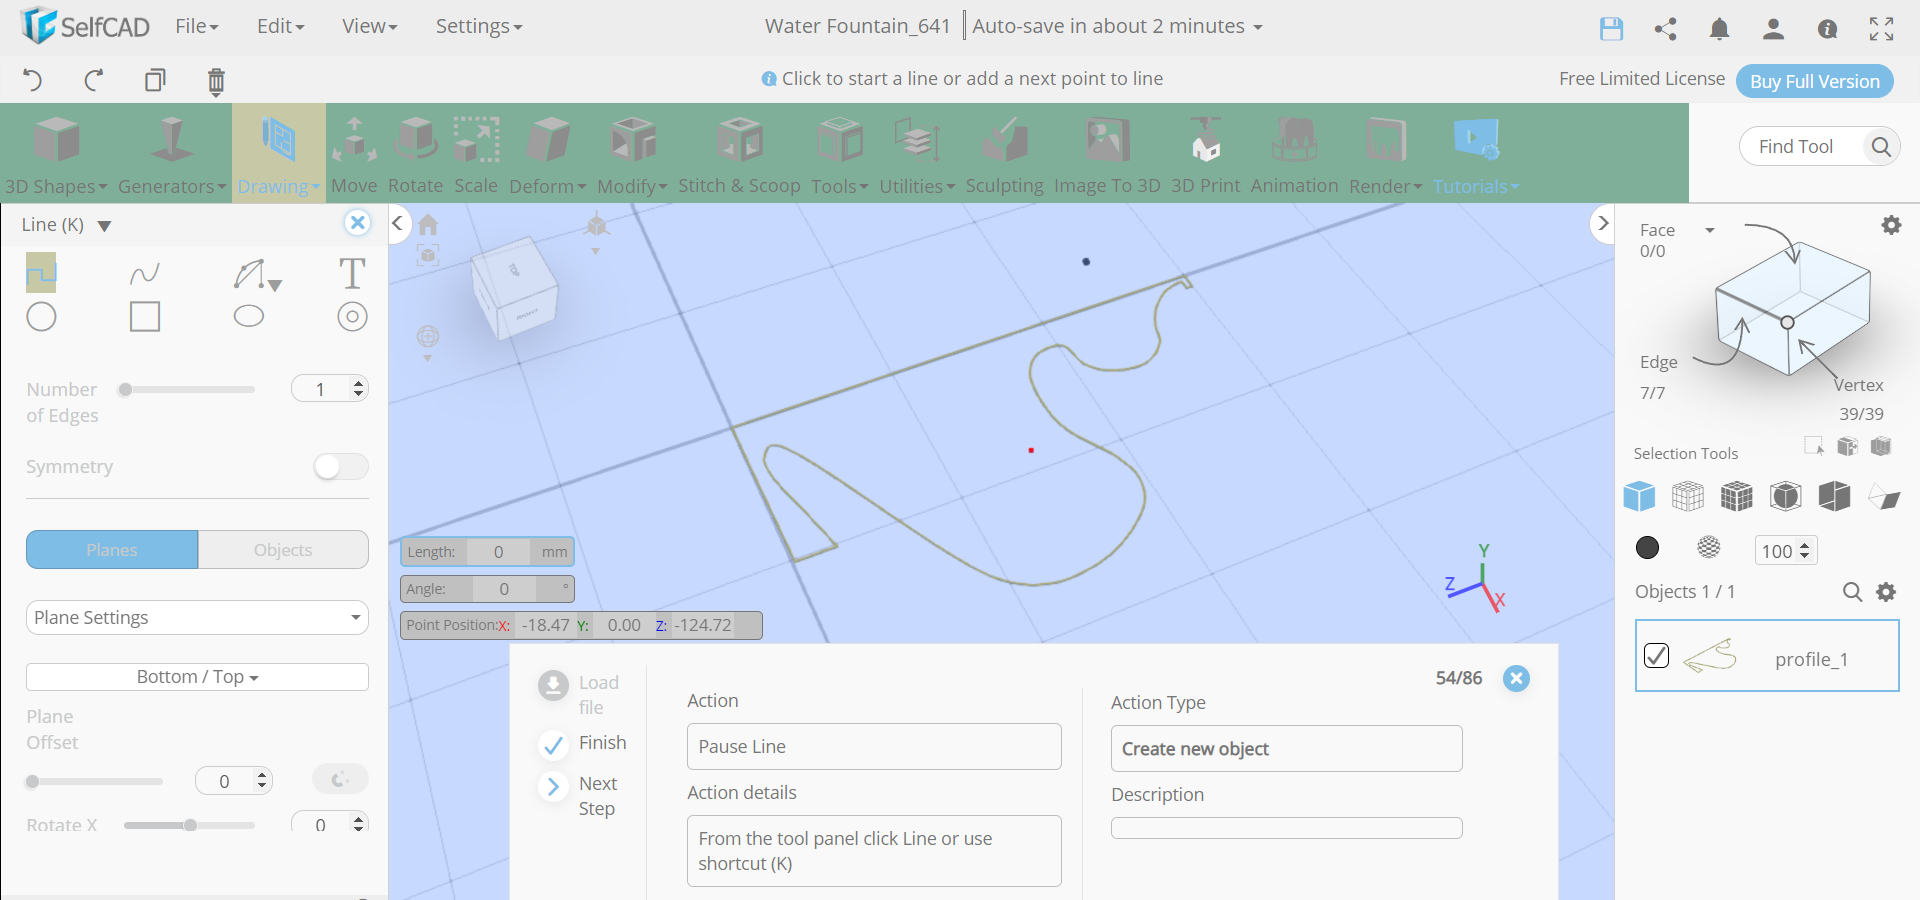
Step2: Draw curved lines by setting the smoothness
Next, continuing from the line, we will make a L-shaped figure on the top. Then we will opt for the spline sketch and set the smoothness to 30. Draw a curved S-shaped structure, follow this with a big curve at the bottom and a base curve. After that, select the line sketch and close the figure with perpendicular lines.
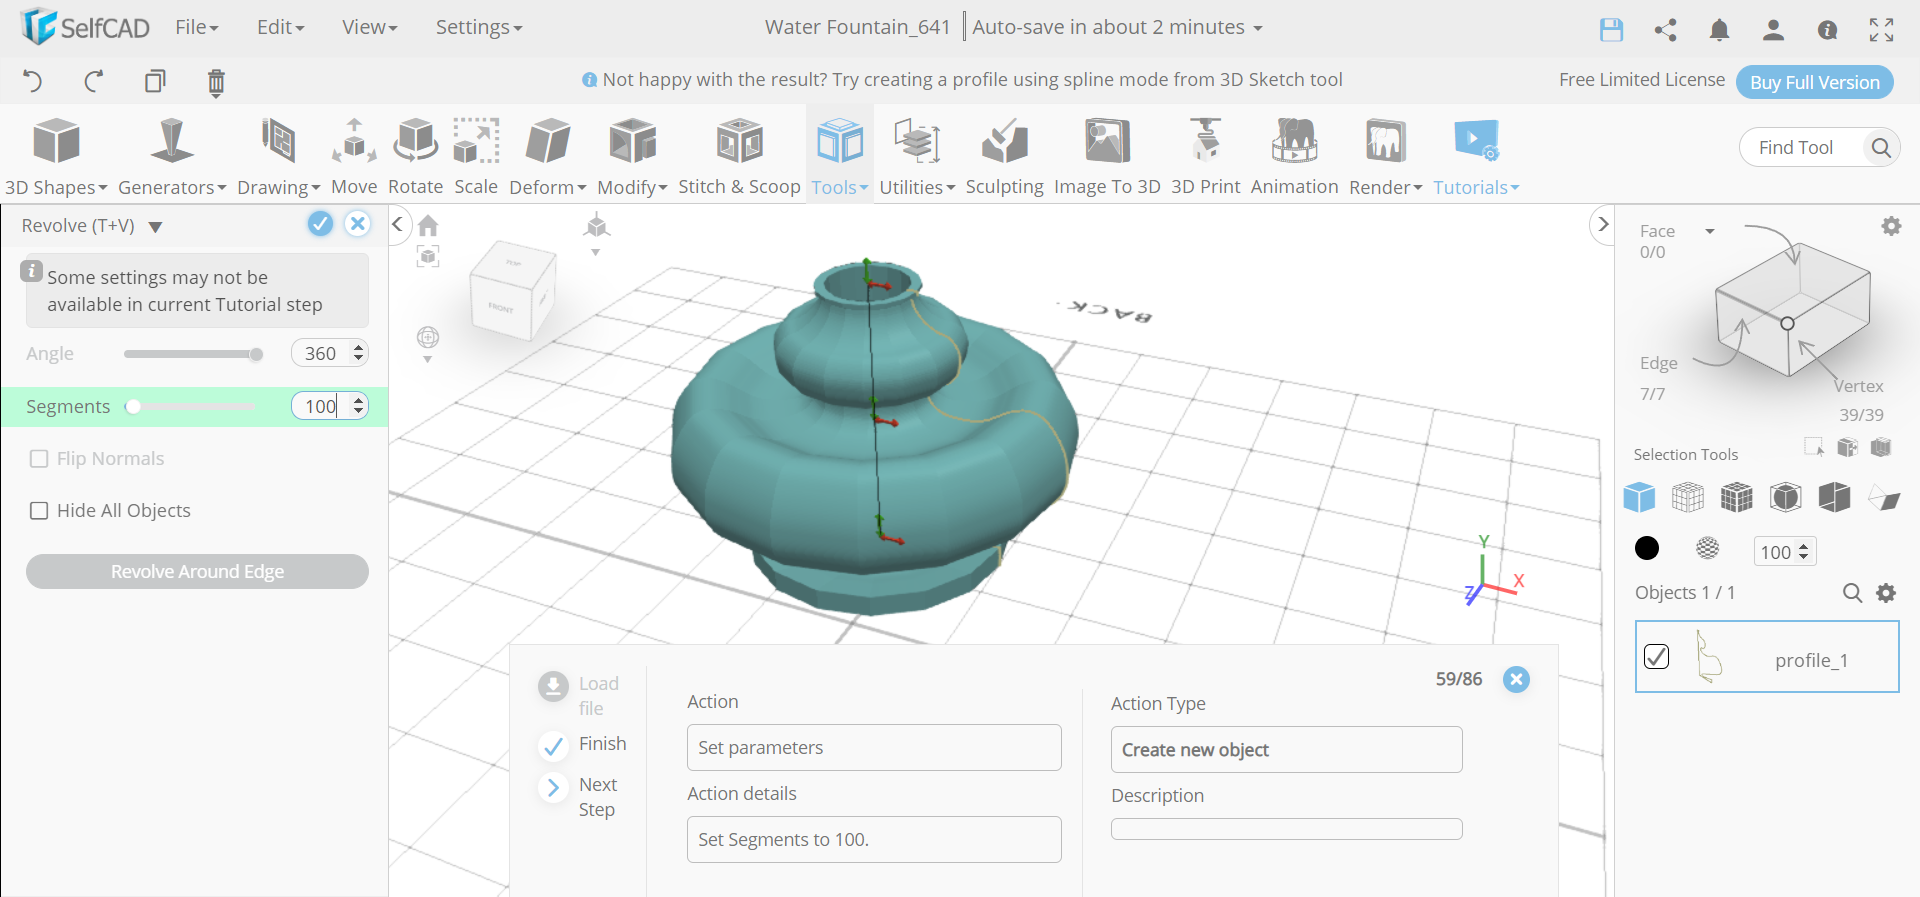
Step3: Rotate and revolve the figure
Now, select the rotate tool and rotate the figure along the red axis in about 90 degrees. Then we will go to tools and select the revolve option. Set segments to 100.
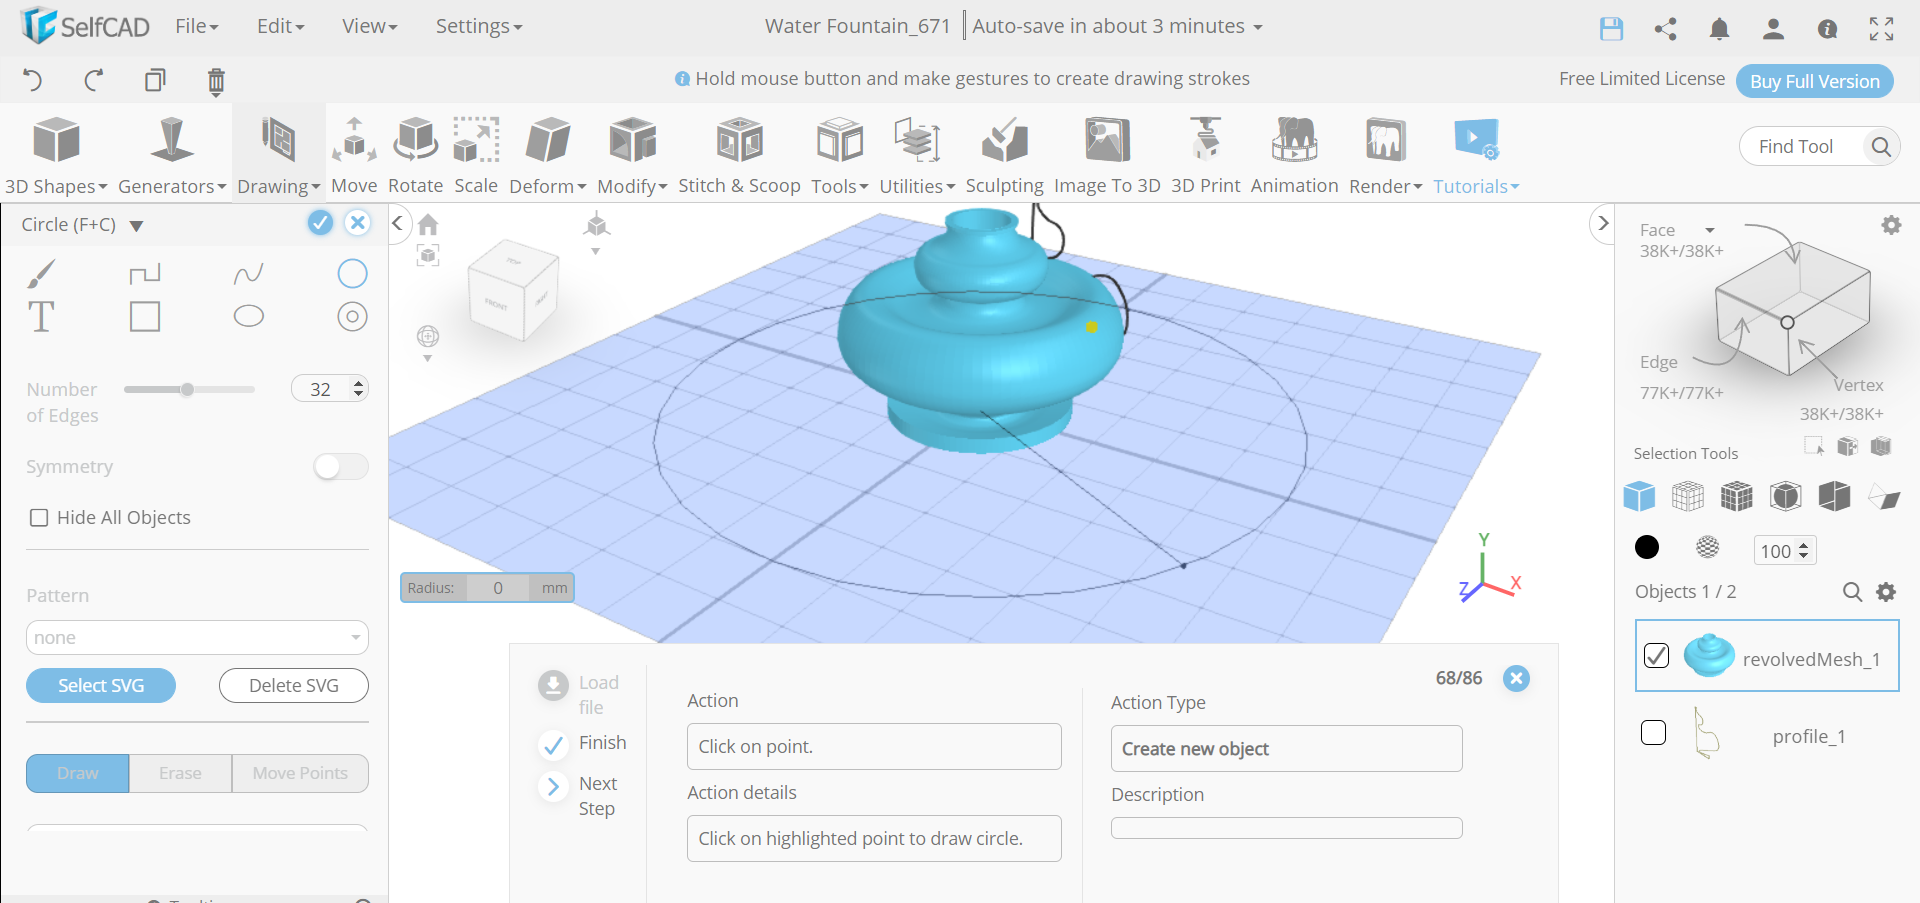
Step4: Move the object to the centre and draw a circle around it
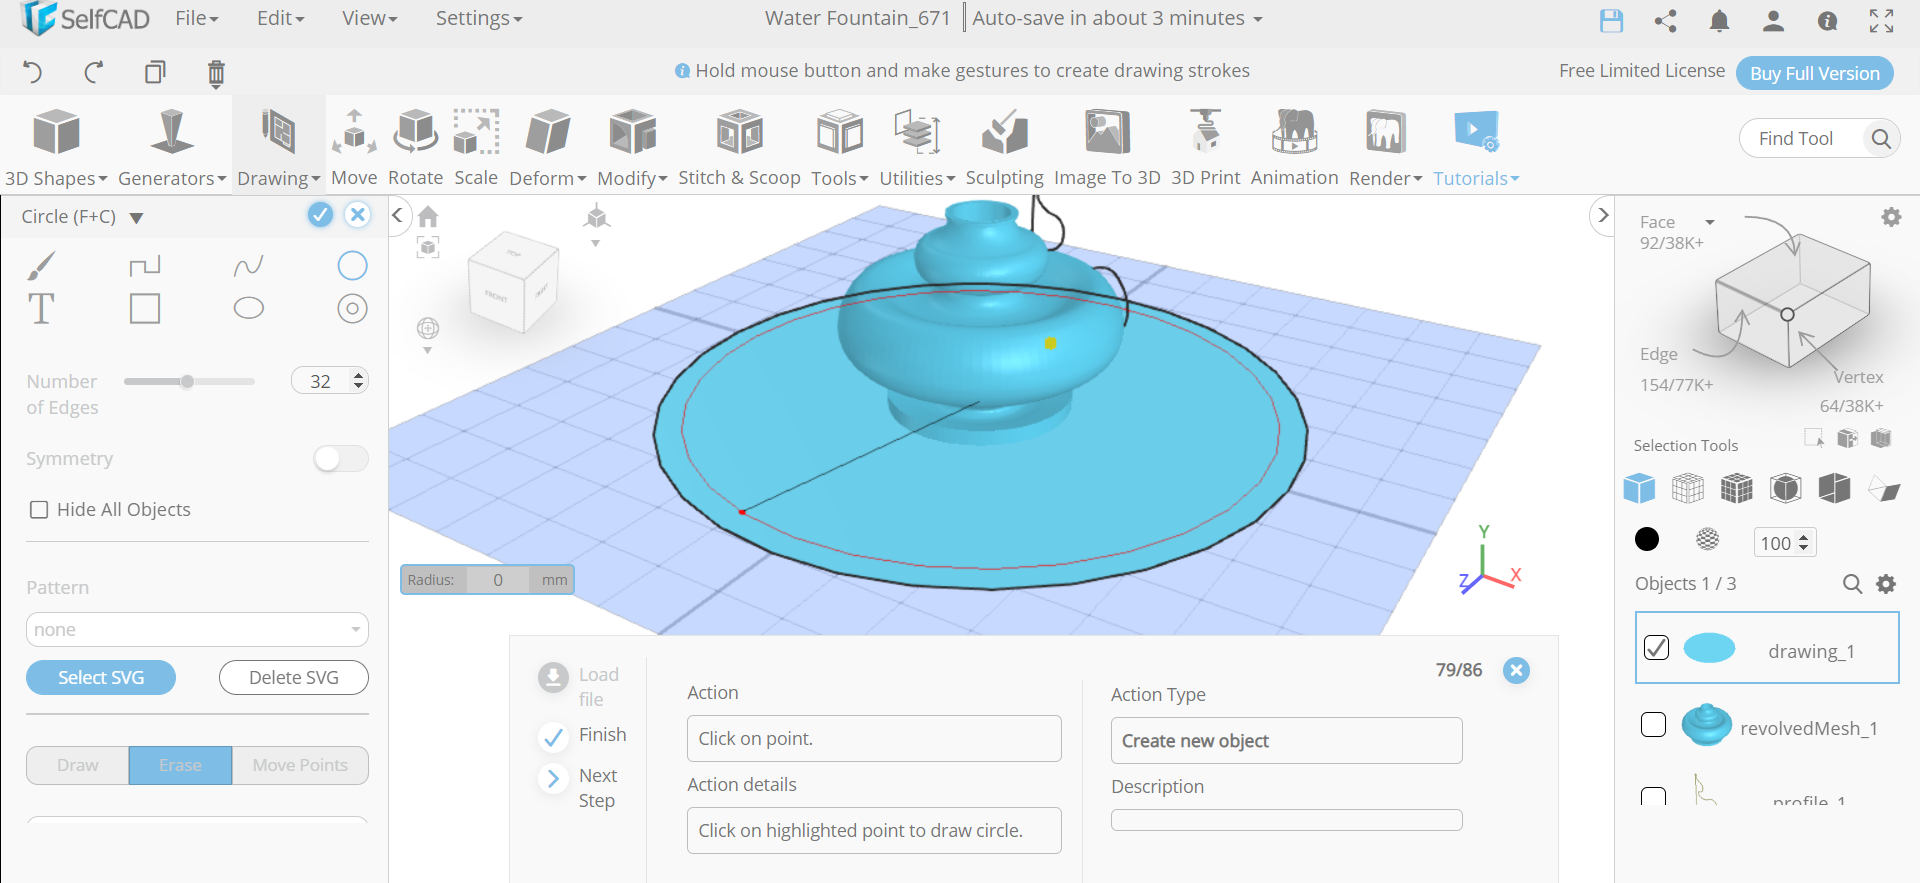
Next, we will choose the move tool and place the object in the centre. Then select a circle sketch and make a circle with 250mm radius value on the plane. Set its height to 1.
Step5: Draw another circle and increase its height
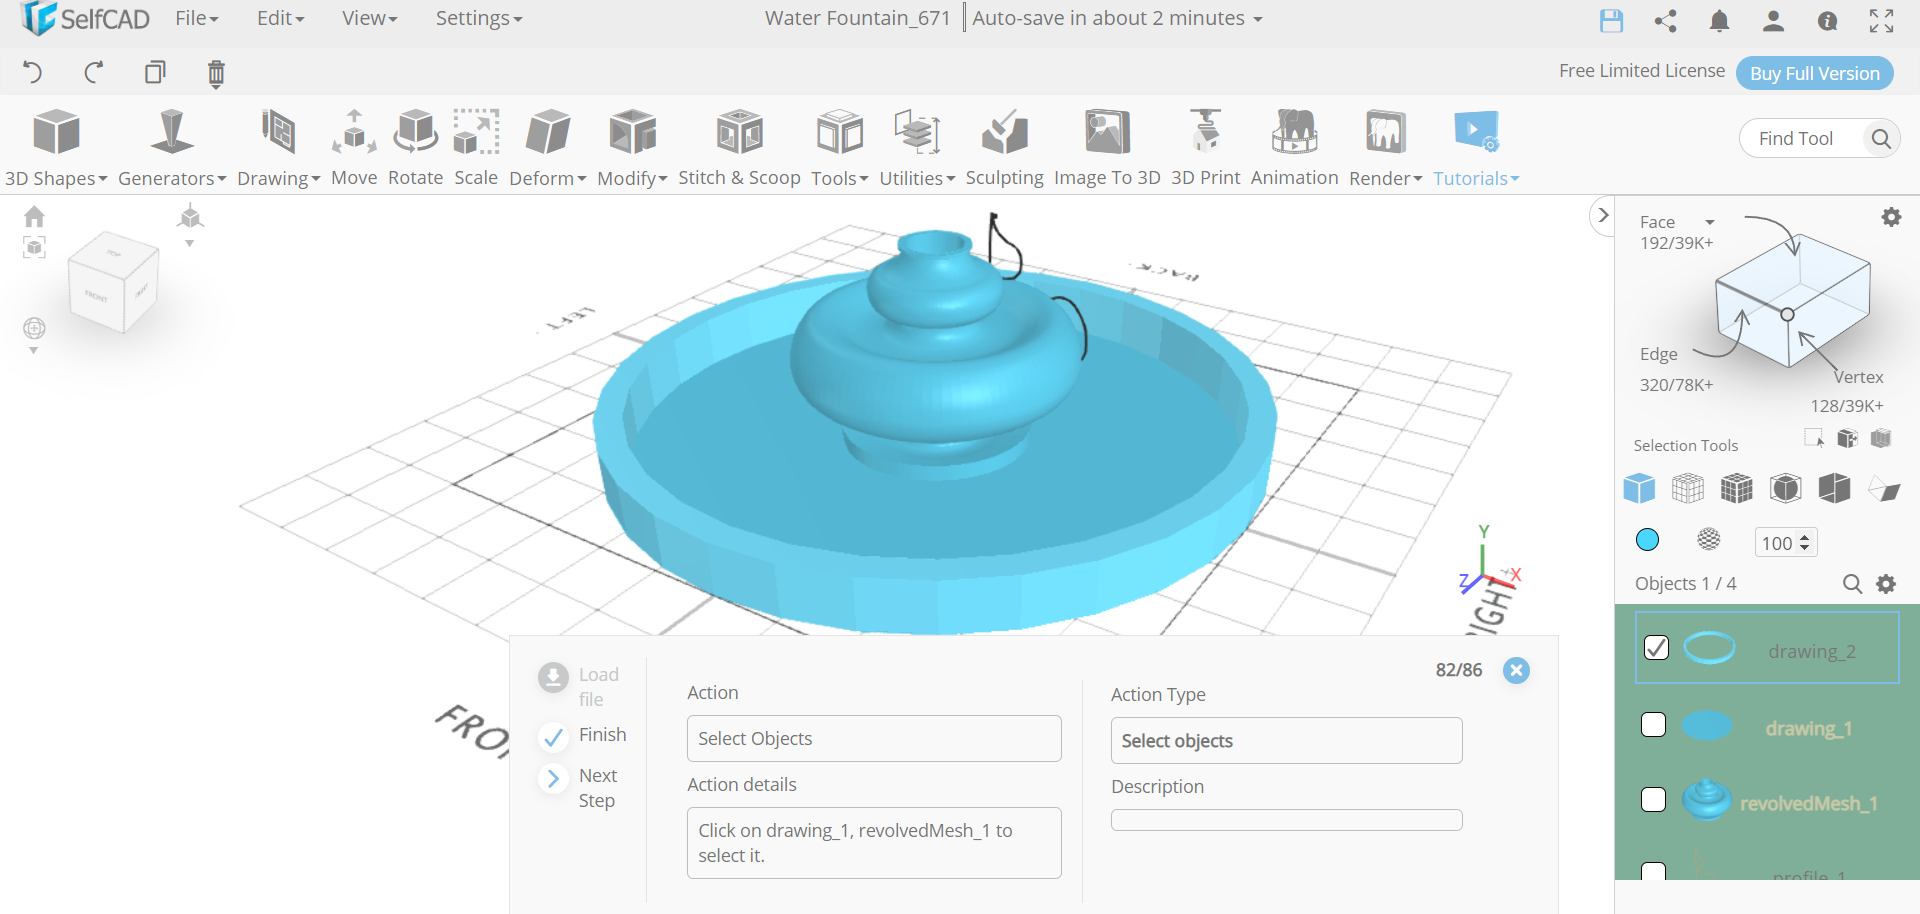
Now, select the circle sketch again and make another circle of the same value. Set mode to erase and draw a circle of 230mm radius value. Set its height to 40. Then select drawing_1 and revolvedmesh_1. After that, go to stitch and scoop and make it a union.
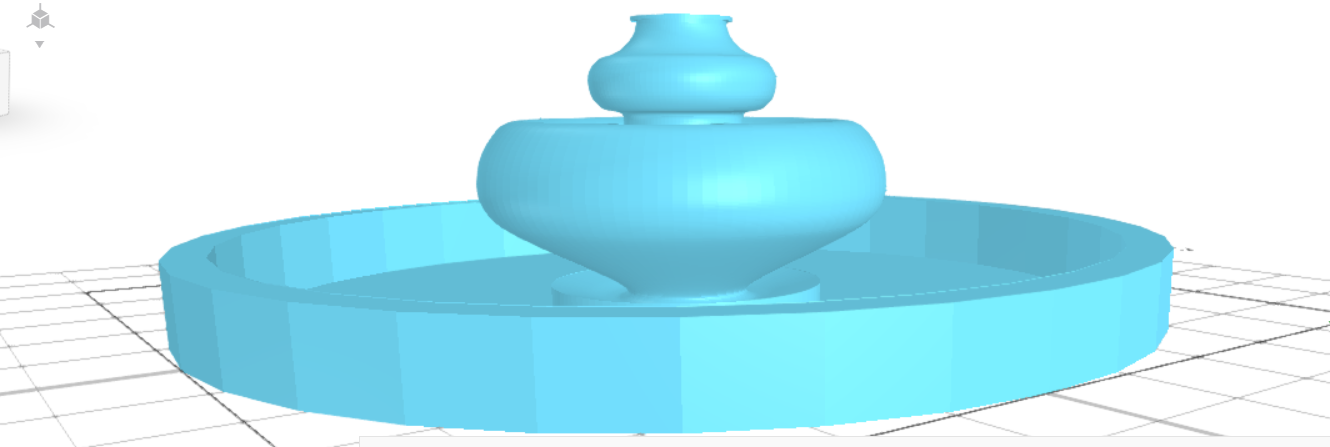
Step6: Isolate the object
Next, go to views and select the isolate option.
Conclusion
So, we designed a water fountain by using simple 6 steps.
HOW TO CREATE A 3D SHIELD
In this tutorial article, we're demonstrating the way that you can design a water fountain in SelfCAD. We will be using tools like 3D shapes, add thickness, polygon selection, and so on.
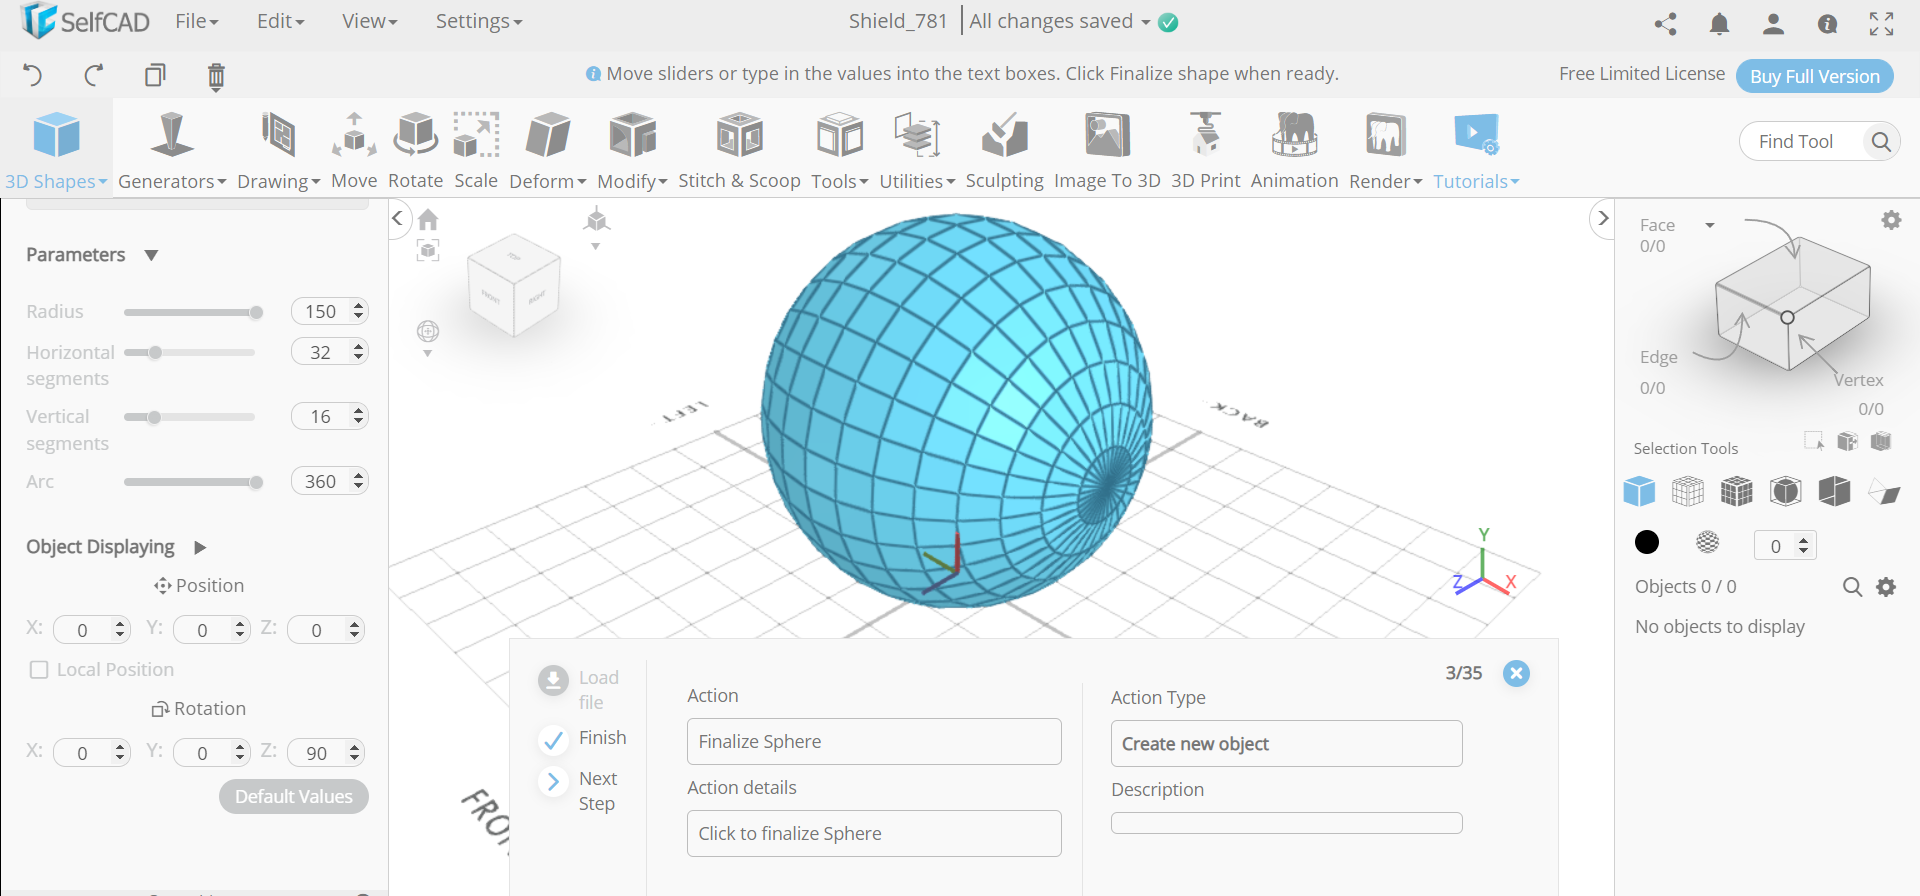
Step1: Insert a sphere to the working interface
First of all, go to 3D shapes and insert a sphere to the working interface. Set radius to 150 and rotation z to 90. Then we will opt for the wireframe option.
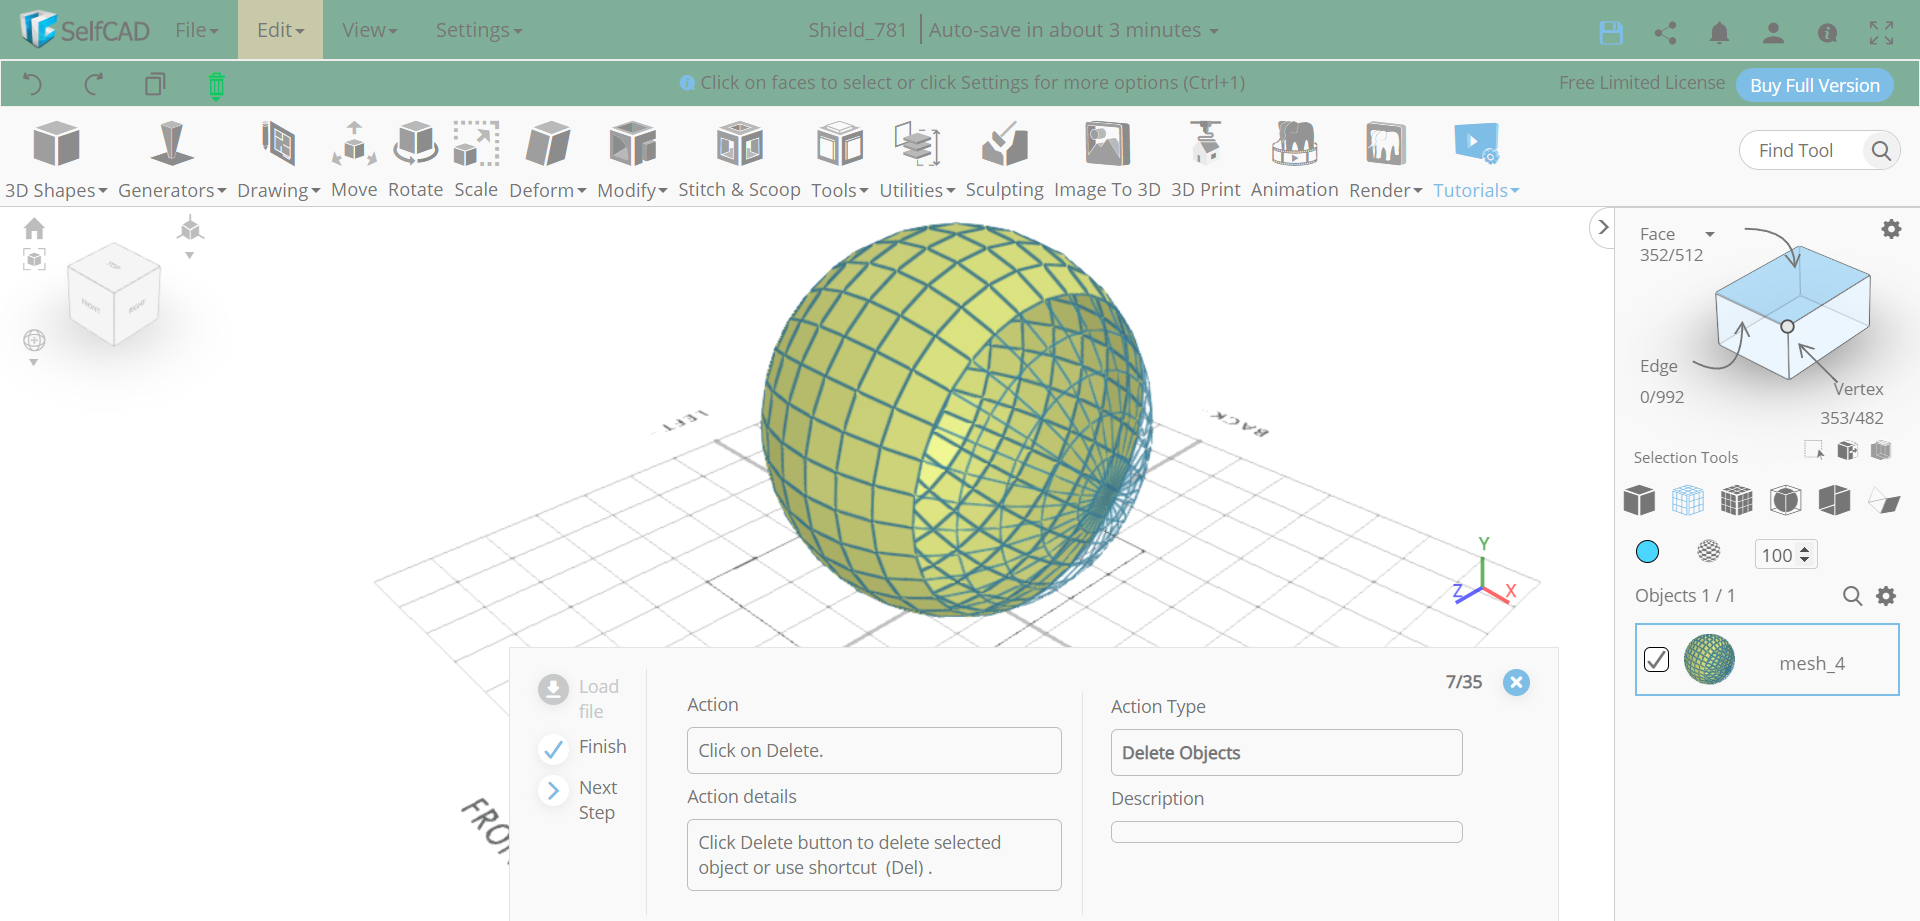
Step2: Delete 3/4th part of the sphere's face
Next, select 3/4th part of the sphere as shown in the picture and delete it. Then opt for the mesh option.
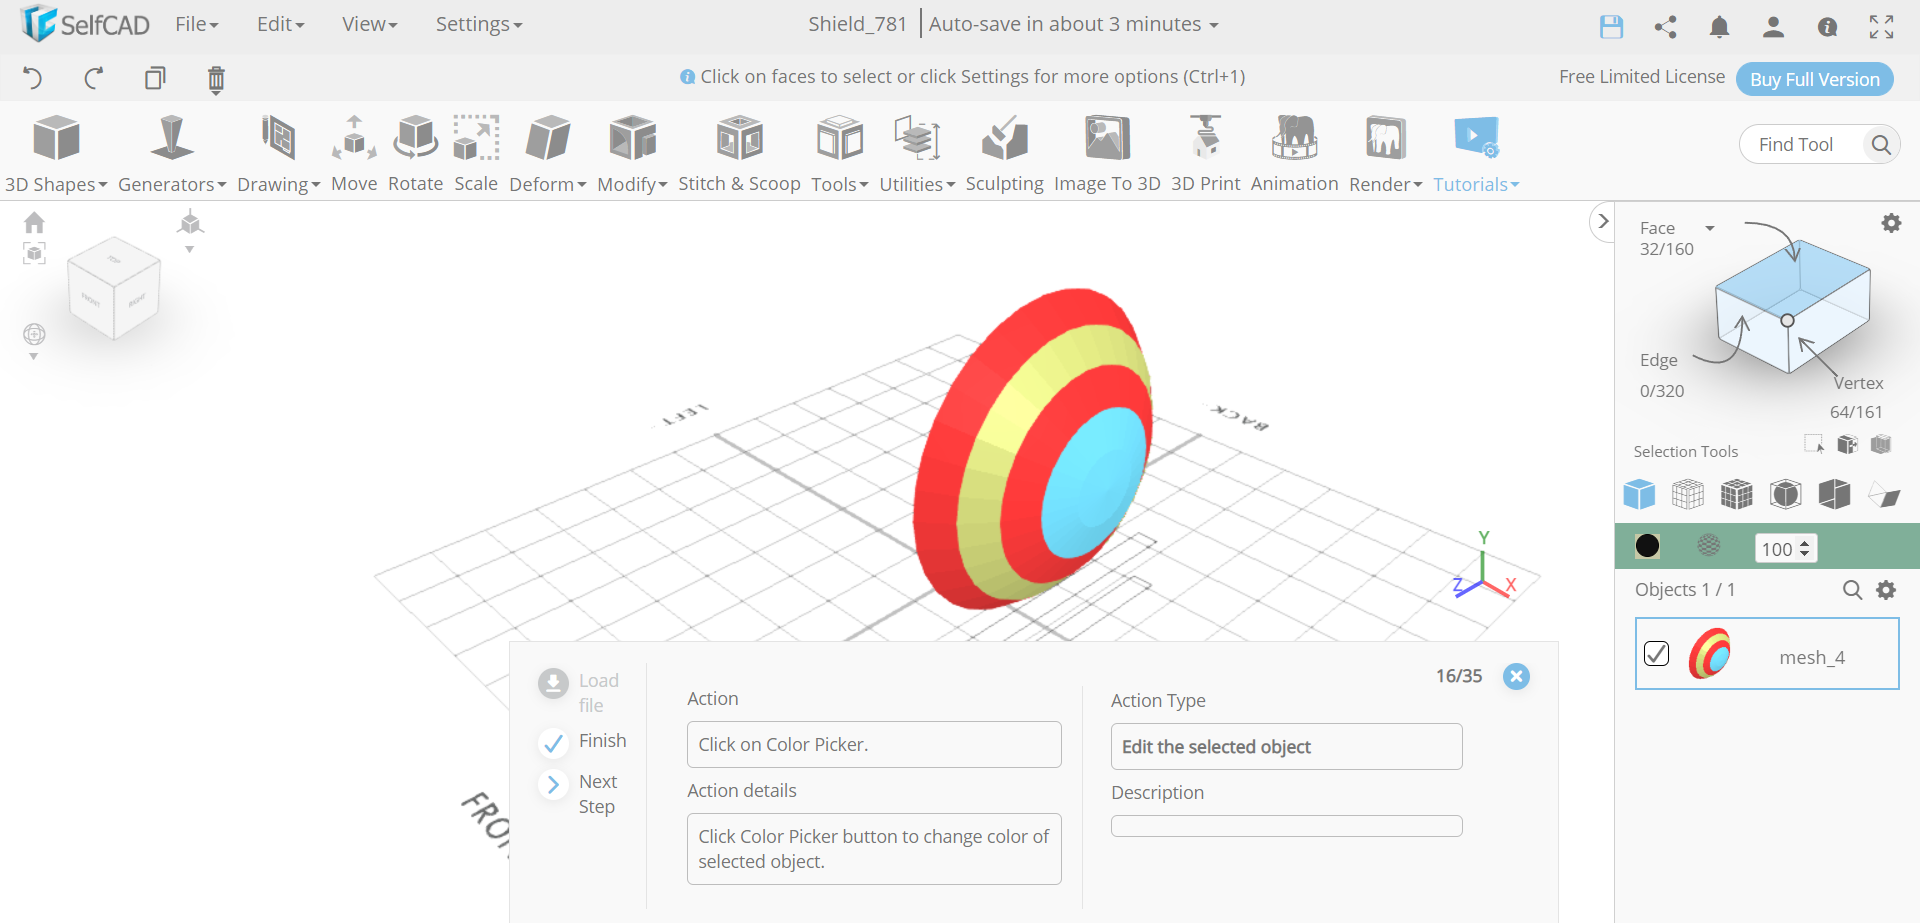
Step3: Divide the sphere into five sections and add colour to the alternative two sections
Now, we will divide the object into five sections and select the alternative two sections using the face selection option. Then go to the colour picker and select a red colour to it.
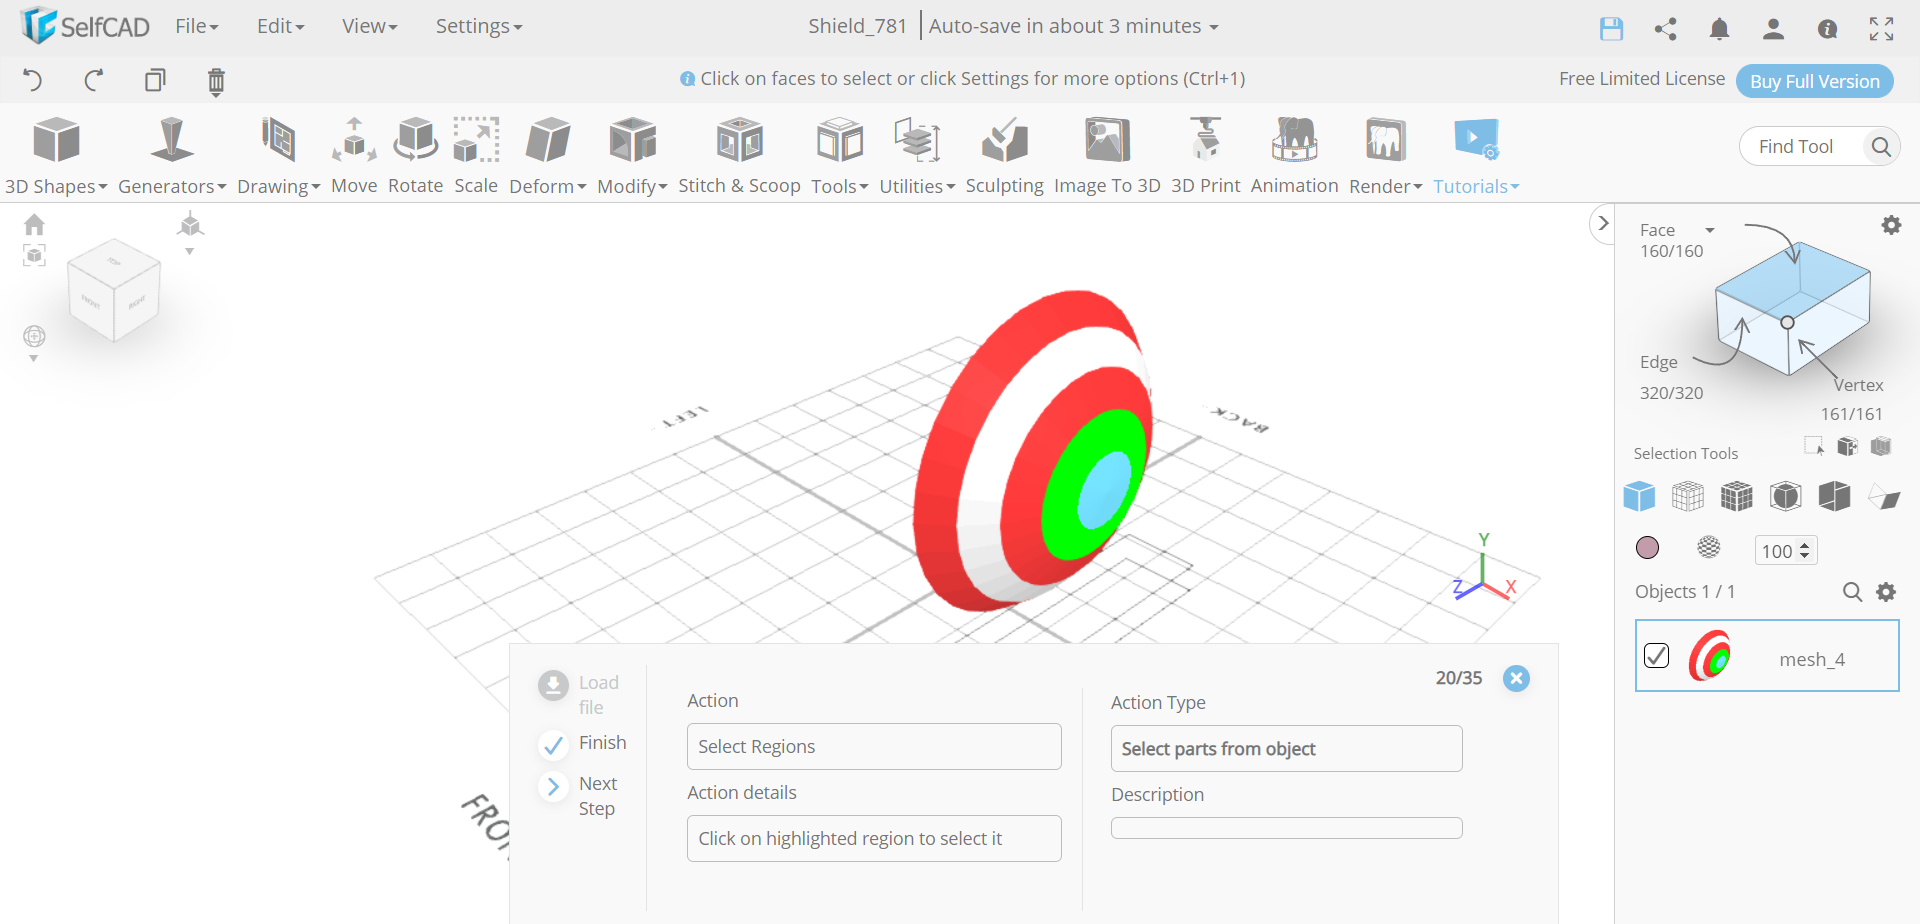
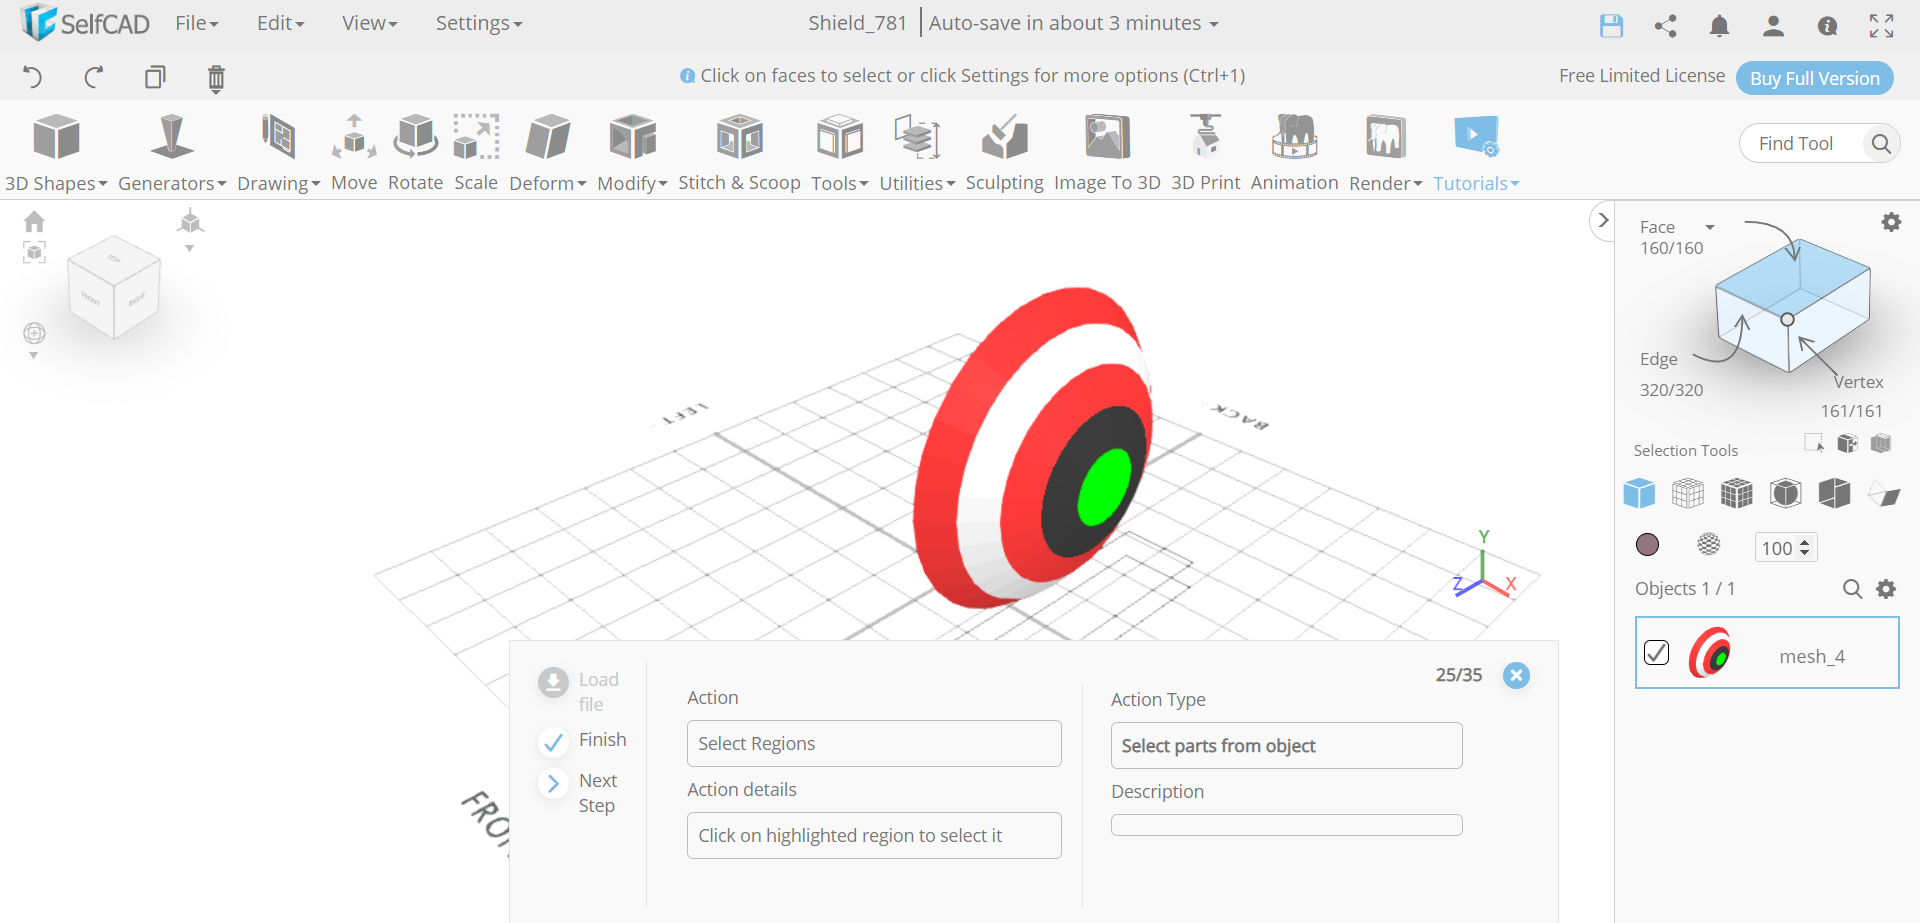
Step4: Add colours to the rest of the sections
Next, select the middle section and give it a white colour in the same method. Then select the second innermost section and colour it black. After that, add blue colour to the innermost section.
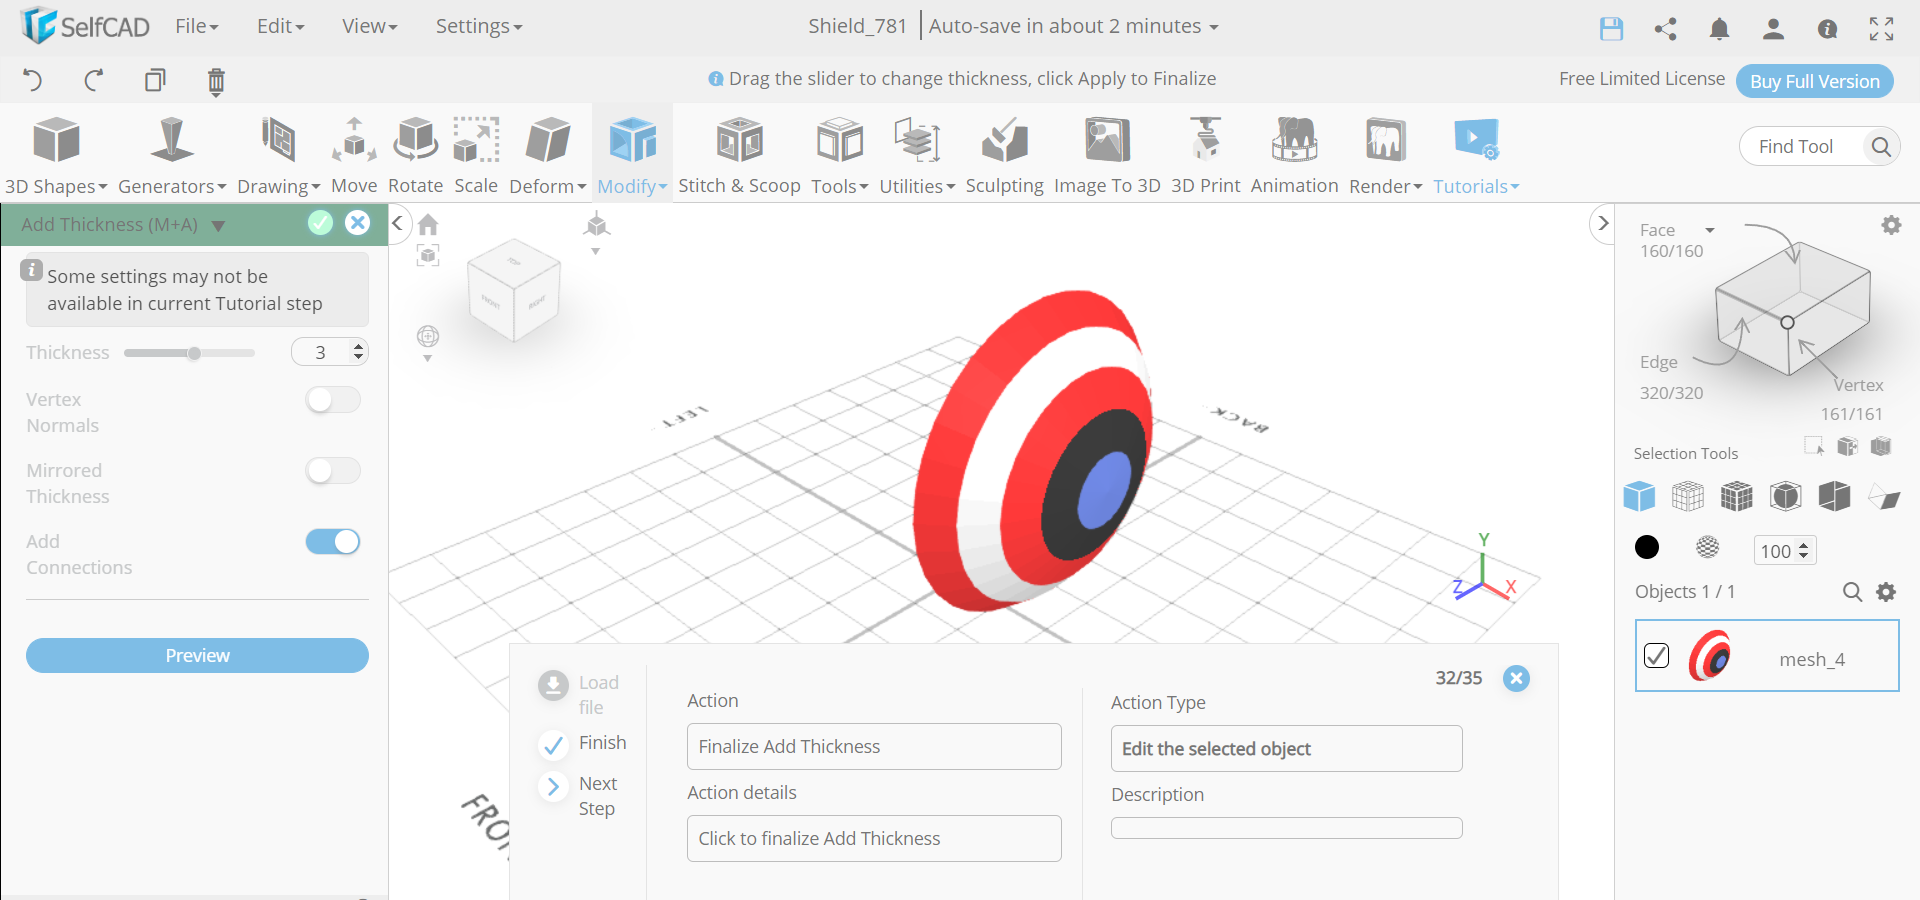
Step5: Add thickness to the object
Now, go to modify and select the add thickness tool. Set the thickness to 3. Then select the scale tool and scale it along the red axis to a value of 45.
Conclusion
So, we designed a water fountain by using simple 5 steps.
CONCLUSION: THEREFORE, WE CREATED A 3D WATER FOUNTAIN AND A 3D SHIELD USING SELFCAD
We have 3D designed the water fountain and a shield with different tools of SelfCAD. It is astounding to 3D design an article that might be almost insignificant, tremendous, or complex. You can similarly utilise a tantamount procedure to 3D design other 3D objects of your choice.