Learn how to control a RGB LED with Netduino.Foundation, a powerful platform to build connected things quickly and easy.
This project uses the RgbPwmLed class that is included in the Netduino.Foundation Library. This guide consists of three parts:
- Part 1: Cycle through the Red, Green and Blue pins on a RGB LED to ensure they are wired up correctly.
- Part 2: Make the LED glow through all the possible hues with just a few lines of code.
- Part 3: Explore more useful LED API methods provided by Netduino.Foundation Library.
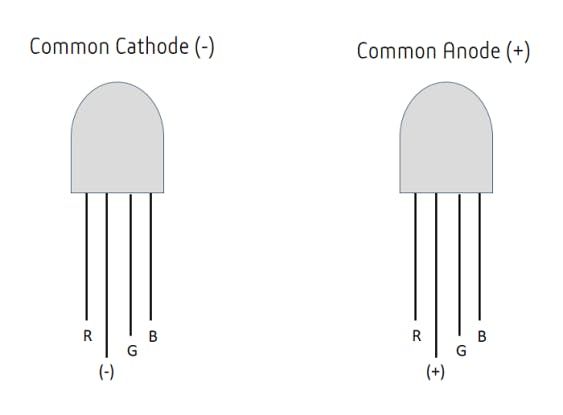
RGB (Red, Green, Blue) LED lights are diodes that have four legs - one for each of the colors mentioned and one for a common cathode (ground) or common anode (vcc), which is also the longest one.
Common Cathode and Common Anode RGB LEDs
In this project, you can work with either common anode or common cathode RGB LED. Just make sure to build the circuit that corresponds to the LED you're using.
Netduino.Foundation is a platform for quickly building connected things using the .NET MicroFramework on Netduino. Created by Wilderness Labs, it's open source and maintained by the Netduino community.
If you're new in Netduino development, I suggest you go to the Getting started with Netduino project to properly set up your development environment.
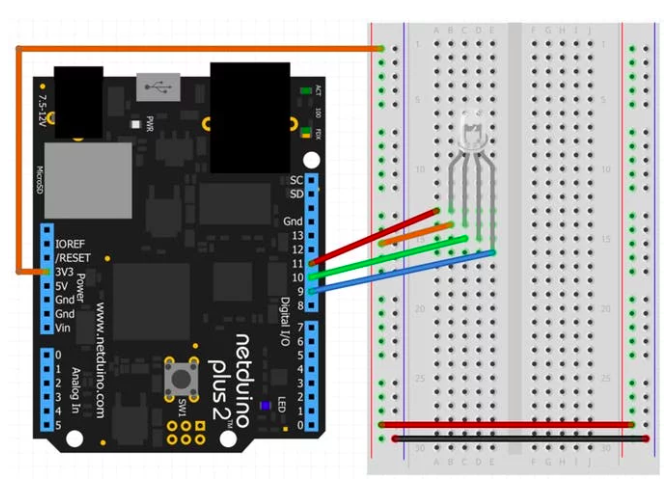
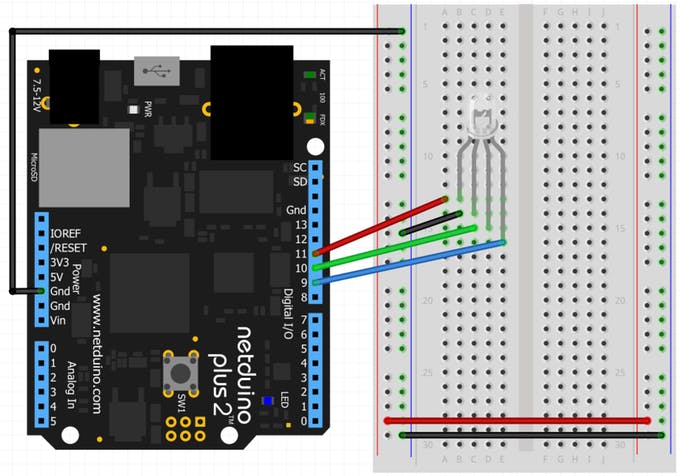
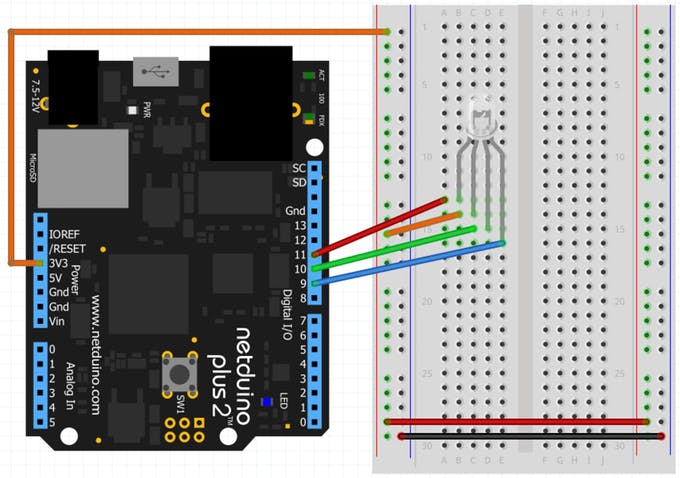
Assemble the circuit
Circuit of a common cathode RGB LED
Circuit of a common anode RGB LED
Note: Notice that resisters aren't used in neither circuits. Normally, passing full voltage can burn the LED. However, Netduino.Foundation can automatically control the forward voltage using a PWM signal.
Create a Netduino Project
Create a Netduino project in Visual Studio 2015 for Windows or the latest Visual Studio for Mac; name the project RgbPwmLed.
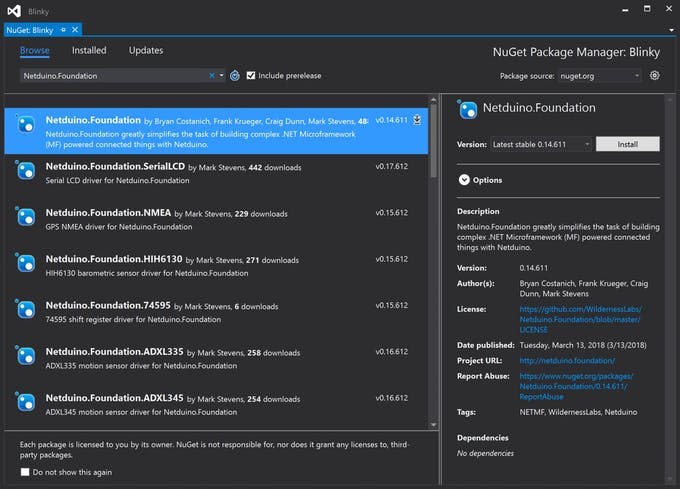
Add the Netduino.Foundation NuGet Package
Windows
Right-click on your RgbPwmLed project and click Manage NuGet Packages. In the Browse tab, search for Netduino.Foundation; it should be the first search result. Click the Install button.
macOS
Alt-click on your RgbPwmLed project in the Solution Explorer, and click Add => Add Nuget Package to open the NuGet Package window. Search for the Netduino.Foundation package and click Add Package to add it to your project.
Part 1: Making the RGB LED glow Red, Green and Blue
In your Program.cs file, paste the following code:
using Microsoft.SPOT;
using Netduino.Foundation;
using System.Threading;
using N = SecretLabs.NETMF.Hardware.Netduino;
namespace RgbPwmLed
{
   public class Program
   {
       public static void Main()
       {
           // create a new pwm controlled RGB LED on pins
           // Red = 11, Green = 10, and Blue = 9.
           var rgbPwmLed = new Netduino.Foundation.LEDs.RgbPwmLed(
             N.PWMChannels.PWM_PIN_D11,
             N.PWMChannels.PWM_PIN_D10,
             N.PWMChannels.PWM_PIN_D9,
             2.1f,
             3.0f,
             3.0f,
             false);
           // run forever
           while (true)
           {
               rgbPwmLed.SetColor(Color.FromHex("#FF0000"));
               Debug.Print("=========== RED! ===========");
               Thread.Sleep(1000);
               rgbPwmLed.SetColor(Color.FromHex("#00FF00"));
               Debug.Print("=========== GREEN! ===========");
               Thread.Sleep(1000);
               rgbPwmLed.SetColor(Color.FromHex("#0000FF"));
               Debug.Print("=========== BLUE! ===========");
               Thread.Sleep(1000);
           }
       }
   }
}
In the Main method, we created a new RgbPwmLed object named rgbPwmLed. In the constructor, we're specifying the pins using to control the LED. Since we're not using resistors, we are including the forward voltage for each pin separately (red is 2.1V, and green and blue 3.0V). The last parameter in the constructor is optional and its the boolean isCommonCathode flag (true by default). Set this value accordingly based on the circuit you're working on.
Now with the rgbPwmLed object, inside a while infinite loop, we're invoking the SetColor(Color color) method, passing the Red, Green and Blue colors in Hex code, and putting the thread to sleep for one second intervals. You can also declare colors specifying in RGB or HSA values, and even predefined named colors.
Additionally, to keep track on which color is currently showing on the LED, you can use Debug.Print to indicate what color is the program showing at all times, just to make sure you wired all the LED legs correctly.
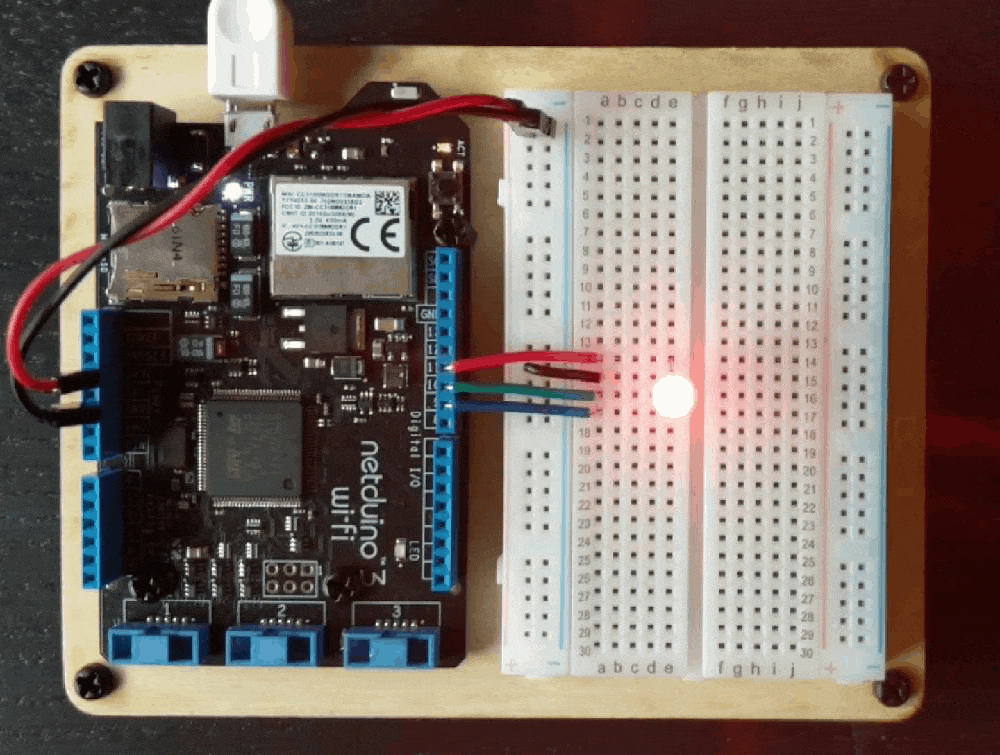
Run the Project
Click the run button in Visual Studio to see your RGB LED in action! You should see the LED cycling through red, green and blue colors every second, like to the following gif:
RGB LED lighting Red, Green and Blue
Part 2: Making the RGB LED glow through all hues
In this part, lets spice up the project a bit. Let's write a small algorithm to go through all 360 possible colors in the Hue spectrum. Why 360? Using the Hue, Saturation, Brightness and Alpha color model, this has a cylindrical geometry, and going through each degree at full saturation and alpha values, it will display all colors inside the RGB spectrum.
Delete the code inside the While(true) cycle, and paste the For loop instead. It should look like this:
...
while (true)
{
    // loop through the entire hue spectrum (360 degrees)
    for (int i = 0; i < 360; i++)
    {
        var hue = ((double)i / 360F);
        Debug.Print(hue.ToString());
        // set the color of the RGB
        rgbPwmLed.SetColor(Color.FromHsba(((double)i/360F), 1, 1));
        // for a fun, fast rotation through the hue spectrum:
        //Thread.Sleep (1);
        // for a moderate walk through the forest of colors;
        Thread.Sleep(10);
    }
}
...
Inside this For, we're declaring a local double hue and assign the result of dividing i/360. After that, we call the SetColor(Color.FromHsba(hue, 1, 1)) method on the rgbPwmLed object, and finally do a Thread.Sleep(10) to see all the colors at a moderate speed.
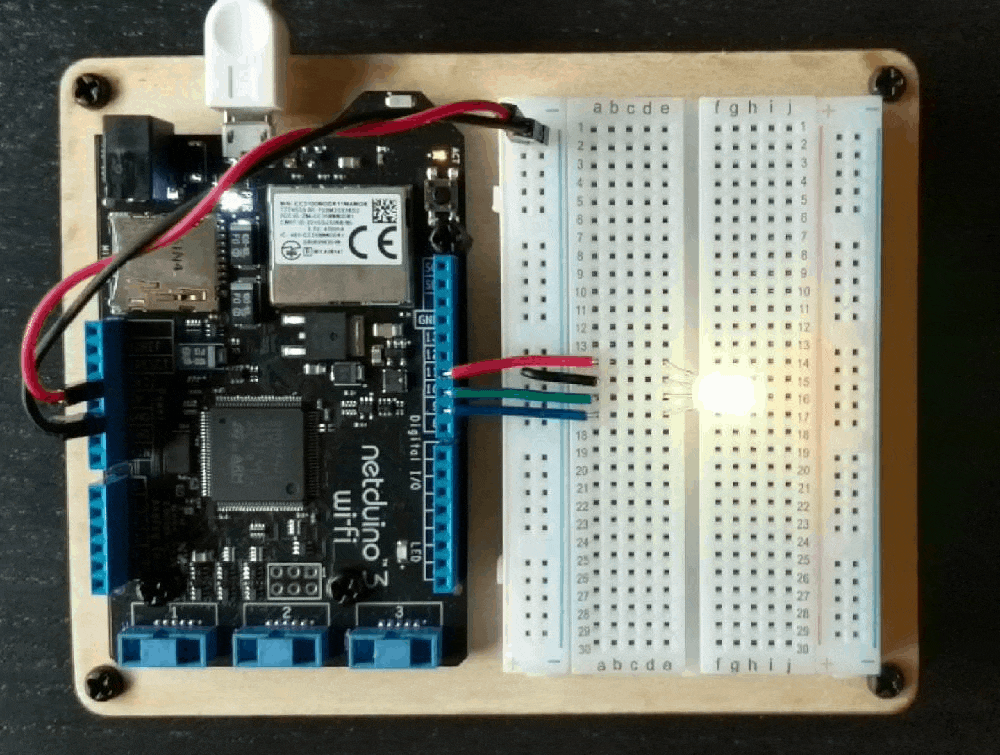
Run the Project
When you run the project now, you should see something like this:
RGB LED cycling through different hues
Part 3: Using StartRunningColors method
Another useful API method that you should check out is StartRunningColors, which consist on passing a list of Colors along with time durations for each one. The following code snippet makes the LED glow Color.White for 1000ms (1s), then Color.Aqua for 500ms (0.5s), then Color.ForrestGreen for 1000ms (1s), and finally Color.OrangeRed for 500ms (0.5s).
...
while (true)
{
    // run through various colors for 10 seconds
    rgbPwmLed.StartRunningColors(
        new System.Collections.ArrayList
        {
            Color.White,
            Color.Aqua,
            Color.ForestGreen,
            Color.OrangeRed
        },
        new int[] { 1000, 500, 1000, 500 });
    Thread.Sleep(10000);
}
...
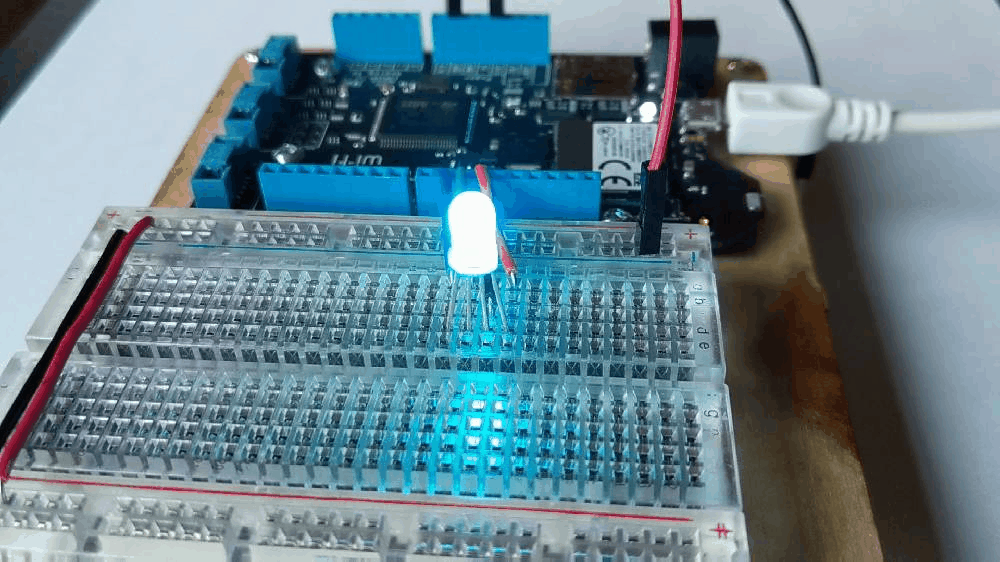
Run the Project
When you run the project now, you'll see something like this: