Smart mirrors are cool accessories to have, but much cooler if you can build one yourself! Learn how in this tutorial!
A smart mirror can be a cool addition to any space. These days, it is surprisingly easy to build a smart mirror with less time and a low budget. For this tutorial, I am going to show you how to build a Raspberry Pi smart mirror using the Magic Mirror platform.
What is Magic Mirror?
Think about it, it’s pretty cool to see daily tasks, weather reports, latest news headlines, incoming messages and more while getting ready in front of the mirror — especially in our daily life with busy schedules.
That’s how the Magic Mirror was born. It is a platform that can be easily installed on Raspberry Pi. It is a very powerful and user-friendly platform that allows users to customize it to make it their own.
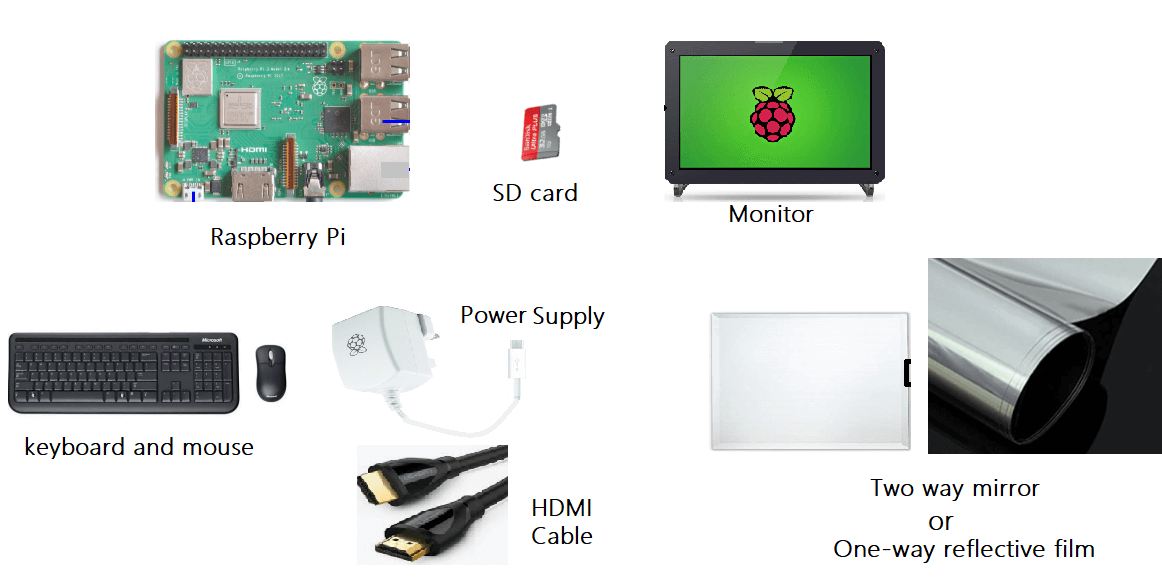
Required Hardware
- Raspberry Pi 3: For this project, raspberry pi 3 is preferable. Other versions will also work, but make sure you have a Wi-Fi adapter if you use an older version.
- Micro SD Card: Raspbian / Noobs installed SD card
- Monitor (with HDMI - in): This is the screen of the smart mirror. Any type of display with HDMI input can be used. If you want a bigger smart mirror, you can go with a 24- or a 32-inch monitor. In addition, for a mini smart mirror, we can use a 7- or 10-inch HDMI display.
- HDMI Cable
- Raspberry Pi Power Supply
- USB mouse & Keyboard
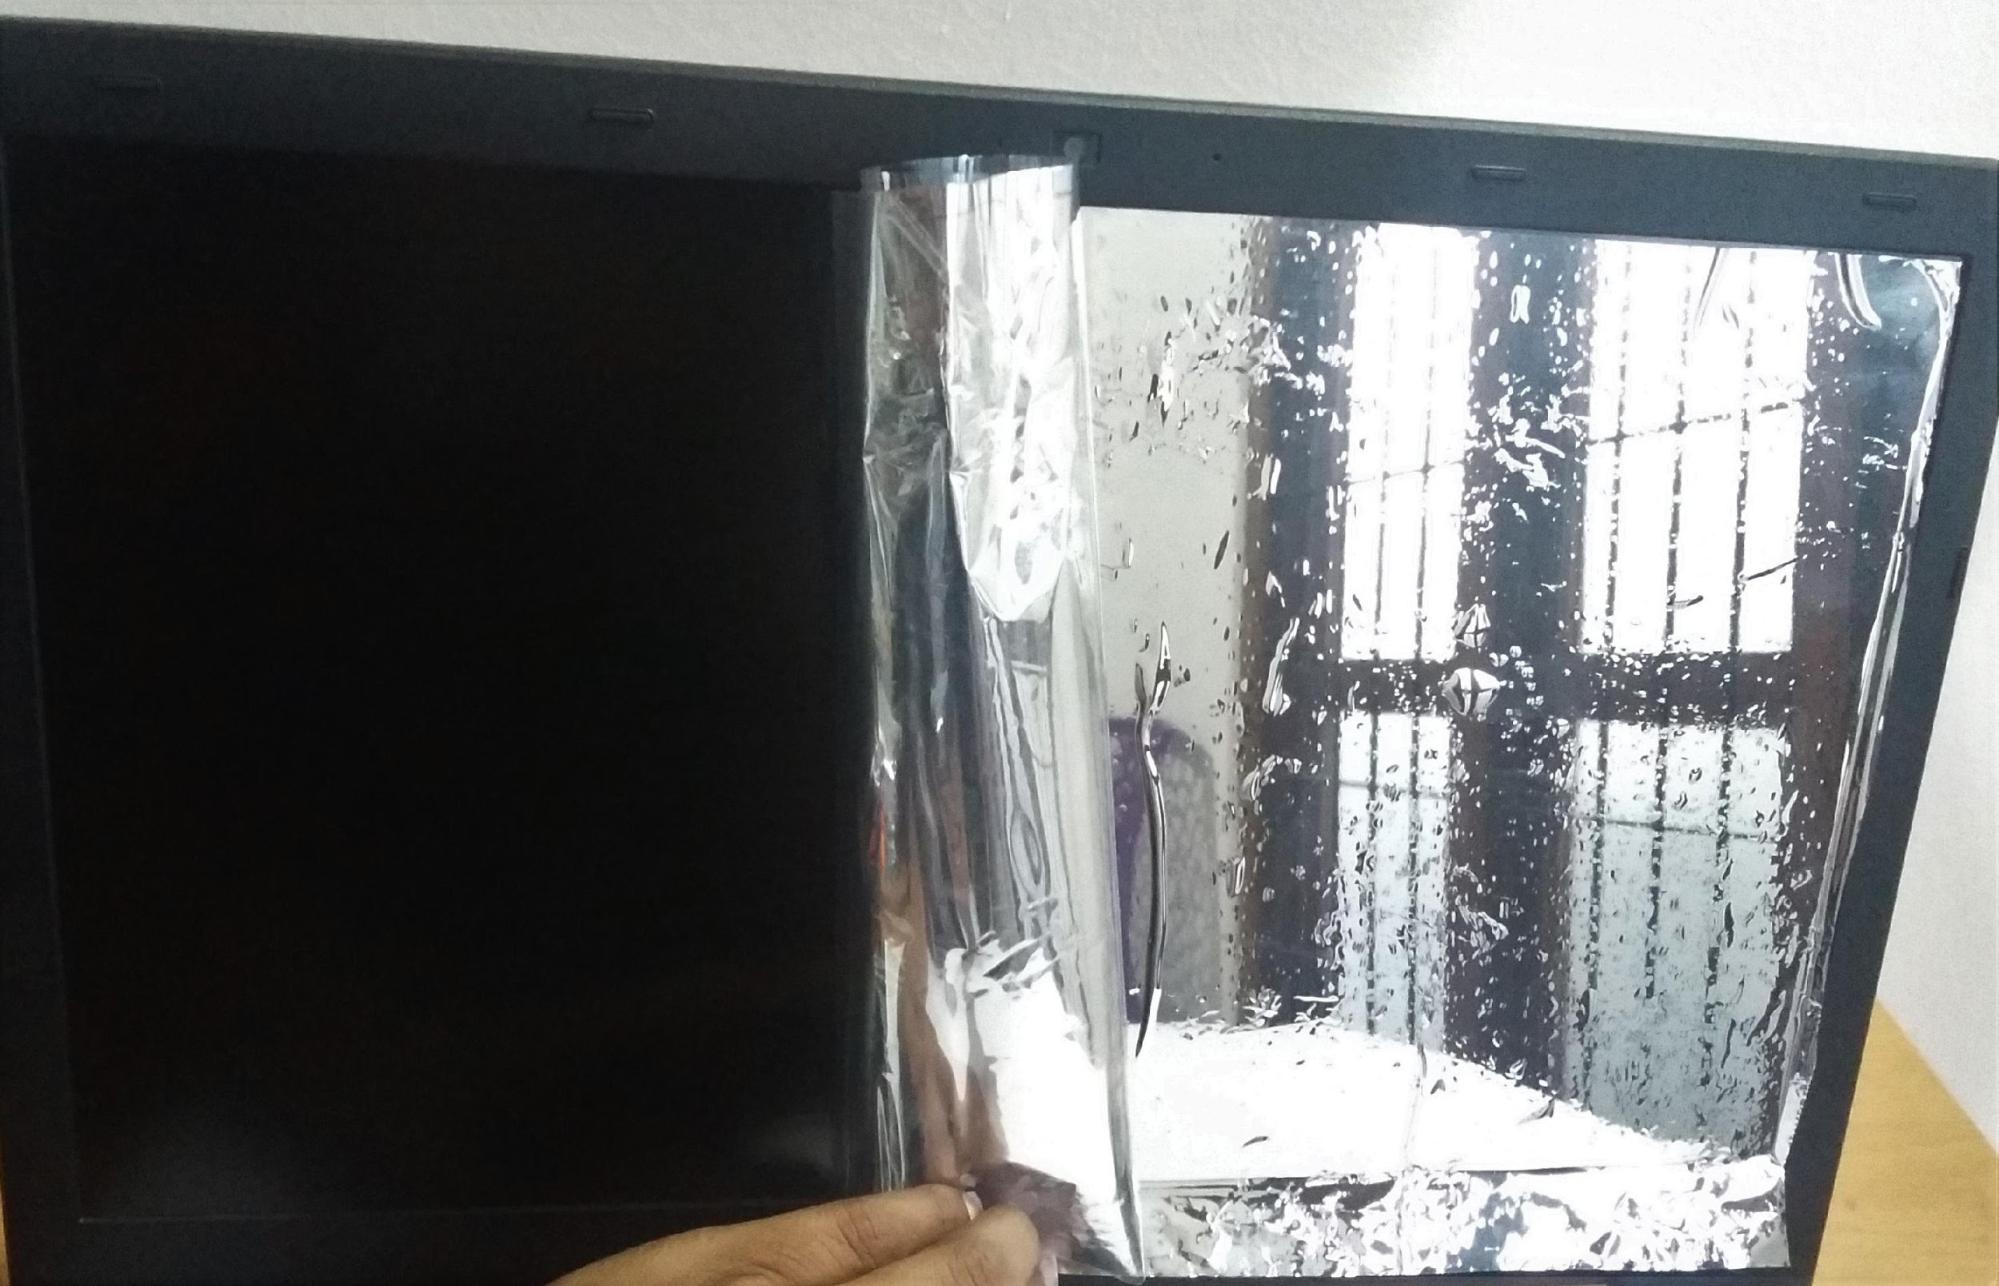
- Two-way mirror or one-way reflective film: Find a two-way acrylic mirror or one-way reflective window film. It should be the same size as your monitor.
For final finishing, a custom-created wood or plastic frame can be used.
Connecting the Hardware
Let’s put everything together.
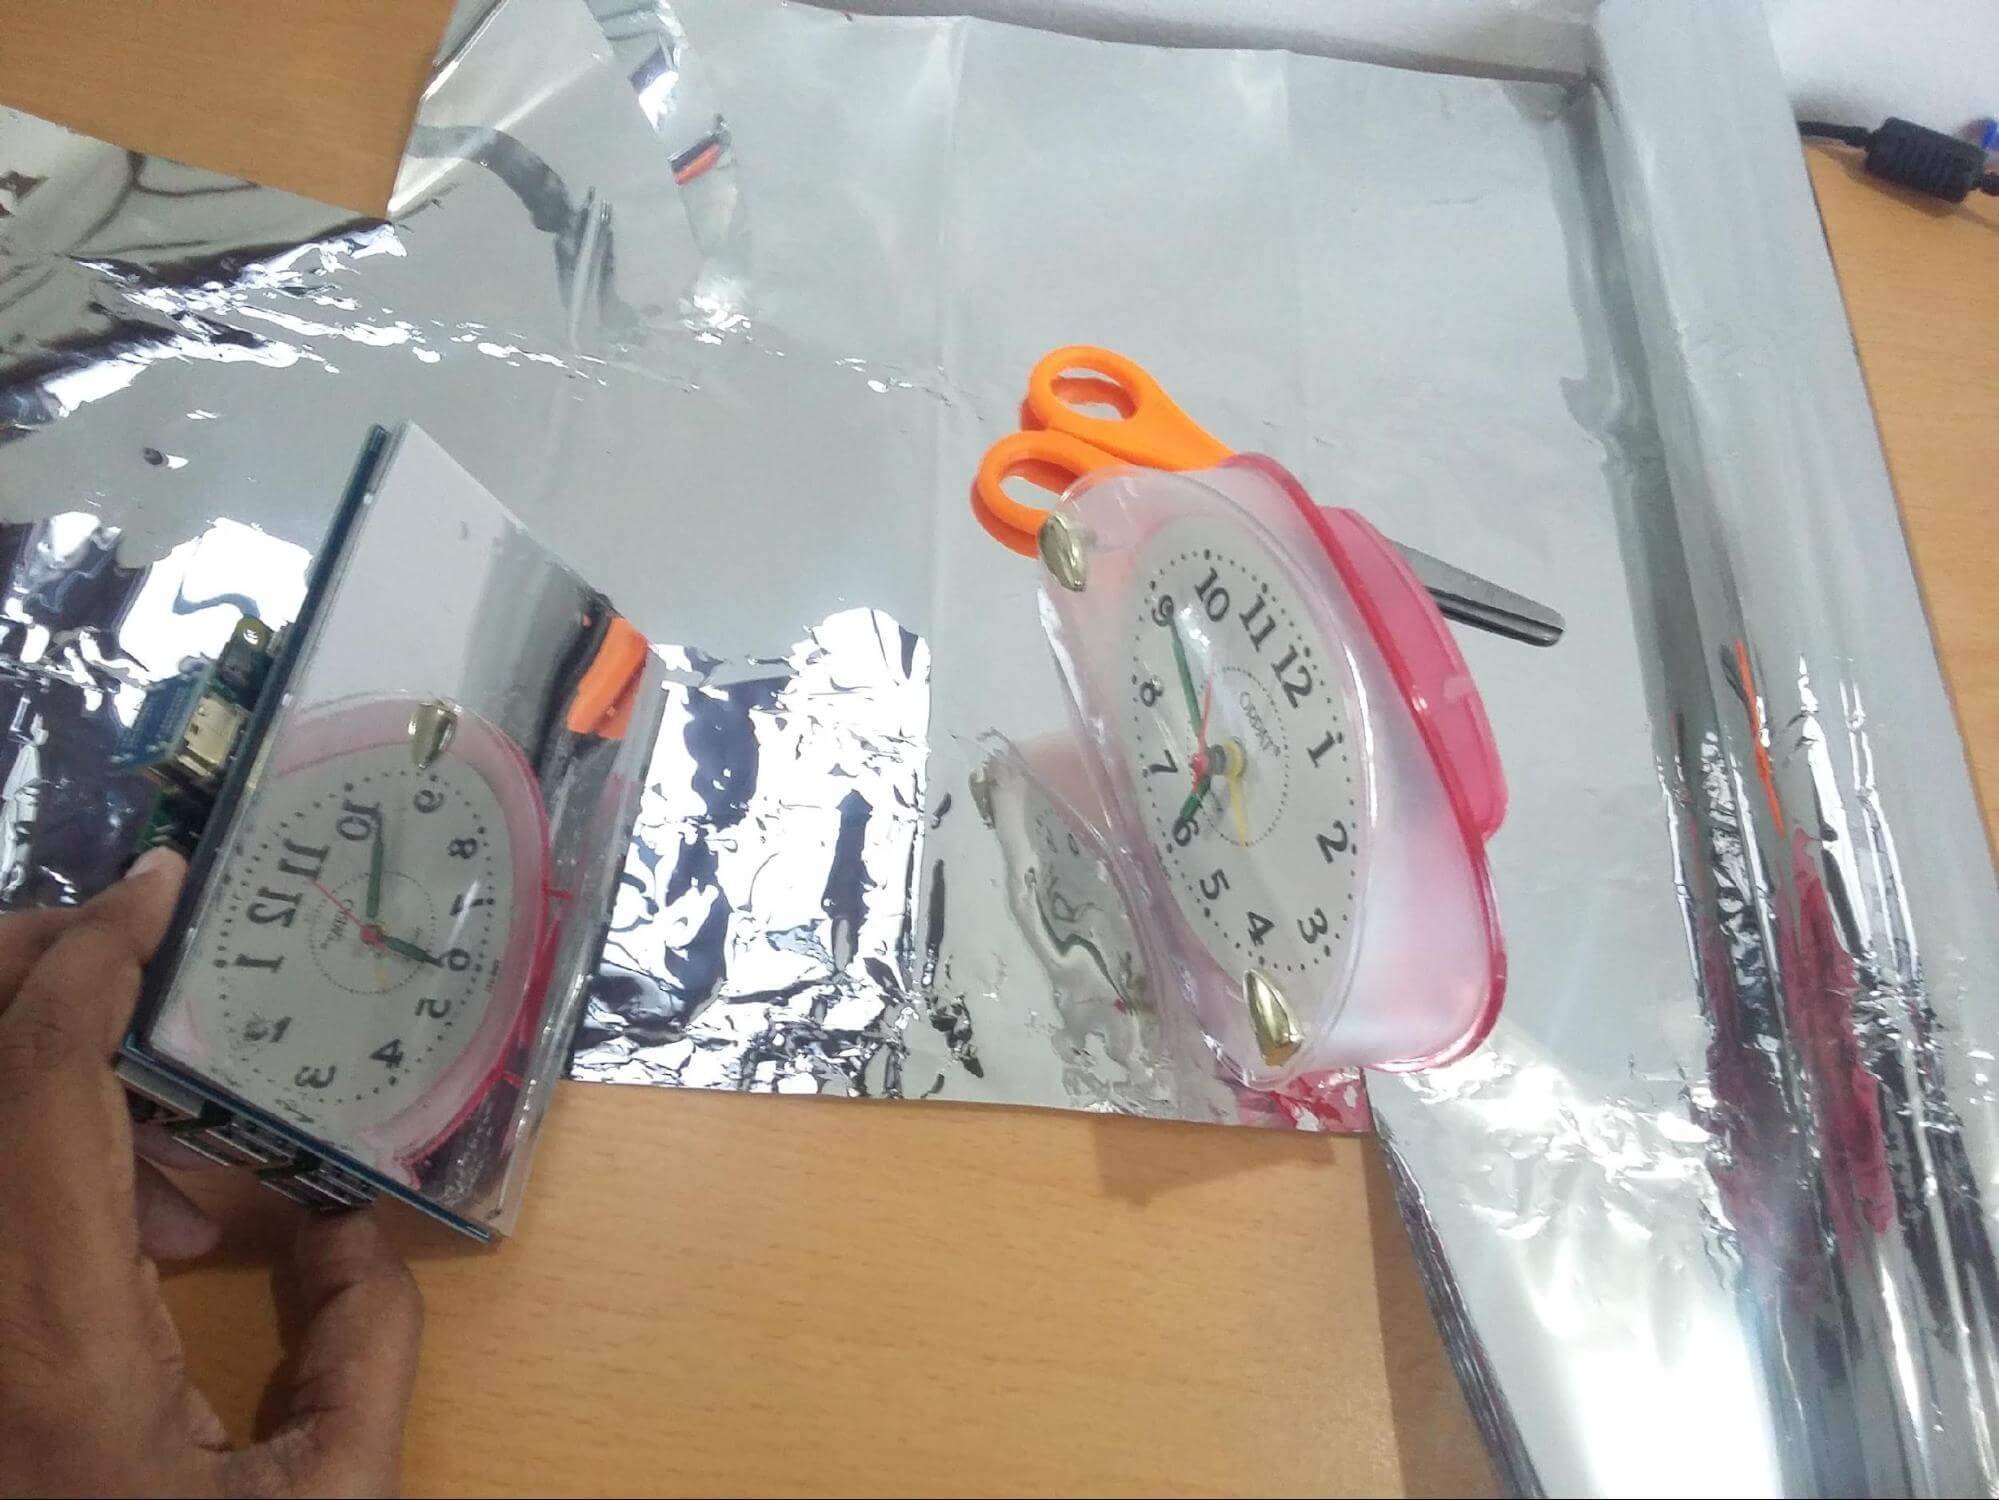
The hardware setup is quite simple. We must conceal the hardware in a way that looks like a normal mirror. Mount the Raspberry Pi on the backside of the monitor. Then attach the two-way mirror on the top face of the monitor carefully.
If you cannot cut the mirror to match the size of the monitor, use a one-way reflective film on the top face. It will behave like a mirror.
To make it look good, mounting a wooden or plastic frame gives it a classy appearance.
Magic Mirror Software Setup
The software setup can be split into two parts:
- Installing Magic Mirror on Raspberry Pi.
- Customizing your smart mirror.
In the first part, I’ll explain how to install the magic mirror platform through the terminal, which can be easily installed using a single command. After installation, it can be customized using a text editor. You can find the customization procedure in the second step.
Installing Magic Mirror on Raspberry Pi
To install the magic mirror, your raspberry pi must be connected to a wifi network. The whole installation may take 10 – 20 minutes depending upon your hardware.
Make sure that you have the latest version of Raspbian on your Raspberry pi.
sudo apt-get update
sudo apt-get upgrade
After that, copy and paste the following command in the command prompt. It will download and install the magic mirror platform by cloning the GitHub repository, along with its dependencies.
bash -c "$(curl -sL https://raw.githubusercontent.com/MichMich/MagicMirror/master/installers/raspberry.sh)"
Along the way, it will prompt you with two options.
Do you want to use pm2 for autostarting of your magic mirror?
Type Y and hit Enter, as we want it to start automatically when the Raspberry Pi boots up.
Do you want to disable the screen saver?
Type Y and hit Enter as we want it to be alive all the time.
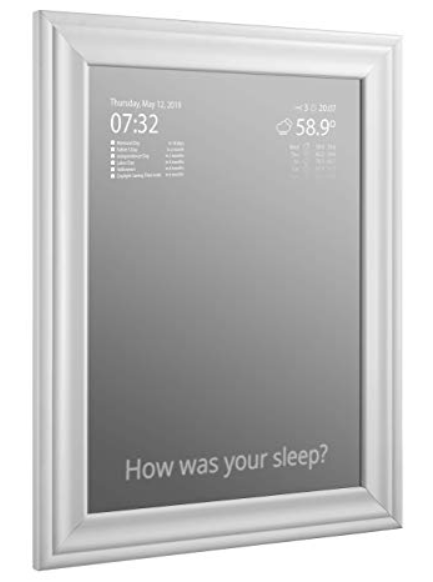
Once Magic Mirror is fully installed, it will start up on its own. Finally, you should be able to see info like the time, news headlines, messages, and more as shown below.
Next, press the Alt button on your keyboard, then go to files and quit the program to do your customizations.
You can always start it back up using the following command:
cd ~/MagicMirror && DISPLAY=:0 npm start
Customizing the Smart Mirror
Now it’s time to turn the Magic Mirror into your own smart mirror!
The first step is to decide the orientation of the smart mirror. You can change your display orientation from landscape to portrait by adding the following line in /boot/config.txt file:
sudo nano /boot/config.txt
# rotate the screen
display_rotate=1
For further customizations, browse the following folder and find config.js file.
Open it in your favorite text editor. In my case it is Geany.
Inside config.js file, there are separate modules to customize the interface such as language, calendar, weather forecast, newsfeed, and more.
The “clock” module displays the current date & time. You can change it to a 12- or 24-hour format as you wish.
The “currentweather” module displays the current weather including wind speed, sunset time, and temperature.
To add weather you will need location ID and the API ID. Go to OpenWeatherMap to find your city’s location ID and API.
The “newsfeed” module displays news headlines based on RSS feed.
Additionally, please visit the Magic Mirror GitHub repository for more information. Other than the above-mentioned customizations, there are some more cool features that are worth looking at.
How the Completed Smart Mirror Looks
As you can see, the Magic Mirror platform is easy to customize and it is expandable. Its features are not limited to just the ones I highlighted in this project. The module lets you add other stuff like the Google Assistant, YouTube, and calendar tasks.
The mirror recognizes both animate and inanimate objects and even provides random compliments to boost your self-esteem!
How to Make the Mirror Start on System Boot
Getting the Magic Mirror to start on system boot is the final configuration. After this configuration, we can remove the keyboard and mouse from the mirror. With these five steps, your smart mirror will automatically start when the Pi boots up. Open your terminal on your Pi and perform the following:
Step 1: Run -> pm2 startup
Step 2: Command in step 1 will output another command. Run that command also.
Step 3: After that create a shell script for the startup:
cd ~
nano mm.sh
Step 4: Add this to the file, save and exit.
cd ~/MagicMirror
DISPLAY=:0 npm start
Step 5: Make your new script executable.
chmod +x mm.sh
pm2 start mm.sh
sudo reboot
Additional Information
Even if it looks like a complete project, there is enough room for improvements and modifications.
For example, if you want to save power when no one is in front of the mirror, interfacing a motion sensor will help you to control the screen’s power or sleep mode of the mirror.
If you are interested in reading more on this, check out the links given below.
Magic Mirror GitHub
Magic Mirror Official Website