Learn all about biometrics and how to build a security system that uses your fingerprints as the key in this tutorial!
Biometrics are physical human characteristics that can be used to identify a person to give access to certain data, devices, or systems. One example of biometrics is fingerprints. Each person in the world has a unique fingerprint. Fingerprint scanners are tools capable of scanning a fingerprint and converting it to a binary code.
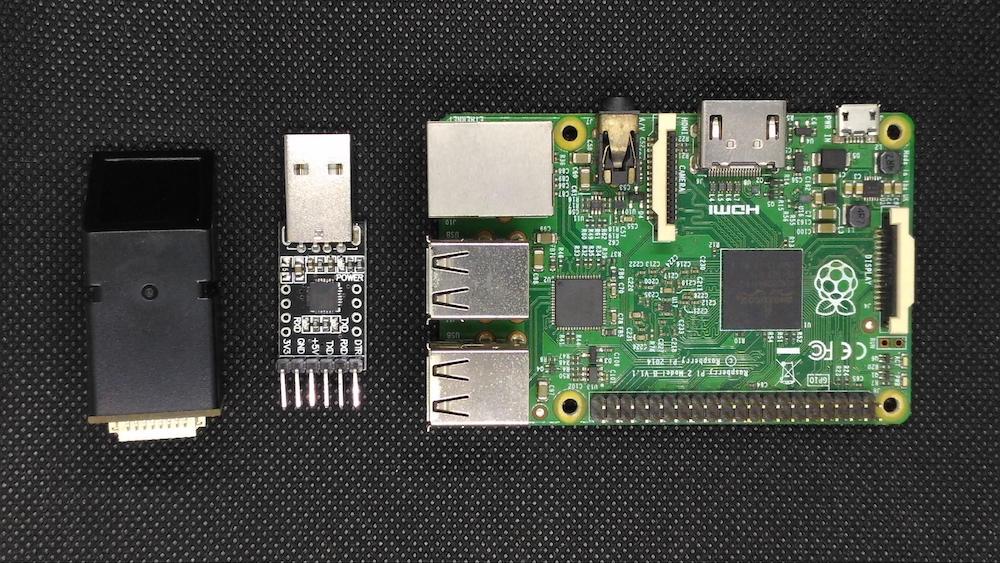
In this tutorial, I’ll show you how to connect a serial fingerprint scanner to a Raspberry Pi using a USB to serial TTL UART to keep the connections free of cumbersome wires. Before diving into this tutorial, collect the necessary hardware.
Required Hardware
- Raspberry Pi
- Fingerprint Scanner (Arduino compatible)
- USB to serial CP2102 TTL UART Converter
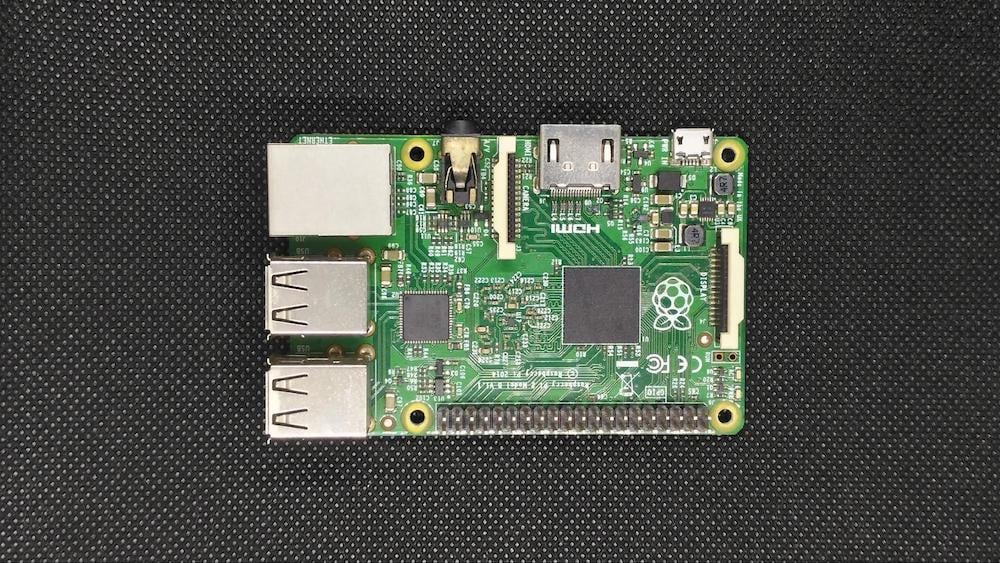
About the Raspberry Pi
The Raspberry Pi is a single-board computer designed for hobbyists and tech enthusiasts who are starting out in the world of electronics and programming.
The latest version of this SBC is the Raspberry Pi 4 Model B. The Pi 4 includes a 1.5Ghz quad-core processor, a selection of 1GB, 2GB or 4GB of RAM, on-board Wi-Fi and Bluetooth, gigabit ethernet, dual micro HDMI ports, USB 3.0 and USB c power supply.
While this project should work with most available versions, I am using the Raspberry Pi 2.
How Does the Fingerprint Scanner Work?
The primary function of the fingerprint scanner is to convert unique biometric identity into something that can be read and tagged by machines. It lets you convert fingerprint data to binary codes that can be read by the applications you are developing. Good use cases for a fingerprint scanner include security door projects or systems that use fingerprinting for its secure functions.
Fingerprint Scanner Features
- Supply voltage: 3.6 - 6.0VDC
- Operating current: 120mA max
- Storage capacity: 162 templates
- Interface: TTL Serial
- Baud rate: 9600, 19200, 28800, 38400, 57600 (default is 57600)
USB to Serial CP2102 TTL UART Converter
Reduce the hassle and time of connecting so many wires to your Raspberry Pi’s GPIO by using a USB to serial CP2102 TTL UART converter. This converter enables you to directly plug your serial devices into your USB ports. It is a great tool for embedded systems that require serial devices or sensors (like the fingerprint scanner).
Features
- 3.3/5V operation level compatible
- USB 2.0 Full Speed compatible
- Needs no external crystal
- Internal EEPROM for device ID
- Baud rates from 300bps to 921600bps
If you are using a different version of Raspberry Pi, you can still follow this tutorial as long as your board has a USB port to plug in the USB to serial converter. Even the Raspberry Pi Zero is supported — you just have to use the micro USB to USB adapter.
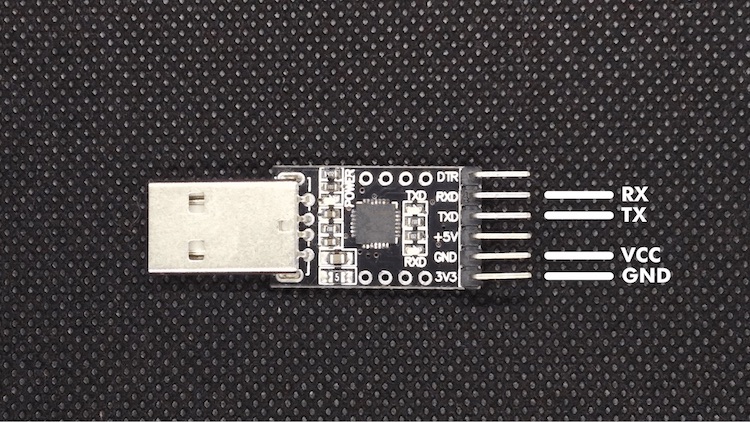
Pins on the USB to Serial TTL UART Converter
Let's get started by first identifying the underlying pins of the USB to serial TTL UART converter. It has six pins, but we will only be using four which I’ve marked in the image below.
The USB to serial TTL UART converter has four important pins:
- RX pin
- TX pin
- VCC
- GND
RX is the abbreviation for receive and TX is the abbreviation for transmit. The VCC and GND pins power the fingerprint module. This converter can supply either 3V or 5V output, depending on your needs. Here, we will be using 3V, which is the power needed for the fingerprint module.
After identifying the pins of the USB to serial TTL UART converter, we may now proceed to the pins of the fingerprint scanner.
Pins on the Fingerprint Scanner
It’s okay if you are using a different fingerprint scanner, as long as you identify the four important pins: RX, TX, VCC, and GND.
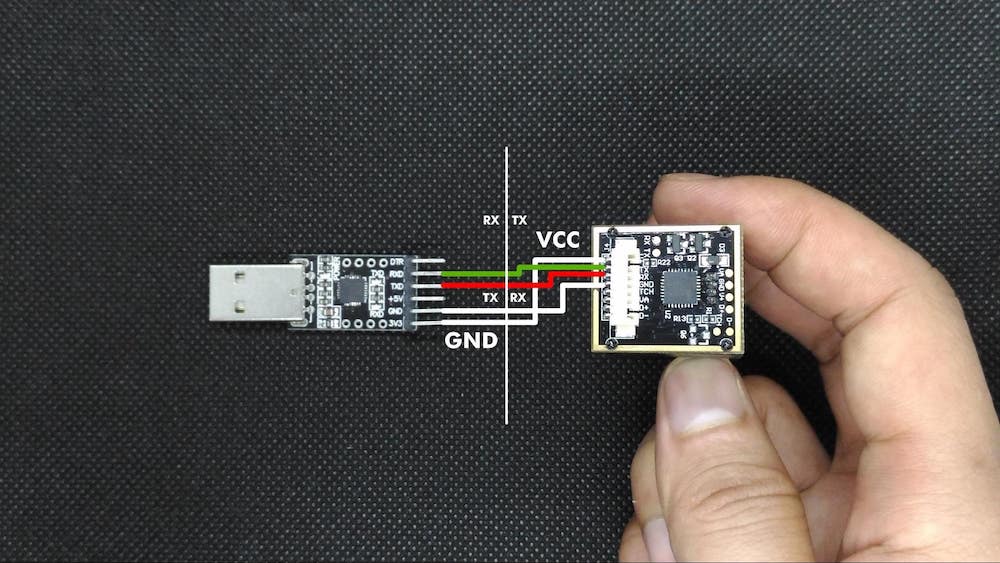
Connecting the UART Converter and The Fingerprint Scanner
The connection between the USB to serial TTL UART converter and the fingerprint scanner is pretty simple because we’re just connecting the same pins between the two modules. We connect the RX and TX of the converter to the TX and RX of fingerprint module. Follow the connection diagram below to keep things straight.
Now that we are done with the hardware interfacing, we can plug the USB to serial TTL UART converter into one of the USB ports on the Raspberry Pi and install the necessary software.
Installing the Fingerprint Software
We will be using Python and CircuitPython as our primary programming language. We will also be using Adafruit’s CircuitPython Fingerprint library. Assuming that you have already installed the latest version of Raspbian on your Raspberry Pi, we will now SSH into the Pi and install the necessary software.
To install the CircuitPython fingerprint library, issue the following command:
sudo pip3 install adafruit-circuitpython-fingerprint
In my case, I’ve already installed it. But for a first-time install, issue the command and wait for it to finish. Then you are good to go!
Next, we clone the Adafruit CircuitPython script from GitHub by issuing the following command:
git clone https://github.com/adafruit/Adafruit_CircuitPython_Fingerprint.git
After cloning the repository, we can navigate to the directory of the project by issuing the following command:
cd Adafruit_CircuitPython_Fingerprint/examples/
This folder contains a Python script file we need to run. Issue the following command:
sudo python3 fingerprint_simpletest.py
It works! We now have a Raspberry Pi powered fingerprint scanner without a bunch of wires. The Python script can enroll, find, and delete fingerprints.