Learn how to control servo motors via a smartphone in this Raspberry Pi based project!
In a recent article, I discussed a few simple methods that you can utilize to command servo motors in your projects. In this article, I’ll explain how you can use a Raspberry Pi and the tilt-sensors of any modern smartphone to control servo motors in your projects.
Required Hardware
- Raspberry Pi 4
- Servo motors (2)
- Jumper wires
- External power supply
Connecting the Servos to the Raspberry Pi 4
For this project, you’ll only need two servo motors and some type of controller. In this case, I decided to connect the servo motors directly to a Raspberry Pi 4. I chose a Pi because it has built-in Wi-Fi connectivity and natively supports the software that I’ll explain in the next section.
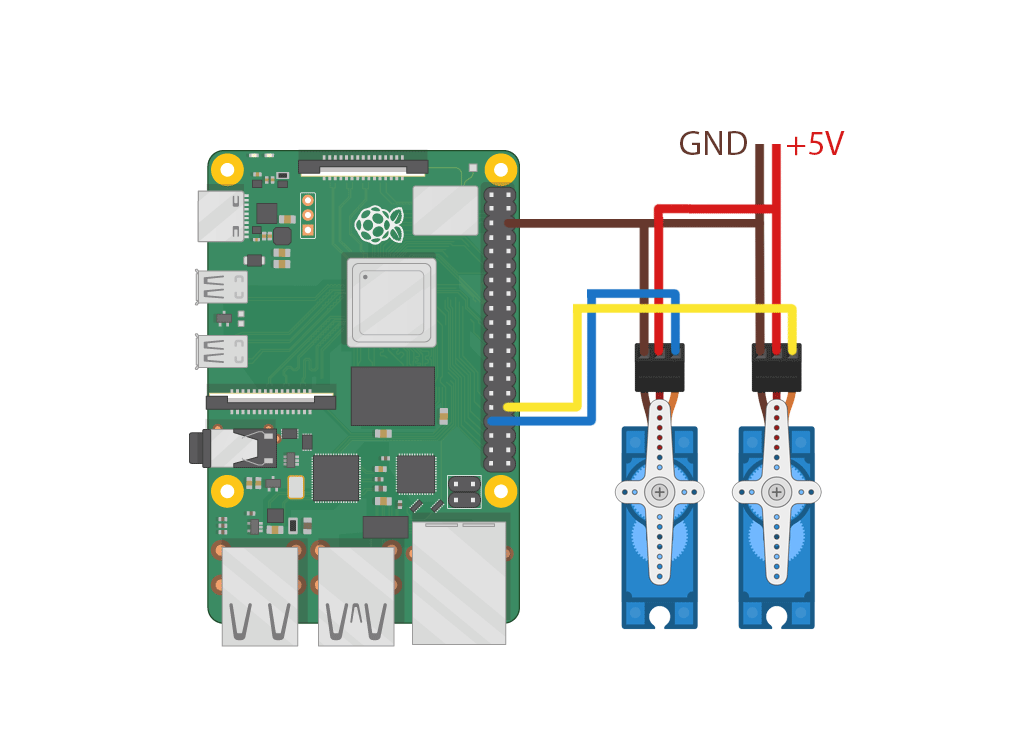
Here’s the wiring diagram:
The wiring diagram for a Pi 4 and two servo motors.
As you can see, the wiring is quite simple. You only need to connect the control line of each servo to a GPIO pin that supports hardware PWM (GPIO12 and GPIO13 in this case).
Furthermore, the GND lines need to be tied together. The servos should be powered by an external supply because the Raspberry Pi might not be able to deliver enough current.
The Software Side
The bulk of the work for this build takes place on the software side. The software, running on the Raspberry Pi, does three things:
- Provides a website that you can visit on any modern smartphone
- Handles incoming HTTP requests
- Communicates with the servo motors
The website reads the sensor value of the device and periodically sends the updated data to the Python script.
You could also write a smartphone app that reads the sensor values and transmits them directly to the Raspberry Pi — for example, via Bluetooth. However, I think the solution we’re using is elegant and sufficient for this task. This way, you don’t have to install any software on your smartphone, and this solution is also platform-independent too.
Setting Up the Flask Backend
Luckily, it’s easy to set up a standard backend server on the Pi. To install the software, simply type:
You can install pip, if necessary, by using the following command:
sudo apt-get install python-pip
Creating the Website
The website itself isn’t fancy. It simply contains a single div that outputs info and error messages so that the user knows what’s going on, and a button to start tracking the motion sensors:
<html>
  <body>
	<button id="connectbtn" onclick="requestPermission()">Connect</button>
	<div id="outputdiv"></div>
  </body>
</html>
The following script does the main work. This code snippet shows the part that reads the sensor values:
function handleRotation(event)
{
	updown = Math.round(event.gamma);
	leftright = Math.round(event.beta);
}

function requestPermission()
{
	if (typeof(DeviceMotionEvent) !== 'undefined' && typeof(DeviceMotionEvent.requestPermission) === 'function')
	{
    	output.innerHTML = "iOS 13+ device";
    	DeviceMotionEvent.requestPermission().
    	then(response => {
        	if (response === 'granted') {
            	output.innerHTML = "iOS 13+ device (Permission granted)";
            	window.addEventListener('deviceorientation', handleRotation);
        	}
        	else {
            	output.innerHTML = "iOS 13+ device (Permission denied)";
        	}
        	finishRequest();
    	}).catch(console.error);
	}
	else
	{
    	output.innerHTML = "Non-iOS 13 device";
    	window.addEventListener('deviceorientation', handleRotation);
    	finishRequest();
	}
}
Note that Apple changed the way sensor requests are handled in iOS 13. Therefore, I provided a fallback for non-iOS 13 devices (this should also include Android devices that don’t support the Permissions API). On iOS 12 devices, you’ll have to enable the motion sensor functionality for Safari in the settings.
The script periodically transmits the last sensor readings to the Python backend once the user clicked the connect button:
function sendToFlask()
{
	const xhr = new XMLHttpRequest();
	const data = new FormData();

	data.append("updown", updown);
	data.append("leftright", leftright);

	xhr.open("POST", "moveservos");
	xhr.send(data);
}
I decided to do it this way because the sensor readings can happen hundreds of times per second which would produce a lot of overhead, and the Flask server wouldn’t be able to catch up with the requests. However, you can tweak the interval timeout in the script to tweak the number of requests per second. The standard is four.
The Python Script
You can find the complete Python code at the end of this article.
The Python script receives the user input from the website and controls the servos. I used pigpio to communicate with the servos because I found it to be the easiest to use and the most stable and reliable when working with servos.
As stated before, I used Flask to create the backend for this application. It receives and handles HTTP requests from the website. For that purpose, I exposed the following two endpoints:
# Serve the HTML file when the root path is requested
@app.route("/")
def serveRoot():
	return render_template_string(TPL)

# Expose an endpoint for sending the servo coordinates
# from the JS to the Flask Backend
@app.route("/moveservos", methods=["POST"])
def moveServos():
	# Get the values from the request
	horizontal = 25 * int(request.form["updown"])
	vertical = 25 * int(request.form["leftright"])
	print(str(horizontal) + ", " + str(vertical))

	# Move the Servos
	setServoDuty(HORIZ_SERVO_PORT, clamp(HORIZ_SERVO_CENTER - horizontal, 500, 2500))
	setServoDuty(VERT_SERVO_PORT, clamp(VERT_SERVO_CENTER - vertical, 500, 2500))

	# Wait for 0.2s so that the servos have time to move
	sleep(0.2)

	# Stop the servo motors to save energy and reduce noise
	gpio.set_servo_pulsewidth(HORIZ_SERVO_PORT, 0)
	gpio.set_servo_pulsewidth(VERT_SERVO_PORT, 0)

	# Return empty request (Should return a 200 OK with an empty body)
	return ""
The first method handles GET requests to the root domain. It’ll simply return the aforementioned HTTP page and JavaScript. The second route accepts POST requests. This is where the website sends the sensor data and where you can change the behavior of the servos.
You can run the code by typing:
Note that you’ll have to run the following command once when you start the backend for the first time:
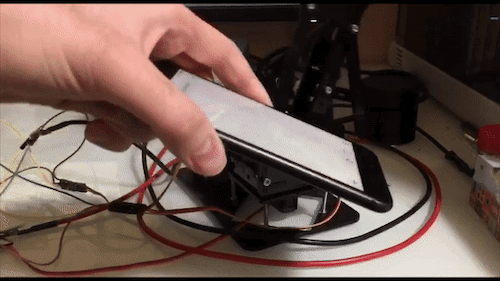
Once the project is set up, your smartphone can control the servo motors!
Ways You Can Use This Tutorial
You can utilize this method to control various devices like robotic arms, toys (like a tiltable maze), and other servo-controlled devices with a smartphone. It can also be used as an accessibility feature for people that can't accurately press buttons on a touch screen.
Reading the sensor values from an iOS device can be quite a pain. However, once you figure it out, it’s easy to do, and it gives you a fun new method to control your projects.