Continuing getting familiar with Raspberry Pi by downloading its primary operating system for projects: Raspbian OS.
Since 2015, the Raspberry Pi Foundation has declared Raspbian as the primary operating system for Raspberry Pi and is open source. After getting familiar with your Raspberry Pi board and it's parts, downloading and learning how to use Raspbian is the next most important step.
Installing Raspbian OS
Many operating systems are available for the Raspberry Pi and most are focused around Linux, but the most popular version is Raspbian. This OS not only provides a fully functional desktop environment with commonly used programs such as chromium and word processing, but it also includes a wide range of programming tools.
One extensively used IDE is the Python 3 IDLE which is a software package that makes creating Python programs easy (but more on this later). Again, for now, you need to download the Raspbian OS — also referred to as an “image” — so start by visiting the Raspian download page.
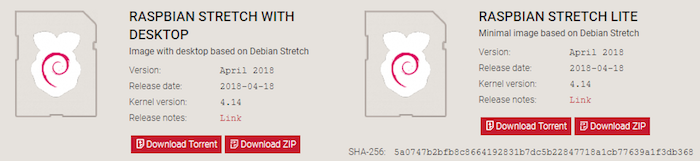
There are multiple options, but you want to download the fullest featured version. In this case, that version is the Raspbian Stretch with desktop (the option on the left). You can download either the torrent or the ZIP.
Downloading Win32 Disk Imager
While the Raspbian image downloads, you also need todownload a program called Win32 Disk Imager, which writes the Raspbian image to our microSD card.
Getting the Programs Up and Running
Run the installer for Win32 Disk Imager first and then load the program. Once Raspbian finishes downloading, extract the .img file to the desktop, go into Win32DiskImager, and select this file in the Image File input box (see picture).
Before you can flash the microSD card, you need to ABSOLUTELY make sure that the device dropdown box is the same as the microSD card drive. In this case, my microSD card reader showed up as I drive and therefore I selected this from the list. With everything configured it’s time to write the image to the microSD card so go ahead and click the “write” button.
Once the image has been written, Raspbian OS is installed and ready to use. Go ahead and insert the microSD card into the Raspberry Pi, connect all the needed peripherals (monitor, mouse etc), and power up the computer.