Enable communication between an Arduino and Web Browser using the Open Sound Control (OSC) protocol.
This article explains how to enable bidirectional, Open Sound Control (OSC) communication between an Arduino and web browser.
We'll be using the buttons in the browser to send OSC messages to Processing.
Processing will then forward the messages to an Arduino, which controls an LED and responds with a confirmation.
It's necessary to use Processing software in this project because the standalone Arduino cannot receive OSC messages from the web.
If you'd rather not use Processing, an Ethernet shield should also do the trick.
OSC is basically a protocol that allows communication between computers and other multimedia devices. This simple, yet powerful tool provides everything needed for real-time control of sound and other media processing needs—while remaining flexible and easy to implement. It can be considered the successor to the Musical Instrument Digital Interface (MIDI).
Prerequisites
Download and install node.js, then install the socket.io library by inserting the follow command into the terminal: npm install socket.io
Browser Instructions
To receive the OSC messages through the browser, we need to use the 'node.js' environment. It will receive and forward the messages to the browser through the WebSocket protocol, which acts as a bridge between the two.
Create a folder and title a file inside it with the '.js' extension. In this project, we'll be using, 'socketio.js'.
Then, input the code below.
var http = require('http'),
    socketio = require('socket.io'),
    fs = require('fs'),
    osc = require('osc-min'),
    dgram = require('dgram'),
    remote_osc_ip;

var http_server = http.createServer(function(req, res) {

  fs.readFile(__dirname + '/socketio.html', function(err, data) {

    if(err) {
      res.writeHead(500);
      return res.end('Error loading socket.io.html');
    }

    res.writeHead(200);
    res.end(data);

  });

});

var io = socketio(http_server);

var udp_server = dgram.createSocket('udp4', function(msg, rinfo) {

  var osc_message;
  try {
    osc_message = osc.fromBuffer(msg);
  } catch(err) {
    return console.log('Could not decode OSC message');
  }

  if(osc_message.address != '/socketio') {
    return console.log('Invalid OSC address');
  }

  remote_osc_ip = rinfo.address;

  io.emit('osc', {
    x: parseInt(osc_message.args[0].value) || 0
  });

});

io.on('connection', function(socket) {

  socket.on('browser', function(data) {

    if(! remote_osc_ip) {
      return;
    }

    var osc_msg = osc.toBuffer({
      oscType: 'message',
      address: '/socketio',
      args:[{
        type: 'integer',
        value: parseInt(data.x) || 0
      },
      {
        type: 'integer',
        value: parseInt(data.y) || 0
      }]
    });

    udp_server.send(osc_msg, 0, osc_msg.length, 9999, remote_osc_ip);
    console.log('Sent OSC message to %s:9999', remote_osc_ip);

  });

});

http_server.listen(8080);
console.log('Starting HTTP server on TCP port 8080');
udp_server.bind(9998);
console.log('Starting UDP server on UDP port 9998');
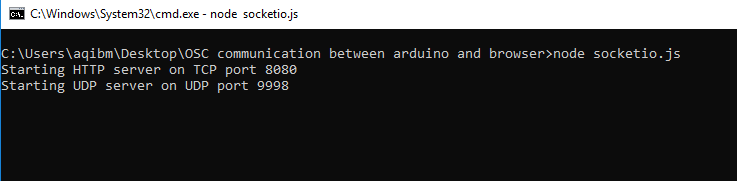
Now, run the 'socketio.js' file, which will allow messages to be sent and received. Navigate to the directory within the CMD and type in the command: node socketio.js
CMD window displaying 'node socketio.js' code input.
Next, open up a webpage in the browser.
You'll see in the output portion of the node script that the HTTP server is set to port 8080. This webpage will send an OSC message and display the output information once the browser button is pressed.
First, save the webpage code in an HTML file and name it 'socketio.html'. Then, place it in the 'socketio' folder.
<!DOCTYPE html>
<html lang="en">


<head>
  <meta charset="utf-8">
  <title>OSC Communication</title>
  <script src="/socket.io/socket.io.js"></script>
</head>


<body>
  <h2>OSC Communication between Arduino and Browser</h2>
  Buttons to control LED
  <button type="button" id="x" value="1" onclick="myFunction()" style="background-color:green;">ON</button>
  <button type="button" id="y" value="2" onclick="myFunction1()" style="background-color:red;">OFF</button>
  <h2>Output From Arduino:</h2>
  <span id="output"></span>


  <script>
    var socket = io.connect();


    socket.on('osc', function (data) {
      if (data.x == 1) {
        document.getElementById("output").innerHTML = "LED ON";
      }
      if (data.x == 2) {
        document.getElementById("output").innerHTML = "LED OFF";
      }
    });


    function myFunction() {
      socket.emit('browser', {
        x: 1 || 0
      });
    }


    function myFunction1() {
      socket.emit('browser', {
        x: 2 || 0
      });
    }
  </script>
</body>


</html>
To open the webpage, you'll need the Arduino's port 8080 IP address.
Follow the URL format: http:://x.x.x.x:8080
Replace the 'x.x.x.x' with your system IP address.
Webpage showing the communication information between the Arduino and browser.
Processing Sketch
At this point, we'll arrange to receive the data from the browser at port 999 and forward it on to the Arduino.
The following sketch will allow the data from the Arduino to be transferred to the browser's port 9998.
Processing will then communicate with the Arduino serial and the COM port.
Take note that the baud rate is the same on both sides.
// Importing the library that will help us in sending and receiving the values from the Arduino
// You always need to import the serial library in addition to the VSync library
import vsync.*;
import processing.serial.*;

// Below libraries will connect and send, receive OSC messages
import oscP5.*;
import netP5.*;

// Creating the instances to connect and send, receive OSC messages
OscP5 oscP5;
NetAddress dest;

//  We create a new ValueReceiver to receive values from the arduino and a new
// ValueSender to send values to arduino
ValueSender sender;
ValueReceiver receiver;

// The below variables will be syncronized with the Arduino and they should be same on the both sides.
public int output;
public int input = 2;

void setup()
{
  // Starting the serial communication, the baudrate and the com port should be same as on the Arduino side.
  Serial serial = new Serial(this, "COM6", 9600);

  //  Ininialize the ValueReceiver and ValueSender with this (to hook it to your sketch)
  //  and the serial interface you want to use.
  sender = new ValueSender(this, serial);
  receiver = new ValueReceiver(this, serial);

  // Synchronizing the variables as on the Arduino side. The order should be same.
  sender.observe("output");
  receiver.observe("input");

  // Starting the OSC Communication. listen on port 9999, return messages on port 9998
  oscP5 = new OscP5(this, 9999);
  dest = new NetAddress("127.0.0.1", 9998);
}

void draw() {
  if (input == 1) {
    sendOsc();
  }
  if (input == 2) {
    sendOsc();
  }
  print("input: ");
  println(input);
}

// Function to send OSC messages to browser
void sendOsc() {
  OscMessage msg = new OscMessage("/socketio");  // tell the address
  msg.add((float)input); // add the message
  oscP5.send(msg, dest); //send the OSC message
}

// Recieve OSC messages from browser
void oscEvent(OscMessage theOscMessage) {
  if (theOscMessage.checkAddrPattern("/socketio") == true) {
    // Receiving the output from browser
    output = theOscMessage.get(0).intValue();

    print("output: ");
    println(output);
  }
}
Arduino Sketch
Once the Arduino sketch receives the output data from Processing, it will trigger the LED signal.
If the output is 1 it will turn on the LED.
If the output is 2 it will turn off the LED.
The sketch will also send a message back to Processing which will confirm if the LED is lit up or not.
Note: Before uploading the sketch, make sure that Processing isn't running, because it will be using the same port and a 'port busy' error will come up.
//Including the library that will help us in receiving and sending the values from processing
#include <VSync.h>
ValueReceiver<1> receiver;  // Receiver Object
ValueSender<1> sender;      // Sender Object

// The below variables will be syncronized with the Processing and they should be same on the both sides.
int output;
int input;

int ledPin = 13; //LED Pin

void setup()
{
  /* Starting the serial communication because we are communicating with the
    Arduino through serial. The baudrate should be same as on the processing side. */
  Serial.begin(9600);
  pinMode(ledPin, OUTPUT);

  // Synchronizing the variables with the processing. The variables must be int type.
  receiver.observe(output);
  sender.observe(input);
}

void loop()
{
  // Receiving the output from the processing.
  receiver.sync();

  // Matching the received output to light up LED
  if (output == 1)
  {
    digitalWrite(ledPin, HIGH);
    input = 1;
  }
  else if (output == 2)
  {
    digitalWrite(ledPin, LOW);
    input = 2;
  }
  sender.sync();
}
How to Run the Project
First, run the 'socketio.js' file through the CMD and it will create a server that helps send and receive data from Processing.
After that, in your browser enter your PC IP address, followed by port 8080 to open up the webpage.
Upload the Arduino code in the Arduino IDE, then change the baud rate and COM port in Processing. Again, the baud rate and COM port should be the same on both sides.
If you press the webpage buttons, the built-in Arduino LED will now either light up or turn off in response.
More Arduino Control Projects