Arduino and Chirp recently announced their partnership that aims to bring data over sound to Arduino IoT projects.
Recently, Arduino announced a new partnership with Chirp, a start-up that focuses on wireless data transmitting technology. What makes Chirp special is that their technology doesn’t use Wi-Fi or Bluetooth. Instead, it uses sound waves to transmit and receive data — a technology called data over sound.
This article introduces the basic concept of data over sound and gives you a starting point if you’re interested in employing it in your Arduino projects.
What is Data Over Sound?
Data over sound is the process of converting information into audible or inaudible frequencies that get transmitted with a speaker and that can be received with the help of a microphone.
When using the Chirp SDK, the message you want to send is encoded into a series of sounds that form an audio barcode that can be played back with any device that has a loudspeaker. Devices that have a microphone can then listen for these codes and decode them to restore the original message.
Using Chirp adds data-over-sound capabilities for Arduino projects. Image courtesy of Chirp
Right now, the SDK only supports the audible sound range. However, according to Chirp, they’re working on a solution to bring the technology to the ultrasonic range which cannot be heard by humans. If you’re curious what a sonic barcode sounds like, here’s an example:
Chip Arduino RED
Possible Uses for Data Over Sound
This way of communicating could be used in many different ways:
- As a handshake before establishing a more secure connection
- For opening and closing door locks
- To communicate with multiple devices in the same room
- At concerts, in commercials, videos, etc. for triggering events
- In classrooms where the teacher wants to update all student devices at the same time
Possible Problems With Data Over Sound
You have to remember that anyone who has the sonic barcode can send data to your devices if you use this way of communicating. So if somebody captures a message, even if it’s encrypted, they can play it back as many times as they want to trigger the desired action. So if you’re using this technique, you might need to implement further security measures.
Furthermore, the interference caused by other sounds that naturally occur in any real environment might be severe.
This way of transmitting data can also be quite annoying if used in ads and videos, as described above. This could lead to unwanted actions getting triggered.
Supported Arduino Boards
The new Nano 33 BLE Sense is the first Arduino board to fully support the Chirp SDK. As of now, the following Arduino models can only be used to send data over audio:
- MKR Zero
- Vidor 4000
- Zero
- MKR Fox 1200
- MKR1000 WiFi
Getting Started With Chirp in Arduino IDE
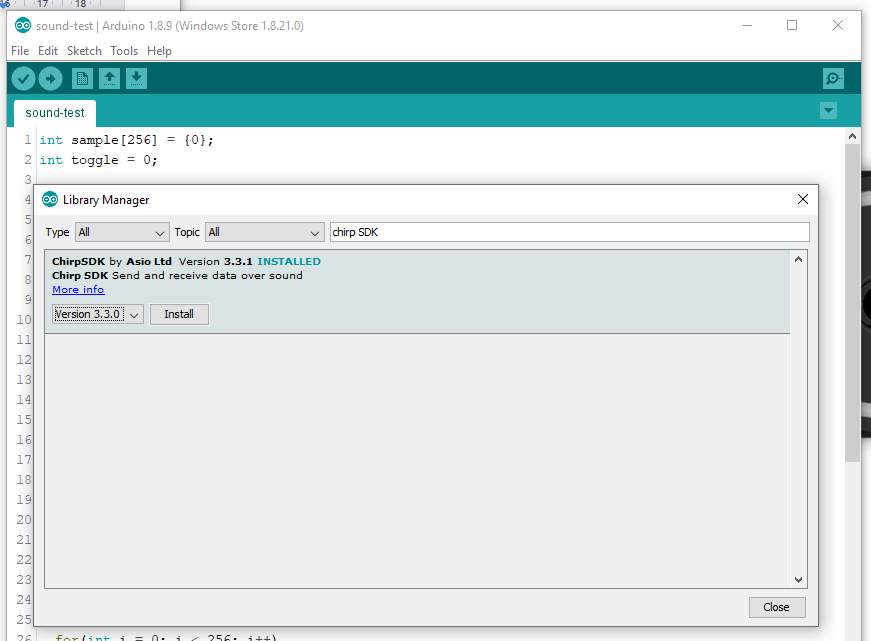
To get started with the Chirp SDK, download and install the official library in the Arduino IDE. In the IDE, navigate to “Tools” and then choose “Manage Libraries…”. Then search for “Chirp SDK” and install the newest version.
Download and install the Chirp library in Arduino IDE
After that’s done, head over to the Chirp developer page and sign up for an app key that you’ll need to use in your programs. A free license is available for personal, academic, and commercial use.
A getting started guide is available in the official docs and the SDK you just installed comes with a few well-documented examples that should get you up and running in no time.
Cover image courtesy of Arduino.