How to enable face detection in images using the Python data science platform Anaconda.
Have you ever been on Facebook and wondered how the facial recognition feature works when uploading photos? How about how a digital camera detects faces while taking photos?
In this tutorial, you'll find out how and learn to implement those functions in your own projects.
The most recent advancements in the machine learning field have been to computer vision applications. In response, the machine learning software, Open Source Computer Vision (OpenCV) was developed.
This program, along with the Python programming language—has paved the way for future machine learning products that are powerful and efficiently designed.
In this tutorial, we'll be using the OpenCV3 library on a Windows-based computer in the Python distribution platform Anaconda.
The most difficult segment of this tutorial involves installing OpenCV correctly and running it without errors. There are a number of online guides available that cover how to install OpenCV on Python 2.7, so this tutorial will solely focus on the Python 3.5 version.
Installing the Anaconda Environment
Download the latest version of Anaconda for Windows by visiting the Anaconda website.
The Anaconda platform website download page.
Note: Make sure to select the Python 3.6 version and the appropriate architecture (32-bit or 64-bit).
Install the Anaconda environment with its default settings.
The Anaconda platform's Advanced Installation Options window.
Make sure you keep the "Add Anaconda to my PATH environment variable" option deselected.
A window displaying the option to install Microsoft Visual Studio Code Installation using Anaconda platform.
This tutorial won't require the installation of 'Microsoft Visual Studio Code' as it will be using the Spyder IDE environment to program in Python.
Go ahead and choose to skip the installation option when it appears.
A few programs will be installed through the setup process: Anaconda Prompt, Anaconda Navigator and the Spyder IDE.
Following the completed installation, search for "Anaconda Prompt" in your Windows taskbar and open up the desktop app.
Windows taskbar with Anaconda Prompt desktop app displayed in search box.
Using Anaconda Prompts
To test if the Anaconda commands are working correctly, run the code below.
Specific code required to test if Anaconda commands are functioning correctly.
At this point in the process, a new Anaconda environment is created for the Python 3.5 version.
The Python 3.6 version was set up using the Anaconda Installer, however for compatibility reasons, we'll be using the Python 3.5 version with Open CV3 distribution.
Creating a New Environment
Specific code required to create a new environment using Anaconda.
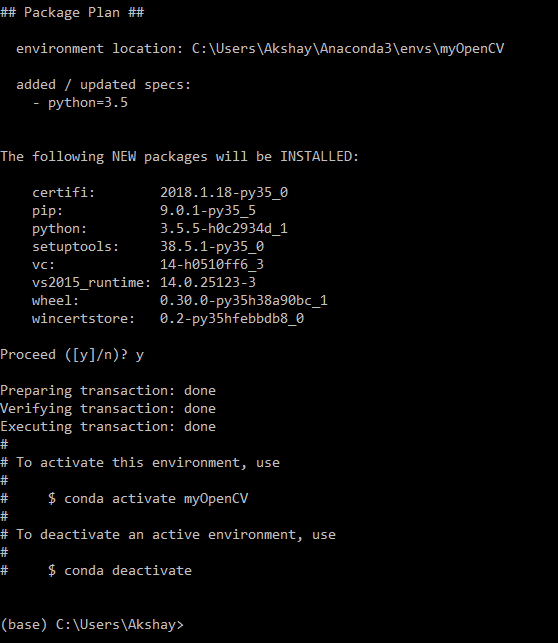
You'll find an example of how the output should look below:
An example of the code output required to activate a new environment using Anaconda.
Anaconda will install a number of new packages; just enter 'y' for yes and hit the enter key to proceed with the installation.
In the next step, we'll be installing more packages, so let the Anaconda distributor install those required or else it might not integrate correctly with Python.
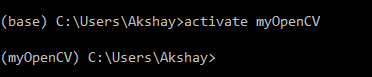
Once the installation is complete, the environment is activated:
Specific code to confirm an environment is activated in Anaconda.
If the installation was performed successfully, you'll notice that the '(base)' environment has changed to a new one.
This indicates that the new environment is activated and that Anaconda has changed the '$PATH' variables to the 'C:/Users/Akshay/Anaconda3/envs/MyOpenCV' location. Now all future installations will only apply to this particular environment.
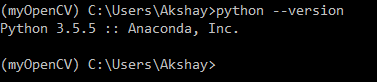
The Python version should now also appear as Python 3.5 instead of the system version.
Specific code to confirm the Python version the Anaconda platform is currently running.
Installing OpenCV3 and Dependencies
First, install the NumPy library for scientific computing.
Specific code required to install the NumPy library.
Then install the anaconda-client.
Specific code required to install the anaconda-client.
Finally, install OpenCV3 (it can take some time for the library to be downloaded because of it's large size).
Specific code required to install OpenCV3 in Anaconda platform.
Now use Anaconda to install and run the Spyder IDE for Python.
Search for "Anaconda Navigator" in the windows taskbar and open it.
From there the new environment can be selected and Spyder installed.
A screenshot of the Anaconda platform's Applications page.
A screenshot displaying location of Spyder environment in Anaconda platform.
Once Spyder is installed, open the program by selecting launch.
The Face Detection Algorithm
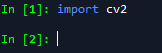
To ensure that the OpenCV platform is working in Python. You can use the following code:
Specific code required to confirm OpenCV platform is functioning correctly in Python.
If it goes to the next line as shown above without returning errors, then you're set to move on to the next step.
You will need to download the required Python script (.pv), the image with faces (.jpg) and the Haar cascade classifiers in XML format (.xml) provided at the end of this article.
Note: Make sure you save all these files in the same folder for convenient access.
The theory behind Haar cascade classifiers is a bit complicated, to simplify it, essentially they're XML files that contain all the data that the OpenCB needs to detect objects, like faces in this case.
The classifiers are trained through machine learning methods to detect patterns within an image in order to identify faces within them.
The 'file explorer tab' will allow you to navigate to the folder where the previous files are saved.
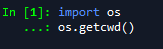
You can check the current working directory using the following code:
Specific code required to confirm the current working directory.
If the code outputs the folder location to where the files are stored, you're good to go.
Code Breakdown
Specific code that includes the XML file and image that will be used for face detection.
Since a folder was setup with all the required files as the current working directory, the file names can be searched for without the full path.
The XML file chosen for this project is used for detecting faces that are directly facing the camera.
A different classifier can be used in its place if desired.
Specific code to designate classifiers.
At this point, we create the cascade classifier and initialize it with our XML file. This loads the required data to detect faces into the variable 'haar_face_cascade.'
Specific code required to convert a photo to grayscale.
Now the photo band.jpg used can be converted to grayscale using the OpenCV's library functions.
Note: Most image machine learning operations are displayed in grayscale.
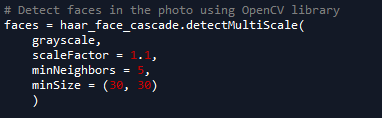
Specific code required to execute the face detection algorithm.
The above function executes the face detection algorithm, which can be broken down to:
- detectMultiScale: A general function that detects objects.
- Grayscale: Converts the photo to grayscale colors.
- scaleFactor: Compensates for the difference in distance of the faces targeted in the photo.
- minSize: The smallest possible object size, any objects smaller than the one designated through this function would be ignored.
- minNeighbors: Define the number of face-like patterns that would need to be detected around a window to declare the space as a face. Note: It is encouraged to set the value of this function as 0 then progressively increase it to see how the output changes.
The above values for the function are set to those that are most commonly used.
It's encouraged to experiment with the different values available to find the best setting.
When the function is executed, rectangles mark the locations of faces in an image. It also provides the coordinates (x, y) on the top-left side of the rectangle along with its width (w) and height (h).
The information can be extracted using the code below:
The specific code required to extract values of the rectangles used to mark the faces detected in a photo.
We use these values to draw a rectangle around the faces using the cv.rectange function.
The specific code required for the Anaconda platform to draw a rectangle around faces detected in a photo.
Lastly, we display the image with the detected faces and wait for the user to press a key.
Face Detection Results
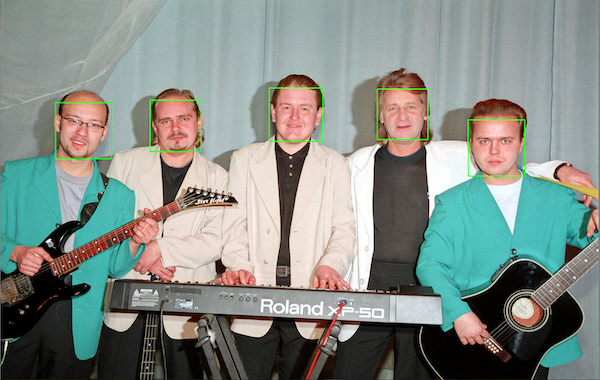
We'll first test the algorithm on the band.jpg photo.
An example of the correct execution of face detection using Anaconda.
When we run the program the console should respond with "Found 5 faces!" and output the photo with rectangles indicating the location of faces in it.
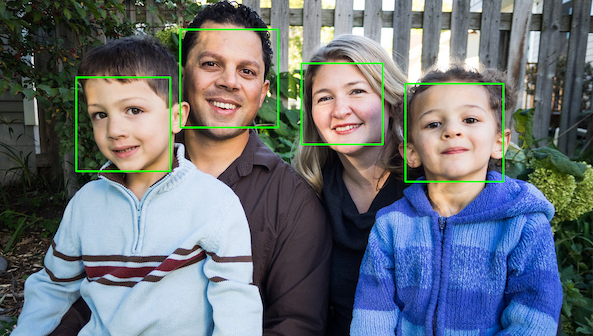
A second test was conducted on this family photo.
An example of Anaconda misrepresenting the faces in an image.
The program misrepresents the clothing as a face in this trial because unlike the first photo, where all the band members are the same distance from the camera—the parents are further away from it than the children in the photo. This issue can be easily fixed by adjusting the scaling factor down to 1.3.
A second example of Anaconda correctly identifying the faces in an image.
The program now identifies the faces in the image correctly.
Since this program is based on machine learning, it will never provide 100% accuracy. If you test the algorithm over a large sample of images, you'll notice that it works in most but not all cases. Also, depending on the photo, the arguments in the detectMultiScale function will need to be adjusted to avoid false positives.
Final Code
1.	import cv2
2.
3.	# Specify the image path for face detection and XML file for the cascade
4.	photo_path = "band.jpg"
5.	cascade_path = "haarcascade_frontalface.xml"
6.
7.	# Initialise the Haar Cascade Classifier with the XML file
8.	haar_face_cascade = cv2.CascadeClassifier(cascade_path)
9.
10.	# Read the photo and convert to grayscale
11.	photo = cv2.imread(photo_path)
12.	grayscale = cv2.cvtColor(photo, cv2.COLOR_BGR2GRAY)
13.
14.	# Detect faces in the photo using OpenCV library
15.	faces = haar_face_cascade.detectMultiScale(
16.	    grayscale,
17.	    scaleFactor = 1.1,
18.	    minNeighbors = 5,
19.	    minSize = (30, 30)
20.	    )
21.
22.	print("Found {0} faces!".format(len(faces)))
23.
24.	# Draw a rectangle around the faces
25.	for (x, y, w, h) in faces:
26.	  cv2.rectangle(photo, (x, y), (x+w, y+h), color = (0, 255, 0), thickness = 2)
27.
28.	cv2.imshow("Faces found", photo)
29.	cv2.waitKey(0)