This tutorial shows you how to get started with the Particle Boron LTE board, including set up and registration.
The Internet of Things has exploded in popularity over the past couple years with all kinds of devices connecting our homes, our cars, our health, and possibly the entire sectors of our economies to the Internet. Consumer products like connected home security devices, smart lighting, fitness trackers, baby monitors, and discrete sensors offer convenience, safety, and the ability to automate our lives.
Many of these technologies currently run on WiFi networks. As a Maker, there are many development platforms for exploring and prototyping with WiFi-connected IoT technologies. The Raspberry Pi, the ESP32, the Adafruit Trinket, and the Particle Photon are some of the most well known WiFi-connected development tools. All these tools allow Makers to build projects that interface sensors or actuators with the cloud through a WiFi connection.
However, one particularly exciting area of growth in the IoT space right now is the increasing number of cellular IoT devices. These types of devices can include interconnected, self-driving cars, asset tracking, fleet monitoring, and remote sensors. Rather than using a WiFi connection for communication with cloud services, cellular IoT products communicate over the same types of data networks smartphones use. This allows for IoT solutions on a massive scale. Cellular IoT devices can communicate with each other or with central cloud services over vast distances using cellular infrastructure including 3G, 4G LTE, and, in the near future, even 5G networks.
Particle, the company behind the popular Photon WiFi development board, recently released a powerful tool for creating products using an LTE cellular connection: the Particle Boron.
This tutorial is an introduction to building cellular IoT projects and using the Particle Boron. It might sound intimidating to build devices running on a cellular connection, but it is not as difficult as it might at first appear.
Once you have the board set up, check out how to build an LTE-connected circuit!
Particle Boron Specs and Hardware
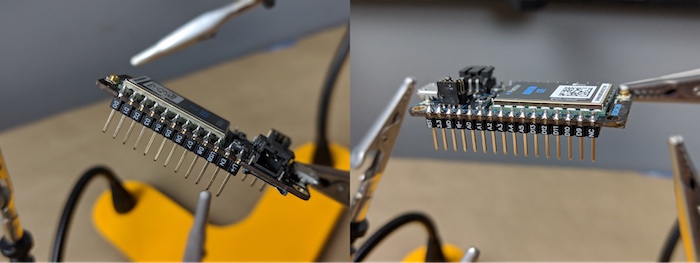
The Particle Boron incorporates a powerful microcontroller along with an LTE data modem and antenna, along with a few other useful features like a battery connector and integrated battery charging circuit. The board communicates through a secure, fast, and feature-rich cloud platform, called the Particle Cloud.
Programming the Particle Boron is done with an online IDE that will look extremely familiar if you have any experience with the Arduino IDE. Plus, the Particle Boron can be programmed wirelessly, rather than with a USB connection, which is an extremely useful feature since the board may be deployed in areas that cannot conveniently be accessed with computer hardware.
In this tutorial, we will build a simple circuit with the Particle Boron and RGB LEDs to create an LTE-connected light. We will be able to send commands to the Particle Boron through the Particle Cloud that will be received by the Boron over cellular to turn the LED on or off, or to make the LED shine in red, green, or blue.
Particle Boron Pinout
Like all microcontroller development boards, the Particle Boron has a variety of pins for power input, grounding, and GPIO. The Particle Boron has a total of six analog and eight PWM GPIO pins. In this project, we will only be using four of these.
The Particle Boron pinout. Image courtesy of Particle.
User Interface
The Boron includes three components that form the physical user interface on the board. The first is a reset button, which will be familiar to you if you’ve worked with Arduino boards in the past. The reset button restarts the user code running on the board, along with the Boron’s cellular connection.
The second part of the user interface is the mode button. This button allows the Particle Boron to be placed into several different operational modes. The reset and mode buttons can also be used together in different combinations to place the Boron into some more advanced modes used for troubleshooting.
Finally, the board has an RGB LED that illuminates in different colors and uses different animations to indicate the mode in which the system is currently running.
The RGB LED indicates different modes.
LTE Antenna
The Particle Boron has an on-board cellular modem but in order to connect to the cellular network, the Boron requires the flexible LTE antenna included in the box.
The antenna connects to the gold plug on the edge of the board opposite the USB port. The antenna itself has an adhesive backing allowing it to be applied to the inside of whatever type of enclosure your project is using. For this tutorial, we will just leave the antenna to dangle off the breadboard.
The LTE antenna, included in the kit, allows the Boron to connect to the cellular network.
SIM Card Slot
On the underside of the board, the Particle Boron has a SIM card slot. However, we will not actually need a SIM card for this project. The Boron actually includes an embedded SIM card that acts as the default for the system. The SIM card tray is only required for projects using third-party SIM cards, which we will not be using in this tutorial.
The SIM card slot located on the underside of the board.
Cellular Plan Pricing
Because it uses a cellular data connection, the Particle Boron does require a monthly data plan to use. Thankfully, however, if you are just experimenting with the technology and building a simple project like the one in this tutorial, you will likely not need to pay for a data plan. Particle offers three months of free cellular service with the purchase of a Particle Boron.
If you plan to continue developing after the three free months are over, Particle offers a data plan with 3MB of data for $3 per month per device. Three megabytes may not sound like much data compared to what a smartphone uses - and it isn't - but the Particle Boron communicates using simple integers or short strings of information. Therefore, each message to or from the Boron uses only a tiny amount of data.
How to Claim the Particle Boron
Now that you have an understanding of the Particle Boron hardware and the Particle Cloud, we can start working on getting the system up and running. The first step is to claim the board.
In order to flash firmware onto any Particle board or allow the board to interface with the Particle Cloud, the board must be “claimed”. Claiming a Particle board is the terminology used by the Particle platform for managing ownership over devices on the Particle Cloud. Only devices you claim can interact with your Particle Cloud account directly. Additionally, as the owner of the device, only your Particle account can be used to flash the firmware to the Boron.
There are a few different ways to claim your Particle Boron. The easiest, and the one we will use in this tutorial, is through the Particle app, which is available for Android or iOS.
Download and Log Into the Particle App
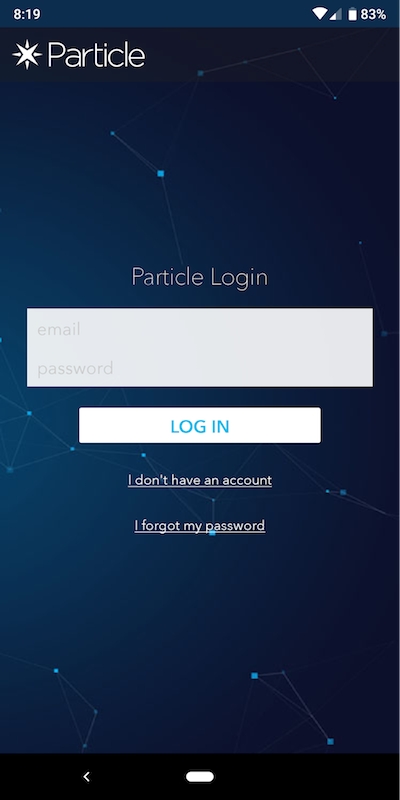
Once you’ve downloaded the Particle app for Android or iOS, the first step is logging into your Particle account. If you don’t already have an account, you can create one.
Log into the Particle app.
Add a New Particle Device
Next we need to add a new Particle device. To do this, tap the + button in the lower-right corner of the screen. You will then be presented with a list of the different types of Particle devices. Select the first one in the list with the Boron included.
Add your Particle device in the app.
Scan the QR Code
Connecting to the Particle Boron is extremely easy using the QR code on the top of the board. Simply use the Particle app to scan this QR code and the app will automatically acquire the information necessary to connect to your board.
Scan the QR code on top of your device.
Connect the Antenna and Power
As shown on the screen, we will need to connect the antenna to the Boron and provide the board with power in order for the app to connect the board to the Particle Cloud. To connect the antenna, simply press the gold connector on the antenna into the gold connector on the Boron. Power will be provided via the USB port.
Connect the power source and antenna to your board.
Choose Not to Use a Mesh Network
There are two different ways the Particle Boron can be set up. We will be using the device as a standalone cellular endpoint, which means we can have sensors and outputs connected directly to the Boron. The board can also serve as a kind of hub for a network of other Particle devices.
The other devices can send information to the Particle Boron, but it is the Particle Boron that connects the mesh system to the Particle Cloud through its cellular connection. So, for the purposes of this tutorial, select No, Don’t Use in Mesh Network.
For this tutorial, select that you do not want to use a mesh network.
Enroll in a Particle Cloud Cellular Service Subscription
As discussed above, the cellular connection between the Particle Boron and the Particle Cloud requires a monthly subscription. However, the first three months of the services are provided for free. On the next step, you can enroll in a Device Cloud subscription.
Activate the SIM
Now that you are enrolled in a Device Cloud subscription, you can activate the SIM embedded in the Particle Boron, allowing the board to connect to the Particle Cloud.
Name Your Device
The final step in getting your Particle Boron up and running is to give it a name.
That's it! With the app downloaded and your device registered, your Particle Boron is ready to use. In the next article, we'll dive into a tutorial to show how the Boron can be controlled via cellular connection.