Use Zero Stem and a Raspberry Pi Zero to build a USB computer that can be connected to any monitor through a USB port.
Stick PCs, also known as USB computers, are currently very popular. These computers are the size of a USB dongle, and you can easily plug this tiny computer to your monitor display.
Novaspirit has started a project called Pi Zero USB Dongle, creating a computer with a Raspberry Pi. “I've been thinking of ways to make better use of my Raspberry Pi Zero and I think I've found one!” Novaspirit said. Turn your Raspberry Pi into a USB dongle and share the internet with your PC!
In this article, I will help you to set up Raspberry Pi Zero as a tiny USB computer. You will need a Pi Zero and a custom 3D printed case, a USB connector soldered to the Pi Zero board (the USB connection provides power). The hardware itself is relatively simple, and there is custom software to make it run more smoothly. In this article, I will show you how to build a custom operating system for the USB Dongle.
What is a Zero Stem?
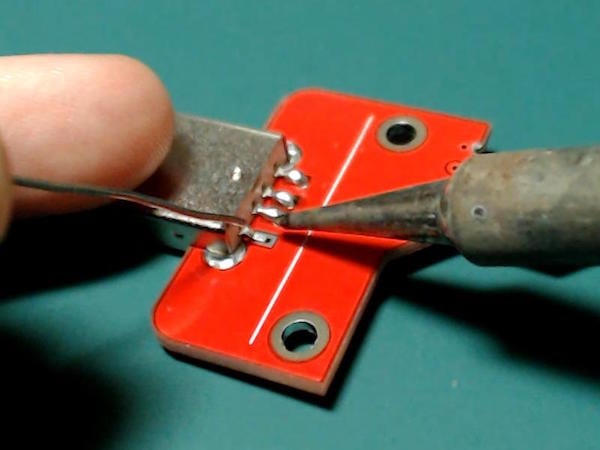
The Zero Stem is designed to be soldered directly to the USB SMD test pad on the bottom of the Raspberry Pi Zero. There is no need for wires or pogo pins at all, just soldering! Connecting to your Pi also lets you create a portable VNC server or even integrate several Raspberry Pi zeros with just one USB hub.
Zero Stem is compatible with Raspberry Pi Zero v1.3 and Raspberry Pi Zero W v1.1, but unfortunately, it is not compatible with Raspberry Pi Zero v1.2 or any full-size Raspberry Pi due to their shape and size.
Getting Started: Installing Raspbian
If you don’t know how to install Raspbian in Raspberry Pi, I suggest you read my previous article, How to Install Raspbian on Your Raspberry Pi’s SD Card.
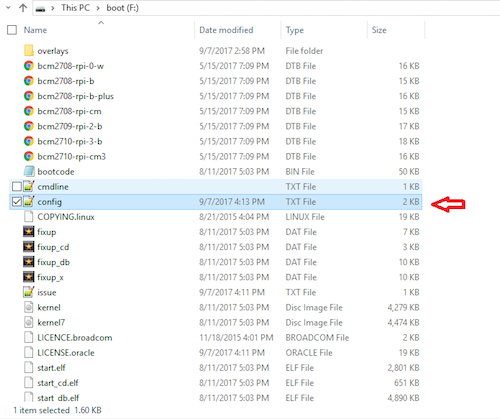
When you are done installing Raspbian, locate the file config.txt in the drive of the SD card where you just copied the image files of Raspbian, then insert this at the end:
dtoverlay=dwc2
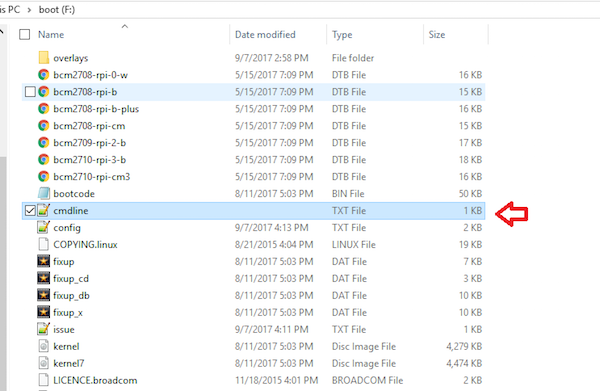
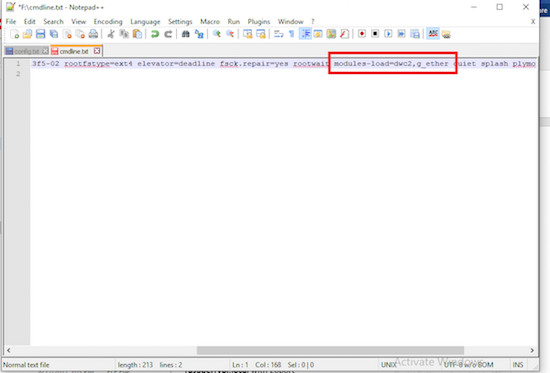
After adding, save the file with the same name and don’t change anything else in it. After this, locate the file in the same directory called cmdline.txt and insert text right after rootwait:
modules-load=dwc2,g_ether
When that is done, do the same thing with Raspberry Pi and save the file. You can now insert the SD card into the Raspberry Pi Zero.
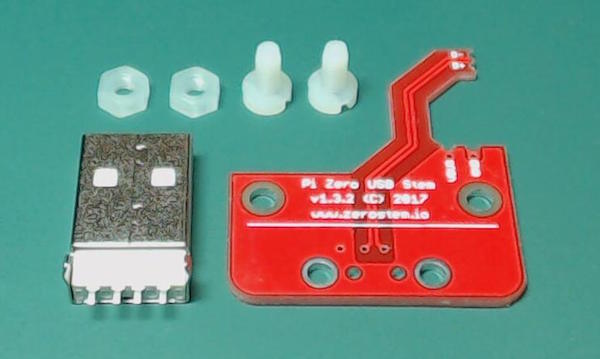
Assembling the Hardware
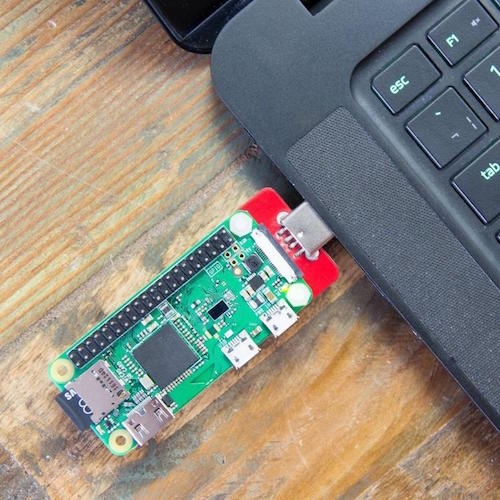
Assemble the USB Stem as shown below in the image, and connect to your computer.
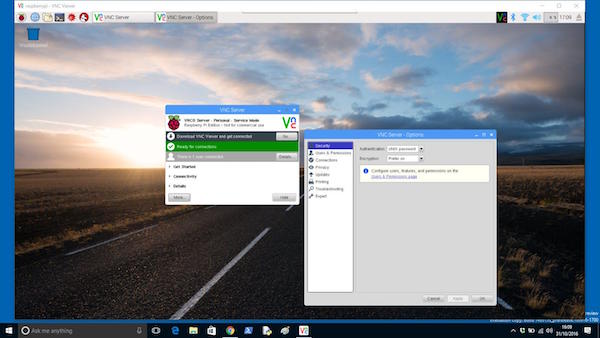
Playing With the Assembled USB Computer
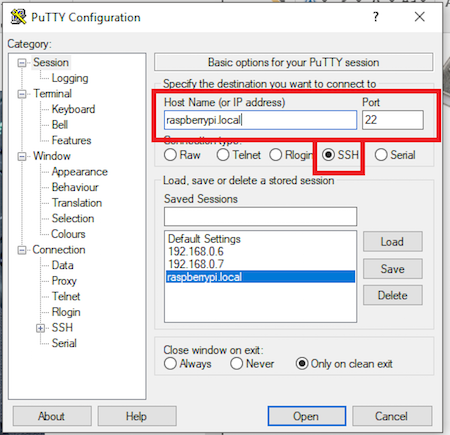
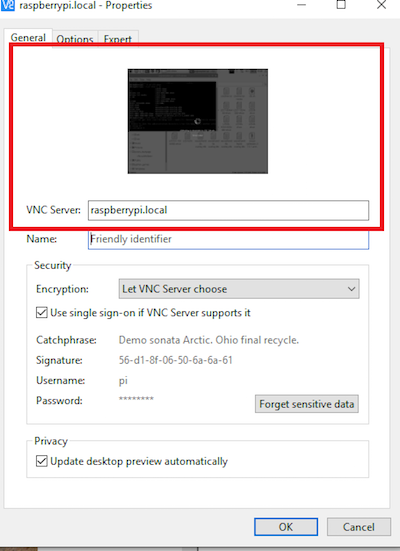
To access your Raspberry Pi from your computer, use ssh client or VNC Viewer and point it to:
raspberrypi.local with 20port
Accessing SSH
The Raspberry Pi Case
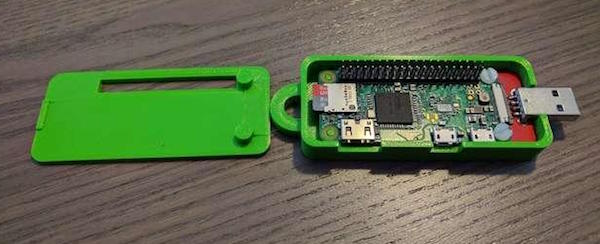
You can also Put the Raspberry Pi Hardware in a 3D printed case. I found this case from Thingiverse.com. Special thanks to the designer of this case, Curcuz.
How the USB computer fits into the case.
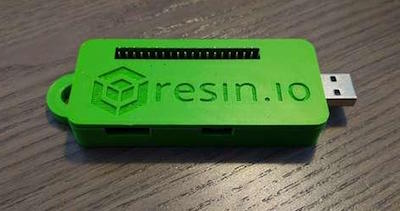
The case clicks shut protecting your new USB computer!
If you need any help troubleshooting, please let me know in the comments!