Learn about the basics of Raspberry Pi Zero W and how to set it up to build awesome projects in the future.
The Pi Zero W is a small-scale version of the popular Raspberry Pi (RPi) Linux single board computer (SBC). You can build the same awesome Raspberry Pi projects with a Pi Zero W. This tutorial will show you how to set up a Pi Zero W.
The Pi Zero W Features
The Pi Zero W has the same features as the RPi. Like the RPi, the Pi Zero W has a microSD card slot, HDMI and camera connectors, WiFi and Bluetooth 4.0 connectivity, a 40-pin general purpose input-output (GPIO) male header connector, and +5VDC mini power connector. The BCM2835 ARMv7 processor-based system-on-chip (SoC) microcontroller powers the Pi Zero W.
Resources provided by the BCM2835 SoC microcontroller include timers, an interrupt controller, GPIO, USB, pulse coded modulation (PCM), direct memory access (DMA) controller, inter-integrated circuit (I2C), four serial peripheral interface (SPI) ports, pulse width modulation (PWM), and two universal asynchronous receiver-transmitters (UART). These internal resources are accessible through the Pi Zero W’s external connectors or computer coding.
Figure 1 highlights the features of the Pi Zero W.
Figure 1. Computer peripheral features of the Pi Zero W.
The Pi Zero W only has one universal serial bus (USB), an on-the-go (OTG) interface circuit, and connector. The OTG allows the Pi Zero W to not only transmit and send data but to power +5VDC devices.
The Pi Zero W can communicate with additional computer peripheral devices, such as a mouse and keyboard, using the OTG connector and a USB hub. The USB hub will allow multiple device connections.
Now that we’ve reviewed the Pi Zero W’s external and internal peripherals, you are ready to install the Linux OS onto a microSD card.
NOOBS
You can install the Linux OS onto your Pi Zero W quite easily using NOOBS. The New Out of the Box Software (NOOBS) provides an easy OS installer containing the Raspbian Linux distribution (distro). Also, included with NOOBS are alternative operating systems which are downloaded from the web and installed onto the Pi Zero W. You can select another version of NOOBS called NOOBS Lite. NOOBS Lite has the OS installer without the Raspbian distro.
Figure 2. The New Out of the Box Software (NOOBS) allows easy install of the Raspbian Linux distro.
Furthermore, you will need to obtain the NOOBS files once you have downloaded the zipped folder from the internet. Once the zipped folder has been downloaded to your laptop computer or desktop pc hard drive, you will need to format at least a 4GB microSD card. You will find excellent instructions on the free software required to format a microSD card, extract the files from the downloaded zipped folder, and placing the file content onto the mini storage device on the raspberrypi.org website. Click here to read the NOOBS installation directions.
With NOOBS copied onto the microSD card, you may insert the mini storage device into the card slot of the Pi Zero W. Congratulations on successfully completing this phase of the project! You are now ready to attach the computer peripherals to the PI Zero W.
Attaching the Computer Peripherals to the Pi Zero W
You have successfully extracted the NOOBS files from the zipped folder and copied the contents to a formatted 4GB microSD card. The next step of the project is to attach the computer peripherals to the Pi Zero W. You will need the following computer peripherals to complete this task:
- (1) USB computer keyboard
- (1) USB mouse
- (1) 5VDC, 2.5A AC adapter (Adafruit Product ID 1995 )
- (1) HDMI monitor
- (1) USB mini hub with OTG (Adafruit Product ID 2991)
You can attach the computer peripherals to the Pi Zero W using Figure 3.
Figure 3. Attaching the computer peripherals to the Pi Zero W.
Recheck the computer peripherals to ensure they are properly attached to their respective connectors on the PI Zero W. You may insert the 5VDC, 2.5A AC adapter into a 120VAC outlet.
The Pi Zero W will begin the bootup sequence and initialization process and you will see a bootup installation sequence taskbar displayed on your HDMI monitor.
Figure 4. NOOBS boot up installation sequence and initialization process displayed on the HDMI monitor.
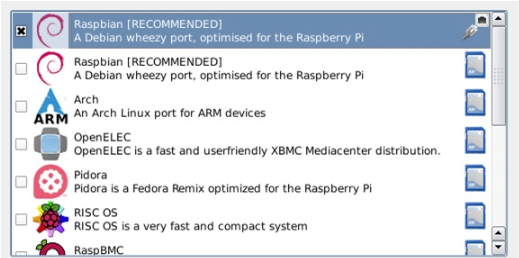
After the boot up is complete, a list of different OS choices will appear. Select the Raspbian Linux distro from this list.
Figure 5. Selecting Raspbian Linux distro. Note: The new version of NOOBS will have the Raspbian Linux distro Jessie instead of wheezy.
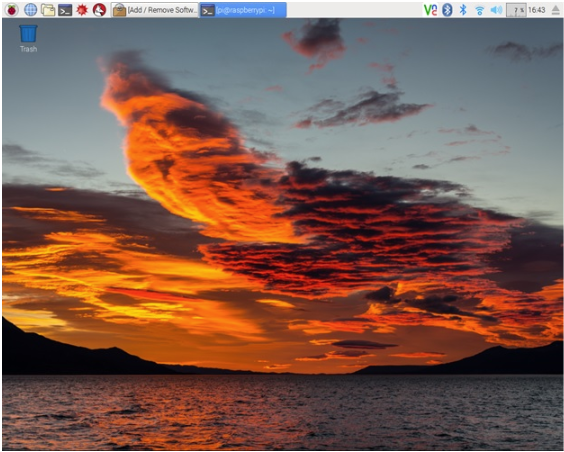
The Raspbian Linux distro will take a few minutes to install onto your Pi Zero W. After the distro installation has been completed, your Pi Zero W will display the Pixel desktop on your HDMI monitor.
Figure 6. Raspbian-Jessie Linux distro displaying the Pixel desktop on an HDMI monitor.
That’s it! You have successfully set up your Pi Zero W. You can change the Pi Zero W settings under Preferences as an exploratory activity.
Figure 7. Changing the Pi Zero W settings with Preferences.