Learn to create a time-lapse camera system using a Raspberry Pi Zero W and an officialRaspberry Pi camera!
In this article, I’ll show you how you can create a time-lapse camera system using a Raspberry Pi Zero W and an official Raspberry Pi camera (although you can also use other USB cameras with this setup).
Along the way, we will also explore cron jobs, shell scripts, and how to export all the images taken by the camera as a video.
Time-lapse Photography
Time-lapse photography is a photography technique where different frames are captured at custom intervals for a set time period. After capturing these images from the camera, the images are played at a normal speed-30fps.
For example, if a picture is captured at one frame per minute, you will need 30 frames each second to create a video. So to make a 10-second time-lapse, you will need 300 images, which can be taken at custom intervals.
Required Hardware
- Raspberry Pi Zero W
- Raspberry Pi camera
- Power bank module
- SD card (8GB+)
- Raspberry Pi Zero official case
- Raspberry Pi Zero camera ribbon cable
Setting up the RPi Camera
Connect the Raspberry Pi camera to the board using the ribbon cable. Open the attachment clip and put the cable with the metal leads inside, making sure the cable has gone in fully. Now push the clip back in place. The cable should be locked in place — make sure the connection is tight!
Securely connect the camera to the Pi Zero.
I set up my rig on top of my terrace as you see in the pictures below:
The setup mounted outside ready to go!
I put the camera higher up on the pole to capture more of the sky than the building.
Setting up the Software
To set up the software, you need to install Raspbian OS on your Raspberry Pi. After installation, execute the following command:
$sudo raspi-config
In the new dialog box, select the camera and enable it. After this step, restart your Pi by typing:
$ sudo reboot
Test Your Raspberry Pi Camera
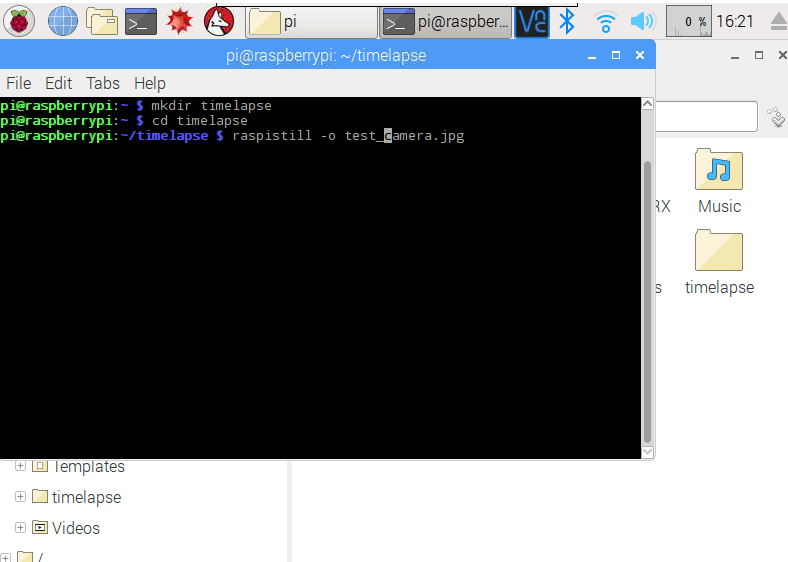
Turn on your Raspberry Pi Zero, go to the terminal screen, and enter:
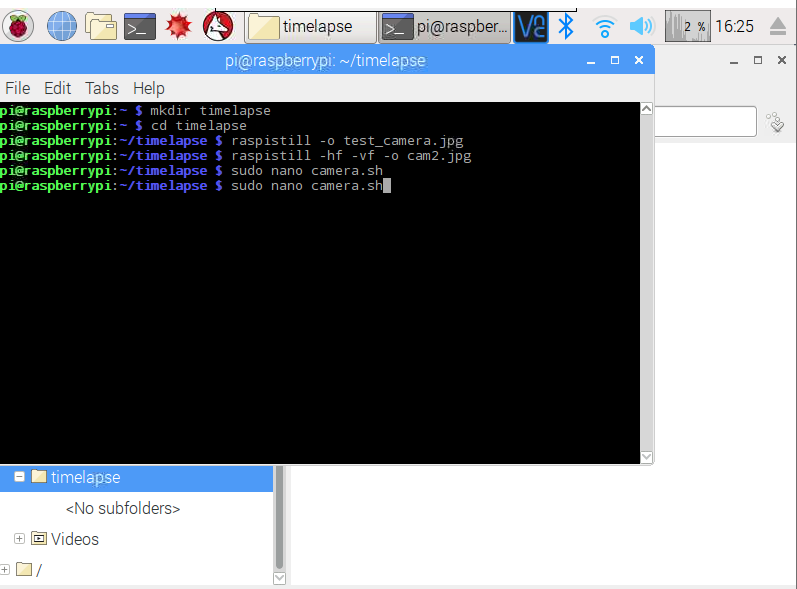
$ Raspistill –o test_camera.jpg
After entering this command, visit the Raspberry Pi directory /home/pi. There you can find the file test_camera.jpg. This is a quick way to check whether your camera works.
Make a Bash Script for Time-lapse
Now let’s start writing a bash script that will take a picture and save the file name with date and time.
If you want to change the rotation of your Raspberry Pi camera, add the flag -hf-vf, which will turn your camera rotation from up to down. Use the steps below to set up the script.
$ mkdir timelapse

//Change your directory to time-lapse folder:

$ cd time lapse
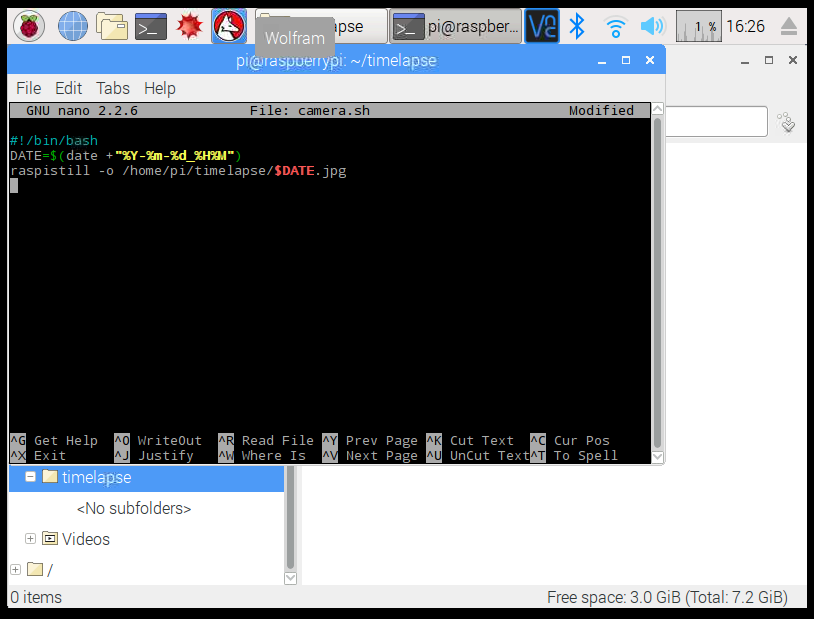
Now we need to create a bash script with the name camera.sh:
Copy-paste the following script into this file. Then save and exit.
#!/bin/bash
time=$(date +"%Y-%m-%d_%H%M")
raspistill -o /home/pi/timelapse/$ time.jpg
If you face any errors after entering this command, double-check the bash script. If the command does not fail, then you will find an image on the /home/pi/timelapse directory with your current date and time.
Add Bash Script to cronjob
We now need to run this script on boot and allow it to repeat itself over X minutes, which will help us to capture the images.
In the terminal, type the following command:
$ sudo crontab-e
Next, select option 2 nanoOS and add the following line at the end of this page:
* * * * * sh /home/pi/timelapse/camera.sh 2>&1
This command allows for the Raspberry Pi to start capturing images with a speed of 1fps.
After adding the line, save and close the file. Once the file is closed, you will see the message “crontab: installing new crontab” on your terminal screen.
That’s it! Now Raspberry Pi will start capturing images at 1fps. For checking the current photos in the directory, type this command:
$ watch ls
How to Create a Time-lapse Video With VideoPad Editor
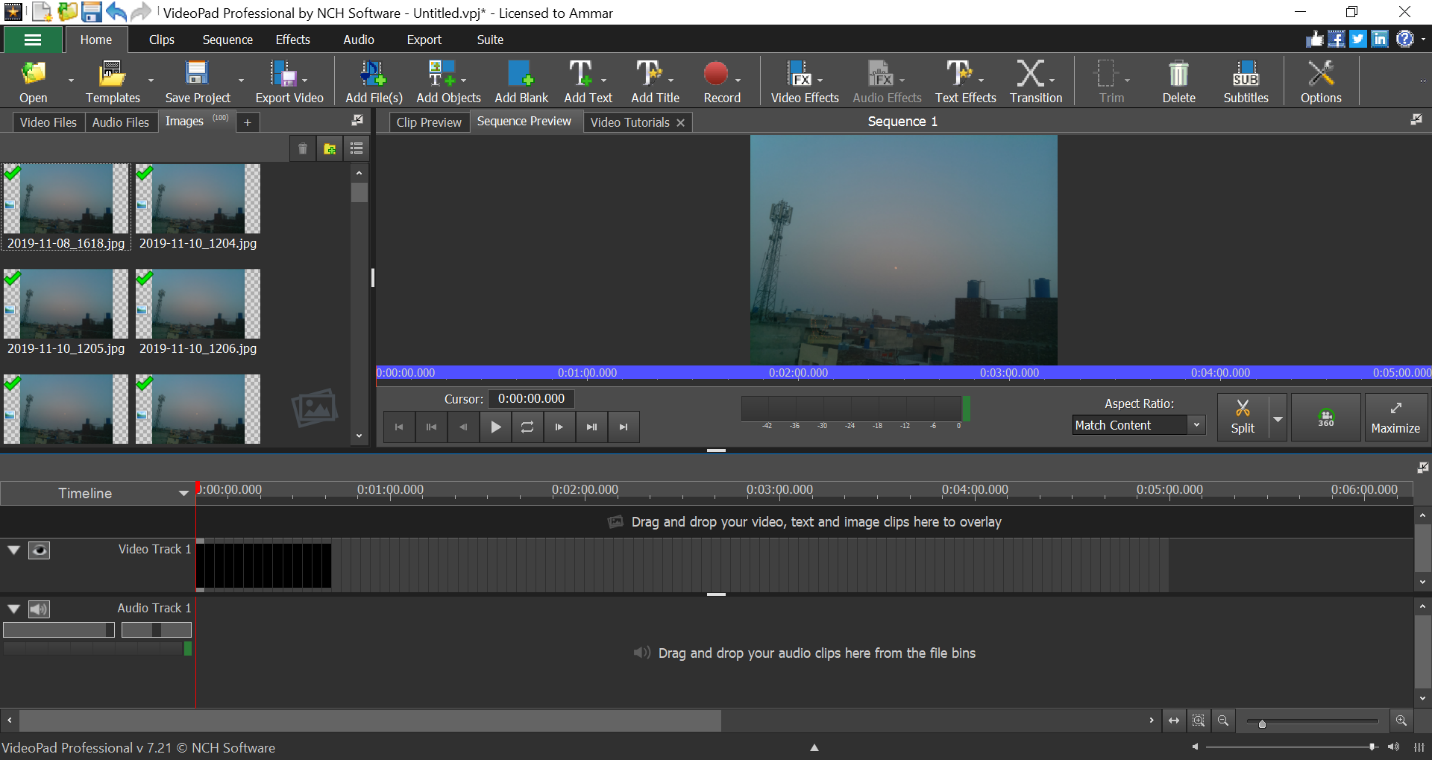
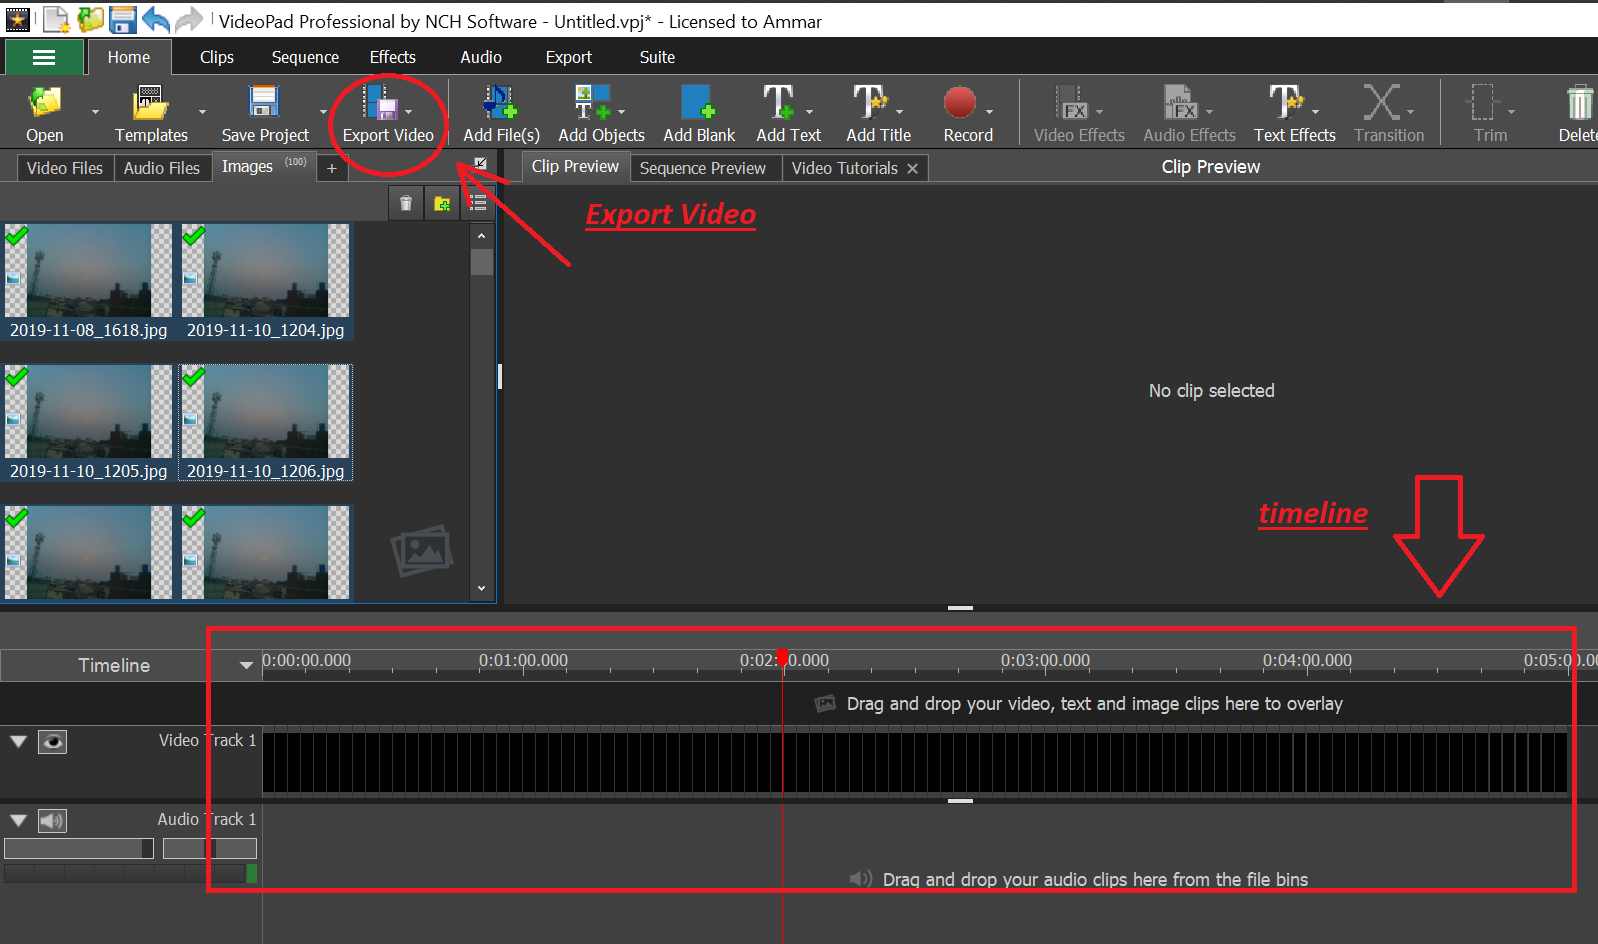
If you want to continue making a time-lapse video with these images, install VideoPad Editor and follow the steps shown below in the screenshots.
Launch the program. Open all images from the time-lapse directory. Select all and right-click on the selection; change the speed of your video by setting a higher percentage.
After setting the time duration, drag all the photos into the timeline and click Export Video.
That's it! Now the time-lapse images you captured will play as a video.
Check out the video below that my build captured during sunset.